SparkFun MP3 Player Shield
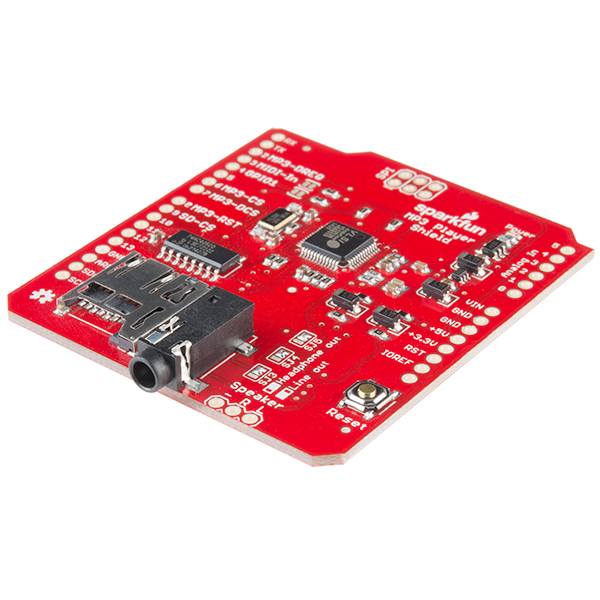
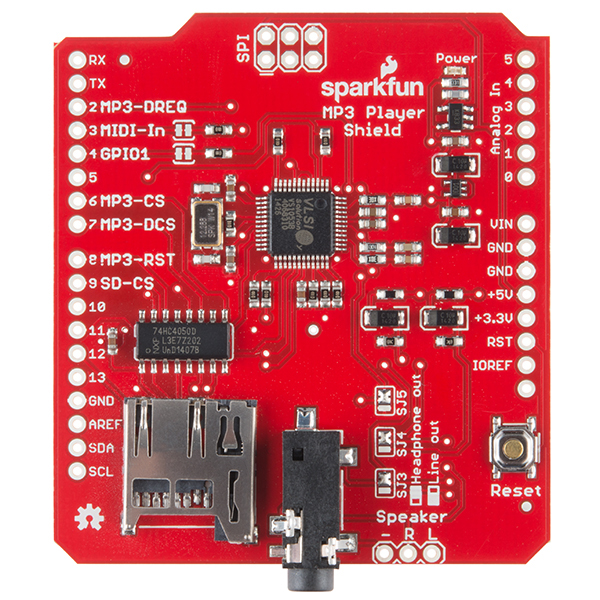
The SparkFun MP3 Player Shield is an awesome MP3 decoder with the capabilities of storing music files onto a run-of-the-mill microSD card, thus giving you the ability toadd music or sound effects to any project. With this board you can pull MP3 files from an microSD card and play them using only one shield, effectively turning any Arduino into a fully functional stand-alone MP3 player! The MP3 Shield utilizes the VS1053B MP3 audio decoder IC to decode audio files. The VS1053 is also capable of decoding Ogg Vorbis/MP3/AAC/WMA/MIDI audio and encoding IMA ADPCM and user-loadable Ogg Vorbis.
The VS1053 receives its input bitstream through a serial input bus (SPI). After the stream has been decoded by the IC, the audio is sent out to both a 3.5mm stereo headphone jack, as well as a 2-pin 0.1" pitch header.
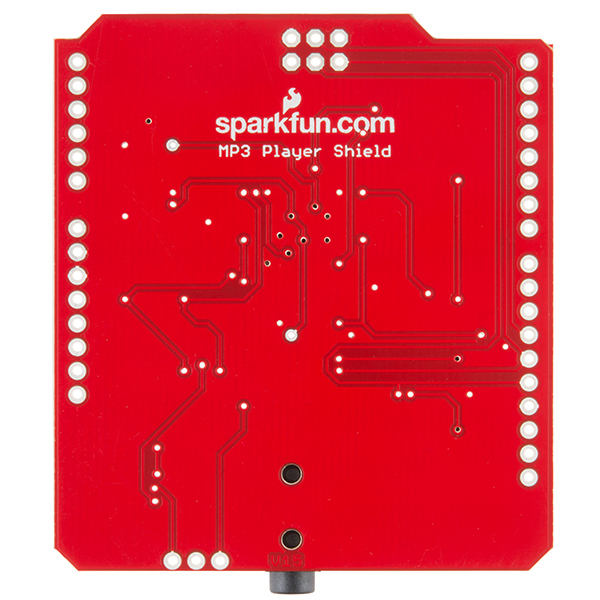
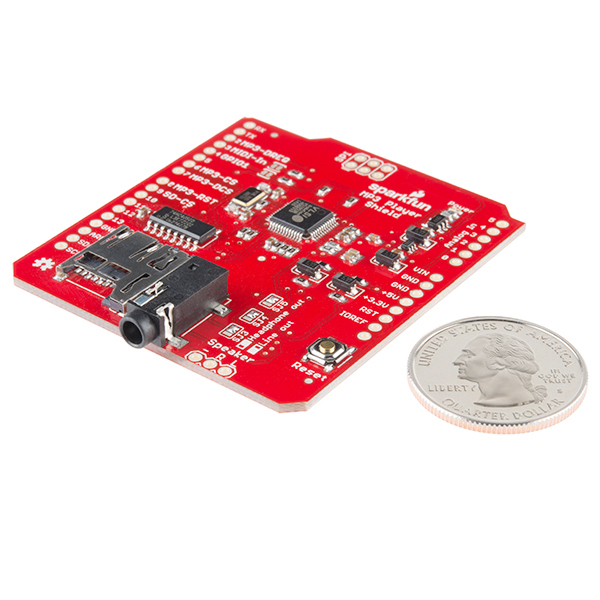
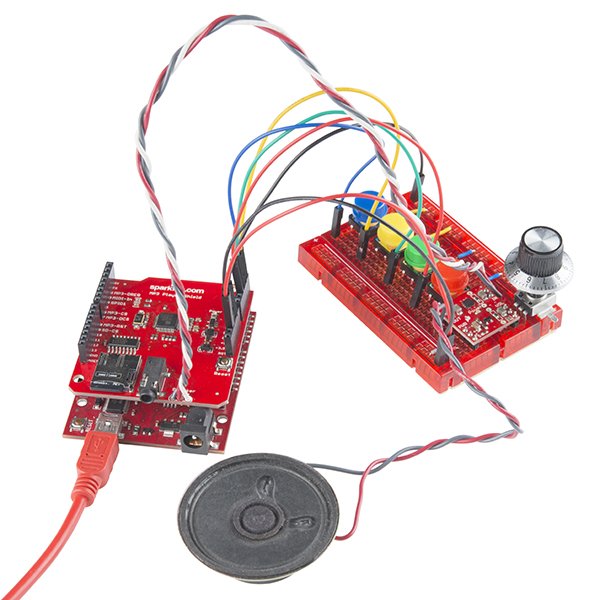
This shield comes populated with all components as shown in the images and schematic; but it does not come with headers installed. We recommend the Arduino R3 Stackable Header Kit.
- 3.5mm audio out jack
- 0.1" spaced header for speaker out
- microSD card slot
- Schematic
- Eagle Files
- Datasheet (VS1053B)
- Hookup Guide
- GitHub (Design Files, Library, & Example Code)
SparkFun MP3 Player Shield Product Help and Resources
MP3 Player Shield Hookup Guide V15
April 6, 2015
How to get your Arduino groovin' using the MP3 Player Shield.
Additional Library Information
More information and troubleshooting tips for the MP3 Shield library can be found on one of the collaborator's website here.
MP3 Shield Library Support Page
Some great troubleshooting tips and information about the library and its functions can be found on the Library Support Page
If you get a humming sound while connecting to an external amplifier
A good, cheap ground loop isolator for protecting the older MP3 Shield from ground loops when connecting to an external amplifier can be found at this link This should solve your humming and buzzing problems.
Core Skill: Soldering
This skill defines how difficult the soldering is on a particular product. It might be a couple simple solder joints, or require special reflow tools.
Skill Level: Noob - Some basic soldering is required, but it is limited to a just a few pins, basic through-hole soldering, and couple (if any) polarized components. A basic soldering iron is all you should need.
See all skill levels
Core Skill: Programming
If a board needs code or communicates somehow, you're going to need to know how to program or interface with it. The programming skill is all about communication and code.
Skill Level: Rookie - You will need a better fundamental understand of what code is, and how it works. You will be using beginner-level software and development tools like Arduino. You will be dealing directly with code, but numerous examples and libraries are available. Sensors or shields will communicate with serial or TTL.
See all skill levels
Core Skill: Electrical Prototyping
If it requires power, you need to know how much, what all the pins do, and how to hook it up. You may need to reference datasheets, schematics, and know the ins and outs of electronics.
Skill Level: Rookie - You may be required to know a bit more about the component, such as orientation, or how to hook it up, in addition to power requirements. You will need to understand polarized components.
See all skill levels
Comments
Looking for answers to technical questions?
We welcome your comments and suggestions below. However, if you are looking for solutions to technical questions please see our Technical Assistance page.
Customer Reviews
4.1 out of 5
Based on 15 ratings:
2 of 2 found this helpful:
easy, cheap, a little inconsistent, and a little noisy
Having purchased and built with 9 of these shields (7 from SparkFun, 2 from Mouser), I can confirm that they're very easy to use and inexpensive for what they do. I had similar initialization problems as Member 873628 with my first shield (worked with USB, failed 50% of the time under external power) but I suspect that it was just a problem with that particular shield because none of the other 8 required any special delays in order for them to initialize properly. That first shield has since stopped working altogether, so maybe it was defective, I dunno. I'd also like to add that the audio is fairly noisy--sounds like digital noise bleeding into the analog output--so you will want to keep the fidelity of your playback system fairly low. I got one shield that sounded like it had excessive data req noise in the output, which was the first time I became aware that there was any unusual noise at all. It sounded like a 16mm film projector from the '70s. Switching to my good amp & speakers, I finally heard that all of the circuits had some degree of digital noise, although it was not noticeable on computer speakers for the most part. Some of the noise can be addressed by adding extra Vcc bypass caps. Bottom line: if it's gotta work, budget one or two extras to be safe.
Update: I just updated both the SD library and the shield library and that appears to have addressed the initialization issues I have been occasionally seeing. Check to make sure you have the latest.
1 of 1 found this helpful:
Nice product!
This is a very nice shield for Arduino, it worked smoothly and I was able to connect play audio files with some push buttons.
Pros: Can play a specific audio track by calling its name, cheap price.
Cons: Separate pin headers, have to solder them, have to install 4 libraries, limited to only 9 audio tracks to be played. Audio tracks have to be of DOS 8.3 format, requires an SD card, and audio files must be stored on the root folder.
I created a full step by step tutorial on how to use and compared it to 1Sheeld's music player shield.
Here is the link: http://1sheeld.com/1sheeld-vs-sparkfun-mp3-player-shield/
4 of 4 found this helpful:
Awesome shield... when you figure out it's quirks!
Spent 10 minutes setting up the shield on a redboard. Ran through the "FilePlayer" sketch. Worked like a charm. Ran through the "MP3 Trigger" sketch. Worked like a charm. Made a few mods to the MP3 trigger sketch to fit my needs. Worked like a charm. Only when I unplugged from the USB of my computer and tried to using the 9V/650mA wall wart did I start having problems. After a couple of days of pulling my hair out trying to figure out why everything worked seamlessly when plugged into the computer USB, but would only work maybe 1 out of 10 times when plugged straight into the wall, it dawned on me. After staring at the sketch, I thought that maybe the Mp3 file player and the MicroSD card reader did not have enough time to initialize, and therefore, caused an error. After playing around with a few delays throughout the setup procedure, I finally got it. By putting a 4 second delay at the beginning of setup, another 4 second delay after the sd card reader initialization, and a final 4 second delay after the mp3 initialization before the loop begins, it worked perfectly! After playing with the delay timing for a while, I found that a 2 second delay would work 1 out of 5 times. A 3 second delay worked about 3 or 4 out of 5 times. While a 4 second delay did the trick. Now, it does exactly what I needed it to do. I was unable to find much reference anywhere to anyone having an issue such as this? I was also unable to find many references of people powering this shield with a wall wort as opposed to USB from a computer? Hope this helps someone!
1 of 2 found this helpful:
Please return the holes!
I got 2 piecess of this card. It works fine, but I was surprised at the lack of Ardiino staddard fixing holes. They were in the previous version that I received about a year ago.
Works as expected
Very happy with the shield - it does exactly what I needed. Would be nice to have a few more available pins for the Uno, but works well with the Mega for projects with greater pin requirements.
GOOD ITEM!!!
Does what I want
This device performs well, although I haven't finished my project, and seems to have all the facilities I require to make a remote controlled (433MHz) MP3 Player. Postage and handling was very steep however.
Works for me
Using with arduino Uno to make an mp3 player with sketch from CoolArduino. No problem with the Sparkfun Mp3 shield but had to change the arduino sketch for the display.
Just what was needed for Halloween project!
I purchased 3 of these for Halloween projects. Given that arduino's are cheap and easy to interconnect, I opted to devote Uno to making sound, triggered by another Uno (or mega or nano) at approprate time.
Pro: easy to use. Sample programs worked great (only after updating some related libraries!). Easy to adapt to what I needed. Works out of the box (after headers soldered on) with real Uno. Not sure about anything else.
Con: changing from headphones to Line Out a bit of a pain. Jumpers would be nicer.
Arduino Trouble
I tried using this test Arduino program and it will not compile. Says "SFEMP3Shield.h: No such file or directory". I go to my libraries folder and it is there along with the other files called for in the sketch, although it does not appear in the library manager. Any help would be appreciated.
/* MP3 Shield Trigger by: Jim Lindblom SparkFun Electronics date: September 23, 2013
This is an example MP3 trigger sketch for the SparkFun MP3 Shield. Pins 0, 1, 5, 10, A0, A1, A2, A3, and A4 are setup to trigger tracks "track001.mp3", "track002.mp3", etc. on an SD card loaded into the shield. Whenever any of those pins are shorted to ground, their respective track will start playing.
When a new pin is triggered, any track currently playing will stop, and the new one will start.
A5 is setup to globally STOP playing a track when triggered.
If you need more triggers, the shield's jumpers on pins 3 and 4 (MIDI-IN and GPIO1) can be cut open and used as additional trigger pins. Also, because pins 0 and 1 are used as triggers Serial is not available for debugging. Disable those as triggers if you want to use serial.
Much of this code was grabbed from the FilePlayer example included with the SFEMP3Shield library. Major thanks to Bill Porter and Michael Flaga, again, for this amazing library! */
include <SPI.h> // SPI library
include <SdFat.h> // SDFat Library
//#include <SdFatUtil.h> // SDFat Util Library
include <SFEMP3Shield.h> // Mp3 Shield Library
SdFat sd; // Create object to handle SD functions
SFEMP3Shield MP3player; // Create Mp3 library object // These variables are used in the MP3 initialization to set up // some stereo options: const uint8_t volume = 0; // MP3 Player volume 0=max, 255=lowest (off) const uint16_t monoMode = 1; // Mono setting 0=off, 3=max
/* Pin setup */
define TRIGGER_COUNT 9
int triggerPins[TRIGGER_COUNT] = {0, 1, 5, 10, A0, A1, A2, A3, A4}; int stopPin = A5; // This pin triggers a track stop. int lastTrigger = 0; // This variable keeps track of which tune is playing
void setup() { /* Set up all trigger pins as inputs, with pull-ups activated: */ for (int i=0; i<TRIGGER_COUNT; i++) { pinMode(triggerPins[i], INPUT_PULLUP); } pinMode(stopPin, INPUT_PULLUP);
initSD(); // Initialize the SD card initMP3Player(); // Initialize the MP3 Shield }
// All the loop does is continuously step through the trigger // pins to see if one is pulled low. If it is, it'll stop any // currently playing track, and start playing a new one. void loop() { for (int i=0; i<TRIGGER_COUNT; i++) { if ((digitalRead(triggerPins[i]) == LOW) && ((i+1) != lastTrigger)) { lastTrigger = i+1; // Update lastTrigger variable to current trigger /* If another track is playing, stop it: */ if (MP3player.isPlaying()) MP3player.stopTrack();
  /* Use the playTrack function to play a numbered track: */
  uint8_t result = MP3player.playTrack(lastTrigger);
  // An alternative here would be to use the
  //  playMP3(fileName) function, as long as you mapped
  //  the file names to trigger pins.

  if (result == 0)  // playTrack() returns 0 on success
  {
    // Success
  }
  else // Otherwise there's an error, check the code
  {
    // Print error code somehow, someway
  }
}
} // After looping through and checking trigger pins, check to // see if the stopPin (A5) is triggered. if (digitalRead(stopPin) == LOW) { lastTrigger = 0; // Reset lastTrigger // If another track is playing, stop it. if (MP3player.isPlaying()) MP3player.stopTrack(); } }
// initSD() initializes the SD card and checks for an error. void initSD() { //Initialize the SdCard. if(!sd.begin(SD_SEL, SPI_HALF_SPEED)) sd.initErrorHalt(); if(!sd.chdir("/")) sd.errorHalt("sd.chdir"); }
// initMP3Player() sets up all of the initialization for the // MP3 Player Shield. It runs the begin() function, checks // for errors, applies a patch if found, and sets the volume/ // stero mode. void initMP3Player() { uint8_t result = MP3player.begin(); // init the mp3 player shield if(result != 0) // check result, see readme for error codes. { // Error checking can go here! } MP3player.setVolume(volume, volume); MP3player.setMonoMode(monoMode); }
0 of 1 found this helpful:
Super simple
All examples worked exactly the way they should, and I was able to attach it to an amp circuit very easily.
works well
I had some initial trouble that turned out to be operator induced. Once I corrected my error, it worked fine.

Any chance you can update the Arduino_Library-vs1053_for_SdFat (issue #12) to support SAMD microcontrollers like the SparkFun RedBoard Turbo?
Is this shield able to play multiple sounds at one time? I need to create a musical keyboard, the clients budget is minimal, so can't afford to buy wrong item.
Hello Sparkfun friends!
I bought this shield, I need to amplify the sound so I followed the steps outlined in the [hookup guide](https://learn.sparkfun.com/tutorials/mp3-player-shield-hookup-guide-v15?_ga=1.187566315. 210801128.1473964424) and tried to reconfigure the jumpers SJ3, SJ4 and SJ5 as is described on that document.
When I tried to reconfigure the jumpers, SJ4 jumper contact went off the PCB. In addition when I suck the default blobs of SJ3 his track got up.
You could give me a solution? Or I invested almost $ 40 to throw them away? I hope you can give me a solution. I use a soldering iron of 40W and I am always very careful when I work with my circuits, I swear to you it was not a misuse of the tools. Thanks.
Sorry to hear you're having trouble!
This may be repairable. Shoot an email over to tech support along with some photos of your board and we will see what we can do for you.
Hello the guys says that i burn the shield but I do exactly steps mentioned on the documentation. Can you replace the shield?
Thankyou, I will send an emails to tech support.
Sorry, new to embedded systems. Where do the General MIDI sounds come from? Are they onboard? If not, how does it find the waveforms? Can they just be on flash or do they have to be in RAM? And can I add my own waveforms? Thanks.
No worries. This IC fabricates the sounds directly. It's not loading waveforms, it's generating them mathematically. No RAM or flash needed. You just ask it to give you a C note from a Violin and it does its best to generate a Violin C. You can't add your own instruments as far as I know.
Will the MP3 player be able to play multiple files at the same time? or perhaps a few seconds apart from one another depending on the input signal triggering the files to be played?
Hope somebody could advice me on this!
//Update: The music board that Sparkfun carries that can play multiple files at one time is the WAV Trigger: https://www.sparkfun.com/products/13660
Aaaarrrggghhh! I put this MP3 player on top of the DUE, and could not get it to work (2 weeks trying). I then bought an UNO, and it worked fine. The difference? The DUE defaults pin 4 as an input with a pull up. Pin 4 is wired to the GPIO1 on the VS-1053B, which (I think) was putting it in MIDI mode. From the datasheet: "If GPIO0 is low and GPIO1 is high, Real-Time MIDI mode is entered."
Setting pin 4 as an output, and driving low made it work!
Hope this helps someone.
I thought the Due was 3.3V? This board seems to be 5V from the diagram.
You got it to work with the Due without burning anything out?
How did you get it to work? I had to go and comment out some lines in the SFEMP3 library (calls to cli() and sei(), disable and enable interrupts) before it would compile for a DUE, and now I get an error message running the test sketch saying that it can't access the SD card.
I believe the SPI pins on a Due and Mega are different vs an Uno. You will need to connect the ISP connector on the Mega/Due to the 2x3 pin header on the shield.