SparkFun 7-Segment Serial Display - Blue
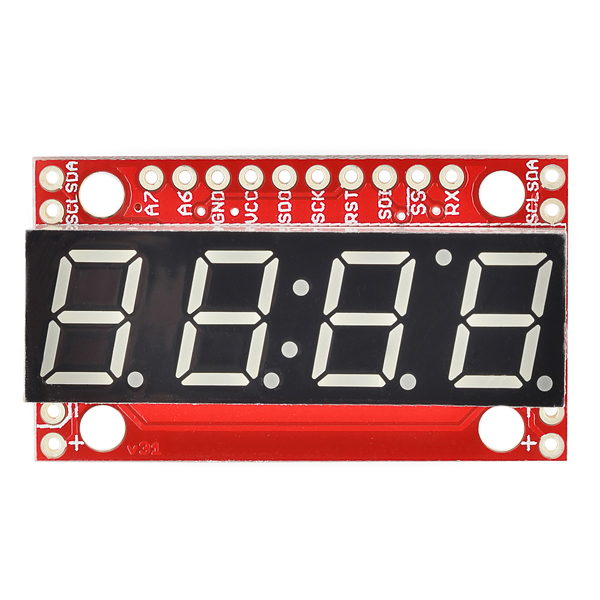
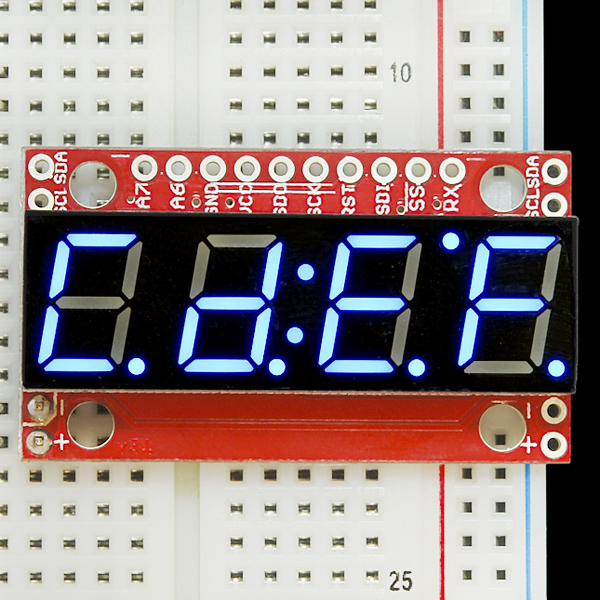
4-digit 7-segment displays are really neat little devices, it's a shame that they can be so cumbersome to control. Well we've solved that problem by making them a little bit "smarter." The SparkFun 7-Segment Serial Display combines a classic 4-digit 7-segment display and an ATMega328 microcontroller allowing you to control every segment individually using only a few serial lines.
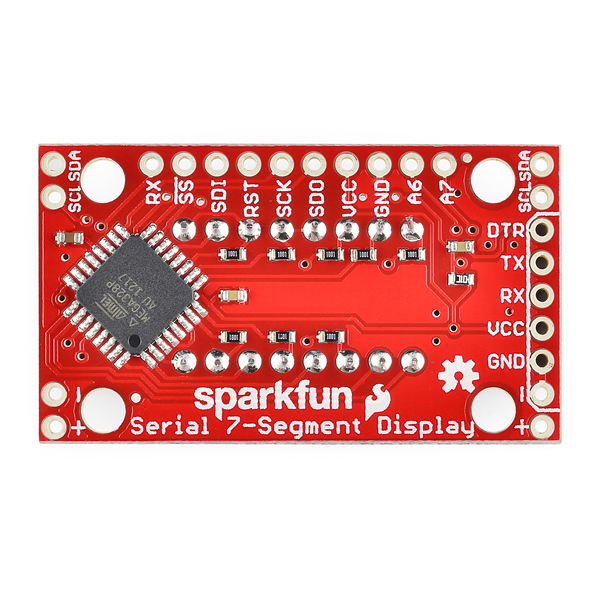
The Serial 7-Segment Display can be controlled in one of three ways: Serial TTL communication, SPI serial communication or I2C serial. You can even program it for stand-alone operation since the ATMega328 comes pre-loaded with the Arduino bootloader! There is also an FTDI header on board and we've provided a hardware profile for the Arduino IDE to make it even easier to program.
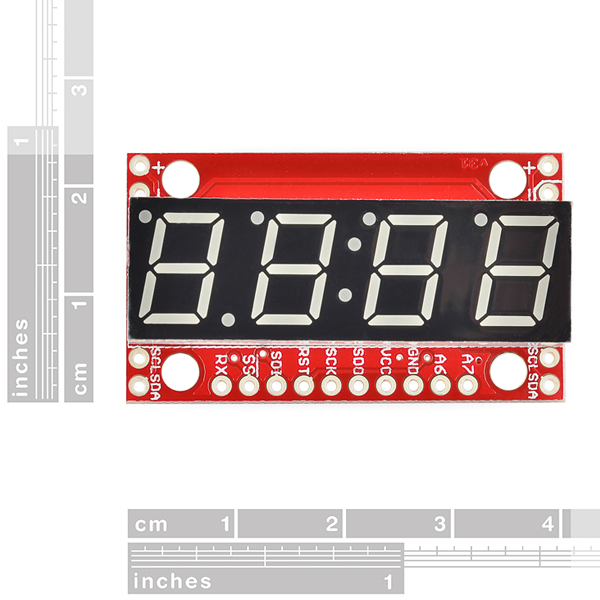
We've made some layout changes to this design as well which will make it easier to incorporate these into your project. We've moved the power and I2C pins to the sides of the board such that you can chain them together in order to display longer strings of digits. We've also added mounting holes to the boards so you can mount them on standoffs (no more hot glue!)
Replaces:COM-09765
- 4 digit blue alpha-numeric display with TTL, SPI or I2C Serial Interface
- Display numbers, most letters, and a few special characters
- Individual control of decimal points, apostrophe, and colon
- Selectable baud rate
- Selectable brightness
- Baud rate and brightness values retained in non-volatile memory
- Individual segment control for each digit
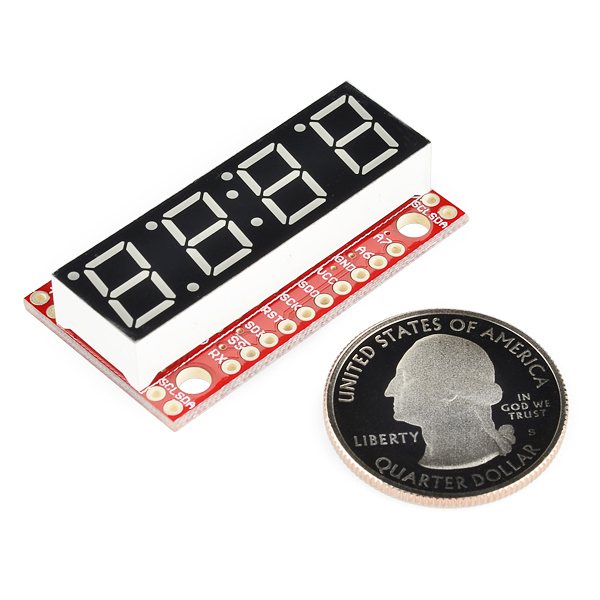
- 41mm x 23mm (1.6in x 0.9in)
SparkFun 7-Segment Serial Display - Blue Product Help and Resources
Using the Serial 7-Segment Display
August 13, 2013
How to quickly and easily set up the Serial 7-Segment Display and the Serial 7-Segment Display Shield.
Dungeons and Dragons Dice Gauntlet
August 13, 2013
A playful, geeky tutorial for a leather bracer that uses a LilyPad Arduino, LilyPad accelerometer, and seven segment display to roll virtual 4, 6, 8, 10, 12, 20, and 100 side dice for gaming.
Raspberry Pi SPI and I2C Tutorial
October 29, 2015
Learn how to use serial I2C and SPI buses on your Raspberry Pi using the wiringPi I/O library for C/C++ and spidev/smbus for Python.
Qwiic GPS Clock
September 14, 2020
What time is it? Time for you to... Qwiic-ly build a GPS clock and output it to a display! This project provides you with the current date and time using GPS satellites. Read the date and time as a digital or analog clock. Or even configure the clock for military, your time zone, or automatically adjust the time for daylight savings time!
Core Skill: Soldering
This skill defines how difficult the soldering is on a particular product. It might be a couple simple solder joints, or require special reflow tools.
Skill Level: Noob - Some basic soldering is required, but it is limited to a just a few pins, basic through-hole soldering, and couple (if any) polarized components. A basic soldering iron is all you should need.
See all skill levels
Core Skill: Programming
If a board needs code or communicates somehow, you're going to need to know how to program or interface with it. The programming skill is all about communication and code.
Skill Level: Rookie - You will need a better fundamental understand of what code is, and how it works. You will be using beginner-level software and development tools like Arduino. You will be dealing directly with code, but numerous examples and libraries are available. Sensors or shields will communicate with serial or TTL.
See all skill levels
Core Skill: Electrical Prototyping
If it requires power, you need to know how much, what all the pins do, and how to hook it up. You may need to reference datasheets, schematics, and know the ins and outs of electronics.
Skill Level: Noob - You don't need to reference a datasheet, but you will need to know basic power requirements.
See all skill levels
Comments
Looking for answers to technical questions?
We welcome your comments and suggestions below. However, if you are looking for solutions to technical questions please see our Technical Assistance page.
Customer Reviews
3.7 out of 5
Based on 7 ratings:
3 of 3 found this helpful:
Works great to double as your controller
I didn't need much I/O for my project so I was able to modify the firmware for this board and run my application and update the display directly. This saved quite a bit on space requirements and cost of not requiring another microcontroller.
Note that you will need to add the board to the Arduino IDE hardware folder and get the latest library imported. After that, the default library has a DISPLAY_TYPE constant that defaults to a different version of this device so the LED display doesn't update properly. Make sure to change DISPLAY_TYPE to S7S in the main firmware project file.
1 of 1 found this helpful:
Great
Easy to connect and install
1 of 1 found this helpful:
Great display
We have used this display for several years, works great and easy to use. Liked it even better when the mounting holes where added. Would like it better if the holes were not so close to the display. Makes mounting a challenge sometimes.
1 of 2 found this helpful:
Not
I worked for two days and died. I bought a second one thinking I might have messed up and had the same thing happen.
Sorry to hear you're having trouble. Please contact our technical assistance team for help with this.
Raspberry Pi - Python I2C
Are there any python examples for use with a Raspberry Pi 2 utilizing the I2C method?
Thanks...
Works great
Nice and bright, works just as advertised
not bright enough
while this display is very easy to use and control via a serial connection it definitely isn't bright enough to be easily viewed in a lit room. one can see digits lit but it is difficult to quickly understand what is being displayed. this is with the brightness/contrast set to maximum. put this behind smoked plexi and it almost disappears in a lit room.

What is the typical current draw?
Hooray for mounting holes!
How big are the digits?
Digits are 10mm tall. For reference, it's this display.
What i2c frequency is this board running at?
As an I2C slave it doesn't have any control over the clock frequency. It should support a maximum clock frequency up to 400 kHz though.
Does this 7-Segment Display include pullup resistors for i2c functionality?
No physical resistors, but there are internal pull-up resistors on the I2C lines with a value somewhere around 5-10k.
I'd like to use three of these for a project I'm working on; is there any way to change the default address of the I2C? Would this be in the bootloader on the chip, itself, or a simple setting I can send it?
Thanks!
Sure! You can either send it the I2C address command (send 0x80, followed by your desired address). Or you can reprogram the firmware with your own address defined here.
This release is frustrating. I've come to depend on this component for a product I sell. Was there any heads up that you would be abandoning the old form factor? I now have to toss and redesign a batch of PCBs because the taller board ( for daisy chaining purposes?) won't fit.
It would be very helpful if you would note in the Features (or Replaces) section above that the Brightness settings are not compatible with the replaced part (now 00 to FF, were FF to 00).
Thanks for the Brightness "flip" verification.
However, it is a real pain to support two versions of this part, especially since there is no way to tell the difference when using just the Serial RX control.
How about making a firmware version for this part that has compatibility with the part that this device is replacing?
Then,
At least it would be easy for you to make the required firmware Hex file and make it available to us, or at least to me.
I will look for a description of how to flash new firmware into this device, but maybe you can point me to the right info.
Thanks, Gary
Thank god for mounting holes, this will make life much easier. On the downside now i've got to order more displays :P
I have this module working in a project I built for a friend, and after some time of working properly, it won't work at all (display anything) unless I send the factory reset command via serial. I am using i2c with external pullups, connected to an Atmega328 with arduino bootloader running at 5V.
What's weird is that on the same i2c bus I have the big open segment serial display (COM-11644) and that has worked like a charm all this time, while this one has had to be factory reset several times (a pain).
They are obviously using different i2c addresses.
¿Any thoughts on what could be going on?
how about some updated firmware?? I tried modifying the code in loop() to display voltage read on the analog pins but all it displays is jumbled up characters. tried uploading the basic firmware again to bring the display back to original functionality but still displays wrong characters when setting over serial. my conclusion would be that the firmware available to download (and the hardware files) have incorrect pin mapping. I'll go through it to try and correct it but it would be nice to have proper firmware!!
have you looked at this?
i installed the hardware profile and tried to upload some code using a 5v basic FTDI but unfortunately i keep getting this error ( avrdude: ser_recv(): programmer is not responding avrdude: stk500_recv(): programmer is not responding) and the uploading stops. what can possibly be the problem?
I had the same problem at first, make sure the TX(FTDI) is plugged into RX(Display), and RX of the FTDI to the TX of display. TX does not go to TX, and likewise RX does not go to RX.
Hi, Is this SparkFun 7-Segment Serial Display - Blue able to show the serial monitor numbers from ARDUINO?
In the .ino files the default I2C address is 0x71 if both solder pads are open. Does this mean address can be changed with a solder iron?
Can the serial (not SPI/I2C) be driven directly from a Raspberry Pi's serial port?
Or am I gonna need level shifting?
TIA
Is it just me or is it nearly impossible to solder a header to the end of the board because the display blocks the holes?
It's not just you - but it's not really intended to be soldered to. You'd only generally need to use those pads to hook up an FTDI type programmer, in which case a temporary solution (be that a pogopin bed, some hook clips, or just some quick soldering to the bottom of the board only) should suffice. If you did want a more permanent header, then a right angle header - or just a regular header soldered at 90 degrees - should do okay.
Hey... The GitHub data sheet is cool and all, but a downloadable PDF would be nice as well... :/
For those just starting with the displays, this blue one is nice and bright. I can see it no problem in the daylight. The white 7-segment display is a little tough to see in the daylight, since the color when these are off is white. Analogous to LEDs.
Received a defective one today. The baud rate is too far off to work on UART. These do not have a crystal for accurate baud rates. While it is possible to calibrate the internal oscillator I don't think that is being done.
I am having trouble getting anything to show up. I have tried both the serial and SPI tutorials. Wired everything exactly like the pictures and used the provided code but still nothing. The other anomaly that is happening is that when wired for serial communication and the ground wire is disconnected the left bottom corner segments flash on the two right "8's* as well as the decimal points for them. Does anyone have any ideas that I could try?
I need to send numbers from serial terminal in PIC16F88, to this display, in C language. Can somebody help me? I just need an example, please.
Is there a fritzing template available for this part?
Hi, I have been using the Serial_7_Segment_Display_Firmware sketch, and I cannot make any sense of the output.
When I run the code as-is, my display looks like this: http://imgur.com/UmmWysg
I have tried a lot of things, including replacing my loop to display a whole bynch of ints, none of which I can make sense of on the display. There are a few segments that never light up. Is my display broken? Is there a coding solution to this problem?
Thanks
SOLVED. Member #376129 posts about changing
define DISPLAY_TYPE OPENSEGMENT
define DISPLAY_TYPE S7S
Thanks for this it helped me out a lot I was going off my head trying to fix this
WOW, I love the Blue Display
Can I use this like an arduino and hook up sensors to it through spi?
The Eagle file schematics here and on github are incorrect and don't agree with the Schematic link (http://dlnmh9ip6v2uc.cloudfront.net/datasheets/Components/LED/Serial-7-Segment-Display-v31.pdf), which is correct. For instance, segment A is on PB0 not PD6, segment B is on PC0 not PB0, etc.
Guys - Has anyone been able to get these modules working on the I2C bus? I am using a Sparkfun UBW32 PIC32 board on I2C2 with code compiled by the Microchip C32 compiler and am getting good wave forms to the device, but I'm getting NACK's back for each byte sent. I2C address is 0x71 and I'm sending that along with digit data with no luck. I've also tried the various commands with no luck. The waveforms are correct, but display defaults to 0000 and I'm not able to write anything to it. I've tried SCL rates from 5 kHz up to 100kHz with no luck. Any ideas? Is the I2C section even functional? Also, just for info, I2C addresses with a '1' as the LSB are for reading a device. LSB of '0' is for writing. (I tried address 0x70 as well just to see if that would work.) I would try the serial port, but they are already in use with high speed data. Would appreciate any info that might assist. Thanks! -- Ed
I had I2C working using an Arduino Nano. I2C addresses are 7 bits. The 8th bit determines whether it's read/write. So to write, send 11100010 not 01110001; to read, 11100011.
Thanks! I'll give that a try and report back when I can get some time to get it done.
Nice improvement over the older display. I'm trying to skip the arduino and hook up an analog sensor directly and here is where I am stuck. Jay's Serial_7_Segment_Display_Firmware.ino calls the function setupDisplay(). Yet that function is not defined in the sketch nor is it defined in the settings.h or SevSeg.h header files loaded by the sketch. So what am I missing here?
Glad you like it!
setupDisplay()(along with a bunch of other system functions) is in the systemFunctions.ino, which is in the same directory as that main firmware file your looking at.Thanks. One of these days I'll have to learn how to use github properly :). Once I got all the files and set the DISPLAY_TYPE S7S correction noted above it works great. I have it hooked up to your LPG sensor and a battery and I'm good to check for propane leaks. Maybe next time I'll get it mounted in the case right side up :)
i buy this product for to use it with a ds18b20 temperature sensor but what can i do that..? i need a sketch example thanks ;-)
I am using 5v for power at VCC.
Strange, my programmed brightness for the old part is:
//uart_putchar(0x7E); // about half is too dim
//uart_putchar(0x1E); // almost max daytime, still too dim
//uart_putchar(0x00); // max for daytime
// turn the brightness full ON
uart_putchar(0x7A); uart_putchar(0x00); // full bright
But, you say that 0xFF is full bright, not 0x00.
Has this changed? Thanks Again, Gary
Oops...the meaning of the data byte was indeed flipped around. Now, 255 will set the display to its brightest. More info here (if that'll load for you).
Cheers.
Using different power source, to eliminate that as a problem...
The LED segments in this new part have MUCH, MUCH LESS brightmess (same driving code) than what I was getting with the previous part.
I tested the new part and then the old part in the same test jig.
Has anything changed in the brightness control commands, or in how the brightness is controlled from very dim to full bright?
In the old part, the segments are nicely a constant bright.
With the new part, they are dim, and flicker a bit.
Unless there is a way to get up to the previous level of brightness, this new part is essentially unusable in my application.
Any thoughts, please?
It is definitely going to be dimmer now with the addition of current-limiting resistors on the LEDs. But it still seems pretty bright to me. Make sure the brightness is set at max (send 0x7A, 0xFF), which it should be by default.
What voltage are you powering it at? 5V will give you the brightest display, while 3.3V will be noticeably dimmer.
All segs off at Power ON means that there is no way
to tell if the part is working before putting it into
a working circuit.
I put it in the circuit, set the baud rate, and then I
can see the expected characters. Thanks, that is good.
However, the brightness seems to be low, but I will check
using a better power source than the test jig currently has.
Thanks Again!
In incoming QC, I apply 5v to VCC and Ground to GND, but nothing lights up.
The replaced unit would show "0000" after power-on bootup.
What is different with this new design, please?
I tried two parts, and all 3 of the Gnd/Vcc connections.
Perhaps you can make the datasheet available as a single pdf?
It seems that GitHub complains when I access the datasheet with IE7.
This newest version defaults to turning all LEDs off when it's turned on. Seemed less intrusive.
Thanks for letting me know about IE8 not loading the datasheet. I'll check into getting another file-type of the datasheet. The link does seem to work in IE9 for what it's worth.
I noticed this product is not capable of displaying the character 'y' or 'Y', whereas the prior version of this product had the capability. Am I alone here?
Bit of a maze to traverse (I don't have this product), but as far as I can tell this uses the SevSeg library. SevSeg.h tells me that 'y' is not displayed, but 'Y' should be fine. If that doesn't work, try 0x59 (should be the same thing). If that doesn't work either, hopefully somebody from SFE will step in - but in the mean time you could try forming the Y yourself using individual segment control
Wow! A $13 Arduino (Arduino compatible) with a built in display. Excellent!
This is following from member #4643 & 37129, we are still struggling to get the circuit working properly. As mentioned above, one of the segments ("E") doesn't work on any of the digits. Digging further we traced this back to the pins_arduino.h file, our sketch linked to the wrong one which didn't describe the extra pins of the ATMega chip PB6&7 (not needing the external crystal) as digital pins D22 & 23. Indeed D22 is controlling the E-segments. However, when we do link to the right .h file, the Analog Inputs A6 & A7 (which worked previously with the wrong pins file...) stopped working, we get error messages from the compiler that "A6" & "A7" don't exist. We tried "ADC6", no luck. This may be something simple, any suggestions? Really keen on getting this circuit to work, for a project with interactive hand counters for a rehab ward where this can make a big difference.
Do you have the Serial7Seg folder installed in a "hardware" directory in your Arduino sketchbook? That should create a Serial 7-Segment Display option in your Tools>Board menu (for more info, see parts 1 and 2 here. When selected, that should handle all the D22/D23 definitions as well as A6 and A7.
Oops this morning we installed everything fresh on another Mac, now it all works! Few small things still but we are ironing those out, will post it all on our Interactivation projects site soon. Thank you Sparkfun people for all your cool circuits, it has made our research and design work so much easier in the last years, fab! - Bert
Oke we (I am working together with Member #4643) have been working on this one for a few days, had a lot of trouble. We mostly worked with the ' Serial_7_Segment_Display_Firmware.ino ' in which the pinlocations seemed to be wrong, at least they do not correspond with the parallel connection. We tried everything, also in the SevSeg.h files etc. but without any clear result. Luckily we just fixed the 'problem'! It seems that everything is correct but one little thing, finally we found out that only this should be changed in that firmware Arduino code: On line 38: Original:
define DISPLAY_TYPE OPENSEGMENT
Changed into:
define DISPLAY_TYPE S7S
The other thing was the pin location, the provided schematic is incorrect!
So for further use: Please fix this part in the firmware code and change the Schematic sheet!!
THANK YOU for posting this. I just bought this and thought there was some kind of bootloader issue because the display would not stop showing 999. I did not realize it was a pinout problem. I am going to repost this on the other colors. They really need to fix this.
Yes luckily we found out this little problem, should be al working good now! By the way somehow segment E doesnt work on any digit anymore now just after the weekend.. But thats probably fixed soon and not a general problem, because it worked perfect on friday! Oh and by the way thanks for reposting on the other product pages!
We have wired up this nice unit with an FTDI Basic 3.3V, installed the hardware profile for the Arduino IDE, but can't make the display work. We wrote a sketch with Serial.begin(9600) and Serial.write('2') but nothing appears on the display. The Arduino Examples section on the Github is empty, and so is the Customizing the display section.... help!
Did you upload new code to the display? Or is that sketch with the
Serial.write('2')on an Arduino communicating with the display?The S7S comes with the Serial_7_Segment_Display_Firmware code already loaded onto it, and is mostly designed to have a separate device send it serial data to be displayed. That said, you can definitely upload your own Arduino sketch to customize the firmware. I updated the customizing the display part of the wiki. Maybe that helps?
Thanks for that tip, will try that! Sorry it might not be clear from our previous message, but the case is: we want to put Arduino code on the ATMega238 which is on the displays breakboard itself, so without an extra Arduino! So we just connected a header for the FTDI connection to the display and try to put the code on there! Here is a picture of it Anyone more experience with this so far?
Oh no! This would have made a perfect miniature-clock if 'segment E' wasn't tied to the Xtal pins now(It wasn't in the other rev), decimal points could be ignored in that instance and disconnected. I suppose with a bit or rewiring though!
Looking forward to seeing one of these in white be it the new or old style. Is there a reason that hasn't happened yet?