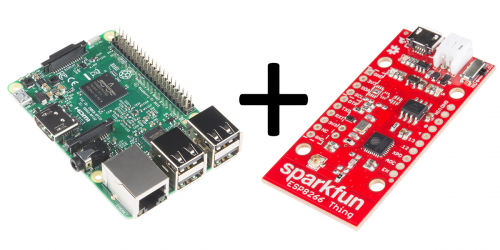
Flask is a simple Python web app framework that can be used to run server-side Python scripts in response to web requests. In this blog post we will show you how to combine that with the ESP8266 Thing to control your Raspberry Pi 3 via WiFi.
A basic Flask app can be written in as few as seven lines of code:
language:python
from flask import Flask
app = Flask(__name__)

@app.route("/")
def hello():
    return "Hello World!"

if __name__ == "__main__":
    app.run()
Example source
The magic, as it were, happens around the @app.route("/") statement. This statement defines a function to be run when an HTTP GET request hits the Flask app at that path (in this case, at the "no-path" path, or the domain-level path without any additional direction). Hopefully you can see even from this example how powerful this is (for good or evil): it allows you to execute arbitrary Python code on a Raspberry Pi (or any computer, really) just by sending a simple HTTP GET request.
Furthermore, the route can contain wild cards that become variables in the function below. Consider this example route:
@app.route('/gpio/<string:id>/<string:level>')
def setPinLevel(id, level):
    GPIO.output(int(id), int(level))
    return "OK"
Now, we accept as strings named id and level the next two layers of path after gpio. This allows us to toggle any GPIO pin on the Raspberry Pi.
Issuing an HTTP GET request is very simple. It's one of the primary examples that any WiFi-based board is probably going to provide. The ESP8266 Thing is no exception to that. The Arduino support package includes a simple HTTP client sketch, which, with slight modification, can be made to issue an appropriate GET request to the Raspberry Pi.
For more information on how to do this, check out my tutorial on using Flask. It will walk you through everything you need to know to make a working WiFi connection from an ESP8266 Thing and a Raspberry Pi 3.


Don't forget to sanitize inputs, the gpio example doesn't... Yeah, it's just a simple demo but a couple "if" statements demoed would encourage good behavior.
I built a toy security monitor out of a PIR motion detector, Pi Camera, raspberry pi b+, and piezo buzzer. Whenever the motion sensor trips, the rpi buzzes the alarm, snaps a photo, and emails the photo to me. I put the camera behind a rest server so that I could trigger the camera on demand with a rest request, not just when the motion detector trips. The code handling the motion detector input relies on the rest server to snap a photo, too, even though they're on the same host. Flask made the rest interface trivial to implement.
Here's the project: https://github.com/larsonmp/security-system
It's incredibly barebones, but good enough for a proof of concept.
Link is broken to tutorial.
Try it now. It should be live. =)