I don't know about you, dear reader, but I've gotten so spoiled by the ease of popping out some code in Arduino that I've almost forgotten what it's like to work with a real, professional design tool. I recently received a sample SAME54 Xplained board, and I thought I'd give it a whirl in Atmel Studio 7.
The SAME54 Xplained Board
-> 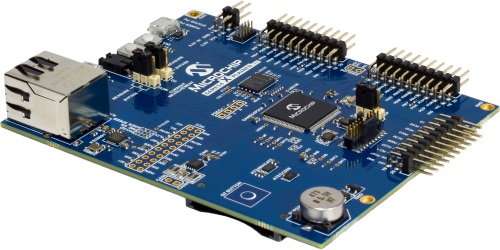
Image courtesy Microchip <-
The SAME54 is a powerful processor, sporting a Cortex-M4 core, built in Ethernet, USB, SD and CAN. The ATSAME54P20A on the SAME54 Xplained board has a full megabyte of flash and 256kB of SRAM. The board has an Ethernet jack and an SD card slot onboard, along with 32MB of QSPI flash, an ECC crypto device and a CAN transceiver. It also has multiple headers to support add-on cards available from Microchip. Last but certainly not least, it has an onboard debugger, meaning you don't need an expensive programming tool to develop applications on the processor.
Atmel Studio 7
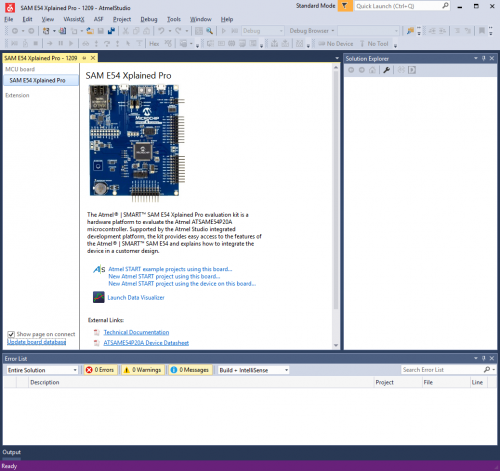
I downloaded Atmel Studio 7 and opened it, with the SAME54 board (henceforth, board) plugged into USB. I was pleasantly surprised that Studio 7 immediately noticed the board attached and offered me some options for playing with it.
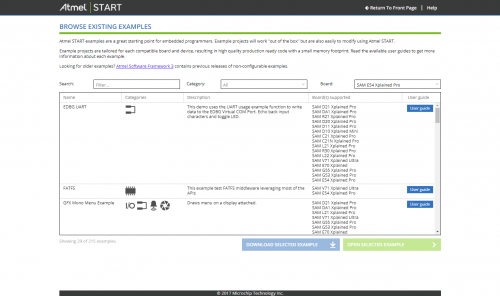
Fumbling for a next step, I decided to click the link called "Atmel START example projects using this board." I'm not sure what I was expecting, but I wasn't expecting to be brought to this website and offered a list of example projects:
There's a nice little list there. I chose the "LED Switcher" example --- basically a program that toggles the state of the onboard LED with the onboard button. Clicking the "Download Selected Example" button provided me with a list of target boards that I could choose from; I selected the SAME54 Xplained from the list, and the download began.
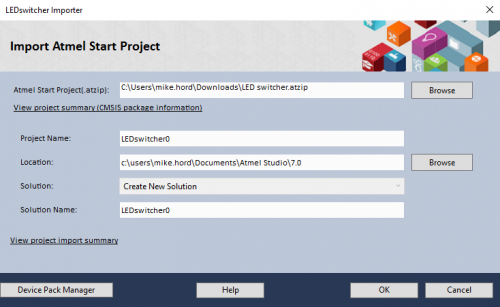
The downloaded file was of type ".atzip" and I was a little concerned that I was going to have to jump through hoops to extract it. But it turns out opening the file in Windows brought up Atmel Studio 7 with options to import the selected project!
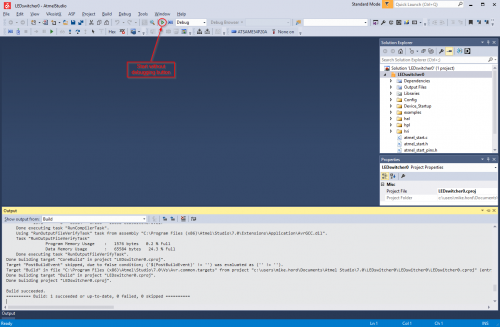
Clicking the "Start Without Debugging" button built the example (no errors!) and uploaded it to the board. It Just Worked.
Changing Some Things
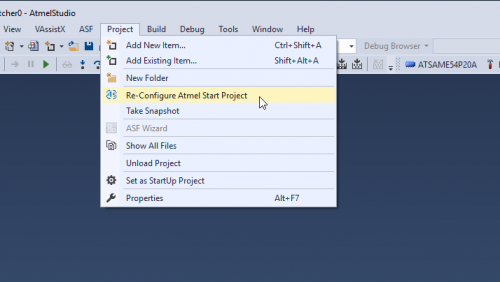
One of my first post-blink tasks on a new system is to figure out how to implement a system clock, sort of like the Arduino millis() or micros() command. I figured the easy way to do it is to implement a timer, and I looked in vain for a timer example project. Failing to find one, I just started poking around. That's when I found the "Reconfigure Atmel Start Project" menu item. Intrigued, I clicked on it, and something pretty neat happened.
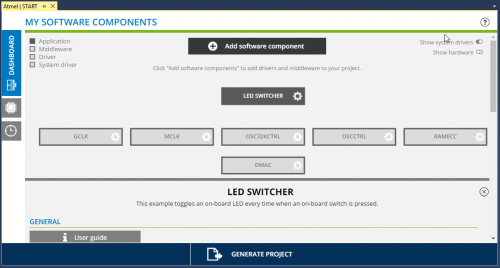
It opened up a hitherto unknown (to me) aspect of START: a software component configurator!
Clicking the "Add software component" button allowed me to add a timer to my project. It, of course, provided many other options, both in driver level (i.e., PWM, ADC, RTC, Delay, etc.) and in middleware level (i.e., USB stack, ethernet stack, etc). Clicking the "Generate" button at the bottom of the page filled in my solution with not only the support files for a timer, but some example code as well! Nifty!
Buuuuuut...
I decided at this point to try to change the clock generation option for my part, since it can run up to 120MHz and was running at a mere 12MHz. Back in the START reconfiguration page, I found the clock generation section and fumbled with it for about half an hour before I gave up and accepted that 48MHz was the best I was going to get. I was disappointed by that aspect of the START system, and I haven't been able to find documentation that might tell me what I did wrong, either. So, there are still some sticky wickets in the START system.
Final Verdict
All in all, the START system in Studio 7 is a fairly robust means of generating the core files, along with example code, needed to make a good start on an Atmel project. I look forward to seeing what they do in the future to support new products and whether the documentation around some features improves.



Welcome to the Atmel world (now part of Microchip but the names persist).
It is in no way necessary to use hardware timers to make a heartbeat timer. There is such a clock built into the Cortex M4 processor, called SysTick. I was going to say more about it but it appears the Microchip site is down.
I usually just use FreeRTOS instead of trying to cobble a bunch of do-it-yourself multitasking together using timers or trying to do it all in a polled super-loop Arduino style. Once you learn the ropes it is a lot easier and less likely to glitch. There is a version of FreeRTOS in the ASF libraries for just about all the Atmel chips though it may be an old version. If it is, it is pretty easy to update it after setting it up. Just replacing files. In FreeRTOS you use the built-in timer routines and the system takes care of the multitasking part.
You can configure the 120 MHz clock in Atmel Start, it is just a little confusing. You have to set the PLL ratios and set the clock path. A little study of the data sheet and a few rounds with the sample programs and it will all become clear.
There is a New Year's message from the CEO of Microchip promising to support legacy devices, so probably the Arduino chips (ATMega, AVR etc.) and Atmel Cortex M series will continue to be available.
Hardly an improved SAMDxx! This is a Cortex M4 with Ethernet on die, running at 120MHz. On the other hand, the SAMDxx series chips are Cortex M0+, a really value segment architecture.
Arduino Due has a Cortex M3 with Ethernet (but Ethernet is not wired out). And this E54 is yet another notch up. The big difference between the M3 and M4 is M4 has DSP, although Atmel Software Foundation (ASF) library's DSP implementation has always been... lacking...
The D series chips are good for low end value segments... particularly the D21 is so simple to boot up... you don't even need to an external 12MHz crystal to run USB. There is no complicated power requirement boot up sequence... just wire one Vcc and Gnd and you are good to go. So simple, even I can wire it up before my morning coffee with just some wires, spit, and glue.
Why bother with E54? SAME70 board is a much better deal, https://www.digikey.com/product-detail/en/microchip-technology/ATSAME70-XPLD/ATSAME70-XPLD-ND/5725743. 300 MHz. Cortex M7 architecture with double precision floating point instead E54's single precision, and at less than 1/2 the price with hell more leads routed out (except the headers are not populated, but who's afraid of soldering a little header?).
Digi-key lists this board at $84 in stock quantity 1. Price for just the chip will of course be lower than this with quantity sales. This looks like an improved version of the SAMx21 (x=D) used in the Arduino Zero family and Adafruit has announced the are working on Arduino library support for the SAMD51 and a board supporting it.
The SAMx5y (solve for the 2 unknowns) family seems to be the natural successor to the SAMD21, featuring greater clock speeds, hardware floating-point, and improved peripheral support. We have yet to decide whether Python, Arduino, or Atmel Studio/Start is the best vehicle for our purposes.
I'd like to ask if SparkFun will offer this year products based on one of these chips. What say?