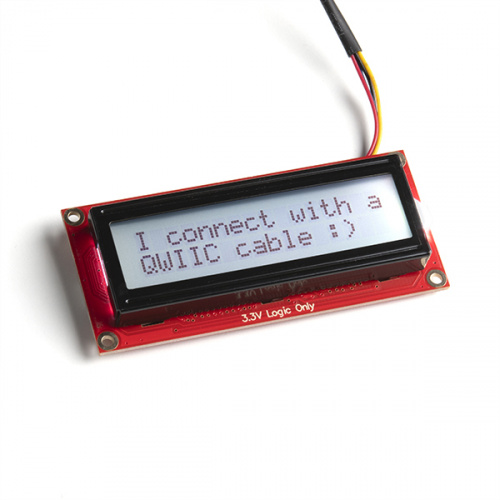
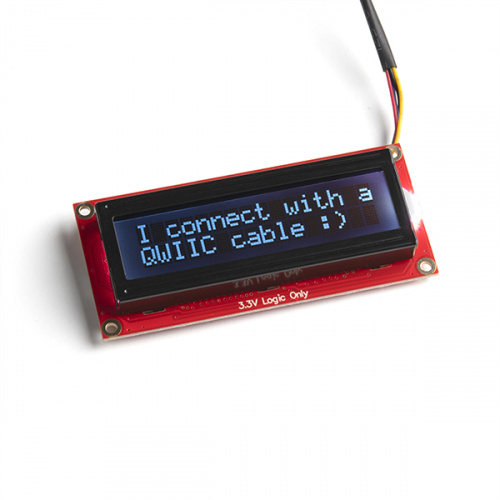
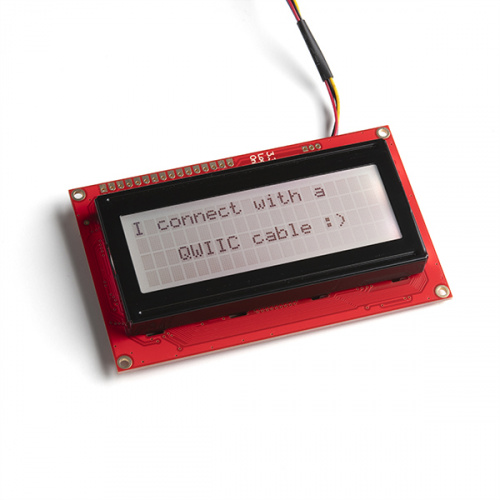
Welcome, welcome, welcome! This week we have three products to show off and they are all new versions of our popular serial LCDs. SerLCD was introduced a few years ago to provide an AVR-based liquid crystal display that didn't require a control backpack. Now, we offer two 16x2 displays and one 20x4 display, all controllable with Qwiic!
Don't forget that you can get a free SparkFun Qwiic Pro Micro BoogieBoard with any purchase of $75 or more using promo code "BOOGIEBOARD20" (some restrictions apply). Supplies are running short so get yours before we run out!
Now onto our new products!
Serial enabled LCDs have never been easier to use!
The SparkFun SerLCD is an AVR-based, serial enabled LCD that provides a simple and cost effective solution for adding a 16x2 Black on RGB or RGB Text on Black Liquid Crystal Display into your project. The PCB design on the back of the screen includes an ATmega328P that handles all of the screen control, meaning a backpack is no longer needed! This display can communicate three different ways: serial, I2C and SPI. These versions come equipped with a Qwiic connector, bringing serial LCDs into the Qwiic ecosystem. This simplifies the number of wires needed and allows your project to display all kinds of text and numbers.
If you need something a little bigger than a 16x2 display, you're in luck! This 20x4 Black on RGB Liquid Crystal Display can be added to a project just as easily as the screens above and possesses all of the same features as well - the only difference is its size.
That's it for this week! As always, we can't wait to see what you make! Shoot us a tweet @sparkfun, or let us know on Instagram or Facebook. We’d love to see what projects you’ve made!



Sorta reminds me of a TV show title from the 60s: "It's About Time"... ;-) (The show was about some fictional astronaughts who somehow managed to go back in time to the stone age.)
Anyway, QWIIC sure would have simplified one of my first Arduino projects back in about 2011 or so. I'd gone to Canada for a short vacation, (side trip on the way back from a trip to Oregon), and of course, speed limits in Canada are in KPH rather than MPH. The car I had at the time had markings on the speedometer for KPH, but they were very hard to see at night. My GPS would display speeds in KPH, but only when not navigating to a particular destination (like back to the motel after supper). So, I'd built up an Arduino with a GPS module and LCD display. I'd done a custom PCB to hang it all together (with a humongous cap to keep the Arduino powered long enough to write some stats to EEPROM when the power went away). It also displayed the altitude, as I haven't been able to track down a car altimeter this millenium.
Oh, I trust that the new ones will be shipped with the latest version of the "firmware" installed that has the debugging messages turned off...
Hey 773, Love that story. Thanks for sharing. I'd also really like to see altitude displayed in my car. How about airspeed, compass and vario? Maybe even a yaw string on the canopy ...urp... I mean, windscreen :)
Indeed, they are being shipped with firmware version v14 on them. But you will need to try out example 15 "message enable/disable" to turn those system messages off, if desired.
I just realized that there's one other tidbit that's "conspicuous by its absence", to wit, a mechanical drawing showing the size. Although one can get something of an idea of the overall size from the "ruler picture", it's a bit difficult to read accurately enough to make a 3D printed or machined case from, plus it's not at all useful for obtaining depth. (Noticed that it's missing from all three of them, as well as the older SerLCDs.) And, although it's not likely to be a big deal for these products, the weight would also be nice to know. One other parameter that more likely would be useful (especially for a battery powered project) is an indication of minimum & maximum current draw (e.g., backlight at 0, no changes to LCD, backlight max RGB with continuously changing LCD).
At the least, Pete just measured them out and it is now on each respective product page and hookup guide. Check it out. ;)
As for the weight, I'll look into that to see what we can do. Further tests would be required to determine the min/max current consumption under such conditions.
Great drawings! Thanks! Though I'd still like to see something about the height above and below the board -- I know that can be harder, but even just an "eyeball guestimate" could be useful. (Some projects can get pretty crowded!) On the weight, again, the accuracy isn't that important, though there are times when it can be a concern. (As an example of a project I did need it for was the battery system for my "Flashy Santa Hat" -- using AAA batteries made it slide off my head too easily.) And again, the current consumption accuracy isn't that critical, but if one wants to do a battery powered project, it's nice to know the current for the "power budget" to be in the right "ball park" (or at least right "zip code") as to what batteries to use.
Anyway, thanks to both you and Pete! (And to all the great folks at SparkFun!)
By request, someone in our catalog team added the weight and dimensions on the respective product pages under the Features tab.
We have yet to look into the min/max current consumption under such conditions.
I found this page looking for the current consumption figure as well. Anyone got that?
Does SparkFun follow up on this sort of question?
It depends. Questions in comments sometimes get lost. Luckily, I had the parts and the time recently to check back on the current consumption. It's been in the back of my mind for a while. ;) I'm going to put this in the tutorial's Hardware Overview as well in case anyone is wondering in the future.
After checking with my trusty multimeter, I was able to view the current consumption. This is assuming that the system messages are disabled, contrast is set to
5, and powering the SerLCDs off the RedBoard Qwiic's 3.3V voltage regulator via I2C. I basically set all the character spaces to black rectangles █ as the "text." Each measurement had about 5000ms to let the SerLCD settle before the next color change. For the continuously cycling colors, I modified example 2 to change the backlight about 50ms. I don't think my basic multimeter was able to pick up the changes in current at that rate.16x2 SerLCD w/ RGB Backlight Current Consumption
20x4 SerLCD w/ RGB Backlight Current Consumption