Hello everyone and welcome to another Friday New Product Post. First, I'd like to thank everyone for coming out to AVC last weekend. Other than getting a sunburn, things went pretty well. We had some great moments, fierce competition, and a lot of fun. As a side note, I will most likely be doing a post about the VSS (video scoring system) in the future if anyone's interested in how we scored competitors at AVC this year. Post a comment if you'd like to see more on that.
For now, let's check out the video and the products.
Vimeo version here.
If you find yourself tinkering around a lot with designs, you really should get some MicroRax to play around with. It makes physical prototyping much easier and quicker. Okay, enough with the sales pitch, let's check out the products.
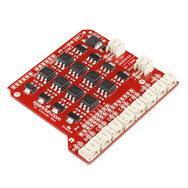
I've said it once, I'll say it again: we make mistakes. The EL Escudo wasn't the most reliable product and was in desperate need of a revision. We listened to our customers and came up with the EL Escudo Dos. The new revision adds optoisolators on all the triacs as well as a regulated 1.5A supply for the inverter. We've tested this out for months and it's bulletproof. No more blowing channels. A redesign on the EL Sequencer is coming soon as well. Thanks for the feedback!
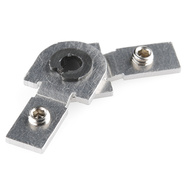
This week we have a few new MicroRax accessories. First up is the knuckle hinge. This hinge allows for 90 degree movement (each way) at a right angle. Check the video above. It uses two set screws to fit into the MicroRax channel.
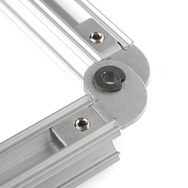
If you need a different type of movement, you might want to check out the elbow hinge. This hinge goes from parallel to straight, for a total of 180 degrees of movement. Check the video above for an example. It uses the same system of set screws to attach into the MicroRax channel.
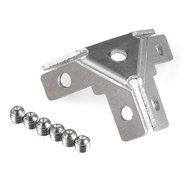
If movement isn't your thing, but you just need three MicroRax beams to intersect, check out the Tri-Corner. Beams simply slide into place and are held there by set screws. Once connected, you have 3 beams intersecting at a common point, similar to the corner of a cube.
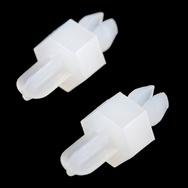
Lastly, these PCB standoffs allow you to easily attach PCBs to your MicroRax assembly. They come with the two plastic parts shown above and some washers. Simply attach them to the slide-in channel nuts and snap in your PCB.
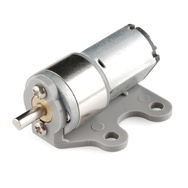
We've carried our mini metal gearmotors for some time, but there's never been a great way to attach them to your platform. These motor mounts attach to the face and give you four mounting holes. The right-angle profile is much easier than mounting directly to the face.
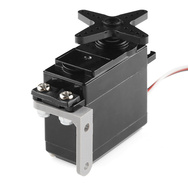
If you need to mount a servo instead, we've got you covered. Our servo mounts are just simple right-angle piece of plastic with holes drilled in them. As shown in the picture above, it gives you a simple way to mount the servo at a right-angle. They mount in the standard servo mounting holes. Just keep in mind we sell them as singles, so make sure you get two of them!
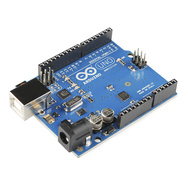
We now have stock of the SMD version of the Arduino Uno R3. This is essentially the same board as the normal Arduino Uno R3, but uses an SMD version of the ATmega328. Everything else functions the same way.
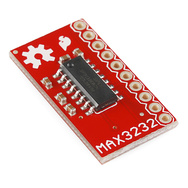
The MAX3232 is a great IC for converting RS232 to TTL. We've put it on a breakout board, so you can easily use it. We've broken out all the pins, added a few necessary components, and easily labeled all the pins. It even works at 5V and 3.3V logic. Check it out if you need to translate between RS232 and TTL.
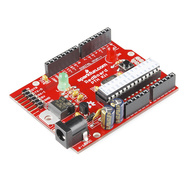
This next product may be a bit confusing, so let me try and explain it. Let's say you want to build your own Arduino-compatible microcontroller. You can use the RedBoard Breadboard Kit to make one, but in the end you just have a breadboard with a bunch of parts on it. The RedBoard PCB Add-on gives you the extra parts (PCB, headers, barrel jack, socket for ATmega328, etc) to turn the breadboard into what you see above. Put it all together and you'll end up with an Arduino-compatible development platform, similar to an Arduino Uno.
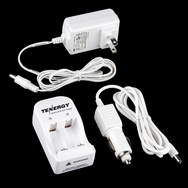
A couple weeks back we announced Cubelets. Since they are intended as a toy, they need a special battery that doesn't explode when it gets wet. Thankfully, we now have the special charger needed to charge the lithium iron phosphate batteries that are included with the Cubelet kit. Use it in your car or at home.
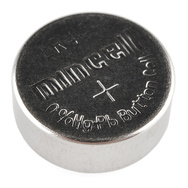
If you've ever used our digital calipers, you might have noticed the lack-luster battery life. Recently, I wrote a mini-tutorial showing how to add a AAA battery to your calipers to greatly increase battery life. However, if you don't want to hack up your calipers, we now have LR44 button cell batteries.
Well, there you have it, a good bunch of new products for the week. We have a lot of new things coming in daily, so be sure to check back next week where we will have (you guessed it) more new products. Thanks for reading and see you then!


Don't mislead your viewers! Quote from the video starting at 6:13 "An inverter simply takes one voltage and puts out a much higher voltage" NOT NECESSARILY TRUE. An inverter takes a DC voltage and outputs an AC voltage.
Yes, in most cases it is a higher AC voltage output than DC input but an inverter could give out a lower voltage than is going in.
I don't want to be pedantic but it sounded like you suggested that any high voltage will do, what's more important is actually that it is AC as DC will not light EL wire (not constantly anyway).
Maybe I am being pedantic but anyway...
Yeah, that's flat-out not true, you're correct. Rob's not trying to mislead anyone, though, these are just usually improvised one-take videos and he's not an engineer (nor am I). He stays plenty busy keeping the catalog in order. Thanks for pointing out that mistake so no newbies get the wrong idea. We'll try to be more careful in the future. Thanks DanJAB!
Fair-enough, I realise he wasn't trying to mislead. Ta.
Yep, sorry. Sometimes I boil it down too much and get it wrong.
That threw me for a loop too. In this case, the inverter puts out a higher voltage than the input, but it's main function is the frequency generation, not the voltage difference.
redundant pedantic ;)
Instead of carrying the LR44 batteries, try the more expensive SR44s. That's what I use in all my calipers and micrometers. The difference is that the SR44 cell uses a silver oxide chemistry while the LR44s are alkaline chemistry. The SR44's discharge curve is also a lot flatter, so with a slightly higher starting voltage the SR44s consequently lasts a lot longer.
-=- Terence
http://blog.OpenBeamUSA.com
"Since they are intended as a toy, their need a special battery that doesn't explode when it gets wet." :)
hey, in the EL Escudo Dos description you say "regulated 1.5A supply for the inverter. " but on the product page, its 0.5A output... Which is correct?
It's 1.5A, it's been fixed. Sorry about that.
can the plastic servo mounts take the stresses of a super strong servo like a Savox SB2270SG servo getting a full 7.4V cranking out it’s full 444 oz-in (or roughly 32 kg-cm) load? i could see these being big with the RC'er crowd if they could handle something that strong.
No. They are not that strong. Other places make nice machined ones, but not for the same price as ours of course.
yeah, i didn't think these were that strong. i usually make my own servo mounts anyway. i just thought if they were up to the task of just ordering like 10 or 20 of them to keep on hand for a quick servo mount.
I'm assuming that they are mostly for mounting continuous rotation servos used as drive motors which don't have the same forces as a servo pushing or pulling a control rod.
For your app I'm thinking you would need metal.
I would really doubt that. I use a Savox 1256TG on my Axial SCX10. That outputs 'only' 277oz/in of torque and I have ripped the stock Axial mounts to pieces in a hard steering bind. These little beams simply do not look strong enough for that. On go-fast RC cars like my Slash, I have hit hard enough to dislodge bullet connectors and servo tape, these would snap. Granted, im hard on my stuff, but still.
Id assume this mount is for light duty stuff, looks like itd work admirably for that.
I would like to be rich so I could do all my projects with this makerbeam/microrax stuff... it's so nice and easy to do everything with it
He has quite a nice ring.
Thanks! It's faceted tungsten carbine. nearly indestructible.
Where did you get it, and do they take bulk orders?;)
somewhere online, I forgot.
I think most businesses are interested in bulk orders :-)
I hope the EL Sequencer revision fixes the compatibility issue with the 3.3v Sparkfun Inverter (output wires of the inverter are flipped on half of them, however, the inverter still passes QC since the output wire orientation doesn't matter when going from battery -> inverter -> panel/wire). Though maybe this would be fixed more simply by having a QC that checks the inverter with the board (both output wires are black, so it can be super confusing).
Yes, that is one of the issues that we've solved with this board (and also with the upcoming Sequencer revision). It will function equally well with the inverter output in either direction.
Oops, for the pedantic among us, it will function VERY, as well as equally, well with the inverter output in either direction. ;)
What size hardware for the motor and servo mounts? I found the drawing but my decimal inches to machine screw size figuring is bad. I'm thinking 4-40.
i'm going to say m3 hardware. most standard size servos have either 1/8" or 3mm holes on their mounting ears.
Thanks for another week of fun bits. And I for one would love to know more about the VSS. The AVC was great this year - hey, it didn't snow! And I'm always up for learning more cool stuff!