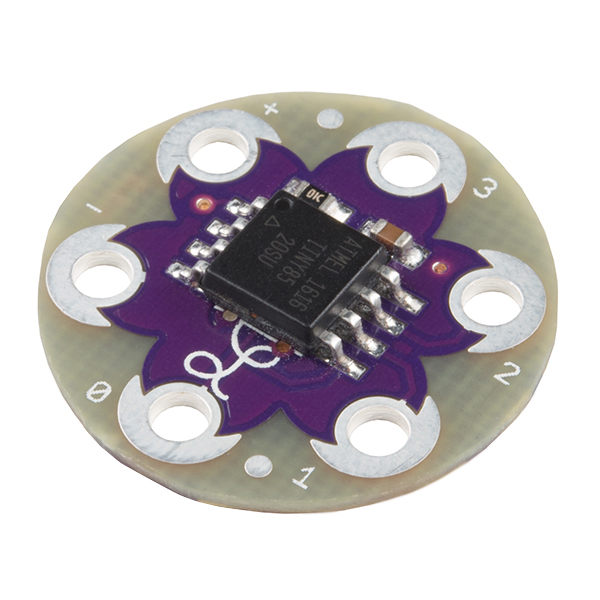
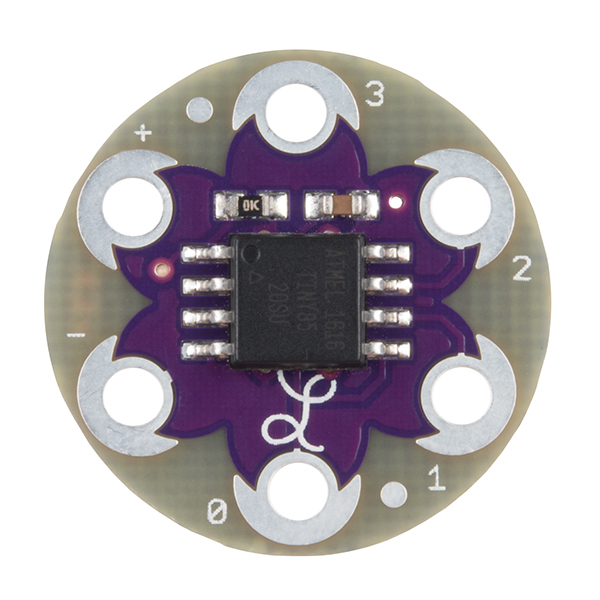
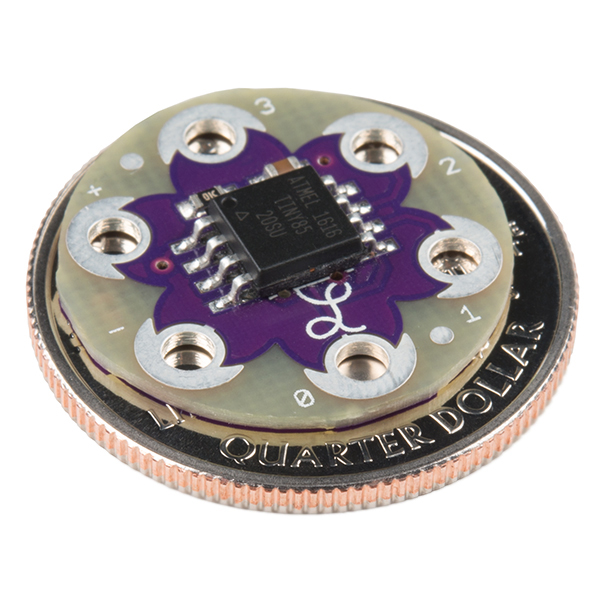
The LilyTiny is a tiny little LilyPad board designed to add flashy functionality to your project without taking up a lot of room. Even though it's as small as some of the LilyPad sensors, this board actually has an ATtiny microcontroller on it so it's actually pretty smart! Simply sew on four LEDs and connect a battery and the LEDs will each blink or fade differently. One will blink on and off (2), another will flash a heartbeat pattern (1), another will do a "breathing" fade (0) and the other will do a random fade (3). LilyTiny is a quick and easy way to add twinkling lights to a project without any programming or a bulky Main Board. It's also a great educational tool for showing a range of functionality without having to get out the computers.
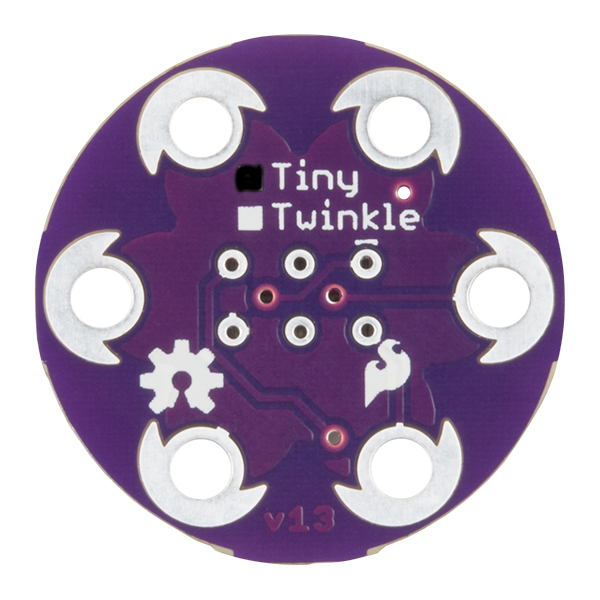
If you're an advanced user and want to re-program the LilyTiny, the ICSP programming connectors are broken out on the back.
LilyPad is a wearable e-textile technology developed by Leah Buechley and cooperatively designed by Leah and SparkFun. Each LilyPad was creatively designed to have large connecting pads to allow them to be sewn into clothing. Various input, output, power, and sensor boards are available.
Note: A portion of this sale is given back to Dr. Leah Buechley for continued development and education of e-textiles.
- 20mm outer diameter
- Thin 0.8mm PCB
- Schematic
- Eagle Files
- Getting Started
- Re-Programming the LilyTiny
- Datasheet (ATtiny85)
- Arduino Quick Reference (ATtiny85)
- Arduino Code
- GitHub
LilyTiny Product Help and Resources
Tiny AVR Programmer Hookup Guide
October 28, 2013
A how-to on the Tiny AVR Programmer. How to install drivers, hook it up, and program your favorite Tiny AVRs using AVRDUDE!
Re-Programming the LilyTiny / LilyTwinkle
September 11, 2014
A quick tutorial showing how to reprogram the ATtiny85 IC found on the LilyTiny or LilyTwinkle boards.
LilyTiny Plush Monster
January 27, 2015
Craft a stuffed monster while exploring the LilyTiny preprogrammed microcontroller. This is a project based on the Plush Monster Activity created at MIT's High-Low Tech Lab by Emily Lovell, Jie Qi, and Natalie Freed.
Light Up Pennant with E-Textiles
September 17, 2015
Show your school spirit, geek pride, or fandom with a light up pennant using the LilyTwinkle or LilyPad Arduino.
Twinkle Zodiac Constellation
August 15, 2017
Create a quick and easy piece of e-textile art based on a Zodiac sign using a LilyTiny, LilyPad LEDs, battery holder, conductive thread, and coin cell battery.
Getting Started with LilyPad
October 27, 2017
An introduction to the LilyPad ecosystem - a set of sewable electronic pieces designed to help you build soft, sewable, interactive e-textile projects.
Night Sky Halloween Costume
October 25, 2017
Make a beautiful night sky costume using the LilyPad LEDs and the LilyTiny.
Core Skill: DIY
Whether it's for assembling a kit, hacking an enclosure, or creating your own parts; the DIY skill is all about knowing how to use tools and the techniques associated with them.
Skill Level: Noob - Basic assembly is required. You may need to provide your own basic tools like a screwdriver, hammer or scissors. Power tools or custom parts are not required. Instructions will be included and easy to follow. Sewing may be required, but only with included patterns.
See all skill levels
Core Skill: Electrical Prototyping
If it requires power, you need to know how much, what all the pins do, and how to hook it up. You may need to reference datasheets, schematics, and know the ins and outs of electronics.
Skill Level: Noob - You don't need to reference a datasheet, but you will need to know basic power requirements.
See all skill levels
Comments
Looking for answers to technical questions?
We welcome your comments and suggestions below. However, if you are looking for solutions to technical questions please see our Technical Assistance page.
Customer Reviews
4.5 out of 5
Based on 12 ratings:
Great
Bought some of these to do some custom thank you cards. Used the Pogo ISP programmer to reprogram it with an Arduino. Works as expected!
LilyTiny is a Big Deal
I've learned the LilyTiny is a great little programmable chip, to me it's a mini-Arduino. I've used it in an Instructables.com project to make a Blinky LED Baseball Cap. It is possibly the smallest form-factor for a Blinky LED circuit. Now I program the Tiny myself, and I use it to control the NeoPixel rings from Adafruit. I also use the LilyTwinkle. I do feel there needs to be one more version, which I call a "LilyBlinky" which would have BlinkyBlinky capability, perhaps 1 sec on Ports 0/1 and 0.5 sec on Ports 2/3.,,probably beats a 555 Timer based BlinkyBlinky for compactness. I may put this on Instructables.com, but it's just public Domain code.
Amazing Little Tool!
These things are nice! Perfect size and power for some of my projects. I've got it hooked up to a ULN2003 and a 7805 regulator powering 12v RGB LEDs and it works flawlessly. Highly recommended, especially since they are so inexpensive.
Versatile & easy to incorporate into projects.
I was looking for a unique device to power the leds for the robot model I designed http://www.thingiverse.com/thing:764680 and came across the lilytiny. It is a great board in a small form factor.
Very easy to use, works well and is a great way to add detail to your models, apparel, kits, or cosplay items. I recommend this to anyone -you can't go wrong.
Great introduction to e-textiles
Just returned from teaching a class for the Southeast Fiber Forum Association www.sefiberforum.org at Arrowmont in Gatlinburg, TN. I taught an e-textile class that included adding electronics to the felt projects we made during the workshop. The students were all new to e-textiles and several new to felting. We used the lily twinkle in one of the projects (which you sent instead of the lily tiny by mistake. I didn't check the packing close enough to realize it before the workshop. Since the stitching is the same it didn't cause any problems). Several were able to get all five of the Lily Pad LEDs to come on before we ran out of time. Everyone went away knowing how to finish the stitching at home and a little about circuitry thanks to this great product. All are excited about the possibilities for adding electronics to their fiber art.
The Lily Tiny is great for teachers
it is not as cost prohibitive as other microcontrollers and is pretty user friendly for beginners but still allows a programming option to add a challenge.
The best for simple textile applications
This is a great little board for textile projects. I finally figured out how to reprogram it to do what I needed. Its not too hard once you figure out the correct path, which for me was to buy a used AVRISP mkII off of eBay and an 8 pin SOIC test clip and reprogram using the Arduino IDE. The only thing I don't quite get about the board is why pin 3 of the ATTiny85 isn't connected to anything. It cost me a lot of time trying to figure out why i could't control that pin but it doesn't matter anyway because I cant get board access to it. My own stupidity. Great price too!
Absolutely perfect!
We ran an event at our makerspace, to introduce folks to wearable electronics... and this item was exactly what we needed. The price is perfect, the simplicity of it is perfect, and it's a sturdy, well functioning little product.
Very pleased and will be ordering hundreds more in the future, I'm sure.
Easy entry point - no regrets!
I bought a LilyTiny to power my first project using wearables. I have some experience with Arduino, but wanted a simple way to control some LEDs. The pre-programmed functions took away a layer of complexity and let me just focus on learning how to set up a wearable circuit. Found enough tutorials on line to determine what else i needed to make my project work: power supply with a switch, conducting thread and some LEDs.
Very cool!
The idea of the LilyTiny is great but creating with them is a little more challenging than anticipated. Probably best for older children (4th gr and up?) Make sure to do a "practice" project beforehand. The conductive thread is temperamental for sure!
Fun easy introduction to fabric electronics
Just using this as is was a simple project with cool results. I am hoping to use these for a new tinkering club at my school. Fun way to get kids excited without being intimidating.
Perfect size for LED doodads
About same diameter as 2032 battery so it all fits in a compact space. It is the simplest mounted attiny85 l have found so I will program it for other projects or just let it flash LEDs.


How many volts does it works with? Is it enough 3V from a button cell battery?
I'm not sure off hand the power requirements, but we do use this board the the ProtoSnap LilyTwinkle which runs from a coin cell battery so you should be fine.
Would it be possible to run all 4 leds off of just the "breathing" pattern pin? I'd like to have 4 breathing pattern lights, but I'm super new at this and don't know how to reprogram all of them to be that pattern.
Are there any plans to make one of these with all 5 IO pins broken out? That would be super awesome!
Wish there was room to have squeezed in PB4 in this design... with charlieplexing and reprogramming the tiny85, one could have a very small, wearable 5x4 led matrix run from a 3V cell battery... Maybe not the brightest display but functional nevertheless. Maybe the next revision? ;-)
could be done with a hack... maybe that's the fun!
That's an expensive way to make an LED matrix. Better to use LED strings and just have one LilyTiny to drive the whole string (you'll probably need a better battery though - like a lipo battery - sparkfun has some and it wont harm the LilyTiny to power it with a lithium ion cell or lithium polymer battery.
That's an expensive way to make an LED matrix. $17.20 for 20 5050 RGB LEDs vs $34.95 for the addressable 20 LED string?
About the ICSP connectors: they do not seem to be identified. How do we know what to connect where on the Arduino for ICSP programming?
Got the answer from the SF tech support, if someone is looking for the same thing:
Looking from the back side (digital pin 3 should be on top from front side):
Left side--------- Right side
MISO----VCC
SCK-----MOSI
Reset----GND
Also, if you look at the standard six-pin programming header that most AVR compatible programmers mate to, you'll note that this is the same as they use, so you can reprogram this with no soldering by putting male pins into the connector on the end of the cable from the programmer and pressing the pins down onto the pads.
I was going to try placing a LilyT*'s pads onto the pins of the ICSP header on my Uno, but it's not compatible. The left and right sides have been flipped. Does anyone know where I can find headers that will fit into the LilyT*'s ICSP pins? I'm trying to use it with a breadboard.
When I designed it I had hoped that would work, but I quickly realized that the RESET line on the Uno header isn't an I/O pin (normally), so that shot down that idea.
If you buy some snappable male pins (PRT-00116) and some male-to-female jumper wire (PRT-09140), you can mate it to an Uno pretty easily.
I'm still working on the "Programming the Twinkle" tutorial (I promise!), and I've just ordered protos on a pogo jig to make programming this easier.
The holes on the back of the LilyT* don't work with SF's male pin headers or jumper wires. I was wondering if some of your pogo pins might work but I couldn't find the dimensions. In the interim here's is my shoddy tutorial using thinner wire (I know yours will be much better :)
Standard male header pins can be used to pre-program the board even though they don't actually fit in the holes. Put the long sides of the pins into the female connector on the ISP and press the short sides of the pins against the holes. It's a bit tricky to hold them in place for the duration of the programming, but possible.
Is it possible to use an FTDI Basic breakout board to reprogram the LilyTiny? I've been trying to match up the pins from the FTDI to the LilyTiny. So far I have:
5V to Lily +
GND to Lily -
CTS to Lily hole #2 (pin 7 SCK)
TXD to Lily hole #0 (pin 5 MOSI)
RXI to Lily hole #1 (pin 6 MISO)
DTR to Lily pin 1 RESET
I'm just a bit nervous about trying it out, in case I'm missing something. Any thoughts?
Not possible, though I doubt you'd hurt anything.
There's no bootloader on the part as it ships. You could probably put a bootloader onto it, but that's an exercise we've not undertaken.
I want to run 3 of these off the same power supply with 4 LEDs on each. Which would you suggest, the Lilypad coin cell holder or the Lilypad power supply.
Will this work with the Tiny AVR Programmer? https://www.sparkfun.com/products/11460
Just adding to this, SparkFun now have a ISP Pogo Adapter which is practically a implementation of the 'jury rig something that you can press onto the pads' bit, and in fact uses pogopins :)
I don't see why not - you'll just have to wire the ISP header on the TinyAVR to the ISP header on the bottom of this board.
For the TinyAVR that's as easy as populating it with some headers - male or headers - female, for this board that's not so easy (can't easily solder something down, especially if you want to keep this e-textile friendly) and you may have to jury rig something that you can press onto the pads or press the pads onto (like a pogopin bed, not cheap or super-easy, but once assembled can be re-used for any boards with the 3x2 header layout), or maybe give https://www.sparkfun.com/products/10527 a shot.
Others have just angled standard header pins into board pads, but that's not the most secure of connections :)
If you are handy with AVR studio and a programmer, you can control up to 12 individual LEDs with this by charlieplexing. I wrote code to show you: https://github.com/madsci1016/LilyCharlieTwinkle
Basic animation is just an expanded twinkle pattern across all 12 LEDs. You can use Vixen to easily create your own effect or even custom animations.
Bill
Hello, would it be possible to run 10 LED's from the LilyTiny do you know? thanks
If that's an ATtiny85, the BlinkM Arduino fork should work just fine with it:
http://blog.thingm.com/2011/03/blinkm-smart-led-as-the-smallest-arduino/
could this possibly be used to drive a string of LPD8806s given some reprogramming?
Yep! The USI related pins are all broken out, so you can drive LED strings by bitbanging in software or via the USI hardware for a little more performance. You'll need an extra power supply though - a button battery is barely enough power to run a one single colour LED.
The ATtiny85 is underrated. Lots of power in a small package. With the RAM and Flash you can do a lot. I've also done a full I2C host - easy with the USI but I don't know if all the pins are broken out.
I only use the 4313 more often because of the 16 bit ICP (also on the '84), but mainly the UART. A 4313 to bluetooth would have lots of possibilities.
Is this different in any way from the LilyTwinkle?
Only in the default programming. The LilyTwinkle does the 'firefly' pattern on all 4 outputs, this one has separate patterns for each of the 4 outputs. The boards and components are all the same. It just saves on having to reprogram them yourself :) ( Reprogramming them is easy, if you've got the gear - the board is even laid out with that in mind. )
What gear? I've been looking all around for tutorials around reprogramming these little things. What is the best thing to hook to the 6 pin header?
Just adding to this, SparkFun now have a ISP Pogo Adapter which is practically perfect for the task.
SFE themselves probably have a pogopin jig, but you can probably temporarily solder some headers to the pads. After that it's a matter of plugging in an ISP/ICSP based programmer such as SFE's Pocket AVR programmer or Adafruit's USBtinyISP. I'm not sure if the 'reset disable' fuse has been set, however - if it it, you'd need something that can reset the fuses as well.
It would be cool if SFE can put up a little tutorial on reprogramming these, I agree :)
I was able to reprogram using a TinyISP. The trick, suggested by my 9 year old, son was to flip the 6 pin connector on the ISP so that you reverse the output pinout. We burned a bootloader and then blink uploaded no problem. The suggestion from above to press a header into the pins worked great! You have to have the Twinkle powered up and not have the 5V jumper in place.
Any update on "hacking the tiny" tutorial? Would be nice to se a vid of someone reprogramming the Lilypad Tiny.
Is the Arduino code available for the LilyTiny? I'd like to be able to reprogram how the LEDs flash.
There will be a "hacking the tiny" tutorial eventually. The back of the board has six pads in the middle which are pinned out for the six-pin ICSP header common to most AVR processors; in my experience it's possible to program using just a DIL header pushed into the connector on the end of an ICSP programmer.
The code will be made available soon, too.
I hope you guys can get around to this soon, this product has a lot of cool possibilities if it can be reprogrammed easily!
yep there is, but youll need an Arduino board to program it. Check out this link for more info. http://hlt.media.mit.edu/?p=1229