SparkFun RedBoard Artemis
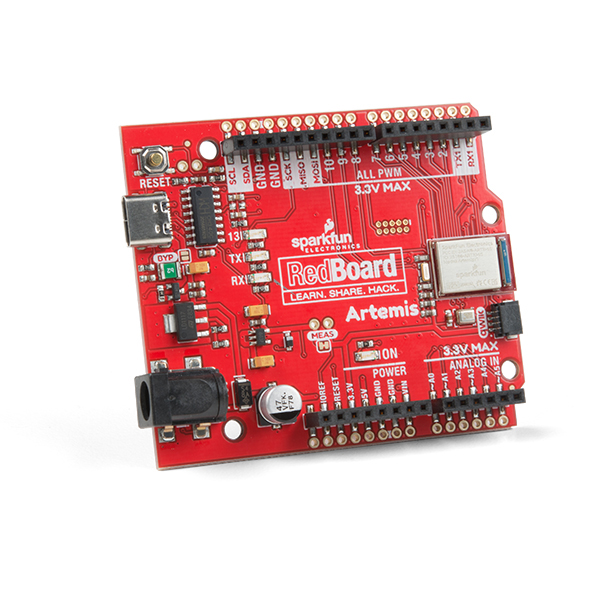
Think of the RedBoard Artemis as just another Arduino... That has BLE. And one megabyte of flash. And runs at less than 1mA. Oh, and it can run TensorFlow models. Ya, that too. The RedBoard Artemis takes the incredibly powerful Artemis module from SparkFun and wraps it up in an easy to use and familiar Uno footprint. We've written an Arduino core from scratch to make programming the Artemis as familiar as Serial.begin(9600). Time-to-first-blink is less than five minutes.
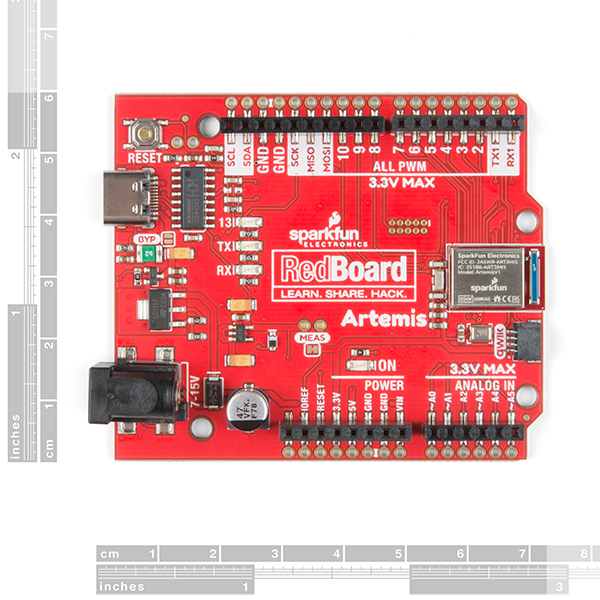
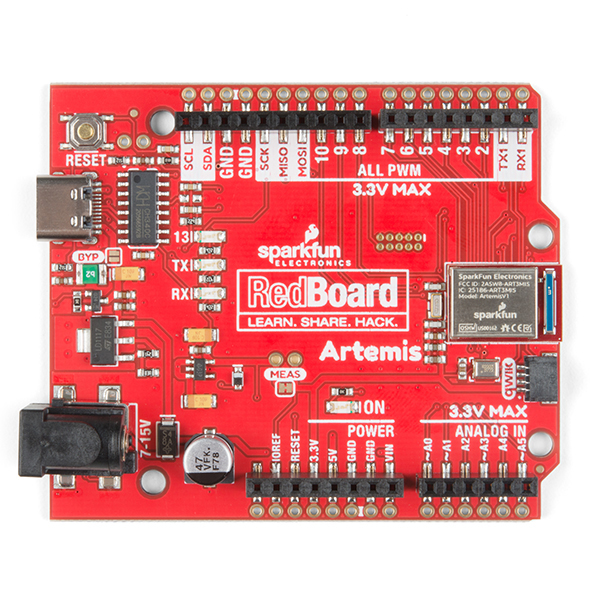
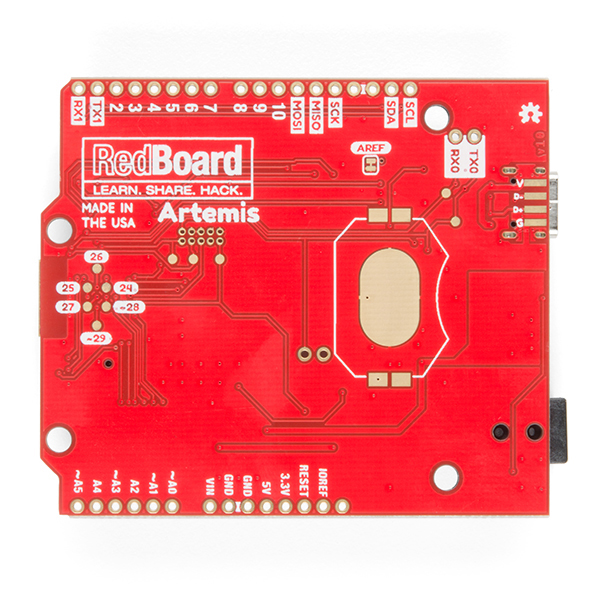
The RedBoard Artemis has the improved power conditioning and USB to serial that we've refined over the years on our RedBoard line of products. A modern USB-C connector makes programming easy. A Qwiic connector makes I2C easy. The RedBoard Artemis is fully compatible with SparkFun's Arduino core and can be programmed easily under the Arduino IDE. We've exposed the JTAG connector for more advanced users who prefer to use the power and speed of professional tools. We've added a digital MEMS microphone for folks wanting to experiment with always-on voice commands with TensorFlow and machine learning. We've even added a convenient jumper to measure current consumption for low power testing.
With 1MB flash and 384k RAM you'll have plenty of room for your sketches. The on-board Artemis module runs at 48MHz with a 96MHz turbo mode available and with Bluetooth to boot!
The SparkFun RedBoard Artemis is a great platform to 'kick the tires' of this amazing module. If you're interesting in testing out the full capabilities of the SparkFun Artemis module or if you're looking for more compact solution, be sure to checkout our ATP and Nano versions of the Artemis line.
- Arduino Uno R3 Footprint
- 1M Flash / 384k RAM
- 48MHz / 96MHz turbo available
- 24 GPIO - all interrupt capable
- 21 PWM channels
- Built in BLE radio
- 10 ADC channels with 14-bit precision
- 2 UARTs
- 6 I2C buses
- 4 SPI buses
- PDM Interface
- I2S Interface
- Qwiic Connector
SparkFun RedBoard Artemis Product Help and Resources
How to Install CH340 Drivers
August 6, 2019
How to install CH340 drivers (if you need them) on Windows, Mac OS X, and Linux.
Designing with the SparkFun Artemis
June 20, 2019
Let's chat about layout and design considerations when using the Artemis module.
Artemis Development with Arduino
June 20, 2019
Get our powerful Artemis based boards (Artemis Nano, BlackBoard Artemis, and BlackBoard Artemis ATP) blinking in less than 5 minutes using the SparkFun Artemis Arduino Core!
Hookup Guide for the SparkFun RedBoard Artemis
August 28, 2019
Get started with the RedBoard Artemis - all the functionality of the SparkFun Artemis module wrapped in the familiar Uno R3 footprint
Artemis Development with the Arduino IDE
September 10, 2020
This is an in-depth guide on developing in the Arduino IDE for the Artemis module and any Artemis microcontroller development board. Inside, users will find setup instructions and simple examples from blinking an LED and taking ADC measurements; to more complex features like BLE and I2C.
Artemis Development on Arm® Mbed™ OS (Beta)
September 10, 2020
With the latest Artemis DK, board, we now offer full Bluetooth support within the Arduino IDE and development with Mbed™ OS. While we have worked tirelessly to get the Artemis module supported in the next Mbed™ OS release, the next release isn't slated until after the Artemis DK becomes available to the public. Therefore, this post will provide users with a jump start for developing with Mbed™ Studio, prior to the next release (in a beta of sorts), by utilizing our fork of Mbed™ OS.
Core Skill: Programming
If a board needs code or communicates somehow, you're going to need to know how to program or interface with it. The programming skill is all about communication and code.
Skill Level: Rookie - You will need a better fundamental understand of what code is, and how it works. You will be using beginner-level software and development tools like Arduino. You will be dealing directly with code, but numerous examples and libraries are available. Sensors or shields will communicate with serial or TTL.
See all skill levels
Core Skill: Electrical Prototyping
If it requires power, you need to know how much, what all the pins do, and how to hook it up. You may need to reference datasheets, schematics, and know the ins and outs of electronics.
Skill Level: Rookie - You may be required to know a bit more about the component, such as orientation, or how to hook it up, in addition to power requirements. You will need to understand polarized components.
See all skill levels
Comments
Looking for answers to technical questions?
We welcome your comments and suggestions below. However, if you are looking for solutions to technical questions please see our Technical Assistance page.
Customer Reviews
3.4 out of 5
Based on 10 ratings:
2 of 2 found this helpful:
My new favorite Arduino
In the past, for small jobs I used the 32u4 based boards. For beefier jobs, I used the ESP32 boards. This is a great replacement for all projects you might use a 32u4 board and many projects you may have used the ESP32. Lots of ram and flash, super fast ADC, DMA transfers and excellent price point, the Artemis rocks.
My only gripe is the pad to pin conversion in Arduino is confusing and different between the various boards.
3 of 3 found this helpful:
The Artemis is great.
It works as advertised, and is really easy to program. My only complaint is that some of the breakouts and accessory boards that are available need to have their libraries updated for the Artemis. It acts more like a DUO and the software libraries need to reflect that difference.
1 of 1 found this helpful:
Highly Recommend
The similar layout served as a good drop in replacement for me. I had a few projects were I need some extra speed or memory. Looking forward to developing down into the artemis further.
1 of 1 found this helpful:
Very, Very Capable While Sipping Power
I like that it has 384K of RAM and 1M of Flash, a 48/96 MHz Cortex M4 with hardware floating point, a real hardware debug port, and lots of hardware SPI and I2C IO. But mostly, I like the fact that when it is running real code at 48 MHz, it draws about as much power as a typical "power on" indicator LED. This board is a great way to get started using the Artemis ecosystem. I have not used the Bluetooth capabilities yet, but I have written a number of FreeRTOS applications that make heavy use of the Ambiq SDK library. I found the Ambiq library to be well-written and quite usable. There are a number of development environments available, but I use Segger Studio with a J-Link for hardware JTAG debugging. It is a very effective development environment. My first Redboard had a hard life involving getting some of its traces cut to see how low I could get the deep-sleep power levels (1.63uA FYI). After all that, I retired it to serve as the controller for my reflow solder machine. The reflow software was written using the Artemis Arduino development system, so that works too. I know that a Redboard is way overkill for a reflow controller, but I couldn't resist: now my old Artemis Redboard enables me to construct my new projects based on bare Artemis modules.
2 of 3 found this helpful:
Still lots of rough edges
I bought this because I wanted to add Bluetooth capabilities to a project that's currently using a RedBoard.
The first problem I ran into is that the uploader fails 99% of the time on recent macOS versions. I finally installed a custom CH340 driver alongside the built-in one and that seemed to make it work.
The second problem is that ArduinoBLE is not actually supported (using Core v2.0.2). The examples show up under an "INCOMPATIBLE" submenu, and the bluetooth start method always fails.
The third problem appears when trying to use this with mBed Studio: you can't actually debug the thing. You have to build and then run try to run a python-based uploader (but the python script has a syntax error).
I'm on the fence between sending it back or trying to get it working via JTAG.
Great board, a boost to the Uno form factor!
I wanted to do several A/D data logging and write to an SD card. The standard Uno crapped out as the SD card FAT filesystem takes up to much FLASH so my app. couldn't run with out crashing. This board has 384K and a ton of RAM to run, so I moved over fairly easily. The Arduino IDE works well and the CPU brings hardware fast floating point for my calculations. All in all a great board to work with for a dirt cheap price!!!
Easy to get going with BLE
I got the RedBoard Artemis for a BLE project I had in mind. Plugged into USB-C and did fairly straightforward Arduino BLE programming and everything works! (I did encounter one issue, the Arduino BLE library crashes if many of the objects are referenced as globals but other than that it works.)
Artemis first impressions
So, I thought this would be a great board to play with and learn, but several of the example projects in the Arduino IDE do not work yet and getting support on them has been rather slow. It has a lot of potential, but it isn't quite there yet.
Garbage - analogWrite does not work and support doesn't respond
If you intend to use analogWrite, it will not work with 2.0.3. I've been waiting for months for just a simple reply in sparkfun support to address this.
I've tried using the Apollo3 analogWrite example with no luck.
Incredibly buggy software
I really want to like this board, because specs wise and price wise it seems great. But.. trying to program this, everything has just been a nightmare. Things I've run into:
- attachInterrupt works ok with RISING and FALLING, but "CHANGE" never seems to register?
- analogRead just does not seem to work. If I do analogRead(A0) it reads from A4. If I try to print out all the pin name -> number, it's totally busted: A0->16, A1->17, A2->17, A3->17, A4->17, A5->17. Wtf? Shouldn't reading from the analog channels be basic functionality? I feel like the software for this wasn't tested at all.
- Some of my QWICC sensors that work with the Uno perfectly fine just do not work with this board at all. No idea why.


The Artemis module is pretty nice! It's powerful, low power, small form factor etc. The only thing I think that would make this module better is WiFi integration. I never use bluetooth, so that feature of the Artemis is wasted for me. I would much rather have WiFi capabilities than bluetooth.
It is advertised as a board with bluetooth but what they are not telling us is that there isn't library supporting the use of bluetooth on this device and there are no examples on how to use it.. Very disappointed.. It may fit your needs if you're experienced, idk.
I would really like to see the voltage range for the VIN pin specified on a page like this. Why isn't such an essential figure documented here? It's specified on the Redboard Artemis Nano product page that its voltage limit is 6V. And I can see that the barrel jack on the Artemis Uno takes 7-15V. So what can I feed into the Artemis Uno's VIN pin? Up to 6V? Or from 7-15V? This really should be part of the mentioned features on this page.
Hi there, it sounds like you are looking for technical assistance. Please use the link in the banner above, to get started with posting a topic in our forums. Our technical support team will do their best to assist you.
That being said, it looks like that information was included in the more detailed graphical datasheet. Otherwise, using the schematic, you can also see that the VIN pin is connected directly to the barrel jack on the Artemis RedBoard.
Where is pin 13 on the Artemis board?
Hi there, it sounds like you are looking for technical assistance. Please use the link in the banner above, to get started with posting a topic in our forums. Our technical support team will do their best to assist you.
That being said, if I understand your question correctly... it is where you would expect Pin 13 to be on a normal Arduino Uno board layout; it is just silked with
SCKinstead because of how the SPI pins had to be mapped.That was it. Thank you.
Are there any tutorials out there for communication between an iPhone app and the Bluetooth module used on Artemis? If there isn't one, could someone create one? It would basically be a Xcode project that does I/O through Bluetooth to the Artemis BLE. Would be a great useful tutorial. RedBear was great at this, but they don't exist anymore..
Hi there, it sounds like you are looking for technical assistance. Please use the link in the banner above, to get started with posting a topic in our forums. Our technical support team will do their best to assist you.
Whoa turbo … this thing looks wicked. They called this impulse buying.
Aww man, I thought the Artemis boards all looked way better in black, but I missed the first run :(
It was still an impulse buy for me even though I did have a project planned 😂