NORA the IoT Explora: Unlocking the SparkFun Thing Plus NORA-W306
The new SparkFun Thing Plus NORA-W306 is a great component for your IoT projects, as long as you take the few extra minutes on the front end to make sure it's properly set up.

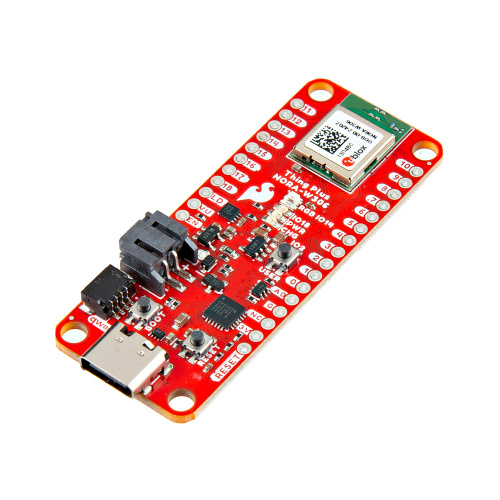
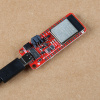
Recently, we released a new Thing Plus board featuring the NORA-W306 module from ublox. This module offers dual Wireless LAN (WLAN), Bluetooth® Low Energy (BLE 5.3), and a Realtek RTL8720DF Dual Processor Core, with separate cores for Main and Low Power. This allows for extremely power-efficient projects that can run for more than a year on a LiPo battery. Harnessing the power of this module is fairly straightforward, and there are lots of Arduino examples specifically for this module and this board. Setup is fairly straightforward, but takes a little more effort than just plug-and-play. Many of you will be familiar with these steps, as you’ve probably gone through them for a few other modules. Either way, let’s take a quick look at the simple steps necessary to get your SparkFun Thing Plus NORA-W306 up and running in no time.
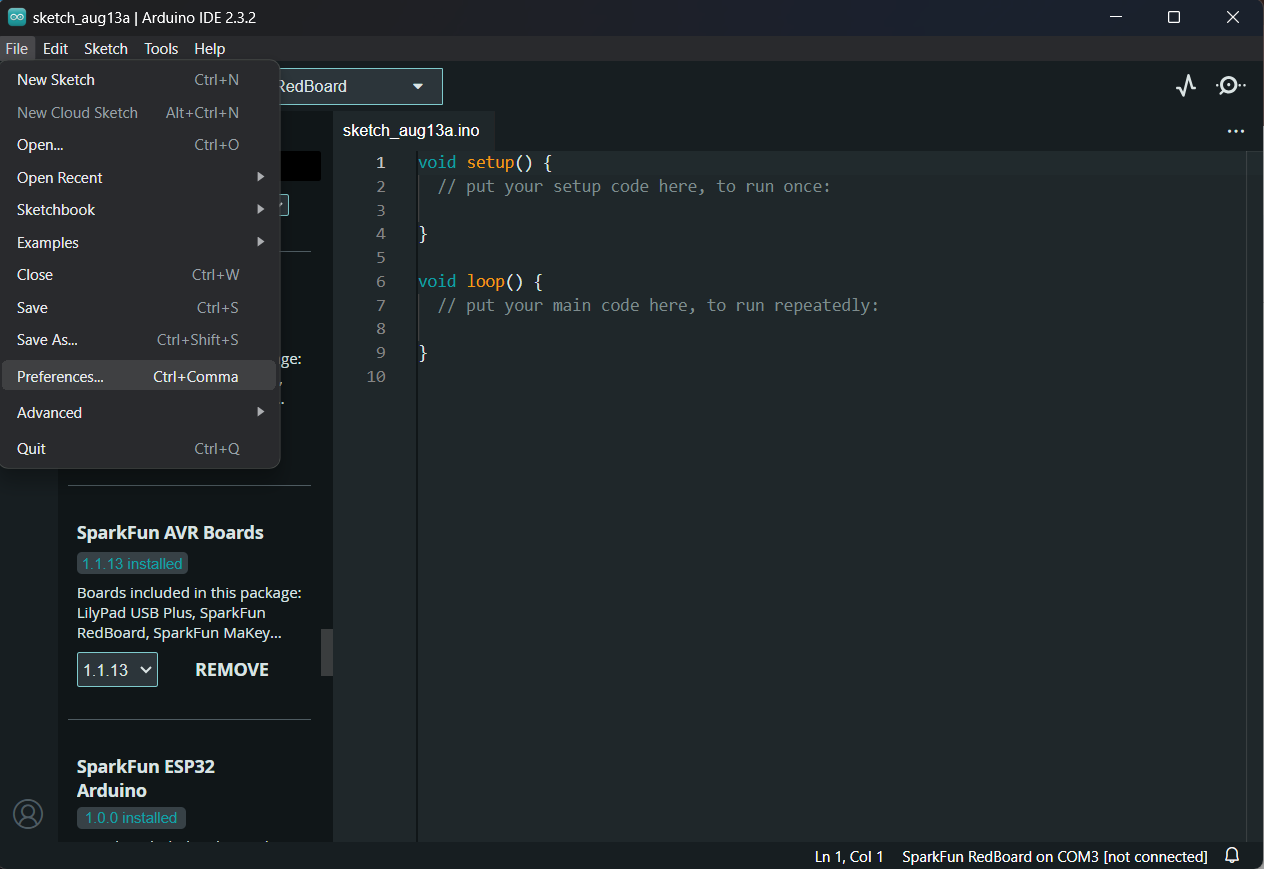
I’m assuming that you already have the Arduino IDE installed on your system, but if you don’t, you can download that from Arduino’s site. When you’re ready, go ahead and open your Arduino IDE. In most instances, you can simply add a board from the Boards Manager by scrolling until you find it, or its parent, and hitting Install. However, there are some boards that require an extra step. Go to the upper left corner of your IDE, and click on File/Preferences.
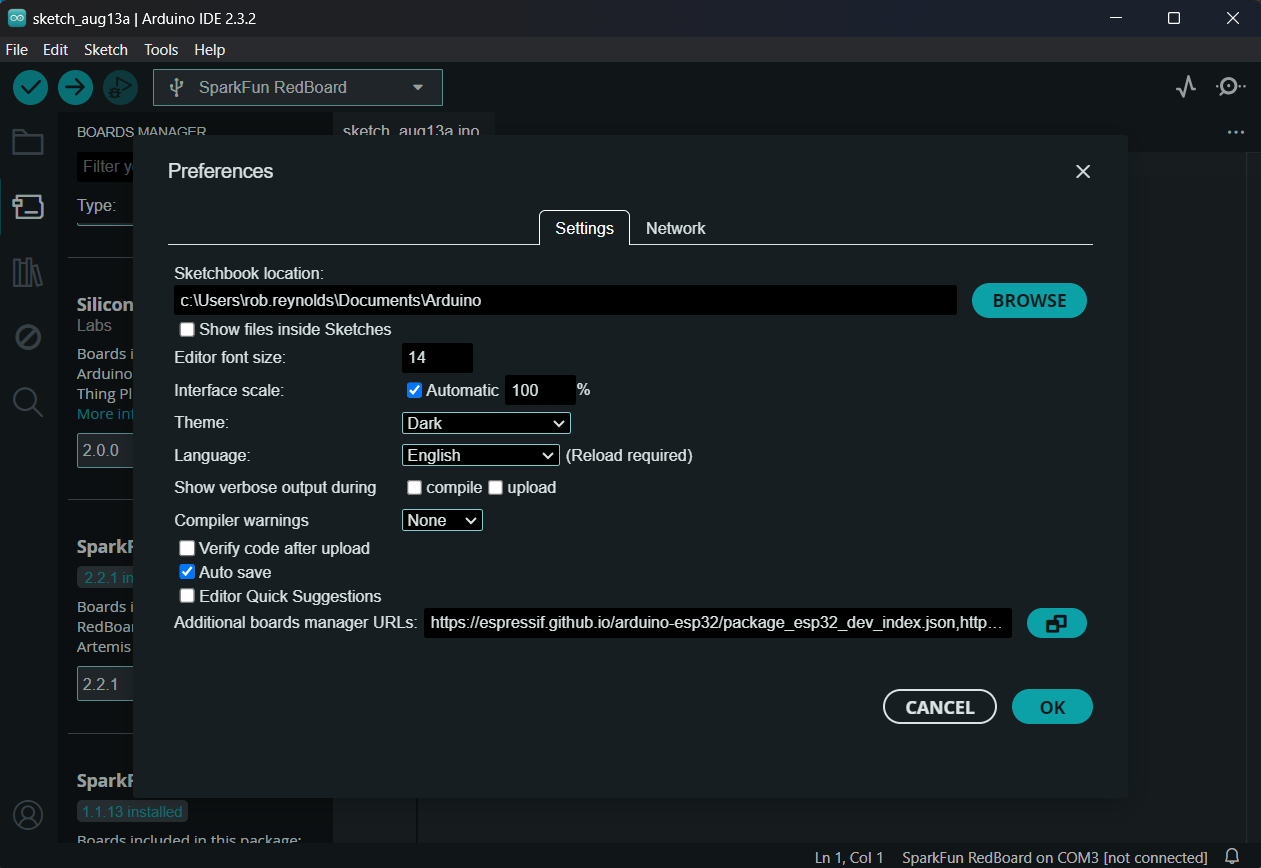
From here, you’ll go down to Additional Boards Manager URLs, and add the following text:
https://github.com/ambiot/ambd_arduino/raw/dev/Arduino_package/package_realtek_amebad_early_index.json
You can add this into the Additional Boards field by placing a comma after the last entry in the window, then pasting this one, or you can click on the window button next to the field to open a new window and add it as its own separate line. Once you’ve added that, hit okay, and close the preferences window.
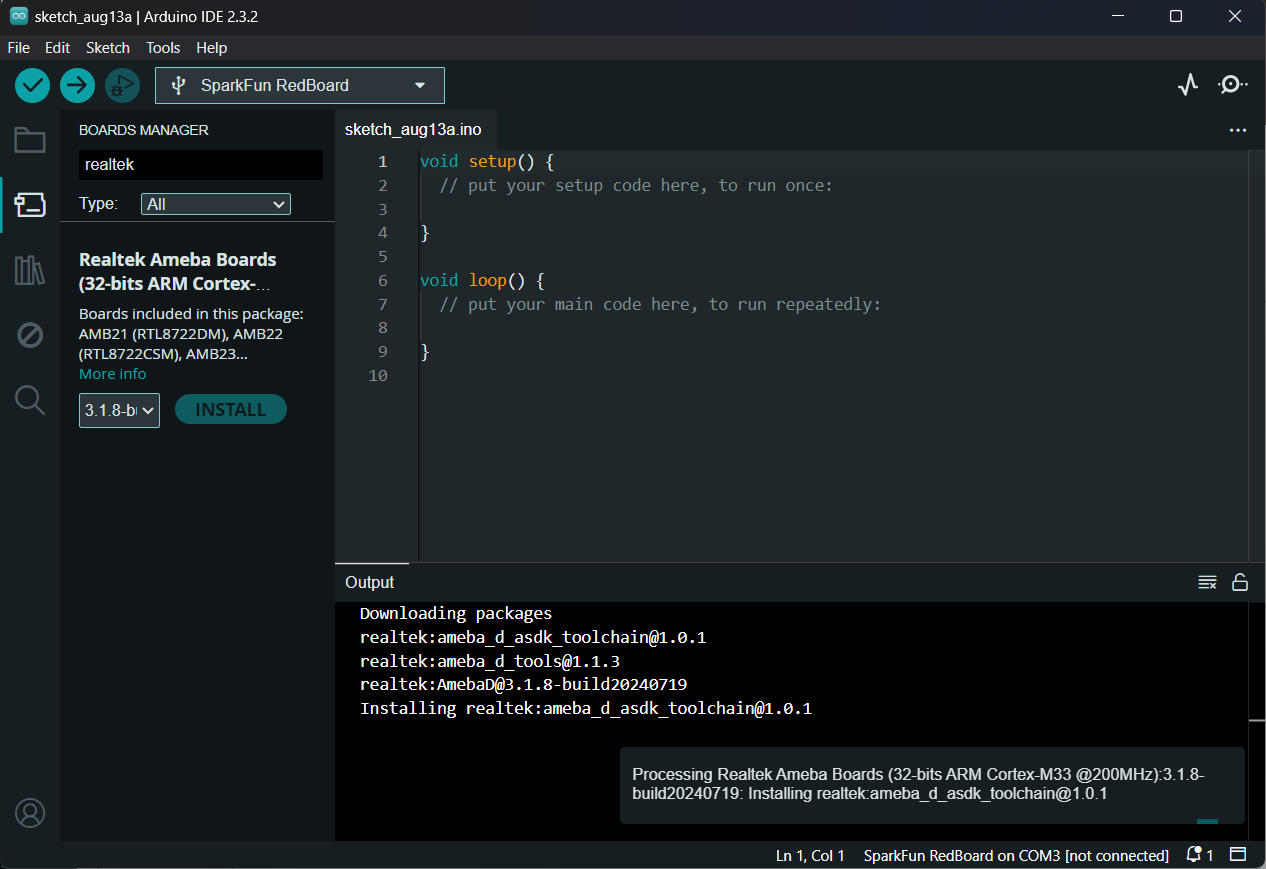
Once you’ve done that, go to the Board Manager, and in the search bar type “realtek”, and you should see Realtek Ameba Boards. Click the Install button, and soon, under the board package name you’ll see the version plus the build number, and ‘installed”. (As I write this, the current install is 3.1.8-build20240719.)
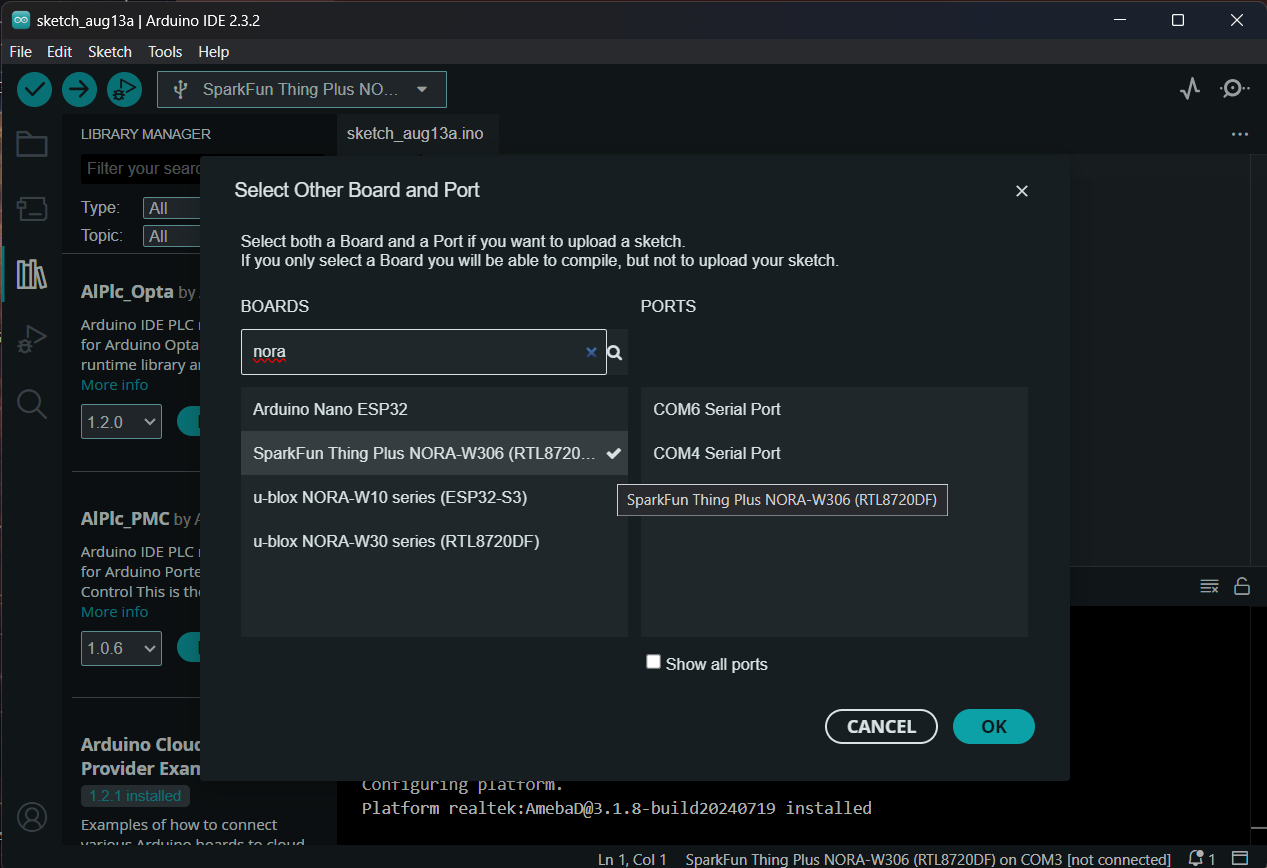
Now go up to the board window and click to drop it down, and then click on “Select other board and port.” This will bring up the boards and ports window. In the Boards search field, type in NORA (you could also type in realtek), and you’ll get a few options. Select SparkFun Thing Plus NORA-W306, and, if the board is connected to your computer, select the proper COM port.
You’re now ready to start uploading sketches to your Thing Plus NORE-W306. You can run the old tried and true Blink Sketch, just to make sure that everything is working as expected, but then you can start flexing the muscles of this little powerhouse.
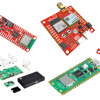
There are a couple of on-board components - the MAX1704x LiPo fuel gauge, and the microSD slot - that you might want to take advantage of, and to do so, you’ll need to download a couple of Arduino libraries.
If you want to start working with more of the board’s features, you can find a dozen or so examples in our Getting Started Guide. (You’ll also notice a plethora of new example files all starting with Ameba, but the list in our Getting Started Guide are the ones we’ve tested.)
There are a lot of great features on this board, from the dual band WiFi to the ultra-low power consumption when in deep sleep, and this should get you well on your way to working with all of them.
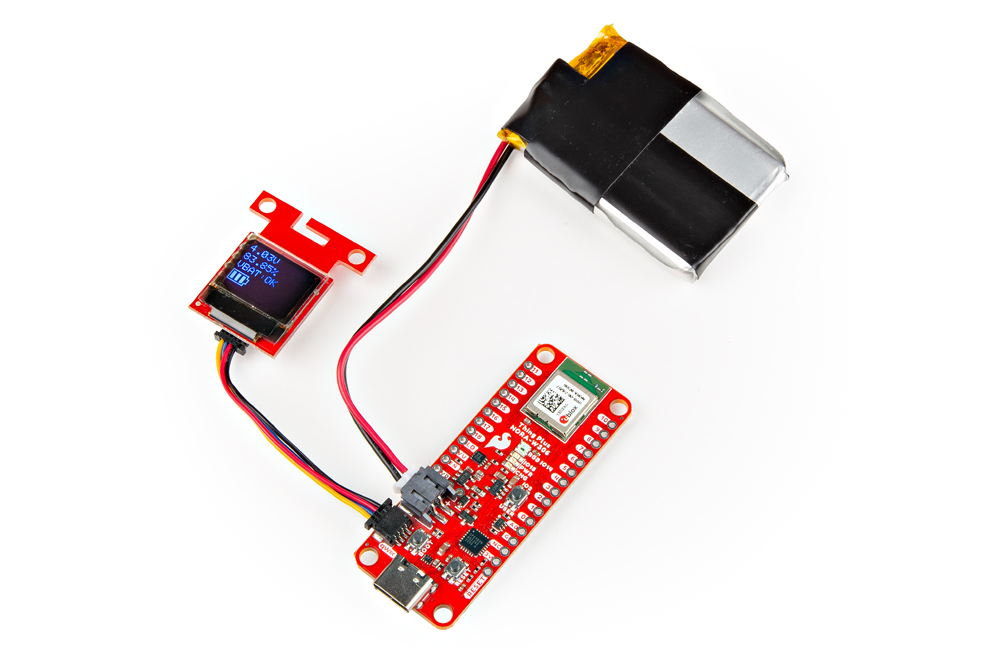
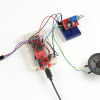
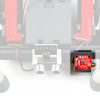
The SparkFun Thing Plus NORA-W306 displaying the Fuel Gauge output on a SparkFun Micro OLED


