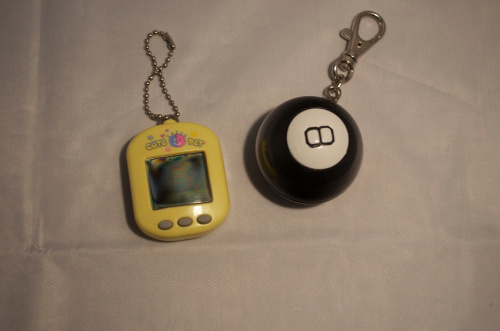
Ah, yet another Thursday has come upon us. It's almost nostalgic at this point. Nostalgic like the awkward stories parents tell about your youth while visiting for family gatherings. I lived through my own version of this recently, and while hiding in the basement I came across some old, electronic key-chain toys I had as a child.
Coming across these toys now, my interests are much less in the games themselves than the hardware that makes the games tick internally. The Cute Pet game is a standard knock-off version of the infamous Tamagotchi pets that first came into popularity while I was a young student. The Magic 8-Ball key-chain was as entertaining to a kid as any regular Magic 8-Ball, but at the time, the fact that it had a digital interface was pretty spectacular to me.
Before I ripped apart my hardware to see what was inside, I figured a quick search online was in order. After doing a bit of research, it looks like there have been many hacks on similar hardware. Natalie Silvanovich has been featured on various sites - including Hack-a-Day, Adafruit and others - for her ongoing hacks on brand name Tamagotchis, and from what I have seen, she is the internet's go-to expert on Tamagotchi customization and hacking.
Along the same vein, Magic 8-Balls have also been hacked over and over, including changing the standard answers to custom ones, along with adding in digital features to a classic analog device. I have yet to find a hack online for the digital key-chain version of the Magic 8-Ball, so if you come across one, let us know!
Because of the similar functionality between these two games, I hypothesized that they may be running on similar hardware. Without even opening them up, one can guess there's an LCD display, and some kind of microcontroller that could process the button inputs and output proper responses, likely with some kind of memory storage for the game data.
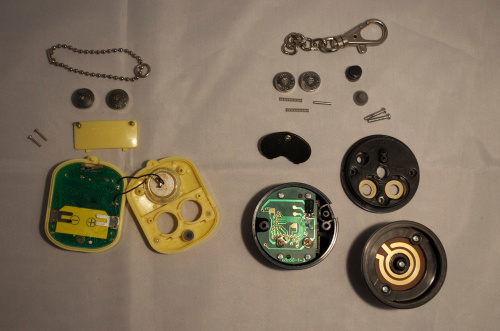
Cracking open the cases, I found the two-layer PCBs exposed, showing a large number of traces. One of the first things I noticed was that the circuits do appear very similar. The button connections have the same PCB layout in the traces on both boards, and the two boards have similar battery connections. Another similarity between the two systems is that both run on two LR44 batteries, a 357a battery, and an AG13 battery, which each have a standard voltage of 1.5V.
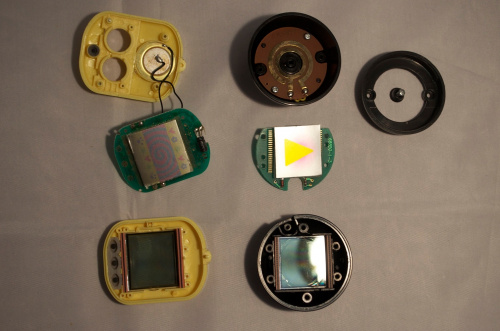
I dug further into the assemblies, and removing the PCBs from the LCD screens showed yet another surprise. Both games had the PCB connected to the LCDs using Zebra connectors. However, I still couldn't see the main IC driving the system, so more disassembly was required.
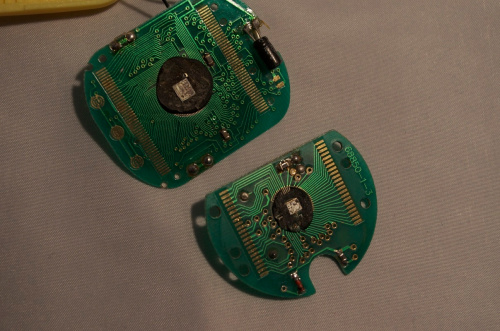
Peeling off the cardboard backgrounds for the LCDs revealed both of the ICs were chips-on-board, with an epoxy covering for each. Just looking at the traces that are visible on each PCB, it's noticeable that the Cute Pet game has more traces running out from the IC. This did seem to indicate that the ICs were different, but without getting off the epoxy coating, there was no way to know for sure.
After some frustrating (and incredibly stinky) time with the heat gun and a hobby knife, I was able to at least get the die of the ICs exposed to verify that there are different chips running each game. Sadly, since they are chips-on-board, I wasn't able to identify them on an initial glance, and will need to spend more time trying to hack into the boards to see if I can find out any additional information on them.
This was a quick hack that doesn't even begin to scratch the surface of the programming on either system, but hopefully it inspires you to try your own personal hacks. For those of you hiding out from the extreme cold or extreme fires, what kind of fun little electronics are you digging into?


Cool! I'm sure there are more than a few folks out there who can ID those dies, right? That's sort of beyond my radar range but I'm curious to hear what transpires with these. I never had either but of course heard of the Tamagotchis.
Since you asked, I've been fiddling with a BK Precision 1590A o-scope that went wonky on me. It has fancy LED buttons to control functions and, of course, a microprocessor driving the buttons and logic. One day, I discovered that pressing certain buttons no longer resulted in the same behavior. Eliminating insanity and beginning to troubleshoot, I found that something crapped out in the MPU which is some totally obscure chip labeled Kenwood-Trio MTM-5010. Here's the writeup so far. Next step is to do up some kind of replacement, probably with ATmega of some sort.
Wow, great looking write up!
I could not tell from your writeup if you have verified beyond all doubt that the front panel buttons are still working. That is, when you look at the switch matrix with a scope or meter, does something actually change when the buttons are pressed? I mention this because the switches themselves are by far the most likely failure mechanism - not the processor. With mechanical switches, the contacts often get corroded and need cleaning. With membrane switches, the membrane pads often get dirty and no longer work.
Never mind! Just re-read your writeup and see you did just that - the signals are reaching the processor. Good job.
Toni - On ebay you can get a chemical cheap (Chinese) that supposedly dissolves the epoxy over on-board chips like this. They actually market it for that, so might be of interest if you play more with these. I'd almost forgotten about those sorts of game things!
Hmm good to know! I'll have to check that out for the next tear down :)
I'm working on a laser tag hack, using Hasbro's Lazer Tag Team Ops guns. I bought a bunch on ebay for cheap and have started capturing and deciphering the codes. In parallel, I'm developing my own main board and screen to replace the gun's main board and screen so that I can write my own game rules. It will be based on the Teensy 3.1.
Out of curiosity is it anything like this? http://www.lasertagparts.com/mtformat.htm I've been thinking about doing the same thing.
probably not. there are a lot of similar concepts I'm stealing from that site, and video games like Halo, but hardware-wise I'm hoping to just develop one board + screen that you can solder into a stock LTTO gun, then download an arduino sketch and that's it.
Oo, that sounds like it's going to be neat :)
Could try throwing those chip dies under a microscope before poking the logic - might be some mfr id on there :)
One common hack for these things is to change the clock frequency. In particular, greeting cards that have sound chips inside so that they play some silly voice sounds are easy to do. Most of these use RC oscillators ($cheap) so look around for a likely RC pair. Then while it's playing, lick your finger and touch around on the resistor. Often, you will decrease the effective value thus raising the frequency producing "Donald Duck" like noises. Now measure the resistor value and substitute small poteniometer either across it or in place of it. Tweak until it makes you laugh.