My name is Nick Poole and I like to live weird. I've built abodes in pick-up trucks and retreats in warehouses... but this year, for the first time, I built an apartment at work. Except this time, I had a lot of help... and I'm not gonna live in it. That being said, I'm really excited about this particular domicile because it's on track to become the most technologically advanced yet constructed.
In the winter of 2014 our marketing team got together and started chatting about how to showcase some IoT related projects using SparkFun parts. We talked about a series of blog posts or tutorials but eventually we all decided that video was the best way to talk about the Internet of Things so the brainstorming began:
What was the Internet of Things?
"Fitness tracking?"
"What about like, um, agricultural monitoring? Soil moisture and pH and stuff?"
"That's not bad..."
"A lot of it is where the home automation movement ended up."
Ahh, Domotics! What a splendid idea! From its humble beginnings as an outlandish idea from the 1934 World's Fair, to the first "wired homes" of the 60s and finally the "smart house" of the 80s and 90s, home automation has been a promise of the future just waiting for the technology to back it up. Sure, automated home appliances like dishwashers and tumble dryers were a big step, but they didn't exactly turn us into The Jetsons. No, to reach the true glory days of laziness we would need inexpensive, distributed and ubiquitous computers – and the far-reaching networks to back them up. If that isn't the promise of IoT, I'm not sure what is.
After a bit more discussion we came up with, well, a pretty obvious idea. Let's build a set, build some projects and just keep adding to it. Eventually it will turn into the home of the future. Along the way, we'll talk about the build process and open-source all of our work so it can be replicated. The projects don't have to be too serious, but they should focus on concepts that are applicable in real life. You may never need your toaster to tweet you, but it turns out that if you can make a toaster tweet then you've learned an IoT skill with a lot of applications! As the set becomes more and more loaded with futuristic goodies, it will also turn into a cool stop on the SparkFun tour. Maybe it can even be the set for future video projects...
We were all on board, it was a great idea but now we needed a place to build our set. The designated studio is pretty large, but it's already pulling triple duty with two video backdrops and a photography studio. Sarah, Shawn and I went location scouting around the office and found a few promising patches. Our first instinct was to use the un-leased, unused space in a corner of the building but after talking it over with Ops we decided it was no good. If the space got leased out, we'd have to move the set. However, that conversation led to our Director of Operations offering up some space near his office so we measured it out and decided it was exactly what we were looking for.
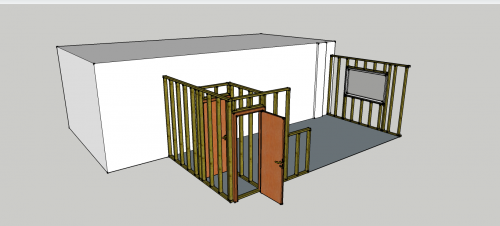
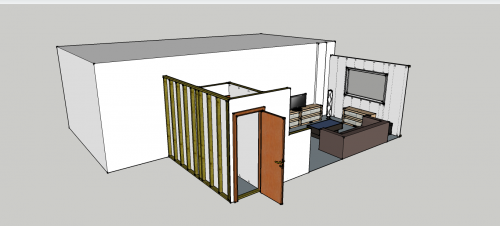
The next step was to measure the space that we had and come up with a floor plan. We knew we wanted three walls and a window and we already had one long wall to work with. We also needed to leave enough space for people to walk through as this was still a sort of thruway. I played with a few different shapes to try to make the best use of the space but eventually I landed on this:
And we took these drawings into a meeting with our long-suffering Facilities Manager. After consulting the fire code and asking a few questions about how we were gonna build it he was totally on board. Done deal, now all that's left is the easy part... framing, sheetrock, putty, paint, trim, flooring and furnishing! As you can tell from the drawings above, I had already framed out the two walls that we were going to build so I had some pretty good materials estimates. We took a trip to the shops and loaded up my truck with sheetrock, 2x4s and various other building supplies.
Most of the work had to take place after office hours since we were making a lot of dust and a lot of noise. Sarah, Shawn and I worked from 5 to 9 or 10 p.m. for several nights putting up walls, and it was actually a really fun time. Our very own Nic B even hung out on a few occasions and shot video (parts of which were in the first Fellowship of the Things episode). We ordered food, put on some tunes and got to work:
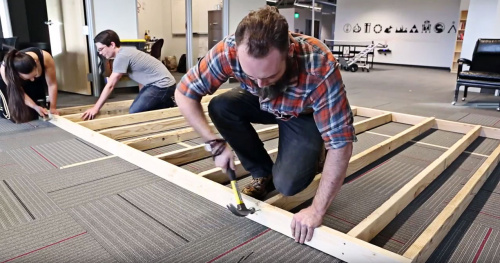
Framing
Framing up the first wall of the build.
The set was framed out with 2x4 studs on 16" centers, just like the walls in your house (probably). One of the walls that we were building, the one with the entryway, would be self-supporting because of its shape and weight. The other wall, the window wall, needed to be supported from the back with braces and weighed down with concrete blocks.
The most difficult part of the framing process was installing the doors. I hate hanging doors, so we bought some doors complete in their frames from the local building salvage. Unfortunately, the only matching set we could find were solid. Solid doors are heavy so they were a challenge but we did eventually brace everything adequately. While we were at the salvage yard, we also bought a window and that got installed in the opposing wall.
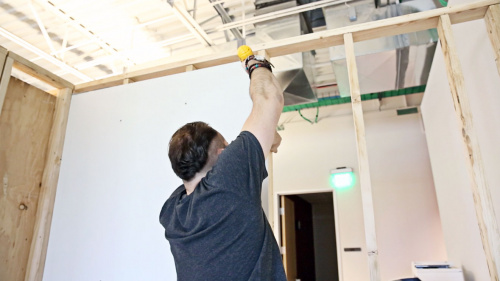
Sheetrock
Hanging sheetrock once the first wall is secured in place.
While framing is certainly the bones of a wall, it isn't what you would recognize as a wall. To turn a frame into a wall, you need to put cladding on it. Sheetrock is relatively light, can be cut with a box cutter and is designed to take paint and primer. It really is a fantastic material. A few drywall screws here and there and the sheetrock was all hung. After that it's just a matter of taping up the gaps, filling the screw holes with putty and sanding it flat!
Paint and Trim
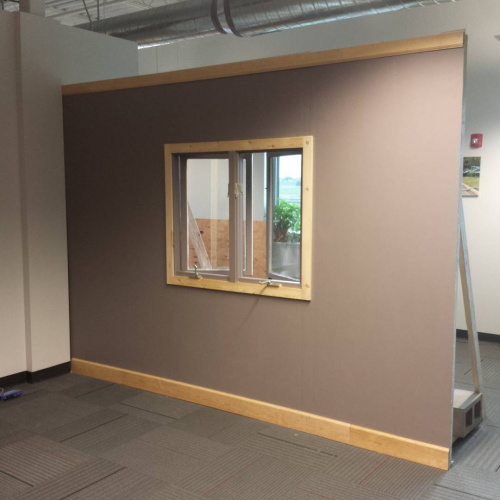
Final wall of the build finished out with paint and trim
Even though we wanted the apartment set to be a clearly separate space from the rest of the office, paint was a good opportunity to bring it in and make it a little less alien. We chose to use paint that was left over from the accent walls in the office building. We left the existing wall alone.
To finish up the walls, we bought some (relatively) inexpensive pine molding and baseboard. This was trimmed to size and nailed into the studs above and below the sheetrock. We didn't stain or oil the trim but I may go back and wax it just to keep it from absorbing moisture and getting stained or warped.
Flooring
With the walls finished, the set looked very close to finished but we couldn't imagine anyone having replaceable, low pile carpet squares in their home. Luckily, the office carpeting is easy to pull up and replace so Sarah and Shawn ripped that up while I was en route with fresh flooring. We decided on a combination of carpeting and (not quite) hardwood.
I snagged a few cases of "fold down" laminate flooring and Sarah joined me in snapping it into place. It went in really quickly and easily, the hardest part was trimming around some of the weird corners. We hid the rough edges under an area rug which finished out the flooring and gave you somewhere soft to put your feet while you relax on the sofa.
Furnishing
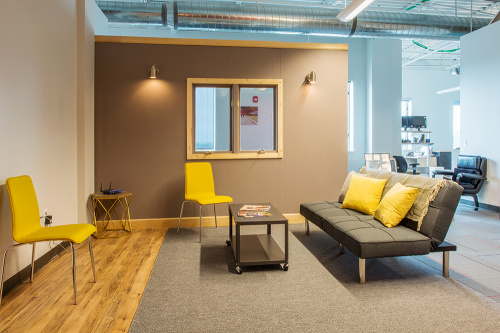
Speaking of sofas, we still needed furniture! I love designing interior spaces so I jumped at the chance to furnish the place. Eventually we'd like the apartment to include a kitchenette, an entertainment system... you know, a "house kit." But to get started I went for dorm room furnishings: futon sofa/bed, coffee table, side table, chairs and a desk. All of our furnishings came from Target (imagine me fighting college freshmen for cute throw pillows).
The lighting is all from Target as well. The sconce lighting is actually intended to be wired external to the wall but as I have the advantage of being able to walk behind the wall to wire things, I simply drilled holes to allow the cables through and plugged them into a surge protector on the backside. This allows us to easily insert a PowerSwitch Tail or similar device in the future to control them. The pendant lamp is an inexpensive lamp combined with a fancy Edison bulb and a piece of steel bar stock that I bent in a vise and screwed to the wall with brackets for a handrail.
Front Door
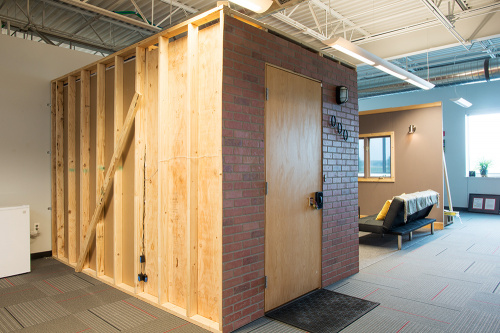
Come and knock on our door...
Of course the interior of the apartment isn't the only thing that got finishing touches. The "front porch" of the set got some brick facade, house numbers (number 000), and even a front porch light which will be integrated into a future project! Of course we needed a door mat and a doorbell as well...
Home Sweet Home
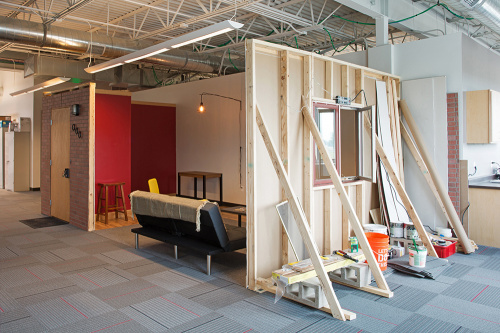
The finished IoT Apartment Set with a little behind-the-scenes peek.
Not a bad place to relax and read a magazine.
The creative techs worked hard to put this thing together and we're really excited to add projects and watch it develop. We hope you'll continue to follow our progress and if you missed the first episode then you can check it out here!
If you have any ideas for projects you'd like to see in the apartment, leave a comment!


Totally dig the flying buttresses!
I really wish there was more of a focus on home automation in the Kitchen. PID controls for the Stove/Oven. RFID tags for items in the fridge so that before an item expires you get a notification that contains recipes suggestion that would use that item. Flours jars that could dispense a chosen quantity of an item.
What, the huge robotic cooking arms aren't enough? :-)
Nice 3's Company reference; so very clever of you.
Windows that open and close with min max temp and whether empty or occupied or if heating or cooling is being used. Ceiling and other fans that circulate and even the temperature or reduce need for heat or cooling.
We actually chose the casement windows that we did because they have a crank-out mechanism that we believe will be easy to automate :)
Everyone is having his/her dream home and to renovate it one has to take so much efforts.But If you have an experienced renovation team then your efforts can be reduced.Home renovation include bath-kitchen,painting ,plumbing,installing drywalls(sheetrock),etc.While renovating my home I took help from Atlantic ocean group.
Absolutely Awesome Design. I love how the Video Lighting Kits portray the design and space in a much larger appearance. ^_^
Awesome! If you guys need any help of advice let me know I used to design high end automation for homes, hotels, and commercial buildings. i.e.: custom lighting control (ac/dc, leading/trailing edge) multiroom audio, HVAC control and many others =) All fun stuff. Can't wait to see your "apartment" evolve.
What about a plant tender robot? Watering, fertilization, pest monitoring/control, lighting? There is an interesting Public Lab project that might be useful.
It would be neat (in a kind of flashy-plus-silly way) to have a camera that identified people in the room and moved a few small plates in front of the window to keep the sun out of their eyes while leaving the bulk of the window unshaded.
How about Window Blinds that adjust based on time of day? Understand that it doesn't actually look outside ... But adjustable to allow the "sun" in during the day, close at night.
Yeah, I often wish for a combination of smart exterior shutters and interior curtains, deployed only when no one is around in order to control heat transfer.
Looks like Internet Kontrol Engineering Associates
Something that I'm not seeing space for here: HVAC automation. Is it something you plan on integrating with everything else?
Personally I'm looking into things like zoning and air recycling within the home, but that might be a bit more than most folks are gunning for.
with a n open-faced Demospace like they have here, that'd be a lot harder to incorporate, though you could get a freestanding Aircond unit and hook it up to a couple of registers in the wall to make it blow warm/cold air
I love the whole idea of home automation and am looking forward to more updates on this project! I have 2 ideas for you. First, Some small Wifi device inside either a light switch or an electrical socket that you can remotely turn on and off the power. Wifi enables people to not have to run new cabling to their existing wall boxes. Second idea is an electrical panel, like the type you find in basements with the house's circuit breakers. Could you setup some type of amp reading off each leg? Also you could have an on/off control for each leg if you wanted to shut off lights or other appliances.
Since users will be identified before they come in the door, a snackbot or drinkbot can have each person's favorite snack food or cocktail dispensed for them when they arrive.
You should definitely include some RGB lighting that reacts to stimuli. Warm light in the morning, cool in the evening, dimmer when the room is empty, brighter when there are a few folks in there. Reduce to low-level accent lighting only when the TV is on.
If you really want to show off, you could have the RGB accent lighting take on the dominant color of whatever is on TV, minute by minute.
One of our first projects that are planned for the space will be lighting related. We'll keep your suggestions in mind!