When we introduced the FreeSoC2 board back in May, we had been spending so much time on development and porting the Arduino core to it that we hadn't really had a chance to really get it out on the road.
Since then, I've been using it almost exclusively in situations where I'd once have used an Arduino (privileges of working at SparkFun -- I can use a more expensive board just because I feel like it!), and I am continually floored by the power and flexibility of this platform. It's also fantastically easy to put something together quickly - in most cases as easy as, or easier than, with Arduino.
Here's a short video showing off a project I put together to demonstrate some of the more advanced capabilities of the FreeSoC2. I'm calling it the "FreeStick."
The FreeStick is the final realization of a project that's been kicking around in my head for something like 20 years.
Sometime way back in the mid-90's, I fell in love with the old Star Wars X-Wing flight sim games. Back when I first played them, I had no joystick; I used a mouse. I was using a Mac, and this was way pre-USB, so my options were limited, but one day I found a Gravis MouseStick (probably for less than that one on Amazon!) and blew several weeks' allowance on it.
I got it home, unboxed it, and immediately regretted my purchase. The deflection on the stick was so huge that I couldn't possibly use it to play a game -- mechanical movement time was huge compared to my response time. A few years later I bought a higher quality Logitech joystick, which was slightly better, but still not great. The fact that the base has to be held in one hand while it's being use is a huge drawback, as well -- the X-Wing games have a tremendous number of hotkeys and not having a free hand to press them is a serious disability.
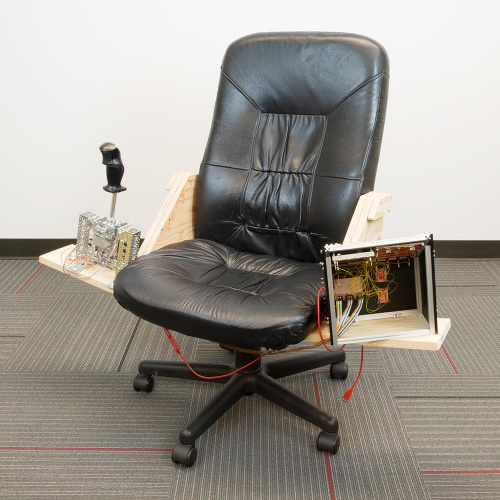
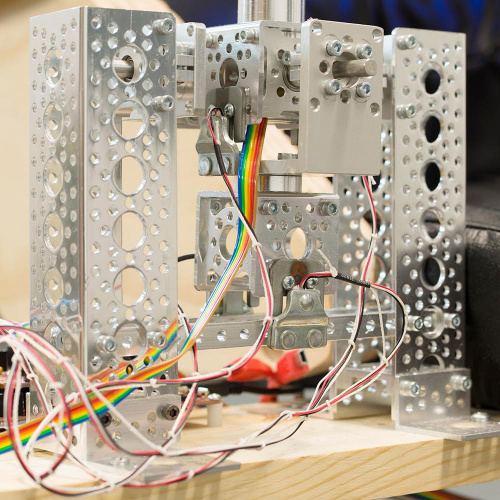
The FreeStick is the long-delayed solution to those problems. It uses a FreeSoC2 board, a joystick handle (which I salvaged from an ancient Microsoft Sidewinder that was on our company free stuff table), a pile of Actobotics parts, and four load sensors to measure the force applied by the user. Because the PSoC5LP part on the FreeSoC2 contains several onboard amplifiers as well as a high-precision delta-sigma ADC, I was able to avoid using the amplifiers normally required for reading load cell based sensors.
Normally, to use these load sensors, you'd want to combine them into bridges and use a differential amplifier to read the voltage out of the resulting circuit. In this case, I was able to use the extremely flexible internal circuitry of the PSoC5LP to buffer the input, eliminating the external amplifiers. I was then able to dump that signal into the sigma-delta ADC and read it with 17-bit precision around the middle of the supply range. The resulting signal is fairly noisy, but a little averaging in software cleans it up nicely. I can also compensate for thermal drift by subtracting off the resting value of the load cell that's not being currently used.
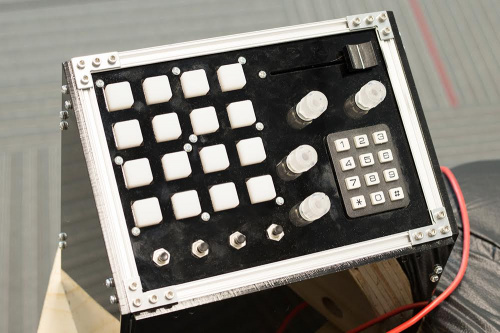
For secondary inputs under the left hand, I used four of our RGB-lit quadrature encoders. The PSoC5LP contains some programmable digital logic in addition to the analog circuitry, from which I created four channels of quadrature decoding circuitry. That means that there's zero software overhead related to the quadrature input!
I also used one of our 4x4 membrane keypads; I hacked the circuit board to use through-hole WS2812 LEDs rather than standard RGB LEDs. Again, the programmable logic on the PSoC5LP came in handy: a Cypress employee created a component for the PSoC which allows most of the signal shaping for the LEDs to be done in hardware. This is important because most processors use software intensive methods like cycle counting or SPI peripheral jiggering to create the output, severely eating into the amount of time available to calculate the next output frame.
Those buttons were wired up as a 4x8 matrix with a 12-key phone-type keypad and four simple SPST pushbuttons. Those went into one of our new SX1509-based I2C expander boards. The SX1509 is a great part, which can, among other things, decode button matrices, monitor signals for changes and trigger an interrupt, and drive multiple LED outputs with PWM. I also used the SX1509 to control the RGB LEDs under, and read the buttons attached to, the quadrature encoders.
The throttle is a 60mm travel linear potentiometer hooked up to one of the PSoC5LPs two SAR ADCs. These are independent of the high-precision sigma-delta I used for the load cells, with lower resolution and higher sampling rates.
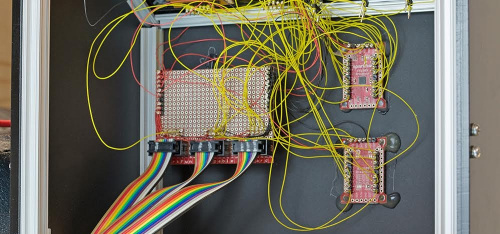
All of those bits and pieces are connected to a local board inside the lefthand box and routed under the chair to the FreeSoC2 board through three 10-conductor ribbon cables. Using wire wrap construction made it fairly easy to connect the components in situ.
Finally, the entire creation connects to the computer via USB. The PSoC5LP has a USB2.0 peripheral, and with the help of a couple of the examples that come with PSoC Creator and a Cypress application note, I implemented both a USB joystick and a USB keyboard to use standard HID drivers to pass data back to the PC.
How well does it work? In a word, amazingly. It's completely changed how the game feels, how I play, how much fun it is. I've been doing a lot of "testing" recently.
Hopefully, this project will give you some insight into exactly how powerful the FreeSoC2 board is, and how much you can do without having to involve a great deal of external hardware. You can find the source code and more information on the FreeStick project on GitHub; I'm still working on it so expect changes in the future.


I've been interested in the PSoC chips for quite a while now, but never got around to buying a dev board due to high shipping costs. This demo, the discount and Sparkfun's reasonable shipping costs to Europe made me buy FreeSoC2 now. Fun times ahead.
If it's a free stick, why do we have to pay for it?
Sorry, I have a Shawn's head hangover and questions like that actually make sense.
Next up, a Dr. Evil chair!!