×
SparkFun will be closed on Tuesday, December 24th, and Wednesday, December 25th, in observance of the Christmas holiday. Any orders qualifying for same day shipping placed after 2:00 p.m. (MST) on Monday, December 23rd, will be processed on Thursday, December 26th, when we return to regular business hours. Wishing you a safe and happy holiday from all of us at SparkFun!
Please note - we will not be available for Local Pick up orders from December 24th-December 27th. If you place an order for Local Pick-Up we will have those ready on Monday, December 30th.
Last January, we interviewed 13-year-old Reagan, who talked about making an animatronic Horus Guard helmet from Stargate using SparkFun parts. At the time, Reagan was working on another project called "CubeRinth," which he unveiled at Maker Faire Bay Area.
The interactive entertainment company, Two Bit Circus, saw the CubeRinth and asked Reagan and his brothers to make one for their upcoming STEAM Carnival event. The catch? They wanted a rather large version of the CubeRinth.
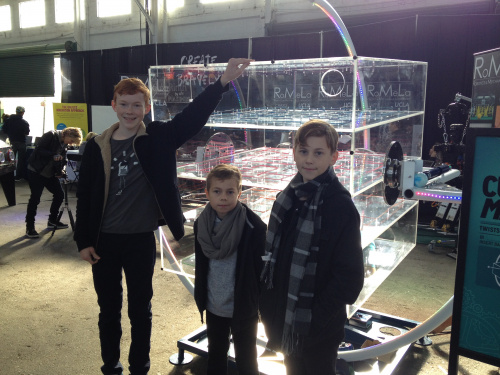
The CubeRinth Maximus and its creators: Reagan, Keane, and Carson (left to right)
We asked Reagan if he was willing to share some of the details on the design and creation of the giant contraption.
ReplaceMeOpen
ReplaceMeClose
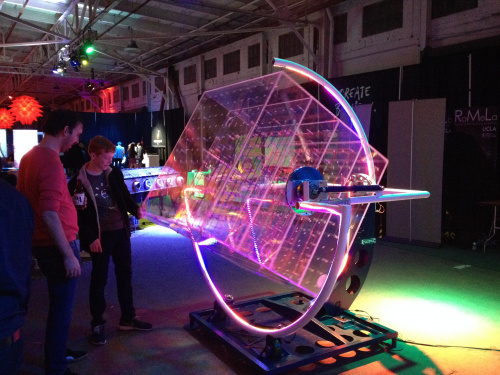
The CubeRinth Maximus in action
Could you tell us a little about the CubeRinth? How does it work, how do you play it, and how do you win?
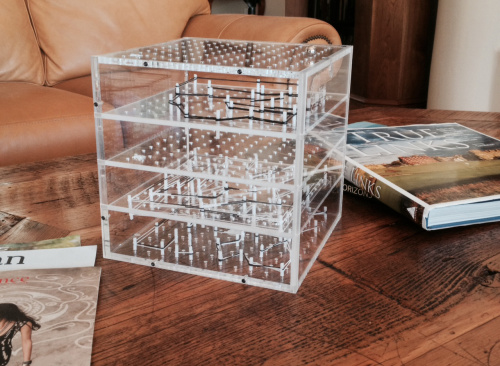
The CubeRinth is a three-dimensional acrylic cube with removable pegboard shelves. Using pegs and rubber bands, players can create an infinite number of maze combinations on the five pegboards enclosed in the in the acrylic cube. The game is played by dropping a marble in at the top, playing the bottom maze, and entering the goal. Then, the user rotates the cube over and navigates the ball back through new mazes to the top again! There are a total of eight mazes within the cube to play.
Where did you get the idea for the CubeRinth?
The idea for the CubeRinth began when we participated in an online camp called Maker Camp. We were introduced to the world of making after meeting Joey and Julie Hudy at a local Maker Fest event. Julie Hudy encouraged us to participate in Maker Camp. During the games week, one of the projects to build was a Labyrinth out of scrap pieces of wood.
Having been inspired by a TwoBitCircus.com video presentation during Maker Camp on their concept of super-sizing games, we decided to super-size the labyrinth idea by making the MakeyRinth V1.0, which was made using a simple 24-by-24-inch piece of plywood, a pegboard, wood pegs and rubber bands, which were used to create your own mazes. The game can be played by two to four people, and is customizable.
With the MakeyRinth V2.0, we kicked it up a notch and created a super-sized version with a 64-LED matrix, which scrolled text. With V2.0, I was introduced further to the world of Arduino and coding by our mentor Erin Kennedy from robotgrrl.com. While working on V2.0 we wondered if it would be possible to make a 3D version that worked in the same way as the 2D versions. The CubeRinth was born: a three-dimensional acrylic cube with removable peg board shelves.
Use rubber bands to create different maze configurations in the smaller CubeRinth
Again, with the encouragement of many in the Make community, we asked ourselves, could we make the CubeRinth into a kit that anyone could build and play with? We now have the CubeRinth kits!
How did TwoBit Circus find out about the CubeRinth?
At Maker Faire Bay Area this past May we introduced the CubeRinth Maze Kits, and while there, we had the opportunity to meet Two Bit’s CEO, Brent Bushnell. Brent was really excited about the creativity and ingenuity behind the CubeRinth and asked if we would be interested in making a supersized version of the CubeRinth for them.
What did you think when TwoBit Circus asked you to build a giant version of the CubeRinth? Were you excited? Nervous?
At first I was really excited that we would get to make the CubeRinth Maximus, but also that TwoBit Circus actually wanted us to build it: something we had created. I also was excited because of all the things I would learn through this process and that I would get to work on a CNC mill.
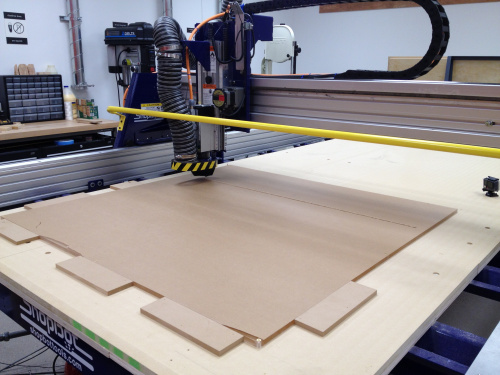
Using a ShopBot CNC router to cut the acrylic parts
The only three parts I was really nervous about were:
- During the CNC milling of the last sheet of 4-by-4-foot acrylic, we had a total of nine sheets to mill, which we completed over a three day period at a new maker space here in Phoenix called CREATE at the Arizona Science Center.
- Putting the Unit bearings on the Cube – they make it possible for the Maximus to rotate 360 degrees and carry the load of the Cube.
- Putting the Acrylic Cube for the first time onto the carriage; it weighs close to 480 Lbs! When we first put it on and backed out the fork lift, the Cube made some interesting noises; it was a nervous moment for all of us.
How long did it take to build the CubeRinth Maximus?
We had six weeks to complete the Maximus build. I have about 45 hours of CAD design work using AutoDesk Fusion 360, complete with over 200 versions and about 75 renderings of the CubeRinth Maximus.
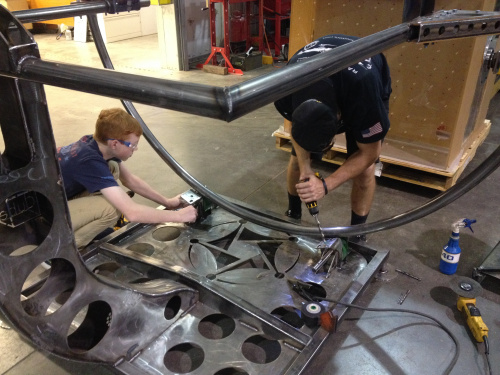
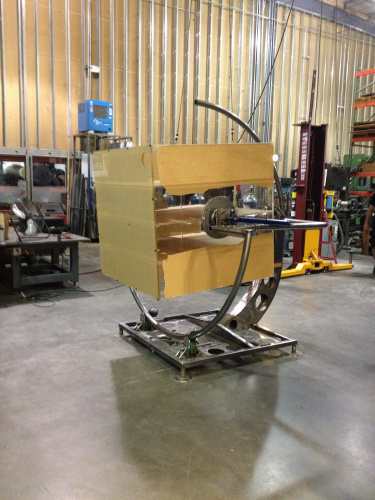
Constructing the base for the CubeRinth Maximus
What tools did you use?
The main tools that we used were a waterjet mill and a ShopBot CNC router. The waterjet was really useful for cutting out all the sheet metal parts, as I could just feed it my CAD files and the waterjet would cut it out. Also, without a CNC router the CubeRinth itself would be impossible. All the pieces were cut out on the ShopBot CNC router at CREATE to laser sharp accuracy as the model demanded. We also used the laser cutters, hand drills, band saw, lathe, belt sander, disk grinder, manual mill, router, MIG and TIG welders as well. It was great learning how to use all the tools!
Waterjets can be used to cut out all sorts of interesting shapes
Where did you build it? It looks like you had to use someone else's garage!
We are very fortunate to have some great maker spaces here in Arizona. Local Motors in Chandler has a community lab, and a new maker space next to the Arizona Science Center called CREATE were the two places where the bulk of the building took place.
At CREATE, Victor Surovec and Steven Weiner gave us access and guidance on the ShopBot CNC mill, as well as a ULC laser cutter, which we used to cut the 300 plus acrylic pegs used to create the eight mazes.
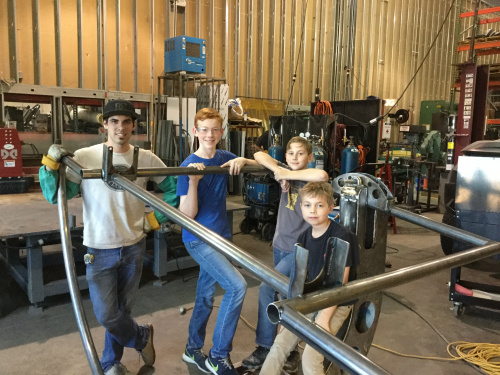
Local Motors Labs, with the help of my mentor Galen Wilson, was where we fabricated the base support structure for the Maximus. We have been going there for a little over a year now. I have learned a great deal from Galen about fabrication, structure, welding and CAD design. Arizona Plastics was a great learning experience for us in working with acrylic as well. We assembled and machined the Cube over a three day period there.
Nearing completion
What electronics did you use?
I used a Sparkfun RedBoard to control seven meters of WS2812 LED lights with various light sequences. Then, I used a MakerShed ProtoShield for the driving circuitry. I also used my first Molex connector and quite a few DC barrel jacks. We also had a Bluetooth speaker that (in the future) will connect to a MP3 Trigger board. I had planned on using the LSM6DS3 accelerometer breakout, but as happens with projects of this size and timeframe, I wasn’t able get all the coding done. The accelerometer will be on when it goes on tour in the spring.
SparkFun-controlled LED lighting
What was the hardest part about building the CubeRinth Maximus?
The size and the short time frame for the build were extremely difficult. With a six-week build schedule, it was important for everything to go well; this was by far the largest build we have done to date.
By far, the hardest part was (surprisingly!) making the mazes inside of the Maximus! We had to send my brother, Keane, into the Cube to right some pegs and repair snapped rubber bands. We spent 10 hours making the mazes! The mazes were generated by a maze generator, which had no knowledge about the number of pegs we had and where the end holes were. As a result, I had to do some major editing to the files.
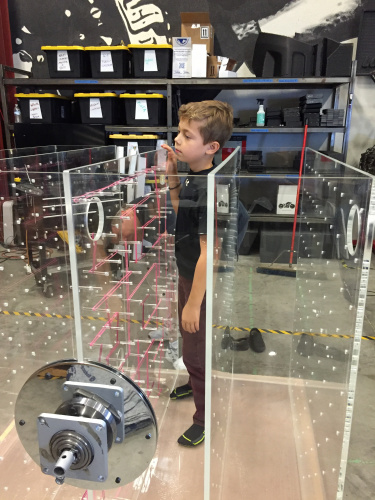
Reagan's brother, Keane, making some much needed repairs inside the Cube
What lessons did you learn in the building a giant, moveable cube? If you had to do it again, what would you do differently?
The main lesson I got out of this is a bit complicated to explain:
- Over-engineering can be good in small amounts, for example, we added a 4-foot wide steel gusset to the base of the supporting arm. It could have been made without it, but there would be a higher risk of flexure on the supporting arm.
- Over-engineering in large doses often makes it very complex to CAD and fabricate your project. But if you keep a balance between over-engineering and under-engineering (under-engineering is WAY worse than the opposite), the results will be worth it!
Based on what we learned during the build, if we built another one, we would perhaps think about adding an entrance hole for the ball on each level so that users can choose which maze they want to start with. I would make it easier to route the electronics; it took a lot of time to run wires. With the base structure, we would want to look at the dampening configuration and the brackets, which allow for the Maximus to be taken apart. Lastly, nothing beats having a waterjet around to machine out parts.
How did attendees at the STEAM Carnival like the CubeRinth Maximus? Did they figure out how to play it, or did it take some teaching?
I think it made quite an impression on them, not just as a fun game, but as a piece of art. It wasn’t hard to find people just watching the light play through the Cube. As for the players, we usually had to explain to the people how to play it, but the people who read the sign knew how to play it immediately.
The CubeRinth Maximus in all its glory
Did players do anything unexpected to try and cheat or break the game?
We knew the Maximus would be put through its paces when played and knew it was important to see what players of all kinds would do with it, but it was still a little disconcerting to think about it. Over the three days at the STEAM Carnival we had a few who wanted to see how fast they could get the Cube itself spinning; thankfully, I designed a dampening function into the movement to prevent this, but it still is capable of rapid rotation.
We saw all kinds of styles of play – those who would use rapid movements and those who realized quickly that navigating the mazes is easier using more finesse. For the most part, once it was explained how to play, everyone was able to navigate the mazes and had a lot fun doing so. I’m proud to say that after three days and hundreds of trips through the mazes it performed to what I designed.
What plans do you have for the CubeRinth Maximus? Are you going to keep it, dismantle it, or modify it?
As far as the future of the Maximus goes, we did get some comments at the STEAM Carnival from a few startup companies telling us it would be a nice addition to their recreation spaces for the employees, perhaps we will build a few more if one comes asking (SparkFun, maybe you should have one).
For now though, the CubeRinth Maximus will be part of the content library for the TwoBit Circus/STEAM Carnival and will travel with them next year across the United States. That was one of the very cool things about this experience: that Brent Bushnell, CEO of TwoBit Circus, decided to ask three young boys to build something of this scale. He and his staff, Molly, Daniel, Andy, and Nikki to name a few, were so supportive and encouraging. It has been very inspirational and motivating to have met them.
Anything else you would like to tell people who might be attempting a large project, like the CubeRinth Maximus?
There are so many things that I would tell that person, but the main point would be to never give up. Don’t be afraid to fail, success is just around the next corner. Einstein said: “The person who never made a mistake never tried anything new.” I would also say stay organized and take notes (keep a project notebook), and be patient.
I’ve learned over the last few projects that we have done that sometimes progress is slow at times, and it always takes longer to complete than expected. Lastly, work on the project every day, even if it’s just an hour a day. Because in six weeks or a year, those hours really add up. In six weeks, if you were doing four hours a day, that would be 168 hours. That’s equivalent to seven days of 24/7 work. And for a year, you would have worked 1460 hours or about 60 days. A little every day can add up!
Reagan, Carson, and Keane with their mentor, Galen Wilson, at Local Motors



awesome project... these are going to be the type of guys that come up with cool solutions to world problems in he next 40 years.