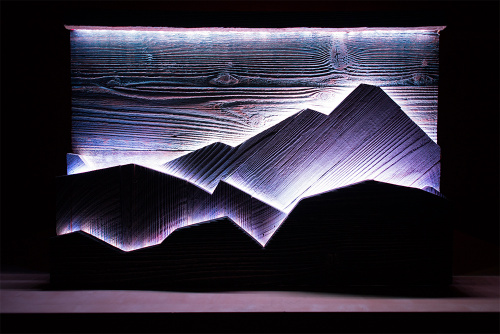
A few weeks ago, my coworker Blake approached me with the idea of building a weather visualizer inspired by the beautiful Rocky Mountains. The idea was to make an indoor visual display that would imitate the look and feel of the current weather outside.
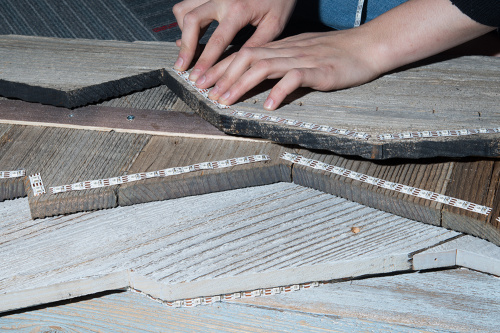
Blake had a strong idea of how the project should look. He stained reclaimed wood different colors to build a mountain scene based on the view from our office. Then he handed it off to me to add the electronics and write the program. The sky was the main area where the weather would be displayed, so I added two addressable LED strips --- one under a lip at the top facing downward, and one hidden behind the back mountain range facing upward. These two strips project light onto the sky area, causing a different visual effect with each animation. I also added an LED strip behind each of the lower mountains to add a small amount of ambient light, which will help define the mountains in low light.
Then I worked on designing LED animations for several weather patterns: sunrise, sunset, rain, snow and clear skies. I built each of these based on images I found online of the Rocky Mountain sky during different local weather patterns.
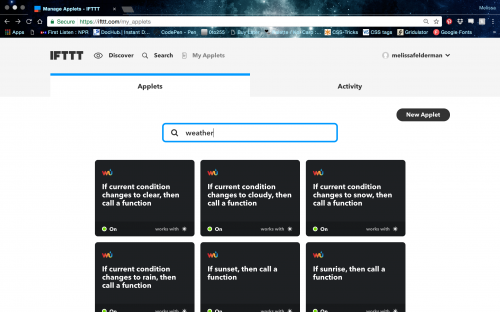
In order to trigger the animations according to weather events, I used the Weather Underground service for IFTTT to pull and publish local weather data to my Particle Photon. I wrote a program to my Photon that will call the LED animations whenever IFTTT publishes a new weather event.
If you are interested in making a version for yourself, feel free to grab my code here:
//IoT LED Weather Visualizer by Melissa Felderman for SparkFun Electronics
// This #include statement was automatically added by the Particle IDE.

#include "Particle.h"
#include "neopixel.h"

SYSTEM_MODE(AUTOMATIC);

// IMPORTANT: Set LED pixel COUNT, PIN and TYPE
#define PIXEL_PIN D2
#define PIXEL_COUNT 210
#define PIXEL_TYPE WS2812B

//setup LED strip
Adafruit_NeoPixel topStrip(PIXEL_COUNT, PIXEL_PIN, PIXEL_TYPE);

//array for even pizels for animation
int evenPixels[] = {0, 2, 4, 6, 8, 10, 12, 14, 16, 18, 20, 22, 24, 26, 28, 30, 32, 34, 36, 38, 40, 42, 44, 46, 48, 50};

void setup() {

  //initialize LED strip
  topStrip.begin();
  topStrip.show();

  //set up functions, sun for seun events, conditions for changes in weather conditions
  Particle.function("sun", sun);
  Particle.function("conditions", conditions);


}

void loop() {


}

//sun function
int sun (String value) {

  //variables for animations
  int firstStripEnd = 48;
  int secondStripStart = 49;
  int secondStripEnd = 107;
  int thirdStripStart = 108;
  int thirdStripEnd = 158;
  int fourthStipStart = 159;
  int fourthStripEnd = 210;
  int secondStripThird = 19;
  int secondStripFifth = 11;

  //sunset animation
  if (value == "sunset") {
    for ( int i = 0; i < firstStripEnd / 6 ; i++) {
      topStrip.setPixelColor(i, 30, 0, 255);
    } for (int i = firstStripEnd / 6; i < firstStripEnd / 6 * 2; i++) {
      topStrip.setPixelColor(i, 40, 0, 255);
    } for (int i = firstStripEnd / 6 * 2; i < firstStripEnd / 6 * 3; i++) {
      topStrip.setPixelColor(i, 60, 0, 255);
    } for (int i = firstStripEnd / 6 * 3; i < firstStripEnd / 6 * 4; i++) {
      topStrip.setPixelColor(i, 90, 0, 255);
    } for (int i = firstStripEnd / 6 * 4; i < firstStripEnd / 6 * 5; i++) {
      topStrip.setPixelColor(i, 120, 0, 255);
    } for (int i = firstStripEnd / 6 * 5; i < firstStripEnd; i++) {
      topStrip.setPixelColor(i, 130, 0, 255);
    }

    for (int i = secondStripStart; i < secondStripStart + secondStripFifth; i++) {
      topStrip.setPixelColor(i, 200, 50, 75);
    }

    for (int i = secondStripEnd - secondStripFifth; i < secondStripEnd; i++) {
      topStrip.setPixelColor(i, 200, 50, 75);
    }

    for (int i = secondStripStart + secondStripFifth; i < secondStripFifth * 2 + secondStripStart; i++) {
      topStrip.setPixelColor(i, 255, 100, 0);
    } for (int i = 86; i < 97; i++) {
      topStrip.setPixelColor(i, 255, 100, 0);


    } for (int i = secondStripFifth * 2 + secondStripStart; i < secondStripFifth * 2 + secondStripStart + 14; i++) {
      topStrip.setPixelColor(i, 250, 250, 50);
    }
    for (int i = secondStripStart + 22; i < secondStripStart + 26; i++) {
      topStrip.setPixelColor(i, 255, 150, 0);
    }

    for (int i = 83; i < 87; i++) {
      topStrip.setPixelColor(i, 255, 150, 0);
    }


    for (int i = thirdStripStart; i < fourthStripEnd; i++) {
      int bright = 10;
      topStrip.setPixelColor(i, bright + 17, bright + 10, bright);
    }
    topStrip.show();
    delay(100000);

  }
  //sunrise animation
  if (value == "sunrise") {
    for (int i = firstStripEnd / 3; i < firstStripEnd / 3 * 2; i++) {
      topStrip.setPixelColor(i, 90, 90, 100);
    } for (int i = 0; i < firstStripEnd / 3; i++) {
      topStrip.setPixelColor(i, 140, 140, 150);
    } for (int i = firstStripEnd / 3 * 2; i < firstStripEnd; i++) {
      topStrip.setPixelColor(i, 140, 140, 150);
    }


    for (int i = secondStripStart + secondStripThird ; i < secondStripEnd - secondStripThird; i++) {
      topStrip.setPixelColor(i, 255, 255, 100);
    } for (int i = secondStripStart; i < secondStripStart + secondStripThird; i++) {
      topStrip.setPixelColor(i, 255, 255, 25);
    } for (int i =  secondStripThird * 2 + 1 + secondStripStart; i < secondStripEnd; i++) {
      topStrip.setPixelColor(i, 255, 255, 25);

    } for (int i = secondStripStart + secondStripThird + 5; i < secondStripEnd - secondStripThird - 5; i++) {
      topStrip.setPixelColor(i, 255, 255, 150);
    }


    for (int i = thirdStripStart; i < fourthStripEnd; i++) {
      int bright = 30;
      topStrip.setPixelColor(i, bright + 20, bright + 20, bright);
    }
    topStrip.show();
    delay(100000);
  }
}

//conditions function
int conditions (String value) {

  //variables for animation
  int firstStripEnd = 48;
  int secondStripStart = 49;
  int secondStripEnd = 107;
  int thirdStripStart = 108;
  int thirdStripEnd = 158;
  int fourthStipStart = 159;
  int fourthStripEnd = 210;
  int secondStripThird = 19;
  int secondStripFifth = 11;

  //rain animation
  if (value == "rain") {
    for (int i = 1; i < 49; i++) {
      int bright = random(50, 70);
      topStrip.setPixelColor(i, bright, bright, bright);

    }
    for (int i = 50; i < 107; i++) {
      int bright = 20;
      topStrip.setPixelColor(i, bright, bright, bright);

    }
    topStrip.show();


    int rainDrop = evenPixels[random(0, 26)];

    topStrip.setPixelColor(rainDrop, 100, 100, 120);
    topStrip.show();
    delay(500);
    topStrip.setPixelColor(rainDrop, 0, 0, 0);
    topStrip.show();


    for (int i = thirdStripStart; i < fourthStripEnd; i++) {
      int bright = 10;
      topStrip.setPixelColor(i, bright + 10, bright + 10, bright);
    }

  }
  //snow animation
  if (value == "snow") {
    for (int i = 1; i < secondStripEnd; i = i + 2) {
      int bright = random(150, 250);
      topStrip.setPixelColor(i, bright, bright, bright);

    }
    for (int i = 0; i < secondStripEnd; i = i + 2) {
      int bright = random(50, 100);
      topStrip.setPixelColor(i, bright, bright, bright);

    } for (int i = thirdStripStart + 1; i < fourthStripEnd; i = i + 2) {
      int bright = random(150, 230);
      topStrip.setPixelColor(i, bright - 20, bright, 255);

    }
    for (int i = thirdStripStart; i < fourthStripEnd; i = i + 2) {
      int bright = random(50, 100);
      topStrip.setPixelColor(i, bright - 20, bright, 255);

    }

    topStrip.show();


    delay(100);

  }
  //clear animation
  if (value == "clear") {
    for (int i = PIXEL_COUNT / 3; i < PIXEL_COUNT / 3 * 2; i++) {
      topStrip.setPixelColor(i, 200, 200, 255);
    } for (int i = 0; i < PIXEL_COUNT / 3; i++) {
      topStrip.setPixelColor(i, 150, 150, 255);
    } for (int i = PIXEL_COUNT / 3 * 2; i < PIXEL_COUNT; i++) {
      topStrip.setPixelColor(i, 150, 150, 255);
    }
    for ( int i = secondStripStart; i < secondStripEnd; i++) {
      topStrip.setPixelColor(i, 200, 200, 200);
    }
    for (int i = thirdStripStart; i < fourthStripEnd; i++) {
      int bright = 10;
      topStrip.setPixelColor(i, bright, bright, bright);
    }
    topStrip.show();

  }
  //cloudy animation
  if (value == "clouds") {

    for (int i = 0; i < secondStripEnd; i++) {
      topStrip.setPixelColor(i, 30, 30, 30);
    } for (int i = thirdStripStart; i < fourthStripEnd; i++) {
      topStrip.setPixelColor(i, 10, 10, 10);
    }

  }
}
Please note: This is certainly not the most efficient or elegant program for addressing LEDs, but it works beautifully for these purposes. Please feel free to share how you would address the LEDs in the comments below.
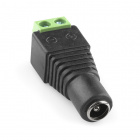
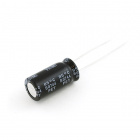
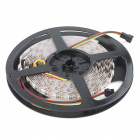
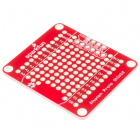
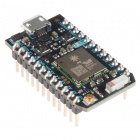
You will need the following supplies to build the electronic component of this project:
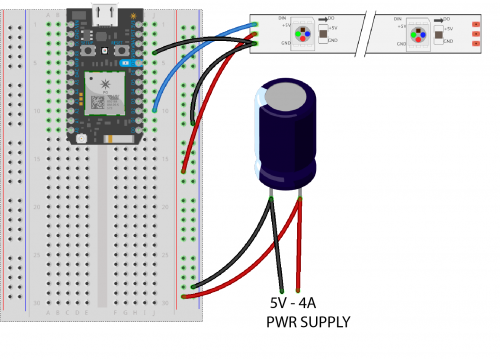
The circuit is super simple and is illustrated in the diagram below.
Having a hard time seeing the circuit? Click on the wiring diagram for a closer look.
The applet recipe is simple on IFTTT. For 'this' select the Weather Underground service and then the weather event that you would like your display to react to. For 'that' select the Particle 'Call Funtion' service. Select your Photon and function name in the first field, and then add the value that you would like to pass through in the second.
Share your thoughts and favorite weather projects on Facebook, Twitter and in the comments below!
Interested in learning more about LEDs?
See our LED page for everything you need to know to start using these components in your project.



Got my Photon, got it working with example sketches from both my computer and iPhone.
Loaded your code in, and through the Particle iPhone app, can get the LEDS to change colors.
Note on the program: Under the "clouds" scenario, I think the code left out the topStrip.show() command.
Question on IFTTT, for the "then" routine, for my function call, I selected conditions on bwt-photon1 (the name of my photon). As for passing the function input (for example, rain) - do I use rain, "rain" or {{condition}}
Thanks for your help.... I can't wait to get this working!
You will want the input to match the value string that you call in your function. This is how the photon will know to trigger the new LED animation. Use that string as the input (for example, 'rain') in place of the {{condition}}.
Got the code working! Thank you. Now for the construction!
Can you use The Thing on this same project? If so, do you need a shift register?
One of the best Sparkfun posts I've seen in years. Simply awesome...great job! I will be building this one.
I absolutely love this project! Could we get a little more info? How thick is the wood (generally)? With the boards with the neopixels facing downward (or backward) for a little lighting - how far offset is the board from the next board? Is it just the thickness of the neopixel? What is the purpose of the code " int secondStripThird = 19; int secondStripFifth = 11;"?
Many thanks in advance... can't wait to build one!
Those variables relate to the number of individual LEDs that are being used. The project is composed of one long strip, so in order to animate the LEDs I needed to know how many LEDs were in each section of the strip (firstStripEnd) and then I needed to pul different sections of that strip (one fifth or one third) to plan the animations.
Thanks for the response. I understood that you used 1 long strip and "coded it down" to four mountain ranges... (Of course I'm assuming that it's 4 mountain ranges...)
I guess what I'm trying to visualize is where "strips" start and stop in relation to the various peaks and valleys....
Waiting for my order to come in so I can start. First time with a Particle and your article did a wonderful job getting me oriented to this particular board. My experience has been limited to non-connected Arduinos, so this is opening up something totally new and exciting for me!
Thanks for you interest in this! Make sure to send us a picture when you're all finished.
This image should give you a good overall idea of the spacing and width of the project. The wood I used for this was 75 year old fence wood so it's pretty inconsistent all around but this averages about 3/4 inch thick. If I wasn't using reclaimed wood I'd probably choose 1/2in (maybe even 1/4in) just to keep the overall size and weight down.
I would recommend each layer (whether the lights are facing up or backward) to be about a 1/2 inch apart since the LED strip is just over 3/8 inch wide. If you could find a 7/16in space that would fit nearly perfect. We used some cork material we had lying around to space out the boards but ideally I would use these. We used them but my local Lowes only had a few in the store so we made it work with the cork.
As for the code, I'll have to get back to ya. Feldi is out today but she can shine some light on this soon.
Thanks, Blade! Especially for the additional pictures. They explained a lot.
I ordered the parts from Sparkfun yesterday.
Since I'm in New Orleans, and there aren't too many mountains around, I was thinking a cityscape would also be impressive. We obviously have the Mississippi River running through us and it could be a nice foreground.
And I don't think I will need the snow animation too often.... :-) But I might try to program in thunderstorms - lightening flashes.
It'll probably be several weeks before I can start, but I'll post when done.
I think that would be really cool with a cityscape and the river. Thunderstorms are next for us on our project as well. We just ran out of time before the video. Looking forward to seeing it in action!