×
SparkFun will be closed on Tuesday, December 24th, and Wednesday, December 25th, in observance of the Christmas holiday. Any orders qualifying for same day shipping placed after 2:00 p.m. (MST) on Monday, December 23rd, will be processed on Thursday, December 26th, when we return to regular business hours. Wishing you a safe and happy holiday from all of us at SparkFun!
Please note - we will not be available for Local Pick up orders from December 24th-December 27th. If you place an order for Local Pick-Up we will have those ready on Monday, December 30th.
In this week's installation of Hardware Hump Day, I continue exploring the intersection between craft and electronics.
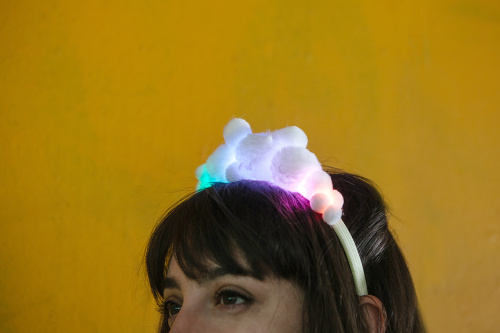
It has recently been brought to my attention that flower crowns are OUT (a summer accessory staple) and pom-pom headbands are IN. When or why this happened is beyond me, but I was shown this fun and festive DIY Pom-Pom Headband a few months ago and had to admit that it would be super fun to embed with electronics.
I decided to make not one but two versions of said LED Pom-Pom Headband. In the first (shown in the video), I used only LEDs and a battery. It is a very simple circuit and a great project to share with kids or electronics n00bs. It's also a perfect learning tool for demonstrating parallel circuits, diodes, polarity and basic soldering skills.
The second iteration is a little bit more complicated but still great for anyone new to programmable electronics. It features a strip of addressable WS2812 LEDs and an Arduino Pro Mini 5V. This means that you can update the LED animations over and over again to get different effects.
You can follow along with both versions of the project using this tutorial.
Tell us about how you have embedded your craft projects with electronics in the comments below!
Interested in learning more about LEDs?
See our LED page for everything you need to know to start using these components in your project.


I like this project a lot. the biggest comment I have is that the speckled table makes it harder to see what you are doing. Otherwise nice idea!
To make this more comfortable to wear and hide the battery and boards, you can add a small panel of felt slightly wider than the band at the top center to serve as a base. Extend the wires from the strip so they will reach back up the band (hot glue underneath to hide them) and then attach the board and batteries there, then cover with extra pom poms. This will also ease weigh distribution so it doesn't slide to one side. I suggest using velcro or elastic to temporarily attach the battery (and to make it easier to remove for replacement in case of damage or for easier charging) - applying heat to any LiPo is not recommended.
I like the idea for my daughter but.... I'm not so sure about putting a LiPo on her head.