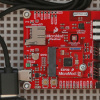
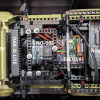
Over the past few episodes of "Adventures in Science," we've designed an Arduino-based RC channel mixer and talked with Jamie Leben about design tips for a combat bot chassis. Now, it's finally time to put all that knowledge to use and make our own combat bot!
If you'd like to take a look back in time and watch the episodes that led up to the finished bot, here they are:
- Combat Bot Weapon Types
- Using an RC Hobby Controller with Arduino
- Mixing RC Controller Inputs for Arcade Drive
- Plastic Ant Combat Bots Chassis Design Tips
I'm ready for AVC! While I don't plan on competing (referee/judge duties call to me), I'm hoping to bring my bot for people to see and play with. Because there is no active weapon, it's (mostly) safe to drive around and run into things.
If you're looking to replicate our design, the electronics wishlist can be found below, and the Arduino code for mixing RC inputs can be found here in a Gist.
After playing with both the wheel/trigger and thumbstick types of controllers, I decided I'm a huge fan of the wheel/trigger type for combat bots (despite my dislike for them as a youth). I had a much easier time positioning and lining up my bot for shots (i.e. ramming) than with a thumbstick. I recommend the FS-GT3B for a wheel/trigger transmitter. If you'd like to try the airplane/quadcopter-thumbstick style of transmitter, I used an FS-CT6B in the videos.
I learned a lot making this bot. A few tips for those planning to make their own:
- Measure, measure, measure! And then leave some extra space just in case. Trying to fit all the electronics in that tiny chassis was a challenge. LiPo batteries have a tendency to bloat a bit, so leave some extra room for the lid.
- 3D printing with a "brim" prevents the bottom layer from peeling up, which can ruin the front of the wedge.
- When space is a concern, cut, strip, tin and solder one wire at a time for your connections. If you guess on lengths and pre-cut all your wires, you'll end up with a mess of wires that you'll need to shove into the chassis.
- If you can, program your Arduino first. I definitely forgot to program the Arduino after securing everything into the chassis and then wondered why nothing worked.
- Keep your work area fairly organized as you solder and build. I'm not the best at this, and it becomes a pain to find tweezers when they're buried under other tools, wrappers and discarded wires.
Now it's your turn! Using the designs provided by Jamie and me, you can build a combat-ready bot in about a day (longer if you want to modify the designs). If you're ready to compete, AVC is less than two weeks away, and you can still register for the Plastic Ant (K-12) or Antweight (anyone) combat bot divisions.
For those of you that have competed in some kind of combat bots event before, can you offer any other tips for designing and building?
And for everyone, I need a name for my bot (even if it's not going to compete). So please give me your best bot names! The cornier the better.


Wedge Ant-illes seems like the obvious name
Congrats GCF. You are the chosen one. I'll be contacting you soon about a prize!
How about "Bumble Bot". Since it doesn't have weapons its kind of like the Abominable Snowman that had all its teeth pulled in the Rudolph the Red Nose Reindeer movie. :)
I am curious about the large doll in the background. What is THAT?!
It proves that Shawn's pick up line "Wanna take a ride..." has worked at least once before.
Creepy is as creepy does :P
She never sleeps...
Seven days...