I love fall! While you might not think it, Colorado has tons of fun things to do specifically during fall. Add that to a multitude of events/holidays/happenings associated with this time of the season, and my list of things to do becomes never-ending. So while I say I'm going to do all these things, life often has other plans. I find myself with not even a third of my list done; my garage workshop is still not complete, my car still needs a timing belt service (see item 1 of this list), and I haven't gotten out to any of my favorite fishing spots in over a month. What's worst? I found myself in the same position last fall.
The Aspen trees put on quite a show this time of year. Makes for great drives in the mountains. Photo by Stacy, Rambling Traveler, at flickr
Today's Enginursday serves as a monument to this unwelcome tradition. Every year I say I'm going to build an awesome robotic jack-o'-lantern. Think of a Transformer in pumpkin form. I usually start pricing out the materials, see the astronomical cost associated with mobilizing organic material, and decide to just put the RGB Cycling LEDs in your run-of-the-mill jack-o'-lantern. This year was looking to be no exception, but then I decided to go for it. At least try to make some headway into the project. Something respectable that I could build on in years to come. So I embarked on the part of the project I had thought about the most in planning it --- weaponizing a jack-o'-lantern.
While I'd like to one day add things like movement and aim, I wanted to start out simple, as I had very little time to complete this. So the goals were fairly basic: detect movement and fire pumpkin seeds out the mouth of the jack-o'-lantern. The ballistic aspect of it was the first problem to solve; how was I going to launch these oblong, inconsistently shaped seeds? My mind immediately went to pitching machines, using a wheel and a confined space to launch the projectiles. Now, if you're not familiar with SparkFun's site, we have lots of wheels and the motors to spin them. But I had to figure out which one met my needs. I needed a wheel and motor set that would fit comfortably inside a jack-o'-lantern, Could be run off a SparkFun RedBoard, and spun fast enough to launch the seeds. I settled on the motor and wheel combination in the Ardumoto Shield Kit. Before I placed the order, my coworker suggested I buy the motor and wheel separate and use the Wireless Motor Driver Shield. It has an H-Bridge motor driver and breaks out a lot of the Arduino pins in useful ways for quick projects. I'm glad she suggested it; it cut the project time down tremendously.
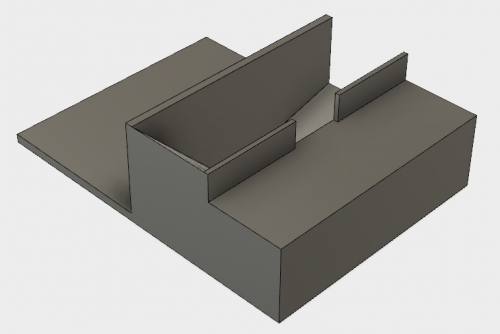
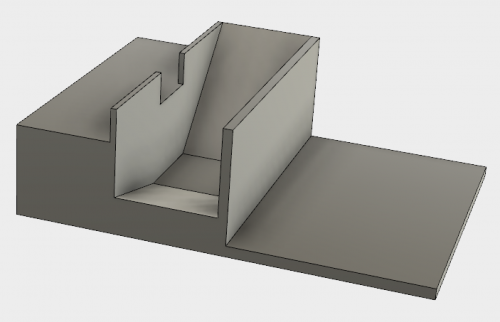
I already knew I was going to use the standard PIR Motion Sensor to detect motion. I've used it in the past, and it works great. So now I had to figure out how to put it all together. Having a desktop 3D printer handy (and a very generous co-worker who would run the prints for me), I could create the proper mounting position and cavity I needed for the motor and wheel to launch the pumpkin seeds. Proper slopes for the entry point and exit point of the seeds were taken into consideration as well. I also wanted to make sure the device wouldn't roll around in the pumpkin, so I created a flat plate for the other end of the device. I would be able to use it as a mount for the RedBoard and shield, along with the PIR Motion Sensor. Below is what I came up with:
Designed this in Fusion360 fairly easily
Better view of the cavity the wheel would be housed in and the seeds would drop into
You'll notice not a lot of seeds would fit into this mechanism at once, which is why there is a separate feed mechanism. Unfortunately, I forgot to get a picture of it and forgot to save my 3D file. To best describe it...it looked like a vacuum cleaner attachment with a narrow nozzle. So much so that more than one person asked me if that's what I was printing. My reason for keeping the feed mechanism separate was so I could add a vibration motor to the feeder to prevent jams. Unfortunately, after a few dry runs it became apparent that vibration wasn't going to prevent clogs in the feed line. Together, the 3D-printed part and the pointy ends of the pumpkin seeds were the perfect combination for clogging the feeder. Which brings me to an interesting topic...
The Mechanics of Organic Material
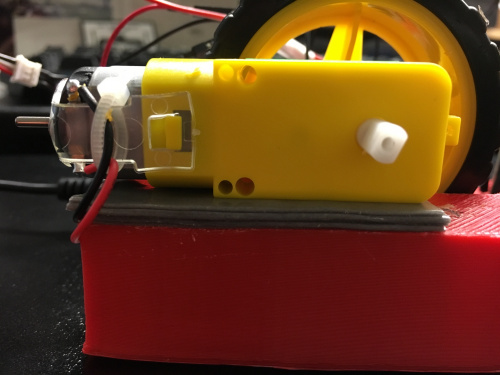
While my background is mechanical engineering, I've never really done anything with it. Usually while designing parts and enclosures in my projects, I haven't had to worry about working with organic material. After this project, I have a new respect for those who design industrial food equipment. I found myself searching for silly things like "average thickness of a pumpkin seed." Creating the proper space between the bottom of the cavity and the wheel to push the seeds through while not jamming the motor was a lot more difficult than I had anticipated. Looking back, a different material for the wheel would have solved this a lot quicker, but I was running out of time and couldn't spend the extra bit on that. In the end, I had to use the friend to all makers, diyers, engineers and tradespeople alike --- duct tape. Using double-sided tape, I was able to increment the size of the gap in small amounts until I got the gap I thought would work the best.
When your math is just "meh".
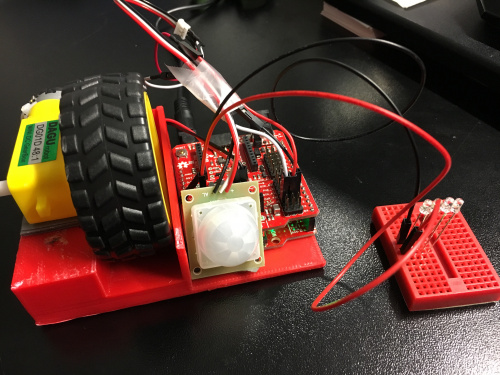
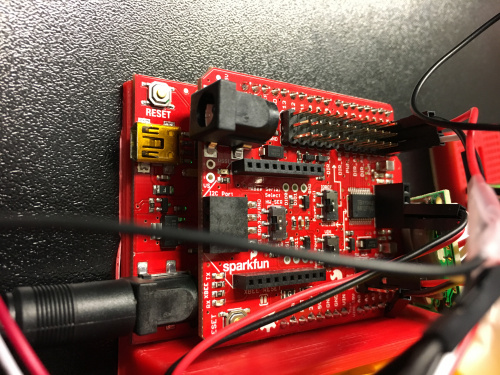
Once I got the device built, the rest was fairly simple. Due to the fact that the wireless motor driver shield comes pre-soldered with male headers on all the pins, hookup was a breeze. In addition, the power and ground rails that run alongside the pins are made for hooking up sensors, so the PIR Motion Sensor attaches in a very clean configuration to the shield. I always like lighting my jack-o'-lantern with the RGB cycling LEDs. So I was able to hook those up to the power and ground rail on the analog pins in a similar manner to the PIR Motion Sensor. They have internal CLRs, so hooking them up was simply sticking them in a breadboard and running wires to the shield. The breadboard also helps keep them upright with its weight.
Here's what the device looks like without the feeder, which relies on the pumpkin as a support structure.
The power rails along the pins are super handy
Thanks to bountiful example code our engineers and support staff provide, writing code for this was simply stitching together other pieces of code. Using the Forward command from the motor shield example code and the read code from the PIR Motion Sensor code was all that needed to happen. In further iterations, I will add other features, but the goal was still to keep it simple and achievable.
/******************************************************************************
  Pumpkin_Seed_Spitter.ino
  Code for a pumpin seed spitting robot
  Comprised of example code from the following sketches:

   PIR_Motion_Detector_Example.ino
   Example sketch for SparkFun's PIR Motion Detector
   (https://www.sparkfun.com/products/13285)
   Jim Lindblom @ SparkFun Electronics
   May 2, 2016


   SparkFun Ludus ProtoShield Example Code
   SparkFun Electronics
   Nick Poole 2015


  Development environment specifics:
  Arduino 1.6.7
  ******************************************************************************/
 const int MOTION_PIN = 2; // Pin connected to motion detector
 const int LED_PIN = 13; // LED pin - active-high

 int pwm_a = 3;   // Channel A speed
 int pwm_b = 6;   // Channel B speed
 int dir_a0 = 4;  // Channel A direction 0
 int dir_a1 = 5;  // Channel A direction 1
 int dir_b0 = 7;  // Channel B direction 0
 int dir_b1 = 8;  // Channel B direction 1

 void setup()
  {
   Serial.begin(9600);
   // The PIR sensor's output signal is an open-collector,
   // so a pull-up resistor is required:
  pinMode(MOTION_PIN, INPUT_PULLUP);
  pinMode(LED_PIN, OUTPUT);

  pinMode(pwm_a, OUTPUT);  // Set control pins to be outputs
  pinMode(pwm_b, OUTPUT);
  pinMode(dir_a0, OUTPUT);
  pinMode(dir_a1, OUTPUT);
  pinMode(dir_b0, OUTPUT);
  pinMode(dir_b1, OUTPUT);
 }

 void loop()
 {
  int proximity = digitalRead(MOTION_PIN);
   if (proximity == LOW) // If the sensor's output goes low, motion is detected
   {
    forward(200); //Full speed ahead
    delay(1000);  //Run the motor for 1 second
    shutoff();
    delay(30000);  //Give it time to reset
   }
 }


 void forward(int speed) // Move Forward
 {

 digitalWrite(dir_a0, 0);
 digitalWrite(dir_a1, 1);
 digitalWrite(dir_b0, 0);
 digitalWrite(dir_b1, 1);

 analogWrite(pwm_a, speed);
 analogWrite(pwm_b, speed);

 }

 void shutoff() // Stop Motors w/o braking
 {

 digitalWrite(dir_a0, 0);
 digitalWrite(dir_a1, 0);
 digitalWrite(dir_b0, 0);
 digitalWrite(dir_b1, 0);

 analogWrite(pwm_a, 0);
 analogWrite(pwm_b, 0);

 }
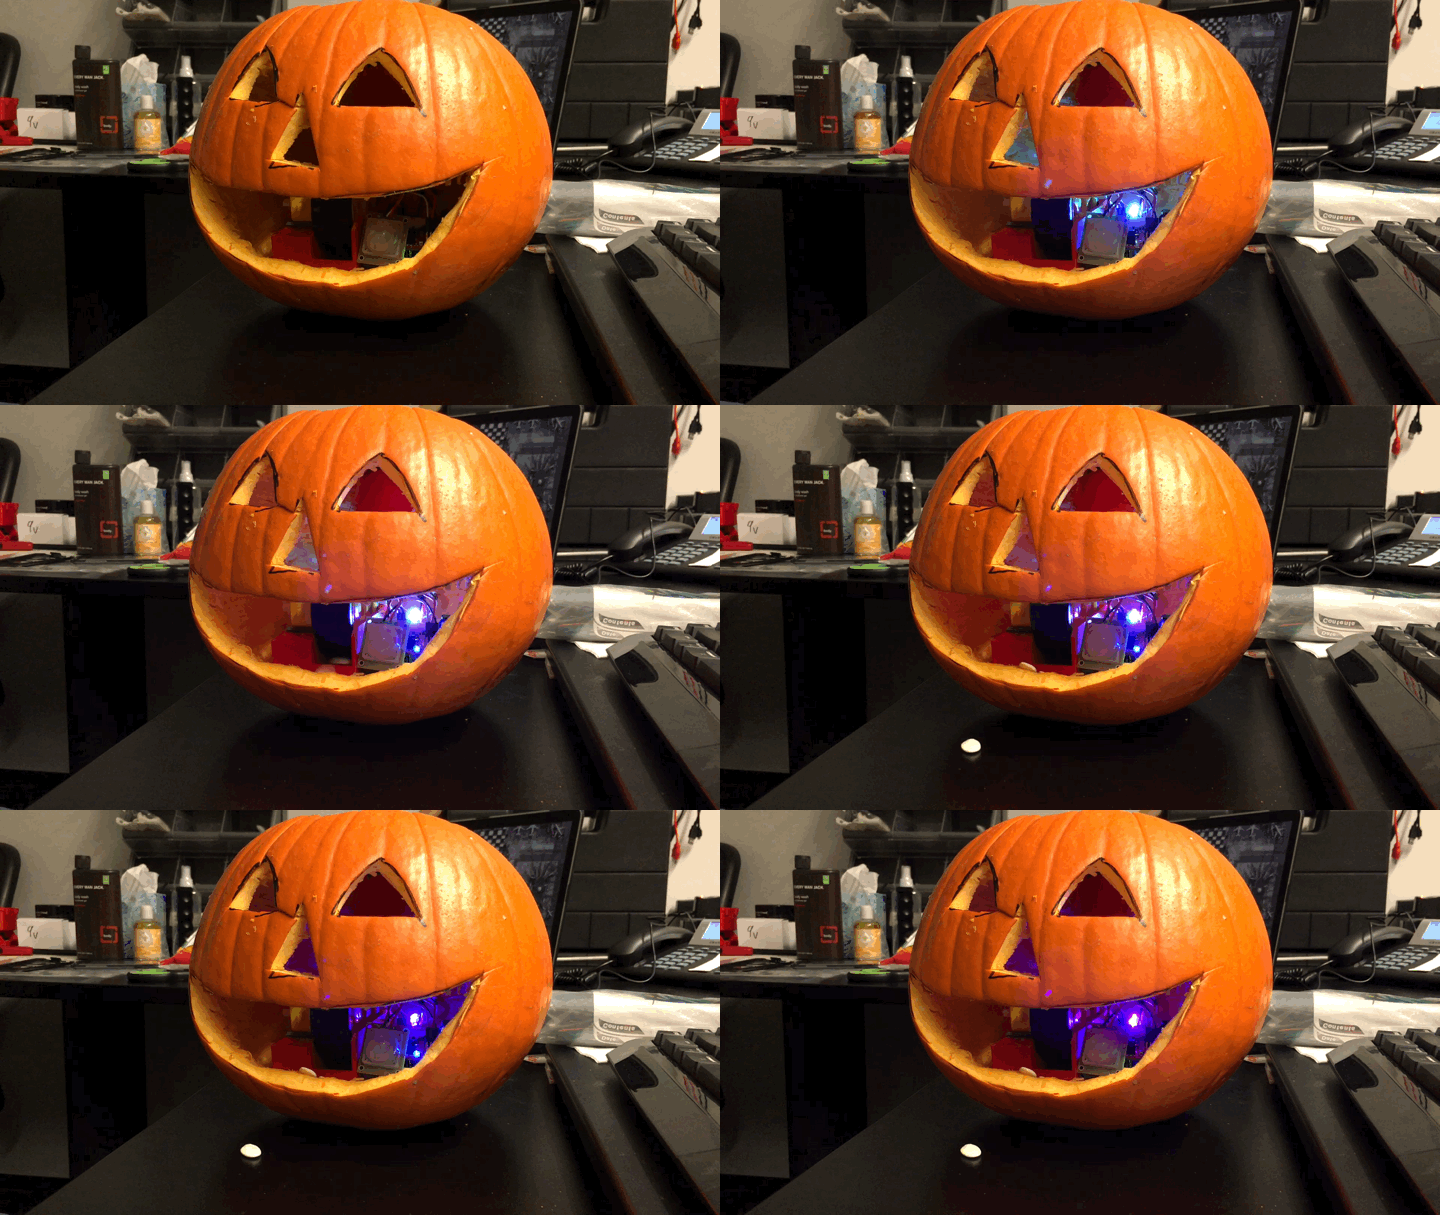
Once all together, the parts were placed into the jack-o'-lantern. In addition to standard jack-o'-lantern features, I had to cut two holes in the back of the pumpkin: one for power and one for the feeder. With everything in position and the LEDs cycling, the final product looked something like this:
Problems to Fix
As mentioned in a few spots, the final product wasn't without its problems. The wheel didn't seem to get enough grip, but a smaller gap was causing a lot more jams. So while the seeds are indeed launched, it looks like more of a burp rather than spitting. In the future, a softer rubber wheel might yield better results. The feeder jamming is another thing that comes up. I was hoping to have a hopper that would mean I could run it reliably until it was empty, but for now smaller amounts at a time will suffice. It's not the end of the world; I'll be out on the porch distributing candy every time it triggers anyway. Now, the goal here was shoot pumpkin seeds everywhere, but, man, does it shoot pumpkin seeds everywhere! Cleanup hasn't been the most fun in building this, and I want to go ahead and apologize to the cleaning staff at SparkFun who are more than likely going to be finding pumpkin seeds around my desk for weeks to come (I think I got most of them).
If you have any suggestions or recommendations for taking this project forward, please let me know in the comments.




Please share your 3D print file for those who do not have the skill to create on their own. I'm ready to order the parts but just need to know there is a file I can download!
Love the project. Would you share your 3D print design? I would love to print one up and get working on it. Great work!!
Instead of a tire, perhaps a flapped intake roller something like https://www.vexrobotics.com/vexedr/products/accessories/motion/intake-roller.html
with a dispensing mechanism above the flapped intake roller, you could spit a stream of stuff out...,
Guaaaauuuuuuuuuuuuuuuuuuuuu increbile, precioso :)
Looks like most commercial wheel type pitching machines on the web feed the ball at the top of the wheel and about 30 degrees back to pickup speed. If you modified your design to do the same, it might make the inconsistencies in seed thickness less of a problem since it wouldn't pinch (losing momentum) it against the delivery chute?
Running out of time? Just add a voice track that says, "I don't feel so good..." and "BLEARRGGHH!" Then the pumpkin spits out a bunch of seeds.
DONE.
I've thought about adding an MP3 Trigger to add a burp track. The motor noise isn't the most desirable and while the trajectory isn't what I was hoping for, it would be great as a burp or barf.
Alternate idea: Since the seeds aren't round and don't fire consistently, use small gumballs, RedHots or malted milk balls. Then your MP3 would say (in a Jack Nicholson impression), "You want candy, kid? I've got CANDY!" and fire a few treats at them.