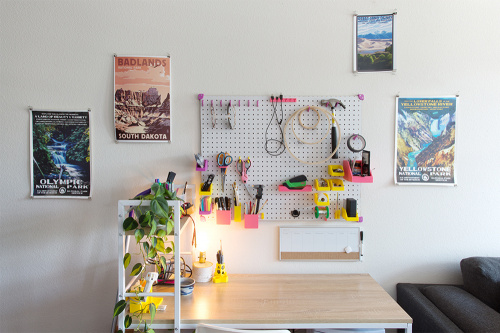
It recently became apparent to me that I was in dire need of an at-home work space, but I was reluctant to start putting it together. As a maker, I want my work space to be super functional like a workshop, but as a designer I want it to look good, too. I live in a small, one-bedroom apartment without much space for an office, so I needed to engineer this work space to be as organized and functional as possible. And of course - cost was a factor.
I was pretty uninspired by the pre-made pegboard and work space accessories I found online, and I definitely did not want to invest in design-y office accessories, so I decided to take advantage of my access to 3D printers and make my own. This is one of the most amazing things about 3D printers; if you can’t find what you want out in the world, you can just make it yourself. As someone who thinks about the best and worst uses of 3D printing quite a bit, I was super excited to pursue this project, and I was really pleased with how it all turned out!
After a quick search on Thingiverse, I found countless open source models for pegboards and desks. For better or worse, all of these free existing models meant I didn’t have to do any modeling on my own. I ordered some brightly colored ABS filament from Amazon to give the accessories more of a design feel. I made a big mistake when I was ordering filament though – our LulzBot printer takes 2.85-3mm filament, but two of the colors I ordered were actually 1.75mm. I had enough bright colors to still make the work space look good, but it was a good lesson to always double check the filament diameter. Learn from my mistakes!
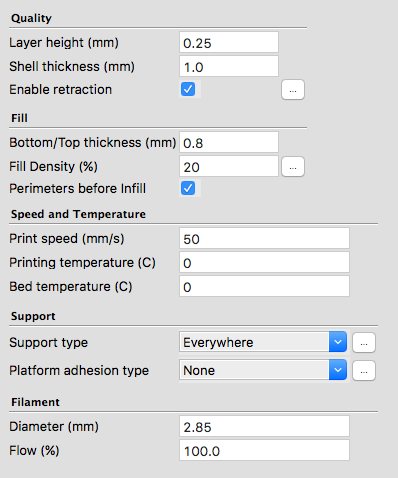
Before we jump into the different parts I ended up using, let’s talk about my printer and settings. For all of the below objects I was using a LulzBot Taz 5 with a single extruder and 2.85mm ABS filament. I prepared the downloaded .stl files in Cura with the following settings:
You may notice I did not set the printing or bed temperature in Cura. That’s because before I started the print, I would set the bed and nozzle heat using the ‘prepare for ABS’ option on the printer. Newer printers will include the heat-up time in the g-code, but our printer requires a manual pre-heat.
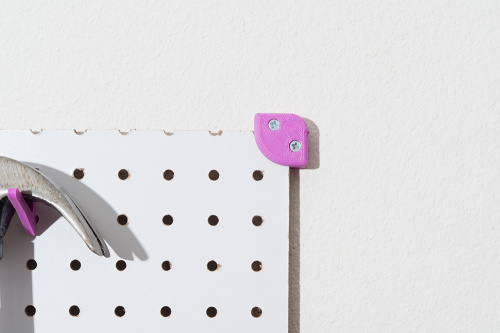
The first files I sent to the printer were the pegboard brackets for mounting my pegboard to the wall. I was a little skeptical that these would be strong enough to hold my pegboard and all the stuff I planned to put on it, but I was very wrong. These guys hold up my pegboard without any issues and don’t strain under the weight as I continue to add more to the board.
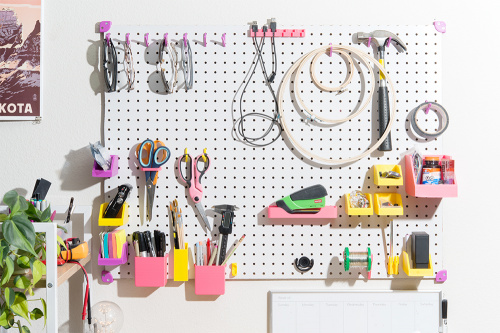
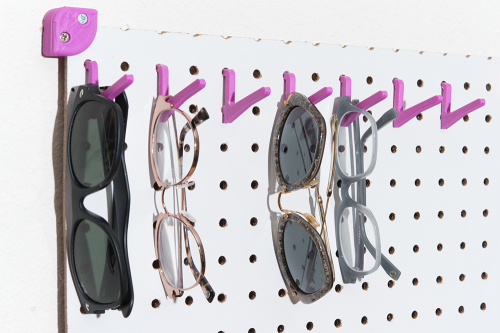
I found pegboard hook files on Thingiverse as well. These were a great addition to my pegboard because they can be used for so many different objects. I also printed a larger hook for a few bigger objects, like my embroidery hoops and painters tape. I found that I needed to do a little sanding on the actual pegs to get them to fit into my pegboard; that’s a common theme with these prints - sand, sand, sand. Often the print is a little too thick for the pegboard hole so it requires a little refining before use.
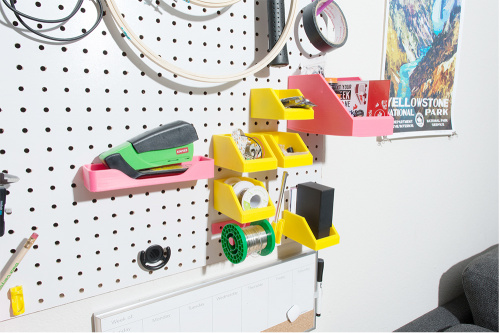
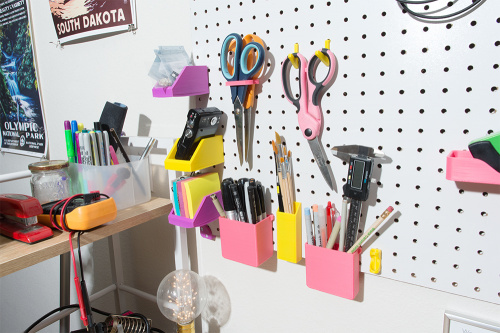
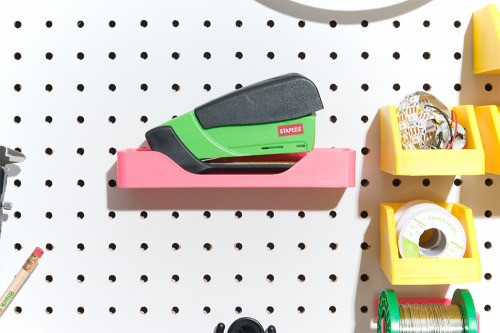
A major requirement for my workspace is to have plenty of storage, so I was happy to find bins, boxes and trays, all fitted for pegboards.
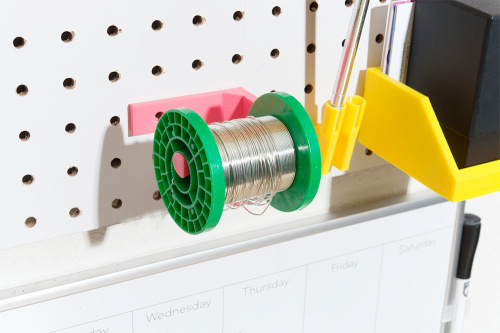
In the interest of making my workspace ready for DIY electronics, I wanted to find a decent solder spool dispenser.
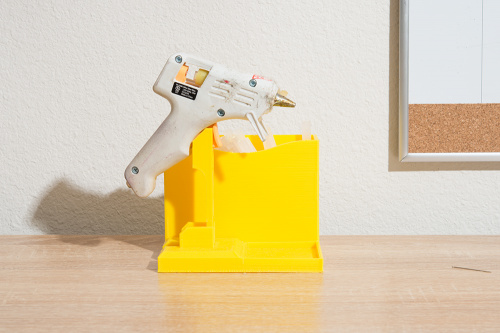
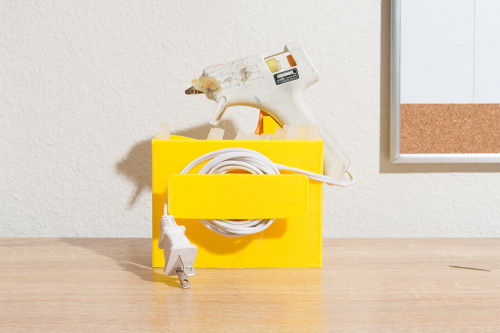
I also wanted somewhere to put my hot glue gun that kept the wire organized and out of the way, so I was very happy when this glue gun caddy came out well.
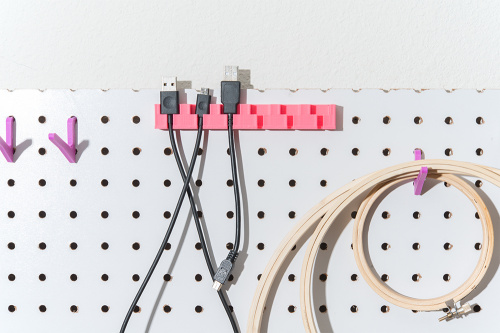
Another awesome find for the maker crowd is this USB Wire Holder, which allows me to keep my different wires organized.
While we have easy access to 3D printers here at SparkFun, we understand that not everyone has a printer at their disposal. Often, local libraries or makerspaces will have a 3D printer available. If not, there are services like Shapeways that will print products for you - at a cost of course! If you are thinking about investing in your own printer, check out SparkFun’s 3D printer offerings.


Gotta love the idea of a claw hammer for the home office. Lots of uses - back scratcher, bad dog pacifier, insect control, jar opener, wall-climbing tool, phone conversation emphasis point generator, emergency window opener (in case of fire), back-up TV remote control, light switch... The list goes on almost forever.
:-)
I've never needed a claw hammer for my home office more than I do now. Might even need 2.
Thanks for sharing the great read. This is something really unique I have read till now. As my per my views, having the home office decorated with such unique ideas, always make it look different and it becomes the centre of attraction for other guests. There are even more office decor ideas which one can look for. One of my most favourite is decorating the office space with trendy and stylish furniture. There are a number of genuine stores available today like Office Furniture Solutions, who provide a high-quality office furniture at an affordable price and helps in making the office space look much more elegant and different. This is one of the easiest ways to make the home office look different and unique, in my opinion.
Love the Ideas' will catch the same! Have seen some cute Office Decor Ideas on Pinterest
I'm really curious about how much the filament costs to print each of the items. Any idea?
Each spool cost me about 20-40 dollars, and I have plenty left over.
Great article, I'll print some of the things.
I recently made the same mistake ordering filament from Amazon but the opposite. I wanted 1.75mm and accidentally ordered 3mm. I blame it on Amazon's search function. No matter what you search, Amazon adds items that do not match your search criteria.
That's so true. definitely a good lesson to always triple check the specifications of the material!
Hi Feldi!
I'm very appreciative of your sharing your very impressive work on your workspace! Nice!
You've brought back some memories, such as needing to always be aware of critical specs. I'm reminded of things like DVD vs. BlueRay, or the older VHS vs. Beta, or when I was about your age, 8-track vs. cassette. Unfortunately, we all seem to have to get bit a few times by these "standards wars". Fortunately today we can often find someone who needs our "standards mistakes".
Another fond memory that you've brought back was my father's pegboards at work (he was an Aircraft Mechanic). He had the outlines of each tool painted on the pegboard -- so at a glance you could tell which tools were missing (it helped make sure nothing was accidentally left inside an airplane he was working on). (I'm sure that had I been a couple of years older when he set this up that I would have been the one doing most of the painting, but as it was, I was just too young to participate in that activity.)
Thanks for sharing those memories :) Glad you like what I did with the space.