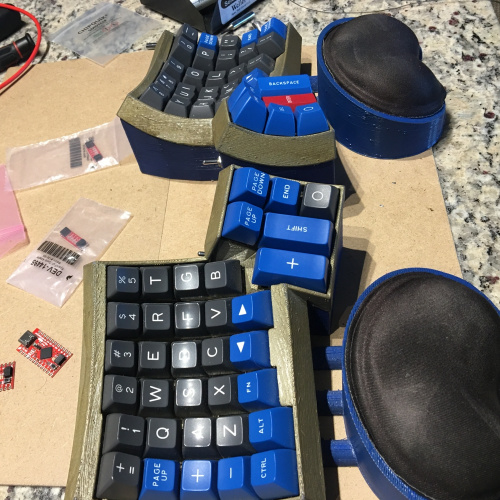
A few months before I came to work at SparkFun, I had built my very own split keyboard (in this case a modified Dactyl). The Dactyl is an open source, split ergonomic keyboard originally designed by Matt Adereth.
My very own dactyl!
The community has many variations and for mine I bought a 3D-printed case/kit from a kind fellow on /r/mechmarket who offers printing cases as service. The keyboard is powered by some awesome community driven open source firmware called QMK, which is running on a couple of Pro Micro clones.
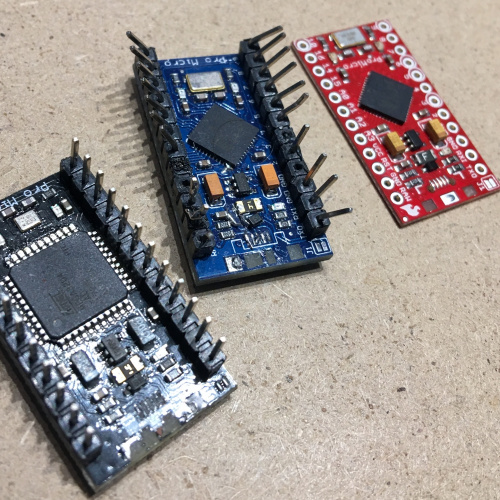
The Pro Micro is a common go-to microcontroller in the keyboard community due to its compact size, use of a ATmega 32u4 (which has a USB peripheral), and a lot of firmware support in the open source community. Unfortunately, both the clones and the official boards suffer from a known weak point: the surface mount micro-USB header. Despite my best efforts and gratuitous amounts of hot glue the left hand side of my keyboard finally gave and the connector broke off!
It wasn't the first!
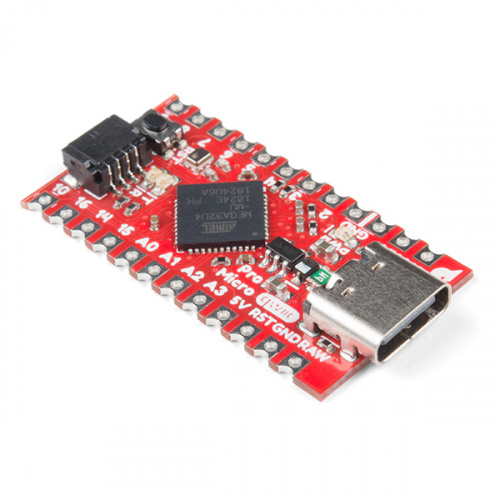
When something breaks, it’s a good excuse for an upgrade, right? Luckily, I knew SparkFun was coming out with a revision to the Pro Micro. It’s got USB-C connections with much sturdier through hole mounts, a Qwiic connector, USB breakout pads on the bottom and castellated edges. Of all these features I think the Qwiic connector sets it apart from alternatives out there, and it comes in very handy for this split keyboard build, since the halves should be able to communicate via I2C.
My goal was also to clean up some wiring and the guts since this project is all hand-wired. Explaining the key matrix is outside the scope of the project but if you are interested here is a write-up that would be much better than my explanation. There’s a lot of room for error and I was hoping a clean-up would be nice. I got my hands on a couple of the Pro Micro revisions, and since I also wanted to take advantage of the Qwiic ports, I grabbed a couple of our little Qwiic adapter boards while I was at it.
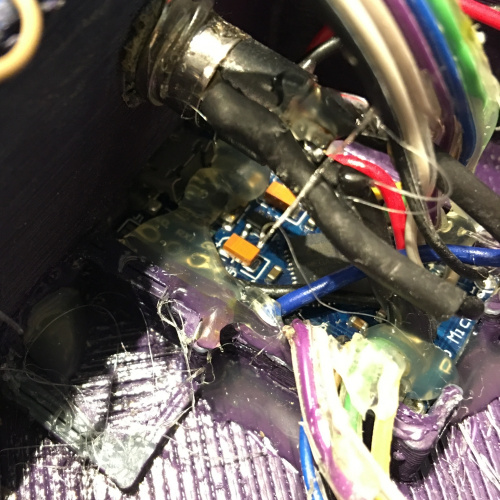
So.. Much... Glue...
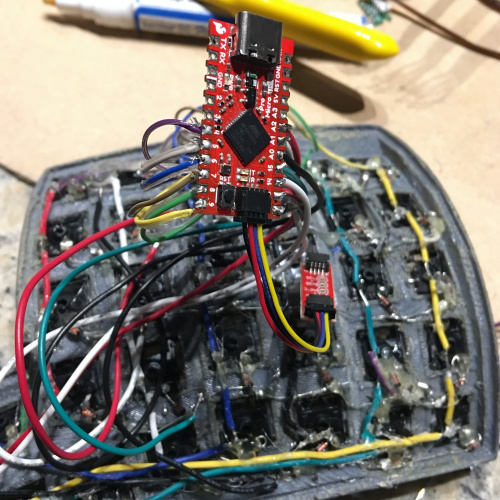
Turns out my gratuitous, nay, decadent amount of hot glue was not only unable to keep the micro-b connector on, it caused a bit of a speed bump as I had to wedge and pry and cut the old boards out of there. Desoldering the pin headers would also have taken a while, and since I had a reasonable amount of length I decided to snip 'em off instead. When it came to soldering the key matrix wires to the new Pro Micros, I was pleasantly surprised that the castellated edges came in handy for wrapping the leads around the edge of the board and having them solder nice and snug, both in the through-hole and on the outer edge.
I was happy with how well it soldered.
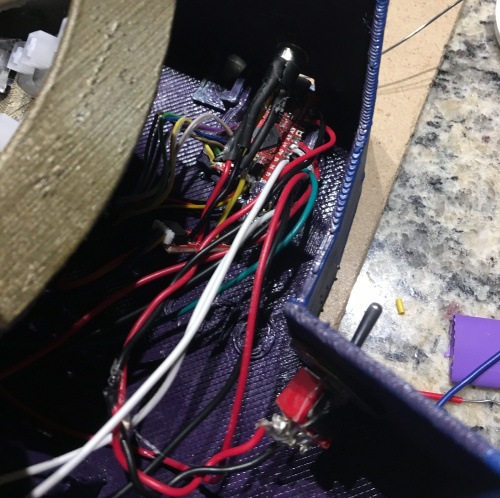
One of my original problems with the keyboard was being able to reprogram it while it was in the case. Although this new revision has a reset button, I still needed to solder the reset pins to some panel mount toggle switches so I could force them into bootloader mode from the outside of the case without having to open it up.
Still a bit messy looking but functional! You can see the toggle switch in the corner.
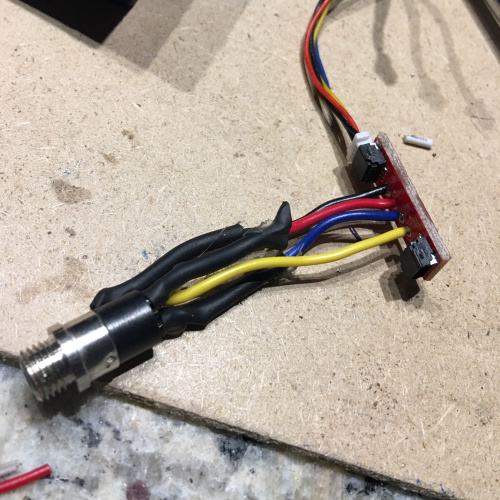
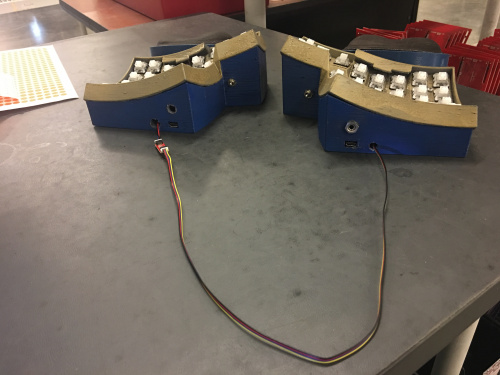
The next step was where I ran into some problems. When removing one of the panel mount TRRS jacks, some excessive wiggling caused a solder tab to come off. Without a replacement on hand I decided just to use my extra-extra-long Qwiic cable and connect it to the adapter on the other side of the board. It’s less than ideal, but should be good enough for testing and usage as long as I don’t abuse it.
I planned to use the breakouts to connect to a TRRS jack.
Before everything was put together, I rebuilt the firmware, re-flashed the Pro Micros and gave it a test. To my surprise it all worked off the bat! Usually something that goes wrong and… wait a minute, why isn’t the other half working?
Both sides worked when individually plugged into the computer via USB, but when only one side is plugged in, I had communication problems via the two halves. I did some snooping and realized I had forgotten to switch from serial to I2C before I built the firmware; after that change and some bus inspection I still wasn’t getting communication, but it was definitely sending info on the I2C bus, and that’s where I decided to call it for the weekend. Hopefully I can figure it out and get it working again.
Long, long cable
I’ll have to investigate further, but overall I was very happy with how easy a transition it was from the old Pro Micros to the new ones!


Interesting project, and nice writeup! Neat thing about DIY projects is the ability (and no fear) to do upgrades.
FWIW, there are micro-USB (as well as other sizes) connectors that have at least through-hole pins on the shield. These are MUCH more rugged, though they cost a little bit more, both for the parts and for the assembly, than the purely surface mount varieties. (I've yet to find a version of the JST-SH connecters, which are used for Qwiic, that have any through-hole connections.)
If you're designing a printed circuit board, calling out the connectors with through-hole will result in a much more durable product, but if that's not possible, it is possible to improve the strength of the purely surface mount ones by putting small vias through to a pad on the other side under the mounting pins. Make sure that the vias are NOT under solder masks, as filling them with solder will further improve the strength, though not as much as using actual through-hole connectors.
BTW, the Adafruit USB Micro-B Breakout uses a through-hole, so is my choice when I need to use a breakout board for Micro-B in a project.
Thank you! I definitely agree about USB's with tht anchor points.
In my experience in assembly and usage USB connectors with 4 points of through hole anchor tend to be pretty solid, all our new designs (both micro-b and usb-c) use the hybrid pth/smd style connectors (afaik) where the usb lines are surface mount but the case has through hole (usually flush with pcb and not protruding) style anchor points. Everything USB-C we use here at sparkfun has the anchor points. [Pololu]("https://www.pololu.com/product/2586"] make some nice Micro-B breakouts with a small footprint that I enjoy.
Nice project. Good luck with debugging the I2C - my experience is that I2C is a fragile communications protocol: its sometimes OK when talking between chips on a board (it's original design intent) but starts to have problems when the wires get longer. I've run into reliability problems with cables much shorter than what you are using. The capacitance of the wires is what kills you - the pull-ups can't recharge the line quickly enough to bring the line high before a bit time is over. Use a scope to look at the signals on each end, and I'll bet you see ugly falling edges and long rise times. You might get away with using the slowest tolerable clock speed and lowering the value of the pull-up resistors, but you've got an uphill battle ahead of you.
If it were my project, I would go with asynchronous serial between the boards, maybe even with a line driver/receiver setup.
I don't understand the fascination with I2C: it's OK for a simple "fun" project where reliability and longevity aren't important and where frequent resets to get things working are tolerable. But in my professional development projects where customers demand reliability, I will look for any other connection method first, and use I2C only if there is no other choice. And if I am forced to use I2C, I will make sure the device has a reset pin, or I will add a FET to allow cycling power to the chip so the software can automatically recover when (not if!) the I2C bus should lock up.
Thanks! I've heard stories of people doing irresponsibly long i2c lengths and getting away with it I could do software serial over the i2c pins and still be able to use the qwiic connector I suppose, that would be my next direction if i can't figure it out. The firmware has gone through some refactoring since I last put the keyboard together so I'll have to check. I appreciate the input!
great article
Hi, thanks for informative post! I bought Qwiic and hoping to make split keyboard connected each other with TRS cable. Mine is not build yet but in Japan there is discord channel Self-Made Keyboards in Japan group, and it reported I2C connection using TRS cable is not working. Looks like LED on slave side is flashing but key input does not send to Master side. He changed to regular micro-usb Pro Micro and it seems like working. Did you figure out how to fix this problem? If you could let me know that would be greatly appreciated!
I am a member of the Discord community in Japan who was facing this issue. After investigating this issue in our community, we found that it was similar to what happened when using Elite-C V3.
#define SPLIT_USB_DETECT
Adding this to config.h improved this problem. We hope you find this information helpful.
// This English text relies mostly on machine translation. It may be difficult to read, but I hope you understand it.
This seemed to fix my problem too! Very happy to have my dactyl back in action!