Today we have two tutorials to get your week off on the right foot. First we have a tutorial on Using an Arduino to Program an AVR. The second tutorial goes through Controlling RGB Matrices with Arduino.
Many of the products SparkFun sells use an AVR, like an ATmega168 or an ATmega328, as a microprocessor. We like these processors for many reasons, one of which is that they are used in Arduino. Of course, just because a board features an ATmega, does not mean it is an Arduino. Fortunately, it does mean that the same code you use on your Arduino can be used on a standalone ATmega! This tutorial will show you how you can use an Arduino to program your standalone ATmegas!
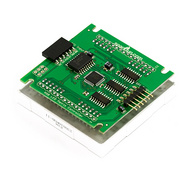
Our RGB LED Matrices have been used in some awesome projects to date, but we think we have really only seen the tip of the iceberg. If you are interested in using these boards, but have been turned away because of the task of linking multiple boards together, we have the perfect tutorial! This tutorial explores a new Arduino library we've created that will allow you to easily link multiple RGB Matrices together! We explain the functions of the library and how to use it to make your own matrix-based display!


For those interested, I've been working on a similar LED matrix project with a radically different design that will result in a much cheaper backpack driven LED matrix. Currently designing around the 3mm red/green matrix, and the price in parts is around $8-10 including the matrix itself.
Have a look:
http://www.billporter.info/?p=374
I plan on scaling up to the large RGB matrix when I finish, and open-sourcing the design; maybe even sell kits if there is enough interest.
That's a good idea. Stomaching $480 just to print out an 8-character "Sparkfun" is a bit on the expensive side.
Thank you for the ISP tutorial. I've looked into this a few times a while back (having AVRs and no programmer), but instructions typically involved buying a shield to do it, or a very old, hacked sketch. This is just what I was looking for. Now to go make use of these spare AVRs.
"ATmega328, as a microprocessor"
actually its a microcontroller
http://en.wikipedia.org/wiki/Microcontroller
^_^
somehow I agree whit you :)
a micro-controller is a base chip that has all major components integrated (flash, ram, cpu, etc.)
a microprocessor is a chip that is just the CPU and requires components like the flash, ram that aren't included in the chip itself :D
thats what I think... not sure if this is true but I kinda think thats the difference :D
Your idea of a microcontroller is correct. CPU, Control, RAM, ROM, and peripherals are integrated into one chip.
And then there's SoC (System on a Chip) in which CPU, Control, peripherals are included on chip. RAM and ROM are usually present on the chip, however in small amounts. Consequently SoC require external memories to be actually useful.
And finally, the last device is the Microprocessor. Microprocessors have no ROM or peripherals except for memory controllers, although they do have on-chip RAM in the form of registers and cache. Most Microprocessors can run with just a ROM and clock connected.
-MattTheGeek
I check Sparkfun at least once a day. I am amazed at how often you update your site with actually useful content.
Is there an award for the best store on the internet? If there is, you guys win hands down.
Thanks. It's just a lot of work and a lot of typos sometimes.
Will v5 firmware source code be posted? :D
Thx