It's been a long week! Tuesday SparkFun made an appearance at the first ever Boulder is for Robots meeting. You can see a small recap here on Sphero's website. We gave a small little demo of the SCORPION. Thanks to everyone that came and supported local robotics! We're always excited to see new hackerspaces as well as new projects. Thanks again to Orbotix and everyone else for setting up the event.
We don't have a ton of new stuff this week, but there are some cool products in the mix. Let's have a look at the whole list.
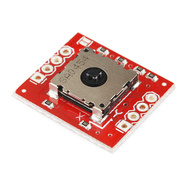
Joysticks work as great input devices because you can not only use the button for selection, but you have both and x and y axis for movement and selection as well. The N35P112 IC is interesting because it uses the magical properties of magnets and hall effect sensors to output the movement of the joystick nub over I2C. Since there are no real mechanical parts, they don't wear out quite as easily. We even have some example code so you can get up and running quickly.
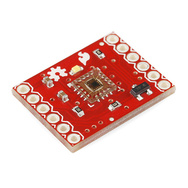
Just because some people are color-blind doesn't mean your next project has to be. The HDJD-S822 Color Sensor Breakout allows you to determine by converting light into 3 analog outputs. Read these values into a microcontroller and you can figure out what color the board is seeing. Dave, this one's for you buddy. ;-)
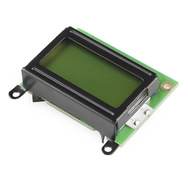
A couple weeks ago we came out with the Mr. Roboto kit and several of you suggested that we carry the LCD screen separately. Who are we to deny our customers!? So, here it is, the 8x2 character LCD that is used in the kit. It's easily controlled by an Arduino using the example code in the Arduino IDE and since it shares the same controller as our other basic character LCDs, there's plenty of examples out there.
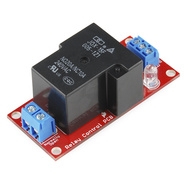
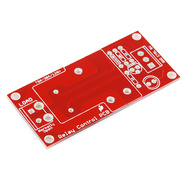
We have a new revision of the Beefcake Relay Control Kit. This new version fixes some of the layout issues and cleans up the whole design a bit. I still wouldn't pump a full 20 amps worth of current through it, but it's a lot better than before.
If you don't want or need the whole kit, we also sell the PCB separately so you can add your own relay. I don't think there's a whole lot else to say about that.
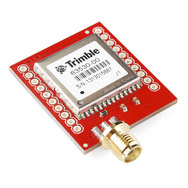
We also have a new version of the Copernicus II DIP Module. This version has unpopulated headers so you can add your own wires or headers instead of having to remove the ones we install. We just wanted to give you the option to use it the way YOU want and not be forced to use the headers that were installed in the last version.
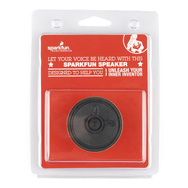
We also have a retail product for this week. We have a lot of audio-related retail products, so we figured it would be a good idea to include a speaker so you don't just have to use your imagination. We have the 8 ohm speaker now packaged for retail shelves to go along with all the other retail products.
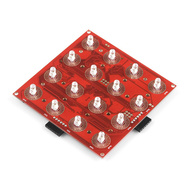
And lastly, we have a new revision to an older product. The Button Pad Controller SPI gets a red board and some cleaned up footprints and such. Overall, it's the same product, but it went through a revision or two which makes it a bit easier to assemble in-house.
So, there are the products for this week. I don't have a whole lot else to talk about so I'll just leave you with a useless fact. American Airlines saved $40,000 in 1987 by eliminating one olive from each salad served in first class. See you next week!


Are you hoping you can save $40,000 by removing the headers from the Copernicus II DIP Module?
Adding headers is easy. Removing headers is a pain.
Yep, and that's really what this revision was about :]
It's not really about saving money (although it does take less time to build them), but more about locking people into using the headers. People continually request that we do NOT populate headers.
A fair amount of other places at least include the headers separately when they do this, if their intention really was convenience and not something else.
Also, soldering on headers/wires/etc. isn't that hard ;)
(but it is a barrier for some people)
Sounds like a business opportunity - isolderyourheaders.com !
I lovelovelove soldering headers.
Depending on your project, headers might be needed on a different side, or you might want to use 90 degrees headers, some people might need to solder wires directly because of thickness requirements, etc.
So yeah, include straight headers if you want to, but don't solder them to the PCBs.
I've noticed that quite a few of the Sparkfun break-out boards don't have screw holes in them. This week, it's your new joystick and your new color sensor breakouts that lack screw holes. The lack of screw holes makes it a pain to mount stuff in an enclosure.
Is there a reason that you leave them out sometimes? My vote is to always have some screw holes
Note: you only need 6 data lines (instead of the 11 mentioned in the video) to drive a parallel LCD using Arduino: the Arduino LiquidCrystal library can drive it in 4-bit mode and you generally don't need to read data back from the display (so R/W can be tied to GND).
You guys totally need a sparkfun jingle to play at the end of each video when the logo is showing
I'll volunteer Rob and Evan to sing "sparkfun electronics doop de doop" in harmony
You talked about recycling etc in a previous post, just like to give the opinion that I think you have excess packaging on that 8 Ohm speaker.
Dick Smith in NZ used to sell them in a small cardboard box. Easily recyclable\degradable etc.
Excess packaging is always a good waste of resources.
I think their retail packaging has a standard size.
"Start switching some high current loads." ha!
Hey Robert, someone posted this video in a photography group I'm in. Skip ahead till time 5:30 when he breaks out the EL Wire. He uses it it capture a really cool photo. You guys have a lot of cool lights to use like that.
http://www.youtube.com/watch?feature=player_embedded&v=kA6axtIEzs0
oh, that guy! i've seen several of his videos. I'm not a big fan of light painting, but he does some cool stuff.
We'll stick with the thumb slide joystick & save $25.
We'll read the product page on which an almost duplicate comment is posted and save you 0.3592 calories of finger energy for more worthwhile typing.
If anyone actually makes a colorimeter with the HDJD-S822 Color Sensor Breakout, I would really like to see a tutorial posted.
For some reason, I am really digging an 8 ohm speaker in a retail package. I might pick one up although I don't even need it.
I noticed your comment on photography and potentially building an open hardware colorimeter with the color sensor module. However, Richard Hughes is already working on an open hardware colorimeter (the "ColorHug"):
http://www.hughski.com/
neat, I'll have to check that out, thanks!
Is it just me or is the audio/video sync usually off on these videos?
Yeah, it's just you.
I had one last week that was out of sync, but it was after I changed to hi-res. I closed the window and re-opened and it was back in sync again. I must admit is was kind of funny seeing Robert out of sync, reminded me of those old crappy B grade kung-fu movies.
I think it's just you. I haven't seen one that's off for me yet and I watch them at home usually the night before they air (and at work when we shoot).
Speaking of the robots the hackerspace did, Texas A&M used FPGAs to design a line following robot. They only had 3 weeks to build it. Impressive.
I recommend hobbyists to read up on digital logic designs and low level hardware side of electronics design. It can get complicated really quick, but the knowledge is so useful, and can help you out in your next project or job!
Grainger.com carries a bunch of low voltage DC driven High current Contactors. These are used mainly in industrial HVAC applications. i have used them for control of real high current loads, Such as 3-5 HP AC motors. They typically need a minimum 24v either AC or DC to drive them. But I have seen them go as low as 12v DC.