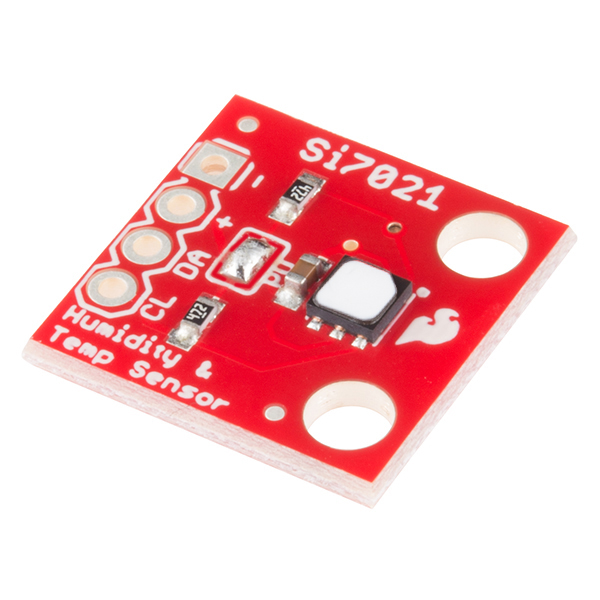
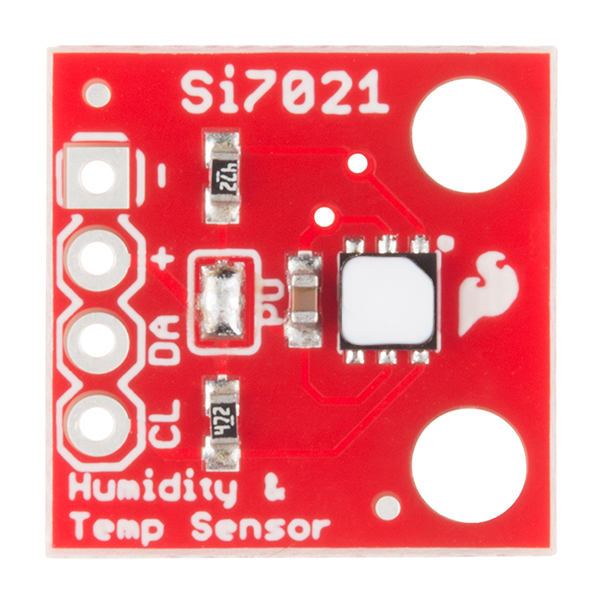
SparkFun Humidity and Temperature Sensor Breakout - Si7021
The Si7021 is a low-cost, easy-to-use, highly accurate, digital humidity and temperature sensor. This sensor is ideal for environmental sensing and data logging and perfect for build a weather stations or humidor control system. All you need are two lines for I2C communication, and you’ll have relative humidity readings and very accurate temperature readings as a bonus!
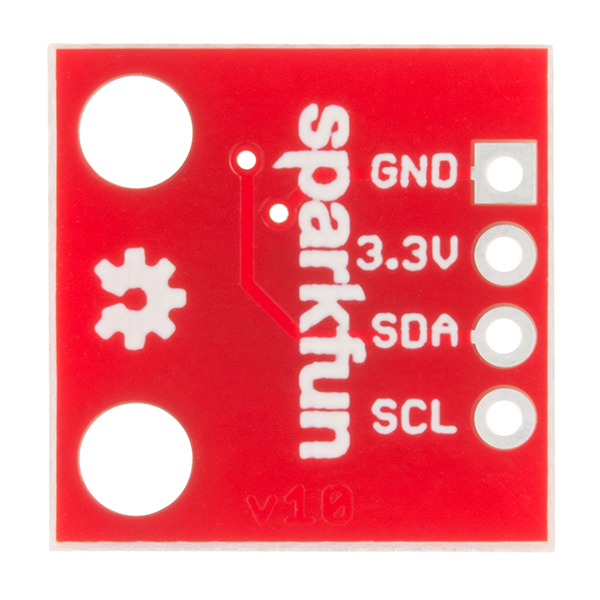
There are only four pins that need to be hooked up in order to start using this sensor in a project. One for VCC, one for GND, and two data lines for I2C communication. This breakout board has built-in 4.7KΩ pullup resistors for I2C communications. If you’re hooking up multiple I2C devices on the same bus, you may want to disable these resistors.
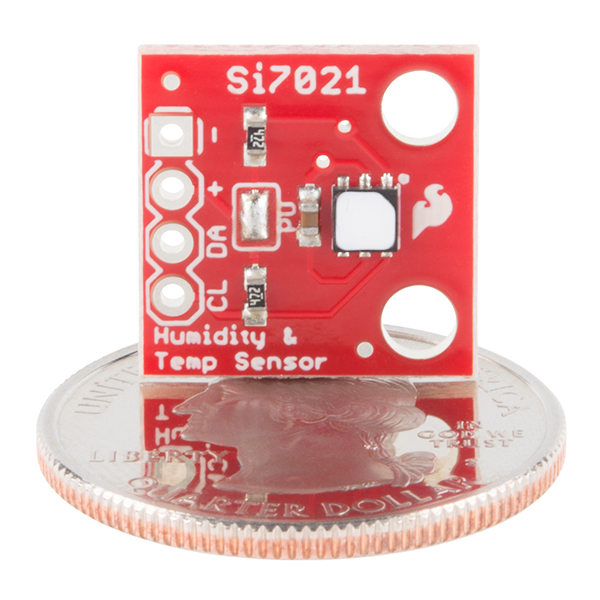
- 0.6" x 0.6"
- Schematic
- Eagle Files
- Datasheet (Si7021-A20)
- Hookup Guide
- GitHub (Design Files)
- GitHub (Library)
SparkFun Humidity and Temperature Sensor Breakout - Si7021 Product Help and Resources
Si7021 Humidity and Temperature Sensor Hookup Guide
May 5, 2016
The Si7021 humidity and temperature sensor is an easy to use, digital, low-cost sensor to aid you in all your environment sensing needs.
Comments
Looking for answers to technical questions?
We welcome your comments and suggestions below. However, if you are looking for solutions to technical questions please see our Technical Assistance page.
Customer Reviews
4.7 out of 5
Based on 13 ratings:
2 of 2 found this helpful:
Tiny, nice and simple
Very easy setup, controlled by a Raspberry Pi 2 with CE's Python script for this module: https://github.com/ControlEverythingCommunity/SI7021/blob/master/Python/SI7021.py
Highly recommended for temp and humidity in one package.
2 of 2 found this helpful:
Working well
This hooked up to the weather station I built easily. Just pulled in the libraries, added a few calls and cal factors and my station now has humidity and dew point stats. Weather Underground quality checkers gave my homemade station the gold seal once I added this sensor. Easy to use and reports accurately.
Really Good Sensor
I spent 20 minutes (figuratively) pulling out my hair trying to get this thing connected to my Arduino. Then I realized: I had not physically connected all four jumper wires!
In all seriousness, this sensor works very well and I have had no real problems with it. It's connected to my ESP8266 Thing Dev Board for logging data to ThingSpeak.
Easy to use, high-resolution, good accuracy
Got it working quickly, integrated it into a wireless outdoor reporting station. Sits next to a DHT-11 that quit measuring humidity in a matter of weeks after deployment (the second DHT-11 to fail quickly -- a DHT-22 (less precise) lasted a year or so in the same place). I'm hoping that the PTFE cover over the Si7021 helps it survive a long time in our tough environment - it has to survive pollen and 100% humidity and sprinkler mist here in Florida.
The only negative was mounting. I soldered header pins with the short side on the sensor side, then trimmed them further, drilled a small hole in the plastic case for the sensor to protrude into (recessed just below the outer surface), and mounted it with the sensor into the hole and just put a big piece of tape over the board to hold it in position. The case is mounted with the sensor facing down to protect it from dust and droplets. I might hot-glue some sort of screen over it to keep bugs out, but it's ok for now. We'll see how long it lasts.
Works great
I have several of these boards. They just work, first time every time. I2C communication is simple and reliable.
Worked perfectly with Z-Uno
Worked almost out of the box using an Si7021 Arduino library compiled for the Z-Wave.me Z-Uno. There was a compile error (Z-uno compiler bug, I think) that required a workaround. Much easier that I expected.
works as advertized
It took some doing to verify the accuracy of the two sensors I purchased. Turns out it's not easy to accurately measure RH. Eventually I was able to use a table salt mixture in a small plastic container and both sensors read within 2 percentage points of the 75.5% theoretical value. I also built a desktop psychrometer that calculates RH and DP from wet bulb temp, dry bulb temp and atmospheric pressure. It took some work to get the wet bulb to cool properly but again both sensors were within tolerance at 25% RH. My next project is building a cooled mirror DP sensor using a Peltier device to get one more independent calibration check but I'm pretty sure it will confirm what I've seen so far.
Top notch - simple, and always work
I have used a TON of these sensors and I've never had a problem with them. Also, the price is exceedingly reasonable. I actually looked into building my own recently, but for the tiny margin of savings I would get, it's not nearly worth the investment.
Very happy- price, performance, ease of use.
(Since writing what's below, which I still stand behind, I've added...
http://sheepdogguides.com/arduino/aht4humidSi7021.htm
Liking this very much. And at this price, giving it a try is risking little.
A few "pay attentions" to notice... not "problems", unless you fail to notice..
a) 3v3 only... but I'm told it plays nicely via a level shifter if you want to use a 5v controller
b) Do not remove "the white thing" covering the sensor... little (3mm) black square. Notes about this ARE present in the Sparkfun hookup guide... if you read it!
c) You can only have one of these on a given I2C string. This is due to the address being hardcoded (0x40) into the chip. Not Sparkfun's fault!
Don't, by the way, be scared by the I2C. I know little about it, but had no trouble following the Sparkfun hookup guide.
=== It is early days... I haven't soak tested it yet... but I've not noticed a bad read while working up the following.
The library provided by Sparkfun... and there are several out there, use the SPARKFUN library if you want their (and my) examples to work exactly as presented.... is excellent. Easy to use, no mysteries or anything arcane. Have a look at the sensor's datasheet if you think you want to write your own code for what the library does... so easily... for you. A lot of work went into that. Buy a sensor, try it, if only to say "thank you", and encourage them to do more such work for us.
=== I'm using mine with an ESP8266... wonderful little things, themselves, by the way. (ESP8266 programs with the Arduino IDE.
I've created a little webserver. When I access it, I get readings from the sensor in a human readable form "on the surface", and in a computer friendly form "inside" the page.
Make you laugh? I did a bunch of work, meant to pave the way for this review... then realized I was working with the wrong sensor! But the sensor specific stuff is trivial. I will eventually produce a Si7041- specific version of the essay. The $16 webserver to provide sensor readings" essay is at...
http://sheepdogguides.com/arduino/aht5env-mon-ws.htm
... and you can see the ESP8266 webserver in action with...
http://mon277rr.dyndns.org:1206/
(That one has a few rough edges, and lacks the embedded "computer friendly" version of the readings. I have a better one up and running... but haven't time just now to fix the NAT settings for it.)
==== But that's just the beginning...
Once that's in place, you can create a program to read the "sensor readings server" automatically from time to time, log the data, present it on a graph. (Proof of concept program running as I write this.)
And when THAT's done, it can save the graph as a jpg from time to time, and another webserver can serve it up... much as...
http://mon277rr.dyndns.org
... serves some of what you see there.
==== So many projects possible with the stuff from Sparkfun. (And so little time)
(I like this little sensor so much that I re-wrote the first 3/4s of this again after losing it to a silly mistake. Sigh.)
=== (And I've ALSO written... http://sheepdogguides.com/arduino/aht5env-mon-si7021.htm The comment at the top about it being a "poor page" is about the organization of the page. It DOES contain information which I hope you'll think useful. (Giveing the page a Facebook like would be a way to say, "yes, useful!" (hint, hint!))
nice chip
Works well with my arduino uno, but I can't get it to work with my raspberry pi. People on the chat rooms say this is because the raspberry can't handle "clock stretching", which this chip apparently does to the scl. I've tried compiling a c program I found, but not being a c programmer, there are errors it is hanging up on I can't fix. I've ordered the nRN52840 express. This processor is 3.5 volt and will use the arduino IDE or circuitpython, so I hope I can meet my needs.
Exacty as Advertised
Again, Sparkfun delivered on their promise. I've never used a Sparkfun product that wasn't honestly advertised and this is no exception. Humidity and Temperature hover within tolerance of what my Nest claims. It was super easy to code for (I used C#) and get readings out of. Documentation is plentiful, product is tiny, love this purchase. It is exactly what I was looking for.
Does what I would expect
I needed a fast temperature digital sensor through GPIO that could be used to prevent the bimetal overtemperature contact opening a heater circuit and then waiting a few minutes for it too close ... losing all the accumulated hor air. The DHT and one wire sensors were slower and less reliable.
It would be interesting to see would happen on a smaller thinner less massive circuit board. Very reliable so far. Perhaps as fast as or faster than a type-K thermocouple working through an A-D converter?


Is this known to work with a Redboard Nano? Works fine with an ESP32 dev kit, but the Nano says No Devices Found. I am using the Qwiic connector, but I also tried pins 6/7 (Wire1). I am using the Arduino IDE version 1.8.16 and the example program associated with this device. Thanks!
It looks like the library has a function for turning on the internal heater, but not for setting the heater current?
Dear all, where I can find the python code for raspberry? Best
This question goes actually to all similar breakout boards that you sell. What is the purpose of the mounting holes? OK, I understand it is for mounting the board to the main PCB :-) but how are we supposed to do it?
If we are to use the through-hole header, then the breakout will be above the main PCB by some mm. In that case what is the purpose of the mounting holes?
My plan is to integrate this breakout board in a PCB of my own. How should I connect the two boards? Is it possible to solder your board on mine without a through-hole header?
If you're using a male header to connect one board to another you can skip the mounting holes. The holes are there in case you use wires and need to hold the board in place, say, inside an enclosure a few inches away from your main board.
With many of my projects I'll use the 4-pin JST wire harnesses. The connector gets soldered to my main board and the wire get soldered into the appropriate pins on the peripheral.
I have a Si7021 hooked up to my homebuilt weather station. In the evening as dew starts rising, the reported humidity rises past 100% and swings negative.
Look here.
Any idea why this would be happening?
I'm going to check against another sensor, in case it's just a linear offset. The datasheet mentions erratic behavior at very high humidity or if it comes in contact with liquid water. So I'm going to do a better job protecting the sensor also.
If I remember correctly the library outputs 999 or 998 in the case of an error. I'm guessing the I2C bus is borking for some reason and it's reporting 998 (0x3E6), which if it is treated as a signed 8-bit, this becomes 0xE6 which is -26. I'm about 30% confident this is your problem. Hard to say without your code.
There might be a weird bug with the library or sensor if the humidity passes the 100% point. Not sure. Please let us know what you find out!
I’ve seen the 999 or 998 issue with wires breaking on my (ahem) prototype I2C connection. This is different. The numbers change, not always 999. Plus they seem realistic, just wrapped around past 100. The temperature values agree with the temperature from a BMP180 barometer right next to the Si7021.
I haven’t dried out the station yet. It rained heavily yesterday.
Looks like it was pilot error. TL;DR: unscrambling the bytes from the sensor was being done incorrectly.
I actually stripped the Si7021 code out of the library to attempt saving some space in the Arduino code. I think there are errors in the code, or my fork of it. I fixed some things, now here is my current routine to read the Si7021, which aligns a bit better with the data sheet equations:
and here is output comparing HTU21D and Si7021 readings
I thought "less than" that was a bit strange, but it's copied directly from the library.
It looks like the culprit was code.
New code uploaded in to the station, and humidity values are now greater than 0% and less than 100%!
Click here to see.
Where did you get your library? I don't see it on our Si7021 lib or on our HTU21D lib. Just want to be sure we're not pushing bad code.
Hmm, I thought it was yours, but I just checked what you have on github, and that's a lot nicer. Only thing I see is "makeMeasurment" (sic) and some other words in the comments are spelled incorrectly. :)
Ah, it's from here.
Jeez, did you have to swap the +/- pins from the HTU21 breakout? Otherwise, seems like a good and cheaper replacement. Since it has the PTFE cover, I think the "Note:" is not required?
I was just going to ask if it was a drop-in replacement for the HTU21, but I guess the answer is no. :-(
Sorry for the design change - we've been migrating all our I2C designs to a standard pinout (GND, VCC, SDA, SCL) since a few years ago. The HTU21D was one of the oldies that had (my mistake) the old pinout. This board has the correction.
Good point about the note. I'll get it fixed.
I'm trying to hook this up and I've tried it on a couple of different boards; Nano and and Uno. They both display the same thing serial monitor.
Am I hooking it up wrong? Bad board? Any thoughts on how to get it up and running?
Thanks Rich
Hi, what was the reason for replacing the HTU21D breakout with this si7021 board? What are the differences? A quick look at the datasheets indicate the HTU21D is more a cure and consumes less power than the si7021. Please correct me if I'm wrong. I'm guessing these sensors are related since the similar part number and seem pinout compatible. Will the same software that worked with HTU21D work with si7021? Thanks, keep up the good work :-)
Primary reason we moved towards the Si7021 was to get the PTFE filter. We found the HTU21D did fine indoors but many of our customers were using them in the field (and Hawaii) and needed the filter to protect the sensor from damage.
This seems promising. After going through 3 or 4 HTU21D's I had given up on the humidity measurement since it only lasted about 6months before starting to go nuts. Do we know if this sensor is more stable in situations with persistently high humidity than the HTU21D? I note that the datasheet for this one also says "Prolonged operation beyond [80% RH] may result in a shift of sensor reading..." which is similar to what the HTU21D datasheet said.