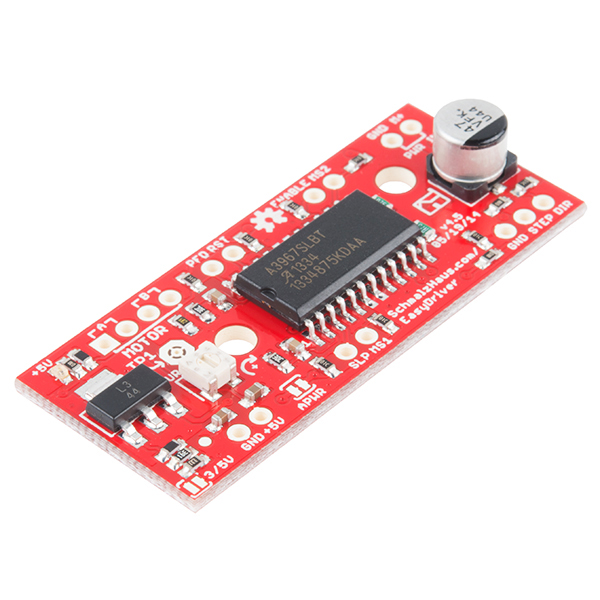
EasyDriver - Stepper Motor Driver
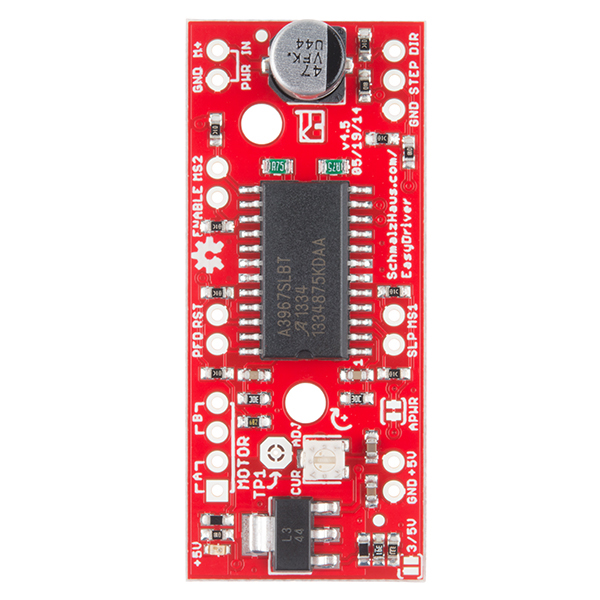
The EasyDriver is a simple to use stepper motor driver, compatible with anything that can output a digital 0 to 5V pulse (or 0 to 3.3V pulse if you solder SJ2 closed on the EasyDriver). The EasyDriver requires a 6V to 30V supply to power the motor and can power any voltage of stepper motor. The EasyDriver has an on board voltage regulator for the digital interface that can be set to 5V or 3.3V. Connect a 4-wire stepper motor and a microcontroller and you've got precision motor control! EasyDriver drives bi-polar motors, and motors wired as bi-polar. I.e. 4,6, or 8 wire stepper motors.
This EasyDriver V4.5 has been co-designed with Brian Schmalz. It provides much more flexibility and control over your stepper motor, when compared to older versions. The microstep select (MS1 and MS2) pins of the A3967 are broken out allowing adjustments to the microstepping resolution. The sleep and enable pins are also broken out for further control.
Note: Do not connect or disconnect a motor while the driver is energized. This will cause permanent damage to the A3967 IC.
Note: This product is a collaboration with Brian Schmalz. A portion of each sales goes back to them for product support and continued development.
- A3967 Microstepping Driver
- MS1 and MS2 pins broken out to change microstepping resolution to full, half, quarter and eighth steps (defaults to eighth)
- Compatible with 4, 6, and 8 wire stepper motors of any voltage
- Adjustable current control from 150mA/phase to 700mA/phase
- Power supply range from 6V to 30V. The higher the voltage, the higher the torque at high speeds
- Schematic
- Eagle Files
- Hookup Guide
- Datasheet (A3967)
- EasyDriver Website
- Example Arduino Tutorial in Portuguese
- GitHub
EasyDriver - Stepper Motor Driver Product Help and Resources
Easy Driver Hook-up Guide
May 5, 2015
Get started using the SparkFun Easy Driver for those project that need a little motion.
Core Skill: Soldering
This skill defines how difficult the soldering is on a particular product. It might be a couple simple solder joints, or require special reflow tools.
Skill Level: Noob - Some basic soldering is required, but it is limited to a just a few pins, basic through-hole soldering, and couple (if any) polarized components. A basic soldering iron is all you should need.
See all skill levels
Core Skill: Robotics
This skill concerns mechanical and robotics knowledge. You may need to know how mechanical parts interact, how motors work, or how to use motor drivers and controllers.
Skill Level: Competent - You may need an understanding of servo motors and how to drive them. Additionally, you may need some fundamental understanding of motor controllers.
See all skill levels
Core Skill: Programming
If a board needs code or communicates somehow, you're going to need to know how to program or interface with it. The programming skill is all about communication and code.
Skill Level: Competent - The toolchain for programming is a bit more complex and will examples may not be explicitly provided for you. You will be required to have a fundamental knowledge of programming and be required to provide your own code. You may need to modify existing libraries or code to work with your specific hardware. Sensor and hardware interfaces will be SPI or I2C.
See all skill levels
Core Skill: Electrical Prototyping
If it requires power, you need to know how much, what all the pins do, and how to hook it up. You may need to reference datasheets, schematics, and know the ins and outs of electronics.
Skill Level: Rookie - You may be required to know a bit more about the component, such as orientation, or how to hook it up, in addition to power requirements. You will need to understand polarized components.
See all skill levels
Comments
Looking for answers to technical questions?
We welcome your comments and suggestions below. However, if you are looking for solutions to technical questions please see our Technical Assistance page.
Customer Reviews
4.2 out of 5
Based on 39 ratings:
1 of 1 found this helpful:
Motor control made super easy!
I got 18 of these to drive a bunch of motors (ROB-09238) at once. Each one worked flawlessly and handled the power without doing any adjustment. Programming was a snap using the AccelStepper library. Used a Mega 2560 to control the step and direction logic.
There was a catastrophe: three of my boards got clipped by an MDF panel and the capacitors were ripped right out. I replaced the caps with typical polar caps (the tallish cans) and the boards are running just fine again.
1 of 1 found this helpful:
Handy Little Driver
Honestly, it did not work for the project I intended. Lack of having the flexibility to choose the + or - common for my signals was a problem. However I am not disappointed, I will be able to design future projects around that drawback. Overall, worth the price.
1 of 1 found this helpful:
Worked great til I fried it
After making my own stepper driver, these are worth all the money to just have it done for you. Works fantastic, easy to integrate with, drove mine right from a raspberry pi. Puts out a lot of heat, if you're using a motor to its full capability, consider a fan when mounting these somewhere. The pot is super small, I was turning it with a metal screw driver and it slipped, I touched the capacitors beneath it, it sparked and stopped working. Bummer. I'll totally be ordering a replacement though! It sparked and its fun, Sparkfun. Edit: After having problems while using the 5V it supplies to a teensy, and looking at the schematic, there's no fly-back diode in this, make sure to include one in your project if you intend to use that power!
4 of 4 found this helpful:
Great - just be careful with EMI!
It works well. Easy to use with literally any microcontroller you can imagine. I use mine with a 3.3V Arduino Pro Mini.
Just beware of EMI. The A/B pads and traces leading to them, along with those pins on the chip, and your cabling leading to the stepper motor, will throw off a ton of EMI. This is not a fault of the board, it's just what happens when you switch a stepper motor. It can mess with nearby microcontrollers and ICs. So be careful how you lay out your project - put some distance between the EasyDriver + stepper motor and other components if you can. If you can't keep them isolated by distance, shield sensitive components with conductive, grounded material.
I wrote back and forth to Brian when dealing with the EMI issues in my project, he is very knowledgeable and courteous. Excellent support.
The chip can get hot to the touch. I am considering adding a heat sink to the top of the chip.
1 of 1 found this helpful:
Easy to use
This is the so easy to use. With the example code from the website, it is very streight forward on how to use this driver. It does get very warm. But if you use the sleep mode when the motor does not need to be on, the driver board has time too cool down.
These chips are pulling a lot of power, and they can get quite hot. Sleep mode helps. Also, I always throw a couple of small heatsinks on the chip.
1 of 1 found this helpful:
Works, but chip hot
Works great, but chip get hot at .5 amp. Probably not a problem, but I bought the larger, slightly more expensive, version (2 amp amp) and it runs with no noticeable chip heat. I might add that I did not use any of the associated code for either the large or small version. I see no obvious need to change the micro-step options on the fly (except maybe for testing), so I hard wired those and just used the direction and step controls. I drive direction off a port output and step from a counter that automatically toggles an output pin on reaching a selected value. (Note this is outside the std Audrino I/O, but far easier in the long run. I suggest everyone should at least glance at the Atmel manual for the Arduino chip an try using some registers directly.)
Hi, These will get warm, even hot in some cases. The chip is syncing a lot of power and that shows through heat. If you are running this on the higher end of the spec, it is suggested that you manage the heat with a heat sink on the chip.
1 of 4 found this helpful:
Not as great as I had hoped
Keeping in mind that I an a novice using arduino and associated products, I am really disappointed with the quality of the coding that I have found so far concerning this board. It seems like everyone is "ga-ga" over it, so the purchase was a natural decision. Unfortunately I feel that I'm back in the Commodore 64 days of loading tons of code, only to find that they don't work. So I expend hours ensuring that I haven't missed, or added something. And generally I haven't. So then I wind up trying to figure out what was inadvertently added, or omitted by the author. Next I start to review other codes and inserting portions of what I think worked to the new code, only to find out that they aren't compatible either. This board is no exception. I'm sure it is probably as good a product as others have reported, but for me, so far, I am not a great fan. By the way, I also have the Seeed Motor Shield and the Adafruit Motor Shield V2.0 and I have exactly the same feelings for them.
You are describing one of the main hurdles of the open source hardware community. Open source code can be hit or miss. You have to learn want resources tend to be good and what resources can be more questionable. Bildr is a great resource that generally has good documentation and examples. -- http://bildr.org/2011/06/easydriver/
Excellent, Simple, but need adjusted arduino library
This is an excellent way to control your stepper motor. But.... The arduino stepper libraries are excellent for controlling connection to 4 wire driver. Some im sure have the delays sorted out so they dont effect the timing on the rest of your code. The easy stepper driver would be so much more powerful if the arduino library was adjusted (for simple folk like me :), especially if acceleration and deceleration timing was also included. I find it difficult to write code without using delay in my project. Maybe im just not so smart :)
Tek.
There's a great library that I've used for these called the AccelStepper library. It incorporates acceleration and deceleration quite easily.
don't know yet
It would be nice if you would offer for sale the required terminal strips needed for the boards purchased.
Thanks
Makes life easy
Hooking this up to a microcontroller is simple and changing to 3.3 instead of 5 for logic is trivial. While the chip can go faster, my stepper motor can not so making sure it does not skip required trial and error until I found the minimum delay which the combination of controller and motor could achieve. If you are in a hurry to just make things work (like I was) this really is a great simple driver. Make sure to take time to adjust the current limit for your motor using the test point before plugging the motor in - there is a voltage to current formula in the manual. For low cost this is very useful.
Worked great!
Worked exactly like it should have
I use it to drive all my acrylic skeleton clock. It's reliable and up 24/7...
works great
works great when you use it correctly.... Easy to blow when you don't use it correctly haha
Great driver
Works as advertised, easy to use, just follow their guides on the product webpage. Make sure to heed their note asking you to not connect/disconnect the motor while the driver is on; this will kill your EasyDriver so don't do it! I loosely wired my motor to the board and it came off during testing and my driver died; fortunately I purchased two boards anticipating I would burn the first one so I made sure to solder proper terminals to the driver the second time around and it's flawless now.
Great, accessible option
I'm new to using stepper drivers and was building a circuit of my own. It's bigger than most other drivers, but that's great when I'm trying to learn how to use a driver and I don't need it directly interfacing with anything else.
I was frustrated before, and after I ordered these I could happily move on to the next steps in my project. Clear documentation and labeling made using these a breeze.
Seems to work well but chip gets very hot
The board works well and easy to program for. I noticed doing small steps or just a few full rotations it's fine. After running full rotations and near high speed the chip gets extremely hot and the motor starts acting jerky. Probably a heat sink will solve that. Does anyone experience this and recommend a particular heatsink?
Great board
I love this board. It's much easier than I thought it would be. My only change would be to move all the pins to one side to make it easier to wire.
Great device, great hook-up guide
Very simple to use following Sparkfun's hook-up guide. Works as promised. I've read comments on the amount of heat it generates but I haven't seen any problems in that regard. The EasyDriver is a no-brainer purchase to go along with your stepper motor.
excellent for its size
top of the line product for the experience i have and am gaining with each project i do highly recommended
Works well in my project
It can run 4000 steps per second driven by a 16MHz Arduino Pro Mini. Pretty good. It is reliable, but I always switch the motor off after running it for 6000 steps or less. If you leave it on, the full programmed current is flowing through it continuously and it gets really, really hot. Burn your finger hot. I would recommend a heatsink if you are going to leave the motor enabled (like when micro-stepping).
Because the module is expensive, I did all of my testing with knock-offs, and fried two of them, then put this one in the finished product for reliability. I highly recommend this driver for smaller motors.
works ok so far
I have not been able to test it with the right kind of stepper motor. The one I have now takes about 2 A, and the driver can not deliver that much. It does make the motor turn, but not at the speed I need. Better motor is on its way, I do not expect any problems, once it has arrived. By the way, it is very easy to use!
works as advertised
This device worked as advertised. I ended changing out to a Big Easy Driver because I needed more current.
EasyDriver is a Slick Stepper Controller!
I was using a PIC16F18855 to interface and analyze several sensors for a scientific application. Late in the prototype stage, the need for a stepper-controlled precison translation stage became apparent. Pressed for time, processor overhead, and PCB space, I decided to try EasyDriver. The stepper implementation and firmware went together in a mere 30 minutes thanks to the clear, accurate, no-nonsense documentation pack that surrounds the board's functionality. With a few modifications, I was able to further reduce board size by tapping into the EasyDriver's +5/3.3v output regulator to power most of the application. If you need a reliable flexible stepper controller, but would rather spend your time on other aspects of your application - EasyDriver will deliver!
Works super good.
I'm the worlds worst programmer, but even I figured it out and I'm having a blast with it. Thanks! Brett R
Plug and play
The documentation was thorough enough for me to make a simple python script for my Asus tinker board, the built in 3.3v mode made things simple and clean, the pin out locations made perfect sense and the masking on the board was well done. Like all of the boards from sparkfun it was very well built.
0 of 1 found this helpful:
WARNING: No reverse polarity protection
Just be careful with it, one slip-up with a wire or soldering job on the power input on the board and it's done.
Only four stars but not the driver's fault!
I had a very simple temporary application to turn a single motor with nothing but a function generator. It worked without any issues but I am not likely to require any more from this board for now. I can't give it five stars (yet) because I barely tested it.
Different products for different people?
A collaborator sent us the link from which they purchased the easy driver. They reported to us that the pins came soldered they ordered the same product. Whereas when we ordered, there were no pins included or soldered. I chatted with customer service and they said they don't sell anything with pins soldered except for one other product. For $22.90 inclusive of shipping, they should come soldered and ready to use.
I'm not sure where your collaborator purchased their EasyDriver with pins on it, but it wasn't through SparkFun.
We've never carried this board with pins installed. The board comes exactly as shown in the photos above without any connectors to allow the end user to install whatever best suits their project.
3D printed mound for the board
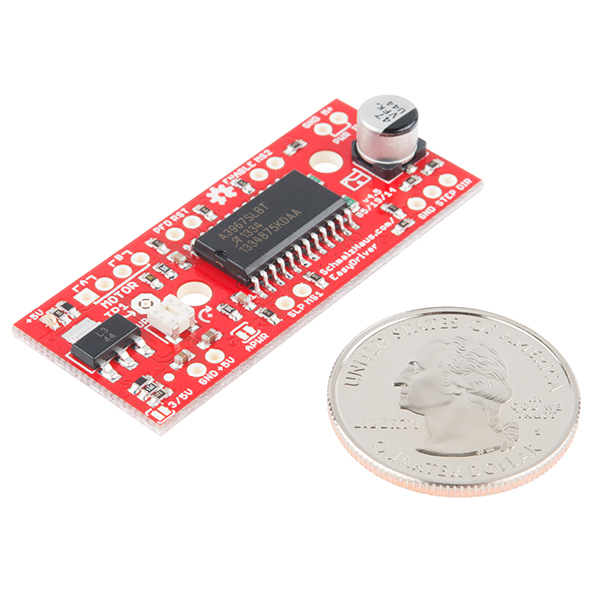
The board is 21 x 49 x 7.6 mm. The mounting holes are 3.3 mm diameter. Go to thingiverse if you want to choose from one of several mounts available. I liked https://www.thingiverse.com/thing:3477410
Great stepper driver
Easy to use
Good but be careful
This product works as described, however, do NOT unplug the stepper while the board and stepper are powered! It will fry the chip because there is no protection built in for the back EMF. I learned this the hard way. This could also potentially be an issue if the motor stalls, but I haven't tested that.
Lives up to its name - easy to build and operate
Power and control lines are easy to use. I don't have to know anything about stepper motors to use them.
Only minor change is that I would move the MS1 and MS2 motor speed controls together on the board for ease of wiring.
Quick and easy
Found a tutorial for beaglebone black and had it working same day. With code. Well documented and straight forward
Makes the job easy
I needed the 1/8 microstepping for close control of a tuning capacitor in a small magnetic loop antenna - the Easy Driver made the job very easy.
I do like this Driver.
Worked as advertised !! Lots of options so it nice to have around so when I need to throw a project together is a good choice. I did blow one up , but it so cheap It was a no brainer to replace than to fix it.
Works
It does what it says on the tin. However that central IC does get very hot. I haven't had it shutdown on me (yet) but I would recommend putting it in sleep mode whenever you can.
Great
Excellent tool. Got a good grade on my project.


Hey guys, My Stepper motor (14HS13-0804S) rated for 5V supply. Easy driver documentation says power input of 6-30V. Will this driver work for my motor?
Idk what happened but mine came and didn't work not sure what to do any help really mad about it bc I just spent 20$ on it with a broken one
Hi - sorry to hear that! Please contact techsupport@sparkfun.com with your order number, and they will be able to assist you further with this.
Sin dudas me lo compro
Can the easy driver hold/lock a stepper motor? Energize both coils at the same time.
Hello guys, Quick Q, any idea on the why im getting a error using the example 7 in the Serial example found in http://www.schmalzhaus.com/EasyDriver/Examples/EasyDriverExamples.html the error is referring to ::FULL2WIRE telling me that
sketch_feb10b:21: error: 'FULL2WIRE' is not a member of 'AccelStepper' AccelStepper stepper(AccelStepper::FULL2WIRE, 8, 9); ^ exit status 1 'FULL2WIRE' is not a member of 'AccelStepper'
Hi sparkfun! Do you have any plan to design more powerful stepper motor drivers based on other IC. Something like here
Can I use the easy driver to run a bipolar NEMA 11 captive stepper motor? Its current per phase is shown as 1 amp. Easy driver spec says that the adjustable current control is from 150mA/phase to 700mA/phase. I am not running this motor at fast speed. The motor is supposed to support axial load of about 4 lbs.
Thank you!
How is v4.5 different from v4.4?
I am currently building a 3-axis cnc mill with sparkfun stepper motors, and I was wondering if I could drive a dual motor x-axis with just one easy driver. I would connect the two motors in parallel and run the wires to the same locations on the board. I figured if I used double the rated current to power the motors this would work. Am I correct, or should I buy another easy driver?
How can I get the coordinates of the holes to mount the driver? I can't find them
Hey! I have a really basic and maybe funny question! But my stepper for an extruder print head requires 0.8A as it is specified on the motor. And the easy board gives max. 0.75; this means that I can't work with this board? -ASYA
Does your extrude require 0.8A per phase, or 0.8A in total? The EasyDriver supports up to 0.7A per phase, or 1.4A peak for the entire two-phase motor.
Whether you can get away with this depends entirely on how much load the motor is driving. It is very common to apply less than the rated current to stepper motors, as the needed current really depends on how much torque you require.
There is also the Big Easy Driver, which isn't a whole lot more expensive. Looks like a good board for your application.
I have a Nema-8 stepper from pololu that runs at 3.9V (600mA per coil). Will this board be able to drive the stepper?
It should, you just need a 3.9V power supply. The board just passes the voltage it is given through a current chopper to regulate amperage.
The supply voltage doesn't matter. Because the coil current is regulated by the EasyDriver, independently of the voltage. The voltage drop over the motor depends only on the current and coil resistance, and so too would the power dissipated. Brian explains something similar on the EasyDriver website.
See the first and second entry in the FAQ here: http://www.schmalzhaus.com/EasyDriver/
So just go ahead and use a 9V or 12V supply.
Work well and easy to use, but is not very powerful. For people who need more amps, I recommend using the A4988 ship which is used in almost every 3D printers.