SparkFun Micro OLED Breakout
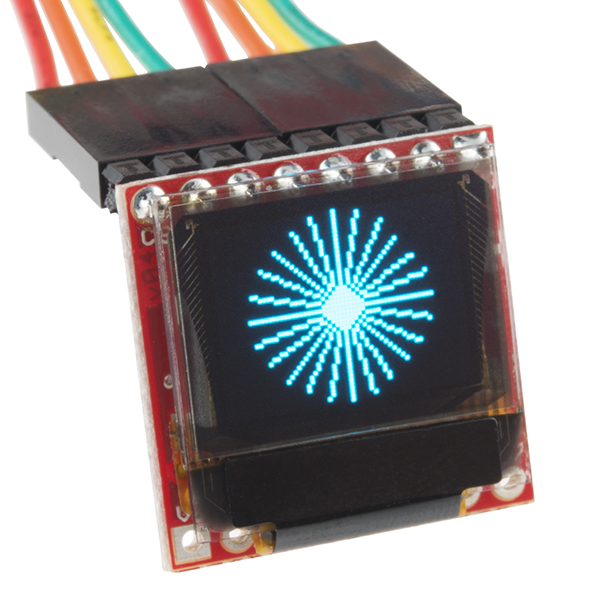
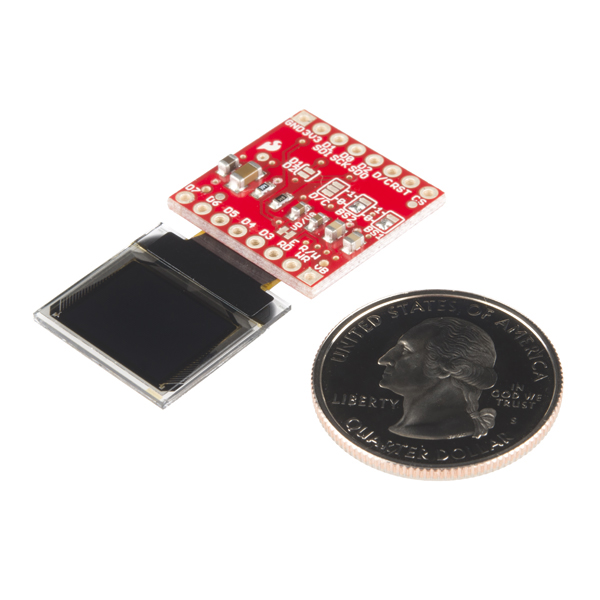
The SparkFun Micro OLED Breakout Board breaks out a small monochrome, blue-on-black OLED. It’s "micro", but it still packs a punch – the OLED display is crisp, and you can fit a deceivingly large amount of graphics on there. This breakout is perfect for adding graphics to your next Arduino project, displaying diagnostic information without resorting to serial output, and teaching a little game theory while creating a fun, Arduino-based video game. Most important of all, though, is the Micro OLED is easy to control over either an SPI or I2C interface.
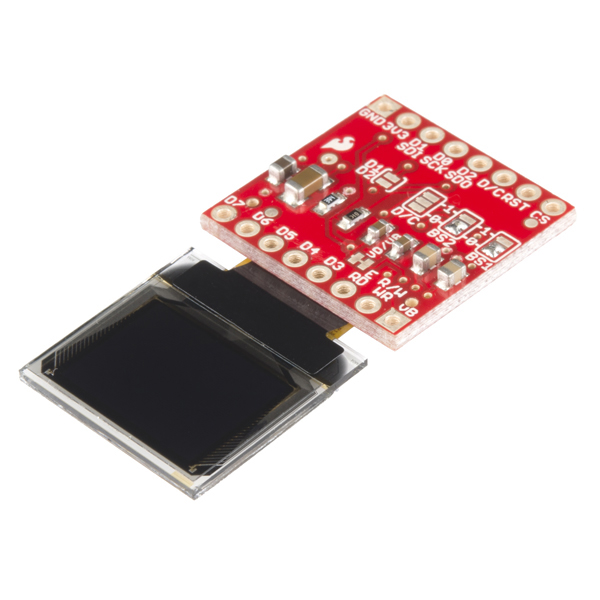
You may be asking yourself, "Why does this board look so familiar?" Yes, this is essentially a MicroView without the Arduino portion. We understand that sometimes you just need a breakout, an open door for you to explore the possibilities of a super small OLED screen. Speaking of, the screen on this breakout is only 64 pixels wide and 48 pixels tall, measuring 0.66" across.
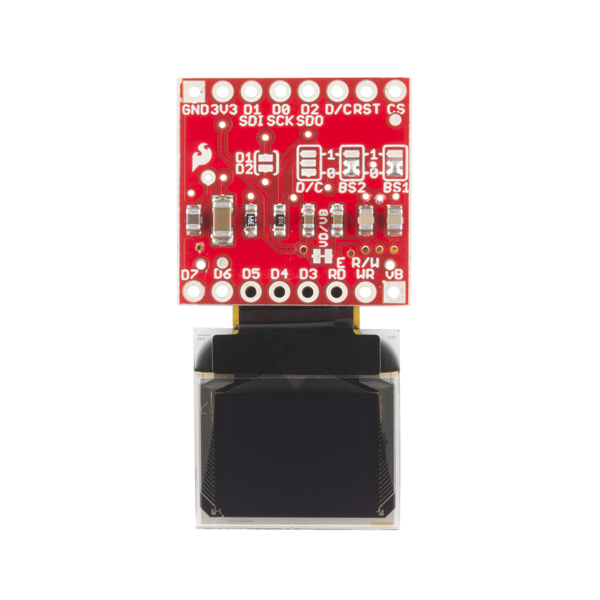
In total, the Micro OLED Breakout provides access to 16 of the OLED’s pins. Fortunately, though, you’ll only need about half of them to make the display work. The top row of pins (GND-CS) breaks out everything you’d need to interface with the OLED over an SPI or I2C interface. The pins on the bottom (D7-vB) are mostly only used if you need to control the display over a parallel interface. This board operates at 3.3V with a current of 10mA (20mA max).
- Operating Voltage: 3.3V
- Screen Size: 64x48 pixels (0.66" Across)
- Monochrome Blue-on-Black
- SPI or I2C Interface
- Schematic
- Eagle Files
- Hookup Guide
- Datasheet (SSD1306)
- GitHub (Design Files & Example Code)
- GitHub (Library)
- Product Video
SparkFun Micro OLED Breakout Product Help and Resources
Micro OLED Breakout Hookup Guide
October 30, 2014
Learn how to hook up the Micro OLED breakout to an Arduino. Then draw pixels, shapes, text and bitmaps all over it!
SparkFun Inventor's Kit for Photon Experiment Guide
September 3, 2015
Dive into the world of the Internet of Things with the SparkFun Inventor's Kit for Photon.
Wireless Joystick Hookup Guide
January 5, 2017
A hookup guide for the SparkFun Wireless Joystick Kit.
Everything You Should Know About HyperDisplay
February 20, 2019
This is a tutorial to go in-depth about the SparkFun HyperDisplay Arduino Library.
OLED Breakout Dimensions
LCD Panel Size

Length = 18.10mm

Width = 18.46mm


PCB

Length = 20.28mm

Width = 21.03mm
Manufacturer Specs for OLED => http://www.wisechip.com.tw/s/en/2/product/0-66%E2%80%9D-OLED-Display-UG-6448HLBEG03-380007.html
Core Skill: Soldering
This skill defines how difficult the soldering is on a particular product. It might be a couple simple solder joints, or require special reflow tools.
Skill Level: Noob - Some basic soldering is required, but it is limited to a just a few pins, basic through-hole soldering, and couple (if any) polarized components. A basic soldering iron is all you should need.
See all skill levels
Core Skill: Programming
If a board needs code or communicates somehow, you're going to need to know how to program or interface with it. The programming skill is all about communication and code.
Skill Level: Competent - The toolchain for programming is a bit more complex and will examples may not be explicitly provided for you. You will be required to have a fundamental knowledge of programming and be required to provide your own code. You may need to modify existing libraries or code to work with your specific hardware. Sensor and hardware interfaces will be SPI or I2C.
See all skill levels
Core Skill: Electrical Prototyping
If it requires power, you need to know how much, what all the pins do, and how to hook it up. You may need to reference datasheets, schematics, and know the ins and outs of electronics.
Skill Level: Rookie - You may be required to know a bit more about the component, such as orientation, or how to hook it up, in addition to power requirements. You will need to understand polarized components.
See all skill levels
Comments
Looking for answers to technical questions?
We welcome your comments and suggestions below. However, if you are looking for solutions to technical questions please see our Technical Assistance page.
Customer Reviews
4.1 out of 5
Based on 27 ratings:
4 of 4 found this helpful:
Amazingly Versatile
I'm pretty new to the Arduino scene, so I'm still amazed at how much capability is baked into these little breakout boards (thanks to a lot of great library code that comes with it). This thing is so easy to use, and the refresh rate is so fast! I never thought it would be this easy to add fairly rich displays to my project, and it's so much more satisfying than a few blinking lights or 7-segment displays. My only issue with it was trying to hook it up to a 5v board (with the 3.3v supply and level adjusters, of course). I never got it to display anything but garbage, and I suspect the SPI clock and/or data lines were not clean enough after passing through the level adjusters. I gave up on the 5v board and switched to a 3.3v Arduino Pro, got rid of the level adjusters, and then the display worked like a dream. Highly recommended!
1 of 1 found this helpful:
Awesome display
I love this display, it's tiny and looks great. I adapted the code on GitHub so it runs on a Spark Core (and presumably in the future Spark Photon) module:
https://github.com/liyanage/Micro_OLED_Breakout
Note that this modified version only supports SPI for now.
1 of 1 found this helpful:
Works fine with 5V Arduino Uno and level shifters.
Clear and bright display. Curious as to why there are no level shifters (apart from 1K resistors on two lines) in the MicroView schematic if the ATmega328 is running at 5V.
2 of 2 found this helpful:
Really great module!!!
I had absolutely no problems running it, just connected as in hookup guide and voila! It has really good contras and I love running the cube example. Additionally it's so thin that can be placed anywhere. Thanks to OLED tech, no extra back-light it required which is even more extraordinary! I fully encourage all who thinks about this little guy to give it a try! You will have a lot of fun with it!!!
1 of 1 found this helpful:
Useful Display
This is a very easy display to code. Its very bright indoors but can be a bit difficult to see in direct sunlight (not impossible though). Only gripe concerning the build is the ribbon cable. After a fair amount of use over the past 4 months, the cable has sustained some damage due to rubbing and the display no longer works. Overall, I really enjoyed this display but I may decide to try out a larger OLED before I decide to go back to this one.
1 of 1 found this helpful:
Video tearing warning
Please note that you may experience "tearing" of a video display. By tearing a mean a frame of corrupted data. 1/2 last image and 1/2 the new image. This is not a major concern unless you are doing moving images. This is not the fault of SFE. The OLED display and its controller chip do not bring out one important pin. This is the "FR" or Frame Sync pin. To not tear video, one must write you image data during the blanking period indicated by this pin. For me on a fast ARM processor updating the display over I2C at a measly 1 Hz, I get a torn image every minute or so. Also, if you are in any way taking a video of the display, you will have aliasing problems recording at 30Hz. I suspect that this is the refresh rate of the OLED.
2 of 3 found this helpful:
Specs don't match video
Haven't turned this on yet but the video says it's a 96x48 pixel display but the specs here say 64x48.
Either is fine for what I want to do with it and I bought it assuming that 64x48 was the real resolution. But you might want to make sure the specs match the video or vice-versa.
EDIT
As of 2015-02-17, the built in examples don't work with Arduino DUE. This is sad considering this product has been out for a long time.
1 of 2 found this helpful:
Decent, but low quality breakout
The LCD seems to be fine for the most part, but this breakout board is really substandard. The bend radius of the FPC is too small and really awkward. I know they were trying to make it small, but the layout and size of this board was ill-conceived. I now have two because the first one stopped working intermittently. The second has begun behaving the same way and it's definitely related to the FPC after several hours of debug effort.
As an aside, the display driver is really awful as well. It would have taken trivially more effort to make it fully object oriented, but, as it stands, you can only make a single instance of the class unless you literally copy and paste the files and then rename everything.
Sorry you are having issues with your board. We use this circuit in our Micro Views so the intended use case would have a custom enclosure to protect the screen and FPC. Looking over our records we have not seen any returns for this issue. However, if you are having trouble, please contact us at techsupport@sparkfun.com
Nice little display
We built one of these into a 1" x 1" x 0.5" 3D-printed enclosure along with an Arduino 328P microcontroller, ADXL345 accelerometer, FTDI USB interface chip, battery, charger, LDO and on-off switch. There's a picture at potomacmeso.com/display-with-accel. The combination of display and tap-sensitive accelerometer gives some interesting alternatives for 2-way communication between the user and the microcontroller. The display is easy to program, thanks to the libraries.
This OLED display works great. It is an amazing little device!
Tried it out with Teensy 3.2 installed on SparkFun Teensy Arduino shield board. This OLED display works great. The Teensy 3.2 is so fast that I had to add some delay statement in order to actually see the different display patterns.
Well documented and highly functional
I used this product with a 9S12 microcontroller instead of the Arduino. I used the SPI interface.
The Ardiuno libraries were accessible, and commented well enough for me to port into C myself. The documentation for the device was good enough for me to get the screen working like a charm.
Loved the resolution! I was able to get the gist of 3D shapes across on this screen which is smaller than a Quarter!
One thing to emphasize; toggling the Reset pin is critical to proper startup. The importance of this was not explicitly stated, that's the one thing I would improve.
Solder Wick
This screen is awesome and the demo software is pretty sweet. Make sure you include solder wick with your order if you dont already have some. swapping those jumpers without it is difficult and potentially fatal. Otherwise this thing is awesome! Make sure not to power your Arduino until everything is connected otherwise the screen will miss the initial line of code and not work. Also, I didn't solder headers to the parallel pads as recommended, but make sure you at least rest the otherside of the board on some while soldering. That way your headers will be square and not cocked to one side.
Don't even need a level shifter for 5v
Works fine with 5v logic, though there might be some long term effects I don't know.
Works good
Product works as promised by Sparkfun.
Surprisingly easy to use and see OLED display.
I wear glasses to read my cell phone and other small print so I kinda expected that this little display would be difficult for me to see. However, it is bright sharp and very easy to see. It is likewise very easy to setup and use. I am going to use it to display signal strength on the front panel of my radio project. The example code will help reduce development time.
Broke this trying to switch to I2C mode. Tiny solder pads are incredibly difficult to use unless a pro at soldering.
Update - I'll give this an extra star since it really is my fault it is broken but still irritated at the difficulty involved to use this with I2C... If going I2C, use the Qwiik version of this and get the appropriate cable (I used the breadboard one) The extra few $ is well worth the time and frustration saved (again, if you are GOOD at desoldering/soldering very small pads or use SPI this probably won't be an issue for you)
Wish I could have actually had a chance to use it. I am giving a star just because I assume it might be good if you intend to use it with the SPI interface it comes configured with or have surgeons hands. I needed I2C and ruined the board trying to put it in that mode. What is the point in putting this onto a breakout board for easier connectivity if the jumpers to switch this to I2C mode are impossibly small solder pads? I would have picked a different OLED if there was some indication that you can't use I2C out of the box. I ended up breaking one of the sets of jumper pads off and now it is useless. Never even got to attach it to the device I wanted to use it with. I think most people would pay an extra dollar or two for you to put an actual jumper or a set of DIP switches on so that you don't have to semi-permanantly set the interface. For me, it was a complete waste of $ and an hour of my time. Guess I will look for a different product as this definitely won't work for me.
Cute OLED!
Really nice looking OLED display. Perfect for my modular synth projects.
Like someone else on here, I don't use arduino so I spent a few hours reverse engineering the basics + porting source code to another IDE.
easy and versatile - but not durable at all.
Very easy to set up and get it going, complete library.
Not durable at all. I've had 2 breaking in relatively short time now, and I don't understand why. Soldering seems fine, the wiring is fine (tested it with new OLEDs), it just dies quite randomly.
Sparkfun, do you have any idea what could cause this?
The flexible strip that connects the screen to the board is very delicate. We recommend not flexing the strip where it attaches with the display or board very much. (Just enough to get things mounted.)
Data Command not working properly
I used SPI interface and when I'm sending data 0. It should clear out the whole row(page) of the display, but it displayed a weird pattern of top 4 pixel turned on alternatively and bottom 4 pixel all off. See figure below, N represents turned on pixel and O represents turned off pixel. Keep in mind that I was sending data 0 and this is what been displayed.
NONONONO ...
NONONONO ...
NONONONO ...
NONONONO ...
OOOOOOOO ...
OOOOOOOO ...
OOOOOOOO ...
OOOOOOOO ...
I changed tried inverting display command and copy the whole initialization function from the library. Nothing solved it. Don't get me started on how they only mentioned the charge pump command in the last page of the SSD1306 data sheet. One of the most important command and it's only mentioned in the last page!
I think this is a faulty part. Now I need to get a new display. And this display is $15 ! Not cheap.
We may be able to help you with this issue. Please reach out to our technical assistance team for help.
Great looking little display
Sharp color(blue only); not bad to set up and very to wire to Nano. Perfect for my little project...small yet visible.
pretty nice little display
In need if a better library...
Great addition to a project
The Micro OLED has been an excellent addition to a number of projects. It was a big hit as part of a recent BowTie project.
http://rightaresearch.com/wikinew/doku.php?id=tweet_bowtie
Pretty happy with it.
I'm fairly new to working with this kind of thing, but it was quite easy to get it up and running, and it looks great. Wish spark fun would stock some more sizes, these are great for displaying info in a small package.
Very nice small OLED display
A bright and crisp OLED display. Despite it's small size even 5x7-font-text is very readable. SPI transfer allows for a quite fast update rate of the whole display. Although there's 'only' an Arduino library available from Sparkfun and i'm using mbed boards and IDE, it was very easy to adapt the library for use with mbed platforms. Here is the link to the SFE_MicroOLED library for mbed:
http://developer.mbed.org/users/synvox/code/SFE_MicroOLED/
Bright and crisp, but small screen area for the package.
It's everything it promises to be—it's a bright, brilliant blue with really sharp pixels, and it's no fuss to hook up to a board and get it working, especially with the provided drivers.
The screen is small, which I suppose is a selling point. But I really wish the acrylic casing around the screen—and especially the rear red breakout board—were smaller to match.
The driver seems well-designed, is automatically double-buffered for clean drawing, and has a good basic set of drawing primitives built in. On the limited space of, say, an Arduino Pro Mini, this library uses up a fairly large percentage of program & global memory, I actually stripped some of the code that I didn't need out, though it probably won't have been necessary to do so by the end of the project.
Really great screen!!!
Love this oled screen. Got it soldered and running to a bluebean in no time. Gets really bright and it's really easy to get set up.

I'm trying to connect it to arduino nano. Does anyone of you know how to connect it to nano not the pro?
Hi there, it sounds like you are looking for technical assistance. Please use the link in the banner above, to get started with posting a topic in our forums. Our technical support team will do their best to assist you. (*Make sure you specify which version of the Arduino Nano you are using... there are 2 different boards with "nano" in their name.)
Hi! Is this available without the display? I have some smaller screens I'd like to use with it.
We don't carry just the board unfortunately, but if you send our Eagle files over to our friends at OSH Park, they can make you three un-populated boards for about $4.00.
Perfect! Thanks!
Cool display. I modified the library so it works on a Raspberry. For the moment only I2C though.
https://github.com/stevennoppe/micro-OLED-Sparkfun-for-Raspberry
(resolved)
I cannot use the example code for SIMBLEE. When I download an example code on SIMBLEE, it shows an error message about an address. As far as I know, Arduino Pro, ATmega328, which is an AVR microcontroller while the SIMBLEE is an ARM Cortex-M0. What do I need to do to fix this problem?
Did you ever figure this out?
(resolved)
And the example code works just fine.
Why does this keep displaying the Sparkfun logo even though I am trying to display a rectangle, the rectangle is there, just half inside the logo.
You have to call oled.clear(PAGE); in order the wipe the entire buffer, not only just the display's memory. Read void setup() in the demo sketch. I think the splash screen is immediately put in the buffer after loading the display.
Does this breakout include the OLED module?
Yup
Are there any plans to sell micro OLED screens that are transparent? Or is that just not feasible right now?
According to SSD1306 spec, there's a frame synchronization signal 'FR': (pad 51 out of 281)
"FR O This pin outputs RAM write synchronization signal. Proper timing between MCU data writing and frame display timing can be achieved to prevent tearing effect. It should be kept NC if it is not used. Please refer to Section 8.4 for details usage. "
I notice its not on this breakout board as a through hole, but is it at all physically accessible at all? Im looking to drive this display at high frame rates without tearing. Thanks.
Unfortunately it's not accessible. We broke out everything we could on the board, but the FR pin doesn't look like it's passed through on the OLED's 28-pin ribbon connector.
FYI, if you use this over I2C you will see in the schematic that the breakout board does not have pull-ups, so make sure to add your own (10K works great).
Hi, Is there CAD for the OLED display? Thanks!
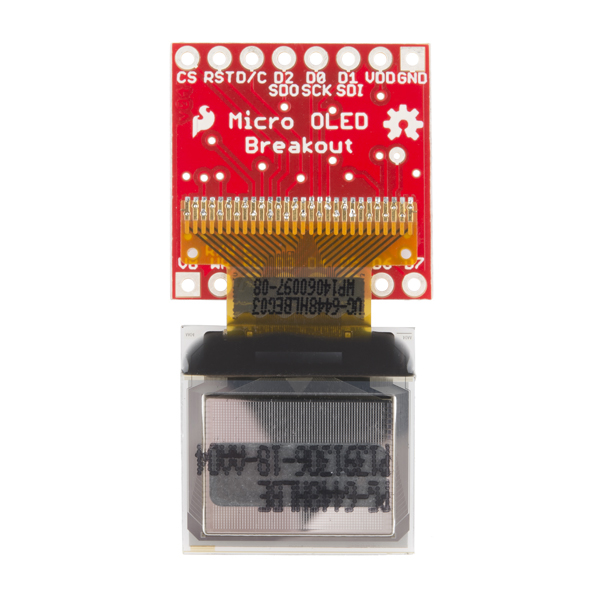
I didn't happen to notice the picture of the back of the display with the part number :) before. Found more info here and am requesting CAD data.
For those planning to use this with the ESP8266, you can use the following library
https://github.com/EdwinRobotics/ER_Micro_OLED_Arduino_Library
This is the same display as in the MicroView, right? Is it compatible with the MicroView library at all? It would be really nice to be able to use the nice widgets/gauges, the OLED library seems to be a lot more simplistic.
Yes, this is the same display. It should be compatible with the libraries as well, just check to make sure you have the right pins hooked up.
It is the same screen, and it should work with the MicroView library provided you hook up the correct pins. Either follow the MicroView schematic for hookup, or edit the pin definitions in the library's MicroView.h file.
Thanks for the info, guys!
I was able to follow the MicroView schematic for all connections except for RST and D/C (my PCB already has those pins used for other functions), but a quick review of the Arduino Port Manipulation page and an easy edit to the header file and I'm up and running with no issues!
Hi, I used the tutorial for i2c on the micro oled ,but when I start my arduino uno the micro just stays black.
I've tripled checked the connections and they're all good can someone please help?
UPDATE: Its the logic of my mega being 5v and the device 3.3v so I put 10k pull ups and it VERY dimmly works.
This part works great! However, it appears that the one I purchased may have been defective. After about an hour of continuous use it shut off and refused to turn back on. I couldn't find any traces of physical damage. Is this by chance covered under Sparkfuns replacement policy?
I tweaked the Adafruit SSD1306 library to work with this screen.
With hardware SPI on my Teensy 3.1, the SparkFun library takes 935 microseconds to update the screen, but the Adafruit library can do it in 625 microseconds.
https://github.com/Swap-File/SparkFun_OLED/
This breakout worked great! Now I'm hoping to get just the OLED screen for a custom application-- would it be possible to get the manufacturer P/N? Thanks.
I think the answer may be 'no' after snooping through the documents, but is this screen capable of varying degrees of value per pixel or is each pixel just on/off? I'm looking in to options for displaying spectrographs for a school project, so I'm looking to be able to show different shades of gray (err...blue?) at each pixel. If this board doesn't work, would anyone have recommendations? I don't need anything fancy (hence looking for black/white options).
So, where's the manual with all the raw command structure so I can use it with whatever micro I want?
There's the datasheet for the SSD1306, which is the driver IC embedded inside the display. You may also be able to glean some information from the Arduino library.
Does this buffer the data itself or do you have to keep refreshing? Does it have a text mode, so you can just throw text at it, or do you have to use something like an Arduino library for it to make text (I wouldn't be using Arduino in my application)?
Its my understanding the data is buffered at least. It has it own refresh rates you can set. As Jimb0 stated, no text character support.
Nah, it's only set up to receive streams of bits which all correlate to single pixels on the display. If you want to send text, you'll need an Arduino or some form of microcontroller to parse that data and convert it to the more raw data the display expects.
Hey thanks for the info guys. Is there one of these that is text capable? Anybody know where Nick got his T-Shirt he's wearing in the vid?
How flexible is the ribbon cable and attachments between the OLED and the breakout board? Is it safe to fold it over the breakout so they take up the same footprint?
Yes, but if you're using double-sided foam tape or something to hold it down, be very careful of how you push the glass into the tape! I've cracked the corner of a similar display with very little pressure; it's thin glass and not meant to be mashed on. Consider laying the glass down on a table and flipping the board over it, pushing against the board rather than the glass.
It's what they did on the Hookup Guide: https://learn.sparkfun.com/tutorials/micro-oled-breakout-hookup-guide