Micro Gripper Kit A - Straight Mount
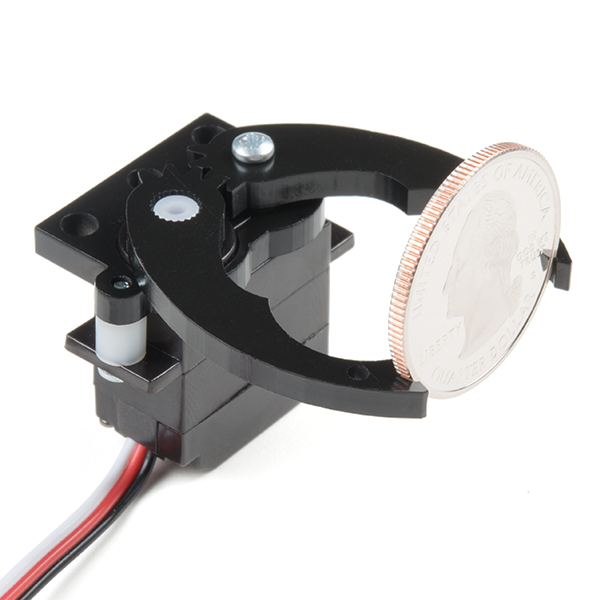
This is the Micro Gripper Kit A, a simple robotics kit that is great for "getting a grip" on smaller robotics projects! Designed for use with a servo, the gripper kit is easy to assemble and requires only a Phillips Head Screwdriver. This Micro Gripper is capable of opening 2.75" wide max, has an overall body length of 1.7" long with a 1.3" wide servo housing body, and offers three 6-32 mounting through-holes along the edges of the servo housing.
Actobotics is a robotics building system based around extruded aluminum channels, gears, precision shafts, and ball bearings. Thanks to the two standardized hole patterns, nearly all Actobotics components can be intuitively connected together. The wide range of components makes building complex electromechanical prototypes or finished projects a reality.
Note: This kit does NOT include a servo. Check the Recommended Products section below for great sub-micro size servo options.
- Opening Width - 2.75" (69.85mm)
- Mounting Hole ID - 0.1" (3.5mm)
Micro Gripper Kit A - Straight Mount Product Help and Resources
Core Skill: Robotics
This skill concerns mechanical and robotics knowledge. You may need to know how mechanical parts interact, how motors work, or how to use motor drivers and controllers.
Skill Level: Noob - You will be required to put together a robotics kit. Necessary parts are included and steps will be easy to follow. You also might encounter basic robotics components like bearings, mounts, or other hardware and need a general idea of how it goes together.
See all skill levels
Core Skill: DIY
Whether it's for assembling a kit, hacking an enclosure, or creating your own parts; the DIY skill is all about knowing how to use tools and the techniques associated with them.
Skill Level: Noob - Basic assembly is required. You may need to provide your own basic tools like a screwdriver, hammer or scissors. Power tools or custom parts are not required. Instructions will be included and easy to follow. Sewing may be required, but only with included patterns.
See all skill levels
Comments
Looking for answers to technical questions?
We welcome your comments and suggestions below. However, if you are looking for solutions to technical questions please see our Technical Assistance page.
Customer Reviews
3.3 out of 5
Based on 3 ratings:
Good gripper!
This gripper works well! It "splines" directly onto your micro servo, providing great performance - much better than the linkage-based options. But... it's only compatible with certain servos (just like you can't always mix servo horns). It fits the recommended servo, as well as Turnigy and Towerpro nylon gear servos (but not the metal ones, strangely enough). Haven't tested any others.
Works well with the micro servo
Pros: Strong, fits nicely on the micro servo
Cons: no assembly instructions


Hello, I'd like to ask if is there maybe a possibility to get cad model of the part. If so, I'd be very grateful :)
There are no assembly instructions (at least that I have found anywhere) for this device so to perhaps save you all the mistakes I made here are my notes for building my next one :-).
1) What you need:
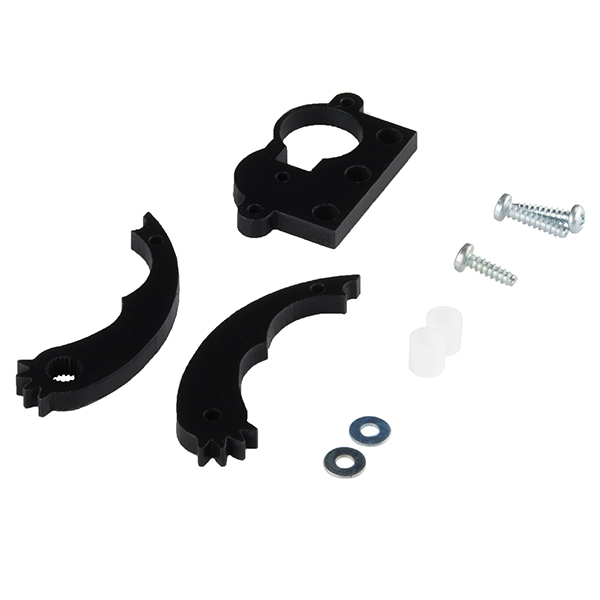
Gripper package: 3 screws two long, one short, 2 washers, 2 nylon spacers, 2 arms (one big hole, one small hole) and one mounting plate (nothing left over).
Servo package: Sparkfun ROB-09065 (I tried various 9G generic servos I have and none work, the servo shaft spines aren't correct to fit the arm! Save grief and use the recommended one.)
small black screw and the servo (the rest of the parts aren't used here).
A small Philips screw driver to fit the screws and a large helping of patience (the screws are tiny and difficult to get in!)
Something (CPU or servo tester) to drive the servo to position it for installation and test the gripper at the end.
2) Assembly:
Mount the plate on the servo (the hole in it is keyed to the servo). Take the 2 long screws and the 2 nylon spacers from the grabber package and put the nylon spacer between the mounting plate and the tab on the servo. Screw one of the long screws in with the head towards the servo wires so the point is going in to the bottom of the mounting plate (if its the other way, the screw head will interfere with the plastic arm's movement on top of the mounting plate!)
3) Repeat with the other side of the servo using the 2nd long screw and nylon spacer.
4) Fit the arm with the larger hole over the servo shaft (it should slide in and lock if you have the correct servo). Now power up the servo and cause it to move to the position where the arms would be fully closed then back of a little bit and power the servo down again.
5) Now using the short screw and washer from the grabber package attach the second arm to the base plate. Mesh the teeth on the arms with each other. Note you want to tighten the screw enough to hold the arm in position but still allow it to rotate! Now power up the servo again and check that the jaws mesh properly when fully closed (in fact the servo should hum a bit as it can't achieve the fully closed position because the jaws are closed!). Adjust the position of the arm on the servo by taking it off and rotating it one position on the servo spline until this works correctly (i.e. when the jaws are fully closed they meet square not at an odd angle!)
6) Now take the black screw from the servo package (the littlest one) and one of the washers from the gripper package and screw the arm to the servo shaft and you are done. Power up the servo again and try out your new gripper. Mine works very well and I'll probably grab another one.
These grippers work just fine but the matching servo leaves a lot to be desired. It would be nice if a higher quality metal gear servo was available for these grippers from Sparkfun.
does not work with tower pro micro servo. Arm doesn't fit on servo 'hub'.
Tried this with recommended servo, rob-09065 and it fit and the gripper worked ok.