STEMTera (Black)
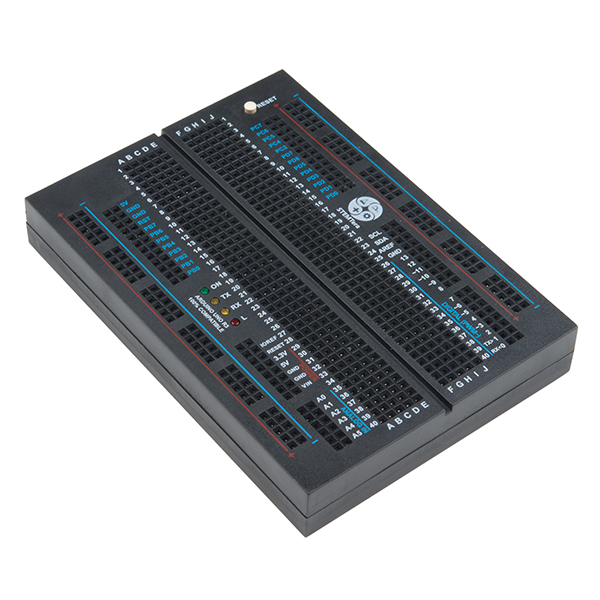
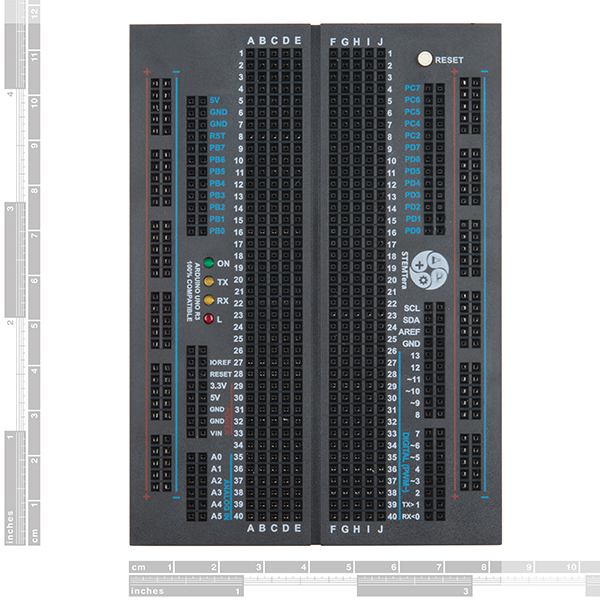
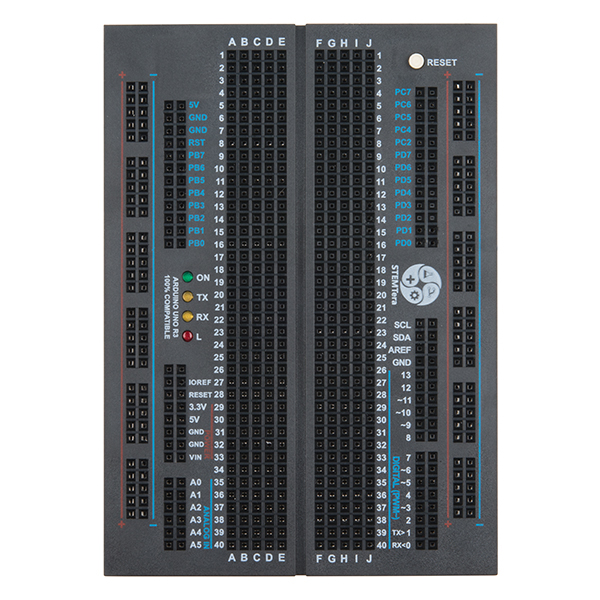
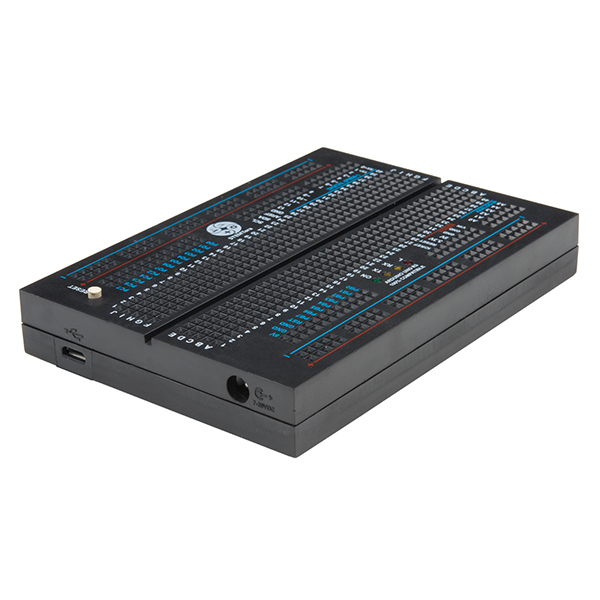
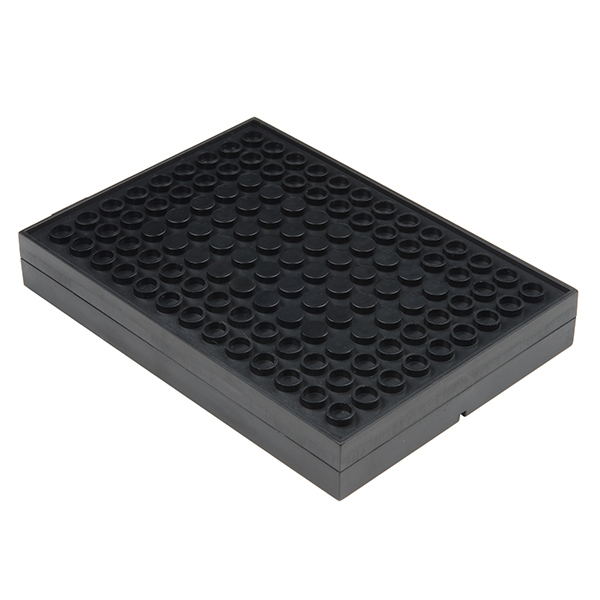
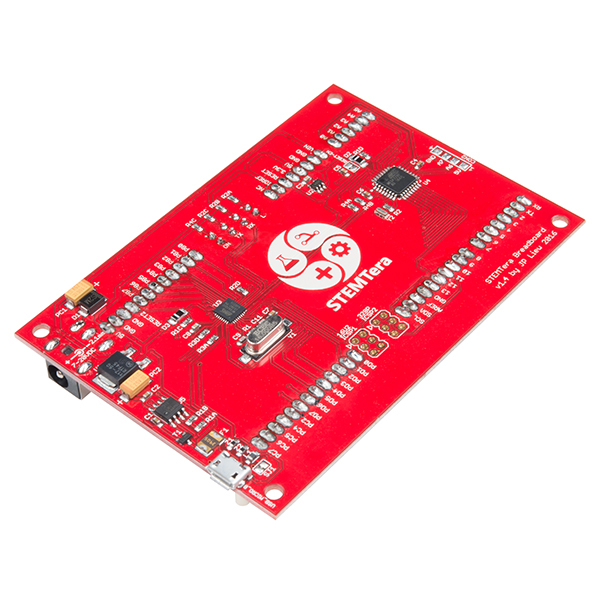
The STEMTera is an innovation in breadboard history. It is the first breadboard with an Arduino-compatible hardware suite built in that works with thousands of shields. With ATmega32U2 pins exposed, native USB projects can be easily developed using the LUFA framework. The STEMTera also features a standard building brick-compatible bottom that empowers projects to be built beyond imagination. This version of the STEMTera is housed in a durable black ABS plastic enclosure.
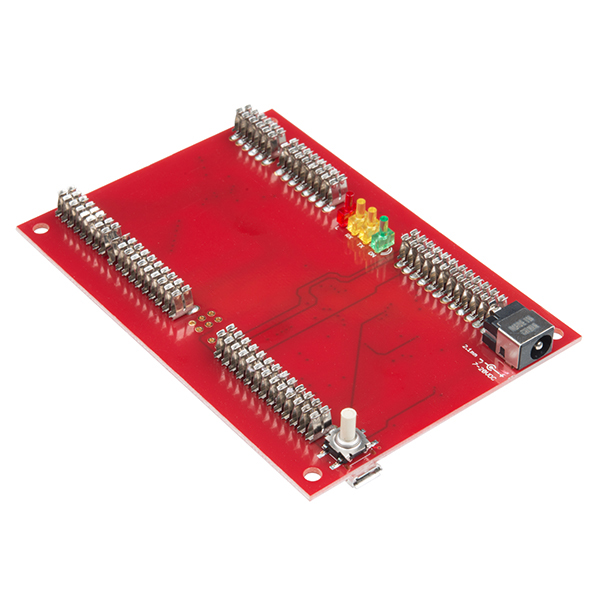
Since the STEMTera is a development board built directly into a breadboard, it eliminates the need for messy wires to be strewn about your work space. By having two microcontrollers built inside the breadboard, it provides direct access to the ATmega328P’s I/O pins. With the 21 I/O pins of the ATmega32U2 exposed, users will be able to develop native USB projects with ease. These extra I/O pins can work directly with the LUFA framework without having a middleman to translate messages as with the original Arduino UNO. Additionally, the STEMTera is pin-to-pin compatible with an Arduino UNO R3 shield and supports multiple IDEs, including: Atmel® Studio, Arduino IDE, AVR-GCC, AVR-GCC with LUFA, Scratch and more!
- Dual Microcontroller -- ATmega328P & ATmega32U2
- USB Native Development
- 4 LEDs (Power, TX, RX and L)
- Black ABS Enclosure
- IDE Support
- Atmel® Studio
- Arduino IDE
- AVR-GCC
- AVR-GCC with LUFA
- Scratch
- 111.8mm x 79.8mm x 16.1mm
STEMTera (Black) Product Help and Resources
2 of 2 found this helpful:
Board Definition
The Atmega328P uses an “Arduino Uno” bootloader. Make sure that you select the correct board definition when uploading.
2 of 2 found this helpful:
Getting Started and Tutorials
For diagrams and getting started with the STEMTera™, Try looking at the STEMTera™ Breadboard Beginner’s Guide located here => http://learn.stemtera.com ].
Note: The user guide is on going development and the designers of STEMTera™ are adding pages as we go.
2 of 2 found this helpful:
GitHub Repository and Documentation
Try browsing the STEMTera™ GitHub repository for Schematic, PCB, Fritzing, Firmware, 3D STL files and components datasheet located here => [ https://github.com/STEMTera/STEMTera-Breadboard-B328 ].
2 of 2 found this helpful:
Default Drivers?
Testing the STEMTera™ board and viewing it in the device manager, it looks like the ATmega16U2/ATmega32U2s use the USB-to-Serial drivers like the Arduino Uno. You will need to install the drivers as indicated here => [ https://www.arduino.cc/en/Guide/ArduinoUno#toc3 ]. If an Arduino Uno's driver is already installed, your computer should automatically install and recognize the board. Plugging the board into my computer, the STEMTera™ was recognized the as the Arduino Uno and the drivers from memory worked.
2 of 2 found this helpful:
LUFA Drivers?
SparkFun has not tested the ATmega16U2/ATmega32U2 using the LUFA (Lightweight USB Framework for AVRs) USB Bootloader and the chips additional features as stated in the kickstarter. I would assume that you might need a different driver after reflashing the avr chip with the LUFA [ http://www.fourwalledcubicle.com/LUFA.php ]. However, it looks like they have linked the LUFA Demos in the STEMTera™ GitHub repository here => https://github.com/STEMTera/STEMTera-Breadboard-B328-LUFA-Demo-Project .
2 of 2 found this helpful:
STEMTera™ FAQ
Try looking at STEMTera™ FAQ [ https://www.kickstarter.com/projects/stemtera/stemtera-breadboard-arduino-compatible-built-in-br/faqs ] or comments [ https://www.kickstarter.com/projects/stemtera/stemtera-breadboard-arduino-compatible-built-in-br/comments ] for frequently asked questions.
Core Skill: Programming
If a board needs code or communicates somehow, you're going to need to know how to program or interface with it. The programming skill is all about communication and code.
Skill Level: Rookie - You will need a better fundamental understand of what code is, and how it works. You will be using beginner-level software and development tools like Arduino. You will be dealing directly with code, but numerous examples and libraries are available. Sensors or shields will communicate with serial or TTL.
See all skill levels
Core Skill: Electrical Prototyping
If it requires power, you need to know how much, what all the pins do, and how to hook it up. You may need to reference datasheets, schematics, and know the ins and outs of electronics.
Skill Level: Rookie - You may be required to know a bit more about the component, such as orientation, or how to hook it up, in addition to power requirements. You will need to understand polarized components.
See all skill levels
Comments
Looking for answers to technical questions?
We welcome your comments and suggestions below. However, if you are looking for solutions to technical questions please see our Technical Assistance page.
Customer Reviews
4.3 out of 5
Based on 12 ratings:
3 of 3 found this helpful:
Great concept "comma but"
Ok, I pre-ordered this thing because it's basically what I want to use in teaching non-technical artists physical computing. I've been working with Arduino since 2006 or so and this is one of the best concepts I've seen teaching.
"comma but" it loses a point for what should be a trivial manufacturing defect. (I come from consumer electronics where we sold millions of devices with USB ports...)
The micro USB connector is flaky as hell on mine. I have to wiggle it just right to get a working connection. I've tried every micro USB cable I can find and they all work the same -- prop the STEMTera up on something then wiggle/support the cord until there's a good connection.
2 of 3 found this helpful:
Good Marriage, However...
I got it on time. Worked out-of-box. Plugged in a 1Sheeld+ and proceeded to use my Nexus sensors. Way Cool. But, I was wondering about something. How about getting rid of the second controller and using the space for internal Lipo's with 5v or 3v toggle and rechargeable circuitry on board. Then it's a real "Unplug-N-Go" project. Or standalone as some might say. In any case, I like it.
By the way, what IS the real purpose of having that second controller anyway??? Am I missing something???
UPDATE:
Found it... LUFA (Lightweight USB Framework for AVRs) Good stuff to know. Check'm out below.
http://www.fourwalledcubicle.com/LUFA.php
https://hackaday.com/2014/11/30/using-the-second-microcontroller-on-an-arduino/#comments
Another quick thought as to its use. Like I did. Make it talk to the kids cellphone. That will get their attention and hold on to it. HEY!!! Put a Simblee as the second processor... Yeah, that's the ticket!!!
UPDATE:
Tried to plug in my 2.8'' TFT Touch Shield v2.0. NO GO!!! Yikes, I didn't consider the ICSP header. The TFT has the female header but the male header pins normally found on the UNO are not available NOR considered into the form-factor of the breadboard. Interesting.
Great product
Worked right from the beginning. I didn't need to install anything, just selected it as an Arduino Uno in the compiler and it uploaded perfectly. I would like it if it used mini USB instead of micro USB since I am so used to the RedBoard, but otherwise I really like it
A good tool but I'm a little mad 😡
The product itself is well made and a good tool. But I'm a little mad because I had the exact same idea to combine a breadboard and a microcontroller and encase it with ABS. I had this idea awhile ago, and I regret not pursuing it. I can now see how successful the idea is. But as a product itself, it is very useful and well made.
Really convenient taking work on the road
I do a lot of device interfacing in the field and this is a great device for quickly hooking into sensors and checking things out. I have three and will likely buy more as I keep finding more uses for them.
Motivated me to develope prototype for patent idea from 7 years ago
First time Arduino user that found the sweet spot to easily develop a prototype of an automotive industry safety improvement idea I have had for over 7 years, That said, the cost for a basic breadboard and Arduino compatible platform is pretty high. So I will continue to use it for quick developments and have purchased a $9 Arduino to build the final prototype model for use in my demos.
Excellent prototype board
This board is so awesome for prototyping, makes debugging super easy.
It is really nice to work with.
That pure breadboard feel is so handy! Own 3 now.
This is going to be great in our teaching lab.
Really like that it is self-contained.
Dead On Arrival...
Plugged it in, and nothing: IDE didn't see it, and in fact, my computer didn't see it in Device Manager. I plugged in my genuine Uno, and it was detected instantly. I contacted Sparkfun support. The technician believed the unit was bricked, and he sent a link with instructions on how to unbrick it. Didn't work. I had to leave for a week, and when I got back, I decided to test it with several other micro-B USB cables. I found one cable that would intermittently work with the STEMTera board: it would only work with a slight downward pressure on the connector, and would only connect in DM for a second, and it would quickly disconnect. As an EE, and without opening the case to check, I suspect the micro-B connector is somehow jacked-up (no pun intended). I returned it under an RMA, so I'll have to wait & see how Sparkfun resolves the issue before I can comment further.
I am loving it.
It's so convienent having an Arduino built into a breadboad.

Interesting idea, but it would be nice if the '328 were a socketed hole-through chip, rather than an SMD. That way, if you burn out the '328 -- an all too common event when tinkering or developing a project -- it's a simple $4 fix, rather than having to throw out a $45 project board.
If blowing out micro-controllers is a common occurrence with you you might try watching some videos on YouTube about electronics and Arduinos. It isn't rocket-surgery and the amount of resources on the web today for noob electronics people is astounding. I've been tinkering with Arduino for 7 years and have never nuked a single component (at east not accidentally :-), much less an Arduino.
A DIP IC makes absolutely no sense for a compact design like this.
It's for prototyping. It makes perfect sense. Besides, if the product takes off, as I suspect it will, an IC version could be offered for us who like to teach 6, 7 and 8 year olds that they can do what an Electrical Engineer with a 4 year degree from a prominent university can do. Yet, in that process, mistakes are made, things are forgotten, code is wrong, jumpers short out as well as many other accidents that can damage the poor little micro. Shit happens. We're only human. Unless your member /#432989, then your perfect and nothing wrong happens. Must be nice. :))
Well, convinced me. Very cool idea. Waiting for its arrival.
However, I do have to agree with Mr. thegrendel about the SMD. What can I say, some of us take chances. So what if it adds a couple 2 or 3 mm to its height.
Would it be possible to include an fun project book with the STEMTera? Just something with a dozen or so projects suitable for new and young project starters?
Cool, combine Arduino with Lego seamlessly. If I didn't already have a butt-load of both I'd buy one!
Simple. Yet genius. So glad someone came up with this.
So, it's described as having 2 microcontrollers, but I'm seeing references to a 328P, a 16U2, and a 32U2. What's actually in there?
I understand the confusion. It is pretty weirdly worded
The serial bridge is EITHER a 16u2 or a 32u2. Apparantly some of the boards have a 16u2 instead of the more spacious 32u2, perhaps they are older or there was trouble sourcing enough 32u2. That is why they mention both of them (I think).
So when you buy this you get one with either a 328P+16u2 or 328P+32u2... or there may be just a typo.
Looks like it uses the 328 for uno compatibility, and the 32u2 for USB serial comms.. and exposes the 32U2 so you can program that too..
I think he is confused by the mention of both the 16u2 and 32u2 . Only one of them is used on any board, but the description sounds like there is a 16u2 and a 32u2 besides the 328p on a board.
Yes, I'm crystal-clear on the two-chips aspect of it... But they make reference to 3 different chips.
I was going to say look at the kickstarter or product page, but just looked again, and the kickstarter page refers to there being a 16u2 in one pllace and the 32u2 elsewhere.. I suspect they started out with a 16u2 and migrated to the 32u2, but am just supposing. damn
@Chiel & @Luc,
Yes you are right.
Please accept my apology for the confusion.The project started with a Developers' Edition that has 328P+16u2, a batch of these were sent to the early adopters. As the funding increased to a level, the Production Units have been upgraded to 328P+32u2.
All SparkFun's STEMTera Breadboard are the upgraded version with 328P+32u2. Hope this clarifies the confusion.
A question to all: can one access the 32U2 pins via the Arduino IDE?
you can also use LUFA to take advantage of the full USB capabilities, sample projects, keyboard, joystick, MIDI are located here
https://github.com/STEMTera/STEMTera-Breadboard-B328-LUFA-Demo-Project
If you're using an ATmega32U2 core in the IDE then yes. But if you're only using the Uno part of it then no.
Where does one buy those breadboard contacts? And what are they called? Does anyone know?
The contact are normally called clips. As far as I know, no company is selling the clips. For this board, the clips are custom made.
Funny how I developed a similar product 3 years ago and sparkfun didn't contact me to produce it. Well played Stemtera.
https://forum.sparkfun.com/viewtopic.php?f=5&t=32260&p=143254&hilit=rfefx#p143254
It's not as eloquent as the STEMTera, so no wonder they didn't contact you.
can the case be safely opened to get to the board inside, or is the casing permanently or semi-permanently sealed or glued closed? Some may ask why, answer is cause i wanna, i like seeing inside the little black boxes :-)
It's a good idea, but I don't get the price. I mean this is just an arduino mashed up with a breadboard. I could buy both of those for like $6 from China (maybe not the highest quality, but still, if I want to go for the best name brand stuff, $30 and still saving a lot).
great idea. but that price is insane. completely missing the mark for the target audience (or trying to take advantage).
politics aside, still nice product (but I wont be buying one at that price point)
There's reasons for the price, mainly it's this much because it's brand new. As you get more and more produced, then the price can come down. I just got mine in the mail from the KS, and I believe it worked out to about $35/ea.
Two gripes.
1: The SMT versions of the atmega328 have 8 analog inputs, but only 5 of them are used on the arduino. In a new design why not bring these pins out someplace, extend the Arduno footprint a bit. 2: Atmel now has a pin compatible upgrade, the atmega328B with TWO usarts, TWO spi interfaces, and TWO I2C interfaces. Plus the usarts can be used in SPI mode (so you have FOUR of them). True some pins are used in multiple ways so you can't use all of these things at the same time. Why not use this part in new designs?
hi,....
can you provide a link to this:
"Atmel now has a pin compatible upgrade, the atmega328B with TWO usarts......"
thanks!
Looks like it's called the ATmega328PB:
Differences between ATmega328P and ATmega328PB
ATmega328PB datasheet
You mention it works with 1000's of shields but I don't see the typical header layout on this breadboard. You know, the one with the single set of pins .05 off from the others so you can't plug it into a traditional breadboard.
If you look carefull at the rows of headers to the right of the logo and leds on the breadboard (opposite of the reset button and between the actual breadboard and power rails) you can recognize the typical arduino layout. Even the little offset between the 2 headers (d1-d7 and d8-scl) is there.
It is a bit hard to see at a glance, but yeah it is indeed compattible. It really is mostly a arduino with a breadboard around it and having also the serial bridge's IO pins broken out.
Yes, now I see it, thanks!