SparkFun Thing Plus - ESP32 WROOM (Micro-B)
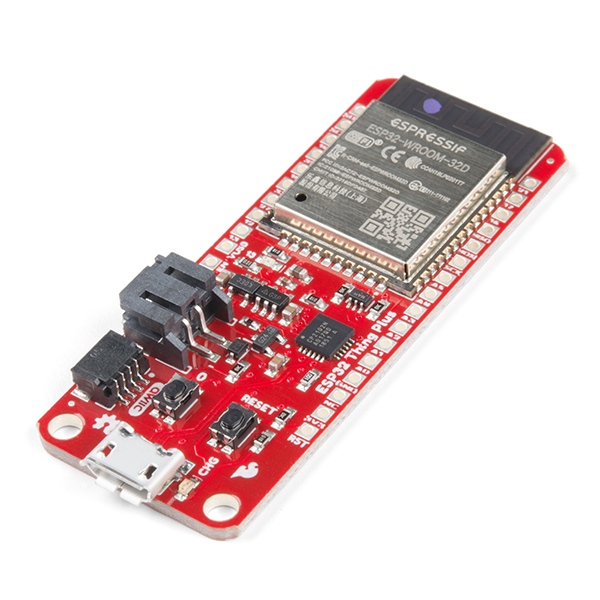
The SparkFun ESP32 Thing Plus is the next step to get started with Espressif IoT ideations while still enjoying all the amenities of the original ESP32 Thing. Espressif's ESP32 WROOM is a powerful WiFi and Bluetooth MCU module that targets a wide variety of applications. At the core of this module is the ESP32-D0WDQ6 chip which is designed to be both scalable and adaptive. To make the Thing Plus even easier to use, we've moved a few pins around to make the board Feather compatible and it utilizes our handy Qwiic Connect System which means no soldering or shields are required to connect it to the rest of your system!
Why the name? We lovingly call it the “Thing” because it's the perfect foundation for your Internet of Things project. The Thing does everything from turning on an LED to posting data with your chosen platform, and can be programmed just like any microcontroller. You can even program the Thing through the Arduino IDE by installing the updated ESP32 Arduino Core.
The ESP32 Thing plus integrates a rich set of peripherals, ranging from capacitive touch sensors, SD card interface, Ethernet, high-speed SPI, UART, I2S and I2C. Thanks to the onboard ESP32 WROOM module, the SparkFun Thing Plus features 16MB of flash memory, 520kB of internal SRAM, an integrated 802.11 BGN WiFi transceiver and dual-mode Bluetooth capabilities, and a JST connector to plug in a LiPo battery.
The SparkFun Qwiic Connect System is an ecosystem of I2C sensors, actuators, shields and cables that make prototyping faster and less prone to error. All Qwiic-enabled boards use a common 1mm pitch, 4-pin JST connector. This reduces the amount of required PCB space, and polarized connections mean you can’t hook it up wrong.
SparkFun Thing Plus - ESP32 WROOM Features
- ESP32 WROOM Module
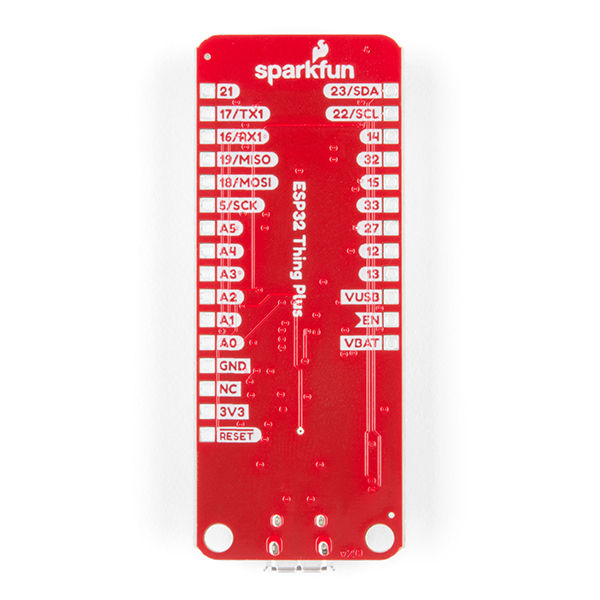
- 21 Multifunctional GPIO
- Up to thirteen 12-bit ADC Channels
- Up to two DAC channels
- Up to sixteen PWM outputs
- Up to eight capacitive touch pins
- Up to three SPI Busses (only one is configured by default in the Arduino IDE)
- An available I2S Audio Output
- Up to two I2C Busses (only one is configured by default in the Arduino IDE)
- Up to two UARTs (only two are configured by default in the Arduino IDE, one UART is used for bootloading/debug)
- 21 Multifunctional GPIO
- Thing Plus (or Feather) Form-Factor:
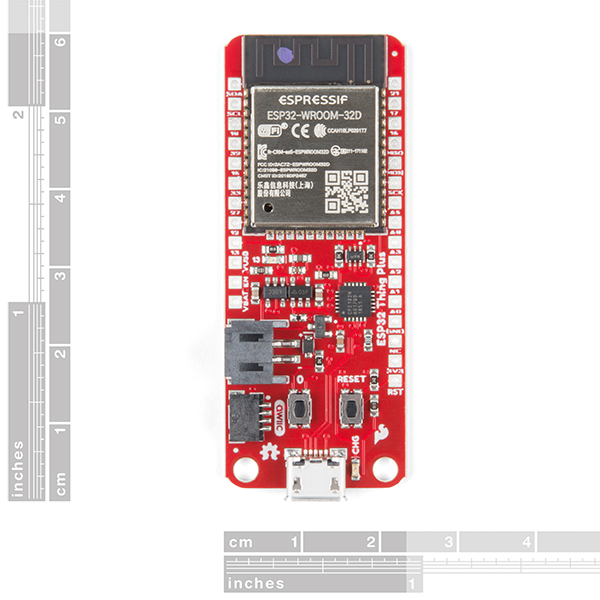
- Dimensions: 2.55" x 0.9"
- Two Mounting Holes:
- 4-40 screw compatible
- 28 PTH Pins
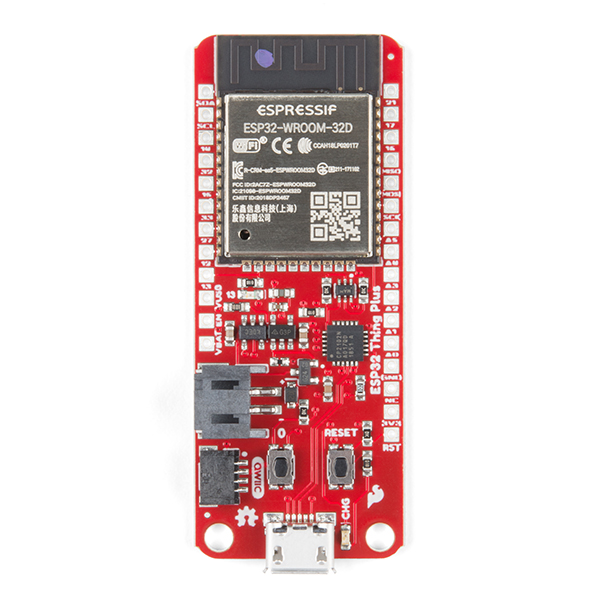
- micro-B USB Connector
- 2-pin JST Connector for a LiPo Battery (not included)
- 4-pin JST Qwiic Connector
- LEDs:
CHG- Yellow battery charging indicator13- Blue status/test LED
- Buttons:
0Reset
ESP32 WROOM General Features:
- Operating Voltage: 2.3 to 3.6 V
- 2.5 µA deep sleep current
- 80 mA average operating current
- Opterating Temperature: -40 to 85 °C
- Xtensa® Dual-Core 32-bit LX6 Microprocessor (up to 240MHz)
- 448KB of ROM and 520KB SRAM
- 16MB of Embedded SPI flash storage
- Integrated 802.11b/g/n WiFi 2.4GHz transceiver
- Integrated dual-mode Bluetooth (classic and BLE)
- Hardware accelerated encryption (AES, SHA2, ECC, RSA-4096)
SparkFun Thing Plus - ESP32 WROOM (Micro-B) Product Help and Resources
ESP32 Thing Plus Hookup Guide
March 7, 2019
Hookup guide for the ESP32 Thing Plus (Micro-B) using the ESP32 WROOM's WiFi/Bluetooth system-on-chip in Arduino.
SparkFun Qwiic Shield for Thing Plus Hookup Guide
January 30, 2020
A short guide for assembling and using the SparkFun Qwiic Shield for Thing Plus.
Monitor Sensor Data from Anywhere
August 10, 2022
Using WiFi to send sensor data from an ESP32 to a WiFi network and be able to read it from an IoT Dashboard from anywhere in the world.
Measuring Height with Atmospheric Pressure
September 29, 2022
Measure height using atmospheric pressure with your Qwiic MicroPressure breakout board!
Core Skill: Programming
If a board needs code or communicates somehow, you're going to need to know how to program or interface with it. The programming skill is all about communication and code.
Skill Level: Competent - The toolchain for programming is a bit more complex and will examples may not be explicitly provided for you. You will be required to have a fundamental knowledge of programming and be required to provide your own code. You may need to modify existing libraries or code to work with your specific hardware. Sensor and hardware interfaces will be SPI or I2C.
See all skill levels
Core Skill: Electrical Prototyping
If it requires power, you need to know how much, what all the pins do, and how to hook it up. You may need to reference datasheets, schematics, and know the ins and outs of electronics.
Skill Level: Rookie - You may be required to know a bit more about the component, such as orientation, or how to hook it up, in addition to power requirements. You will need to understand polarized components.
See all skill levels
Comments
Looking for answers to technical questions?
We welcome your comments and suggestions below. However, if you are looking for solutions to technical questions please see our Technical Assistance page.
Customer Reviews
4.4 out of 5
Based on 14 ratings:
1 of 1 found this helpful:
Longer range, nore reliable WiFi connectivity
This embedded processor was used as part of a summer engineering program that required teams of students to develop working prototypes of a COVID-related device. The students used an Internet of Things interface to connect their hardware to their smart devices. This was an impressive feat for non-computer engineering/ computer science students who never touched embedded hardware or software before. SparkFun, you nailed it with this one--powerful and easy to use.
jck
3 of 3 found this helpful:
Tiny Swiss-Army Knife from Shanghai
I've bypassed the Arduino support and gone straight to C++. The ESP32 IDF and its dependencies have worked fine on my Linux (Ubuntu 20.04) system.
Two things I'd like to have: 1) Schematics showing equivalent circuits when various I/O pins are declared as input, output, pull-up, pull-down or open (drain?) so that I do not accidentally destroy the Thing; 2) better guidance toward real-time debug via JTAG. Given the potential for huge programs, misunderstanding FreeRTOS capabilities and possibly blocking on incomplete communication, this is a necessity, IMHO. Sparkfun could make a few extra bucks by providing and documenting an end-to-end debug solution.
Great support from SparkFun ordering department
When I got my unit I ciuld not get it to work. Being new to Sparkfun I was not able to get to the forum to ask for help. So I went direct to the order department and told them my unit's symptoms and with getting into the forum. Within 24 hours I was informed a replacement was being shipped and someone else contacted me and said that my login problems had been corrected. The new unit works fine as far as I have been able to check out the example sketchs. My only concern is that the cross references between the Thing Plus and Arduino language are really hard for a newbee to figure out. However, I am not upset because it certainly will keep my mind working in my retirement. I commend SparkFun for working to make so many different kits available to hobbyests.
Reliable and fast.
Solid as a rock, 100% compatible with Adafruit Terminal Block Breakout FeatherWing, the only terminal block for this device to prototype. I am using it to control my home thermostat. Sparkfun did not include the pin header, really Sparkfund? Those this are very cheap, but if you dont have them, the board is kind of useless. One thing I dont like about this board is the way the number the pins, it seems to me they did not follow a sequence, it's a mess, no Sparkfun fault. Look these GPIOs, 12, 27, 22, wow!
Works very well.
It connects fairly easily and works well. Documentation is excellent unlike several others I have bought in the past..
Not quite
I had an application to submit sensor data via WiFi MQTT. I wanted the device to be battery powered. The Thing Plus was drawing 6.7 mA from the battery when the WROOM was in deep sleep. That's not anywhere near acceptable! :(
It did run all the code I had developed in the ESP32 Dev Kit C. And the qwiic connector to the sensor worked very nicely.
great ESP32 device
great ESP32 device with qwiic.
WELL THOUGHT OUT
Very neat design, well thought through, making it easy to use as a tool to learn wifi and bluetooth, and then, once ready, to incorporate into a system design, allowing a simple path toward product, or new concept development.
Wi-Fi widget up and running fast.
With this board combined with the PlatformIO plugin for VS Code, it takes no time to get a Wi-Fi connected project up and running.
Great board
This board, programing with the esp-idf libraries was a breath of fresh air after banging my head against the wall trying to get around bugs in the Arduino MKR boards.
Works well
Lots of features & pins. It's now on my list of controllers to use for future projects... rather, it is my list of controllers to use for future projects.
Tons of fun
I'm just getting started with this board, but it has everything and the kitchen sink, operates quickly, programs easily, I've loved every second.
Drivers are useless. Just a paper weight.
I can't imagine why this device would be designed to require very specific drivers just to drive the reset circuit. The tutorial on installing the drivers is not very helpful. Also, the troubleshooting section says you need to have the CP210x drivers version 10.1.3.2130 or higher. I installed the drivers the the hookup guide linked to, so now I have driver version 11.3.0.176 but nothing can program this device. The device just sits there doing absolutely nothing. Will not communicate with my computer at all. Useless crap. Useless drivers. Wasted money.
A wonderful board!
Realized all kinds of projects easily with this board. Great documentation and support.


Is this compatible with existing screw sets for raspberry pi?
What is the EN pin on the board connected to internally? I can't find the connection in the schematic file
I would greatly appreciate it if you could attach to the Hookup Guide Classic Bluetooth example for transmitting accelerometer data in an Arduino environment. Between two SparkFun Thing Plus processors - ESP32 WROOM
There is a flaw in the design of this board when operating with only a battery. In order for it to work properly, V_USB should be pulled to 0 V, causing Q1 to be switched on. As it is, V_USB does not drop to 0, and Q1 remains off. Therefore, the input to U3 is about 3 V with a 3.6 V battery. This means the regulator input is incorrect and the 3.3-V output rail is also incorrect. I have verified this flaw with a voltmeter on more than one board.
For some reason, the QWIIC connector is connected to IO22 and IO23 instead of the Arduino default IO21 and IO22. Use Wire.begin(23, 22); to use the QWIIC port
The ESP32 uses the Feather footprint, which also uses IO22 and IO23 for I2C. It's mentioned in the hookup guide, but the "Adafruit ESP32 Feather" should be selected for the board definition file.
Thanks. Not everyone is using the Arduino software suite. I think the hardware documentation should not make assumptions. There are two I2C devices on the ESP32 and nothing intuitively indicates the Qwiic connector on that particular board just connects to GPIO 22/23. As a side note, my problem was that the default I2C address of the SparkFun BME680 breakout does not match the default I2C address of the BOSCH BME680 chip, as such the official BOSCH BSEC library does not work on that breakout without either modifying the library, or soldering a jumper on the breakout board. Several hours wasted for no good reason.