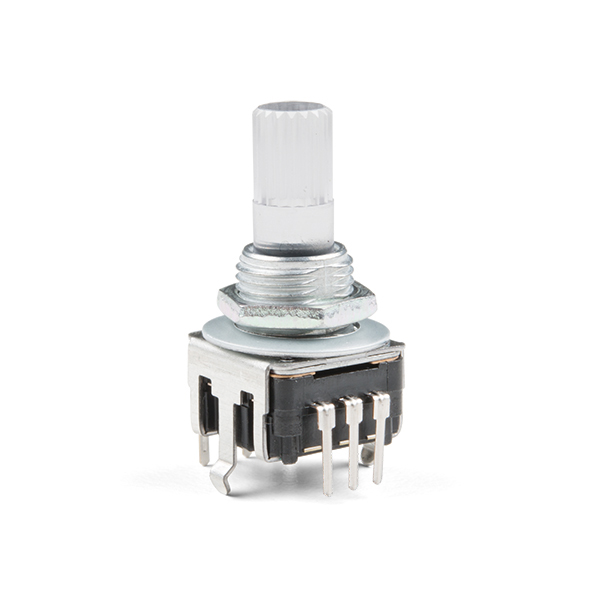
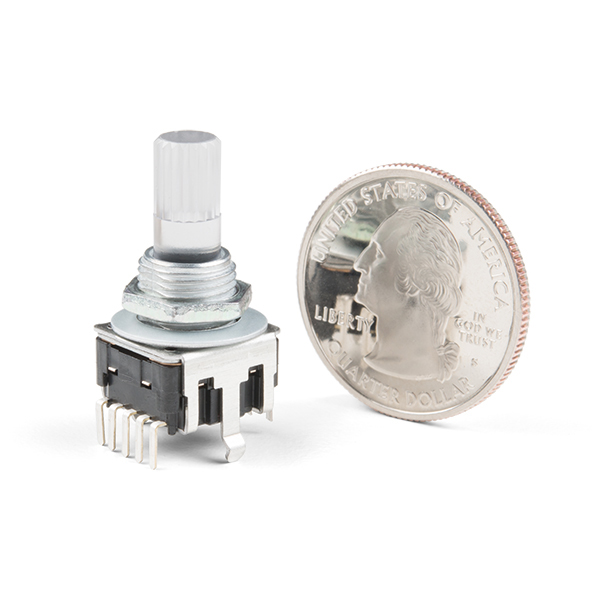
Rotary Encoder - Illuminated (RGB)
Rotary encoders can be used similarly to potentiometers. The difference being that an encoder has full rotation without limits (It just goes round and round). They output gray code so that you can tell how much and in which direction the encoder has been turned. They're great for navigating menu screens and things like that.
This encoder is especially cool because it has a common anode RGB LED built in, as well as a push-button. This version has an updated material that is heat resistant and slightly changed dimensions, but should still work well with our rotary encoder breakout board.
- Switch Travel: 0.5mm
- Shaft Diameter: 6.0mm
- Shaft Length: 18mm
- Vertical Through-Hole Mount
- 24 Pulses per Rotation
- Red/Green/Blue LED
- Pushbutton
Rotary Encoder - Illuminated (RGB) Product Help and Resources
Getting Started with the LilyPad MP3 Player
May 8, 2013
The LilyPad MP3 Player is an amazing little board that contains almost everything you need to play audio files. You can use it to create all kinds of noisy projects, from MP3 hoodies to talking teddy bears. Your imagination is the only limit! This tutorial will help you get started.
Core Skill: Soldering
This skill defines how difficult the soldering is on a particular product. It might be a couple simple solder joints, or require special reflow tools.
Skill Level: Rookie - The number of pins increases, and you will have to determine polarity of components and some of the components might be a bit trickier or close together. You might need solder wick or flux.
See all skill levels
Core Skill: DIY
Whether it's for assembling a kit, hacking an enclosure, or creating your own parts; the DIY skill is all about knowing how to use tools and the techniques associated with them.
Skill Level: Noob - Basic assembly is required. You may need to provide your own basic tools like a screwdriver, hammer or scissors. Power tools or custom parts are not required. Instructions will be included and easy to follow. Sewing may be required, but only with included patterns.
See all skill levels
Core Skill: Programming
If a board needs code or communicates somehow, you're going to need to know how to program or interface with it. The programming skill is all about communication and code.
Skill Level: Competent - The toolchain for programming is a bit more complex and will examples may not be explicitly provided for you. You will be required to have a fundamental knowledge of programming and be required to provide your own code. You may need to modify existing libraries or code to work with your specific hardware. Sensor and hardware interfaces will be SPI or I2C.
See all skill levels
Core Skill: Electrical Prototyping
If it requires power, you need to know how much, what all the pins do, and how to hook it up. You may need to reference datasheets, schematics, and know the ins and outs of electronics.
Skill Level: Noob - You don't need to reference a datasheet, but you will need to know basic power requirements.
See all skill levels
Comments
Looking for answers to technical questions?
We welcome your comments and suggestions below. However, if you are looking for solutions to technical questions please see our Technical Assistance page.
Customer Reviews
2.7 out of 5
Based on 3 ratings:
2 of 2 found this helpful:
Poor contact between LED and pins
As the title says, the quality on these are not the best. The LED makes up part of the switch mechanism and relies on some tiny springy pads to create contact between the LED and the outer pins. On the one I got the LED stopped working after trying the button function a couple of times so I disassembled the encoder to verify that I didn't burn out the LED somehow and the LED works fine on its own. In the end I managed to get the LED working at expense of the button function.
Hmm, sounds like a defective part. If you want to fill out a return ticket we can work with you on a replacement: https://www.sparkfun.com/returns
1 of 1 found this helpful:
Red LEDs are very dim or don't work
I bought three of these and on two of them the LEDs are dim or very dim. The third one I don't think the red LED is working at all.
I used a 5v with a 150 ohm resistor. Carefully adjusting max current and forward voltage doesn't appear to make a difference.
Also makes a great RGB Tact Switch
I use this encoder along with the https://www.sparkfun.com/products/11722 BOB and Sparkfun cabling to create an RGB Tactile Switch. I don't need the encode function, but I do need the center switch press. Having the switch, PCB, knob and cable all available make this very easy to implement.


Is there a pinout somewhere that I can use?
Hi there - I couldn't find one either so I made one: https://qbalsdon.github.io/circuitpython/rotary-encoder/python/led/2021/02/27/rgb-rotary-encoder.html
I would like to know this as well! The datasheet does not specify.
I would love a version of this without detents, or maybe a guide on how to remove the detent mechanism
It's pretty simple to do. Remove the outer metal housing, pry apart the pieces then remove the little copper (?) plate in between.
Is there example code for use with raspberry pi? I'm interested in using this in place of a KY040 rotary encoder on a pi project. Thanks!
Hi there, it sounds like you are looking for technical assistance. Please use the link in the banner above, to get started with posting a topic in our forums. Our technical support team will do their best to assist you.
That being said, I did a simple Google search which yielded several relevant tutorials in the results.
This is possibly a ridiculous request, but is a 3D model of this part available? Its pins fit into the footprint of the Bournes PEL12T devices but the body is slightly different.
Unfortunately, we do not have the resources for that; however, you can find a dimensional drawing (aka mechanical drawing) for the part under the Documents tab, just below the product pricing.
Yeah, I figured as much. The dimensional drawing is nice but I can't import it into Fusion 360. The manufacturer of the part, Top-Up, doesn't have any 3D models on its website.
But it turns out that these parts are copies of the TE Connectivity DPL12 parts (https://www.te.com/commerce/DocumentDelivery/DDEController?Action=showdoc&DocId=Data+Sheet%7F1-1773449-0%7FG%7Fpdf%7FEnglish%7FENG_DS_1-1773449-0_G.pdf%7F2-1879314-1) and TE provides models.
(edit: not an exact copy! Dang it!)
I am pretty sure Fusion360 doesn't operate in the manner, in which you described. You would have to use the mechanical drawing as a reference, for the part's dimensions, to create your own 3D model. That being said, it sounds like you were able to sort things out on your own.
(As a note, the comment section uses markdown... to add a hyperlink, use the following syntax:
[text](web address).)I know that F360 "doesn't operate in the manner, in which I described," hence the question: do you have a proper 3D model?
Anyway, I created one. Use at your own risk. it's here
I should have just bought the Bournes encoders I originally specified -- Bournes provides models.
**Prior to Arduino 1.0.1, it was possible to configure internal pull-ups in the following manner:
pinMode(pin, INPUT); // set pin to input digitalWrite(pin, HIGH); // turn on pullup resistors
remove these lines for ROT_A and B, and just declare pinMode(pin, INPUT_PULLUP); for pulled-up inputs on ROT_A, ROT_B
** warning ** The sample code for both RG and RGB encoders instructs connecting the LED contacts directly to the Arduino:
// Rotary encoder pin 1 (red anode) to digital pin 10
// Rotary encoder pin 2 (green anode) to analog pin 1
A series current limiting resistor should be used between the anodes and the Arduino pins.
Looks like a fun part. I've ordered a few, and am working on an Eagle Layout now.
I think this part would be much improved if the switch pin connected to 'C' rather than Pin 5 when pressed. Many microcontrollers have built in pull-up resistor capability, but far fewer have built in pull down capability. For those micros, an external pull down resistor looks to be necessary.
Good luck with your project. I believe that this part is in our Eagle library somewhere.
Unfortunately, we don't manufacture components like these.
For every rotary encoder you sell you should add 'how many pulses / 360°' in the description, so your customers don't have to look up the datasheet. It is 24 for this one...