SparkFun Qwiic OpenLog
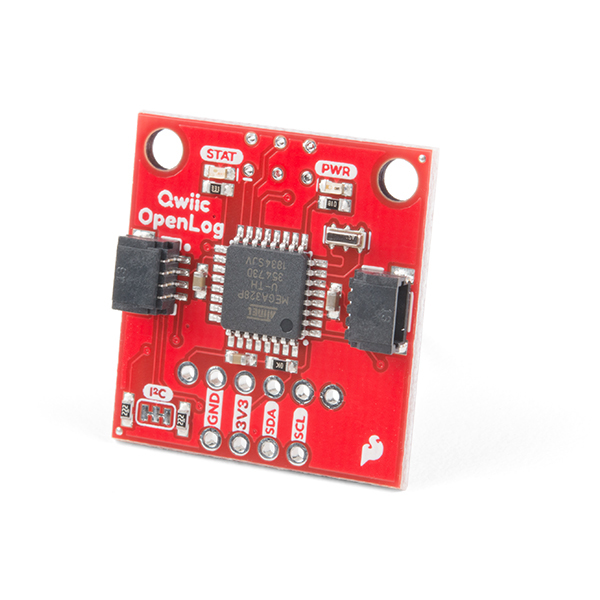
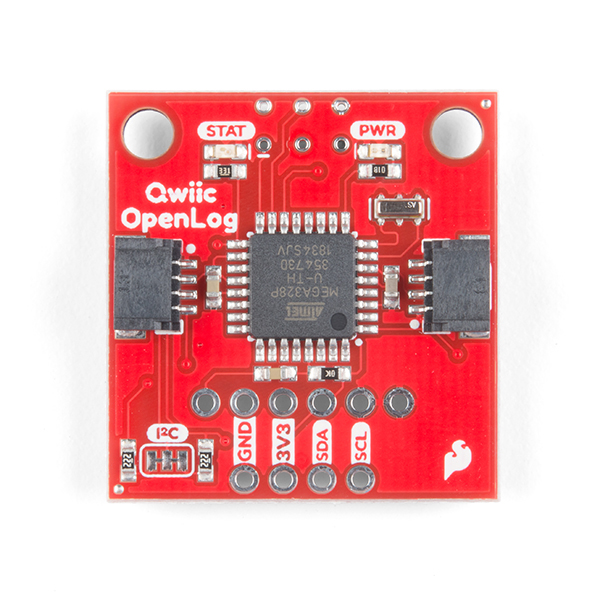
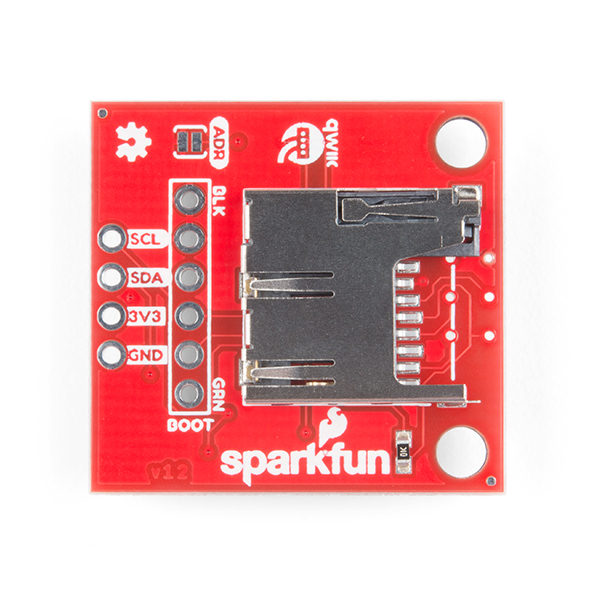
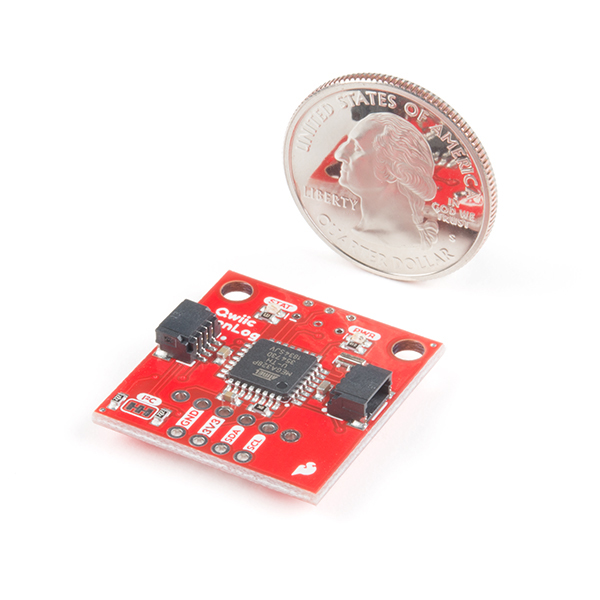
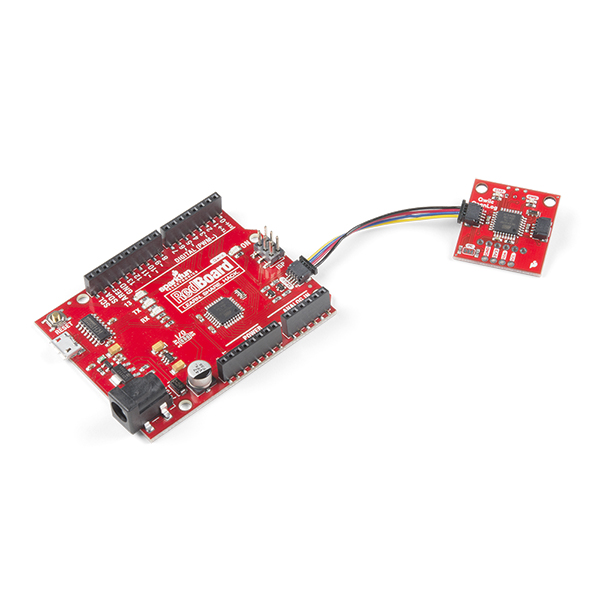
The SparkFun Qwiic OpenLog is the smarter and better looking cousin to the extremely popular OpenLog but now we've ported the original serial based interface to I2C! Thanks to the added Qwiic connectors, you can daisy chain multiple I2C devices and log them all without taking up your serial port. The Qwiic OpenLog can store, or "log", huge amounts of serial data and act as a black box of sorts to store all the data that your project generates, for scientific or debugging purposes. Utilizing our handy Qwiic system, no soldering is required to connect it to the rest of your system. However, we still have broken out 0.1"-spaced pins in case you prefer to use a breadboard.
Like its predecessor, the SparkFun Qwiic OpenLog runs off of an onboard ATmega328, running at 16MHz thanks to the onboard resonator. The ATmega328 has been sure to feature the Optiboot bootloader loaded, which allows the OpenLog to be compatible with the “Arduino Uno” board setting in the Arduino IDE. It is important to be aware that the Qwiic OpenLog draws approximately 2mA-6mA in idle (nothing to record) mode, however, during a full record the OpenLog can draw 20mA to 23mA depending on the microSD card being used.
The Qwiic OpenLog also supports clock stretching, which means it performs even better than the original and will record data up to 20,000 bytes per second at 400kHz. As the receive buffer fills up this OpenLog will hold the clock line, letting the master know that it is busy. Once the Qwiic OpenLog is finished with a task, it releases the clock thus allowing the data to continue flowing without corruption. For even better performance the OpenLog Artemis is the tool you need, featuring logging speeds up to 500000bps.
Note: The SparkFun Qwiic OpenLog supports 64MB to 32GB microSD cards in both FAT16 and FAT32 formats.
Note: The I2C address of the OpenLog is 0x2A and is jumper selectable to 0x29. A multiplexer/Mux is required to communicate to multiple OpenLog sensors on a single bus. If you need to use more than one OpenLog sensor consider using the Qwiic Mux Breakout.
The SparkFun Qwiic Connect System is an ecosystem of I2C sensors, actuators, shields and cables that make prototyping faster and less prone to error. All Qwiic-enabled boards use a common 1mm pitch, 4-pin JST connector. This reduces the amount of required PCB space, and polarized connections mean you can’t hook it up wrong.
- Continuous data logging at 20,000 bytes per second without corruption
- Compatible with high speed 400kHz I2C
- Compatible with 64MB to 32GB microSD cards (FAT16 or FAT32)
- Preloaded Uno bootloader so upgrading the firmware is as easy as loading a new sketch
- Valid I2C Addresses: 0x08 to 0x77
- 2x Qwiic Connectors
- Example 1 - Writing to a log
- Example 2 - Creating and appending a file
- Example 3 - Creating a new empty file
- Example 4 - Reading the size of a file
- Example 5 - Read the contents of a file
- Example 6 - Make a directory
- Example 7 - Read contents of a directory
- Example 8 - Remove a file and directory
- Example 9 - Read firmware version
- Example 10 - Check status
- Example 11 - Change I2C address of OpenLog
These examples are included when you install the Qwiic OpenLog library.
SparkFun Qwiic OpenLog Product Help and Resources
Choosing an Arduino for Your Project
December 11, 2017
Examining the diverse world of Arduino boards and understanding the differences between them before choosing one for a project.
Core Skill: Programming
If a board needs code or communicates somehow, you're going to need to know how to program or interface with it. The programming skill is all about communication and code.
Skill Level: Rookie - You will need a better fundamental understand of what code is, and how it works. You will be using beginner-level software and development tools like Arduino. You will be dealing directly with code, but numerous examples and libraries are available. Sensors or shields will communicate with serial or TTL.
See all skill levels
Core Skill: Electrical Prototyping
If it requires power, you need to know how much, what all the pins do, and how to hook it up. You may need to reference datasheets, schematics, and know the ins and outs of electronics.
Skill Level: Rookie - You may be required to know a bit more about the component, such as orientation, or how to hook it up, in addition to power requirements. You will need to understand polarized components.
See all skill levels
Comments
Looking for answers to technical questions?
We welcome your comments and suggestions below. However, if you are looking for solutions to technical questions please see our Technical Assistance page.
Customer Reviews
No reviews yet.

Looks like this version of the Open Log is still partially incompatible with the SAMD21 boards. Only certain functions work when I connect it to my Arduino MKR WiFi 1010 and run the example scripts. I was able to verify this works on an old Arduino Leonardo.
The SD card sometimes does not want to engage when I push it into the slot. On the top of the metal cage there is a unique club-shaped cut-out located nearest the side (not the other two cut-outs). When I push gently on that cut-out with my finger nail then I hear a click/pop, and then I can get the SD card to engage into the slot.
Does anyone know of some code ( callback function or some other method ) for the Qwiic OpenLog data logger ( I'm using the I2C version ) which could be used to date/time stamp the files save with the current time? That way when doing a directory the last date/time updated would show for each filename.
The edge board its compatible with this product ?
Arduino Nano IOT 33 is not supported, loss of information in long data strings
Hi there, it sounds like you are looking for technical assistance. Please use the link in the banner above, to get started with posting a topic in our forums. Our technical support team will do their best to assist you.
That being said, if it is an issue with the library you will want to file an issue in the GItHub repository. Otherwise, it could possibly be a compatibility issue with the microcontroller you are using. (I'm not too familiar with the newer Arduino boards like the Nano IOT 33.)
The github codes work partially, when it comes to executing, they lose characters at the time of writing, they do not open files, they do not return the status correctly either. Although they indicate that they already support SAMD21
Hi there, it sounds like you are indicating that you are experiencing issues with the library. Again, if that is the case, you will need to file an issue in the GitHub repository, for the engineer to look into the problem.
I had great experience with the serial version of OpenLog, and this Qwiic version is also good with some important limitations. I have been unable to get it to perform properly with SAMD21 based boards including the MKR WiFi 1010, nano 33 IoT, and the Sparkfun Redboard Turbo. However, it works fine with the Uno. The basic problem is that it drops a lot of characters in the file with the SAMD21 boards I have tried when using the commonplace x.print() or x.println() routines. The only way I have been able to get it to work "ok" with the SAMD21 boards is by saving data one byte at a time (printing one character at a time) followed delay(15) for each and every character. This is in no way a "high performance" (high speed) device when you need to slow it down like this just to eliminate dropped characters in the file. This problem when working with some boards seems to be well-known and is mentioned in the "howto" and on GitHub. It sounds like a hardware limitation, but perhaps a solution will emerge in the future!
Wait... would this have the potential to be the smallest Qwiic compatible development board out there? If you can easily reprogram it with an FTDI, it seems like it could be useful as a stand-alone unit interfacing a couple of Qwiic sensors. I might have to pick one up bc the small form factor could be a big plus for little projects...
Might want to give DEV-15423 a look at, I think that might meet your needs a bit better. :-)
Oh yeah! I also just saw DEV-15846, the Qwiic Artemis Openlog, which looks pretty slick.
...and the Qwiic Pro Micro is also a good option. Wow, I might have to update my lineup with some of these newer options!
buggy firmware, very unstable behaviour, hard to debug and to customize firmware
Hi folks! I have tried daisy-chaining the qwiic openlog and the qwiic scale on the same I2C line, and have run into problems. Each works fine when connected by themselves, but when they are both on the I2C line the library qwiic openlog examples lock up and won't write to the sd card. Changing the I2C address doesn't help. Any suggestions?
Is there any guide/documentation which can help to reload firmware directly to Openlog using Serial basic breakout?
EDIT: OK, I already found it here: https://learn.sparkfun.com/tutorials/qwiic-openlog-hookup-guide?_ga=2.67582737.1810058906.1567660438-2084988557.1560317336
I like Sparkfun documentations. They are really helpful!
Am I able to program this directly from my PC without a RedBoard?
Hi there, it sounds like you are looking for technical assistance. Please use the link in the banner above, to get started with posting a topic in our forums.
Unfortunately, that is not the designed intention of this board, which is why we don't give explicit information on how to do that. However, if you wish to go through the process of doing so, you would need to use the FTDI headers as mentioned in the hookup guide.