SparkFun RedBoard Artemis Nano
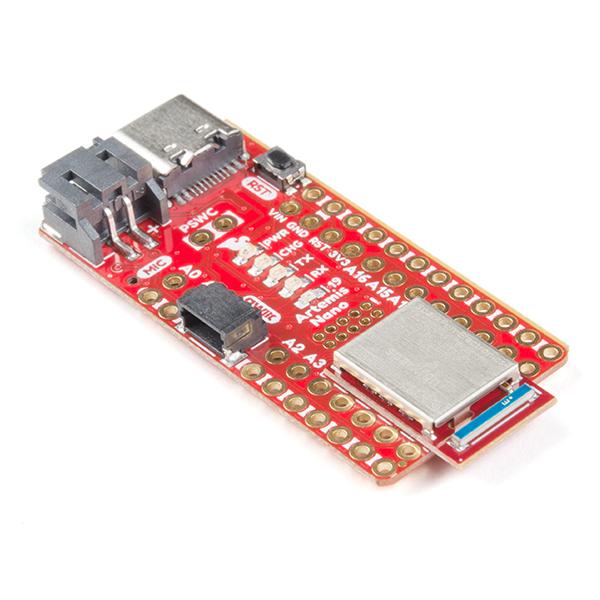
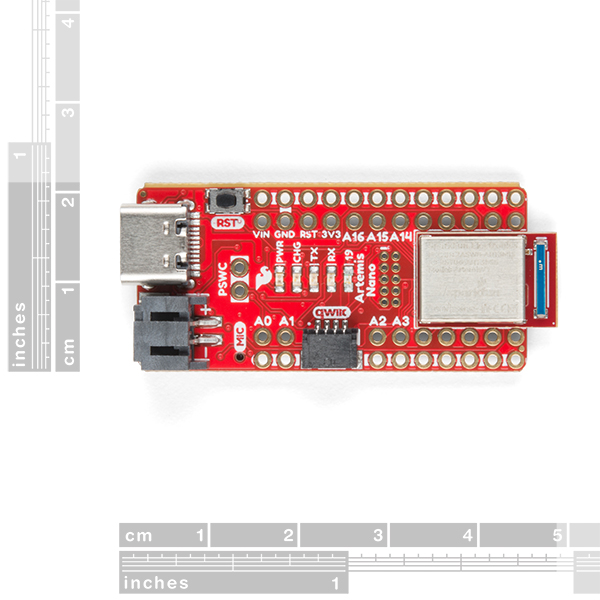
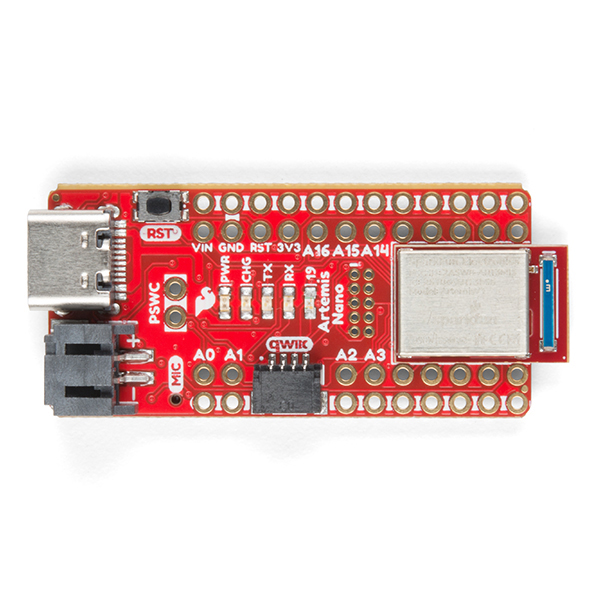
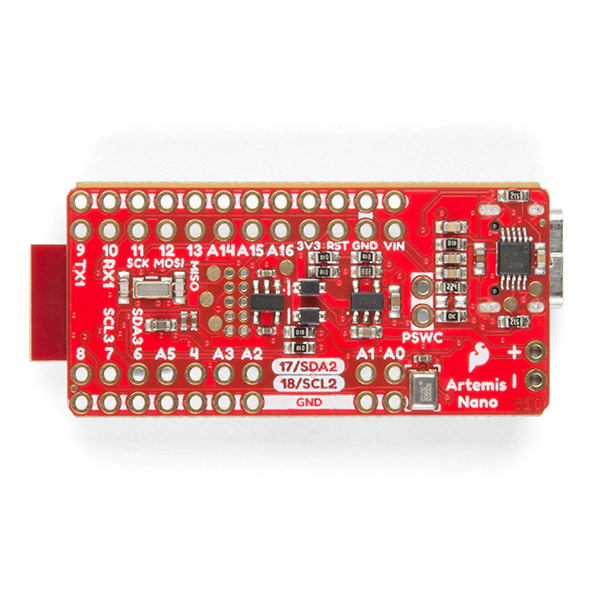
We like to joke the Artemis Nano is a party on the front and business on the back. And that's by design! All the important LEDs, connectors, labels, and buttons are presented on the front for the best user experience with all the supporting circuitry on the rear of the board. The RedBoard Artemis Nano is a minimal but extremely handy implementation of the Artemis module. A light weight, 0.8mm thick PCB, with on board LiPo-battery charging and a Qwiic connector, this board is easy to implement into very small projects. A dual row of ground connections make it easy to add lots of buttons, LEDs, and anything that requires its own GND connection. At the same time, the board is breadboard compatible if you solder the inner rows of pins.
A modern USB-C connector makes programming easy. The Nano is fully compatible with the SparkFun's Arduino core and can be programmed easily under the Arduino IDE. We've also exposed the JTAG connector for more advanced users who prefer to use the power and speed of professional tools. If you're looking for a simple, cost-effective board to replace your aging Arduino Uno or Arduino Nano, look no further. We've even added a digital MEMS microphone for folks wanting to experiment with always-on voice commands with TensorFlow and machine learning.
With 1MB flash and 384k RAM you'll have plenty of room for your sketches. The Artemis module runs at 48MHz with a 96MHz turbo mode available and with Bluetooth to boot!
The SparkFun Artemis Nano is an incredibly flexible device for a small footprint but if you're looking for all the bells and whistles, be sure to checkout our RedBoard and ATP footprints for even more I/O and capabilities.
- 17 GPIO - all interrupt capable
- 8 ADC channels with 14-bit precision
- 17 PWM channels
- 2 UARTs
- 4 I2C buses
- 2 SPI buses
- PDM Digital Microphone
- Qwiic Connector
SparkFun RedBoard Artemis Nano Product Help and Resources
How to Install CH340 Drivers
August 6, 2019
How to install CH340 drivers (if you need them) on Windows, Mac OS X, and Linux.
Designing with the SparkFun Artemis
June 20, 2019
Let's chat about layout and design considerations when using the Artemis module.
Artemis Development with Arduino
June 20, 2019
Get our powerful Artemis based boards (Artemis Nano, BlackBoard Artemis, and BlackBoard Artemis ATP) blinking in less than 5 minutes using the SparkFun Artemis Arduino Core!
Hookup Guide for the SparkFun RedBoard Artemis Nano
August 28, 2019
Get started with the powerful RedBoard Artemis Nano
Artemis Development with the Arduino IDE
September 10, 2020
This is an in-depth guide on developing in the Arduino IDE for the Artemis module and any Artemis microcontroller development board. Inside, users will find setup instructions and simple examples from blinking an LED and taking ADC measurements; to more complex features like BLE and I2C.
Artemis Development on Arm® Mbed™ OS (Beta)
September 10, 2020
With the latest Artemis DK, board, we now offer full Bluetooth support within the Arduino IDE and development with Mbed™ OS. While we have worked tirelessly to get the Artemis module supported in the next Mbed™ OS release, the next release isn't slated until after the Artemis DK becomes available to the public. Therefore, this post will provide users with a jump start for developing with Mbed™ Studio, prior to the next release (in a beta of sorts), by utilizing our fork of Mbed™ OS.
LiPo Fuel Gauge (MAX1704X) Hookup Guide
February 23, 2023
Monitor your LiPo battery with the LiPo fuel gauge! In this tutorial, we will be using the MAX17043 and MAX17048 to monitor a single cell, LiPo battery over the Arduino Serial Monitor. We will also connect a display to view the output without the need to connect the microcontroller to a computer.
Core Skill: Programming
If a board needs code or communicates somehow, you're going to need to know how to program or interface with it. The programming skill is all about communication and code.
Skill Level: Rookie - You will need a better fundamental understand of what code is, and how it works. You will be using beginner-level software and development tools like Arduino. You will be dealing directly with code, but numerous examples and libraries are available. Sensors or shields will communicate with serial or TTL.
See all skill levels
Core Skill: Electrical Prototyping
If it requires power, you need to know how much, what all the pins do, and how to hook it up. You may need to reference datasheets, schematics, and know the ins and outs of electronics.
Skill Level: Rookie - You may be required to know a bit more about the component, such as orientation, or how to hook it up, in addition to power requirements. You will need to understand polarized components.
See all skill levels
Comments
Looking for answers to technical questions?
We welcome your comments and suggestions below. However, if you are looking for solutions to technical questions please see our Technical Assistance page.
Customer Reviews
4.5 out of 5
Based on 6 ratings:
2 of 2 found this helpful:
Nearly perfect - ADC issues and Lipo charge rate too high though
I really like the Artemis Nano, it does many things very well and seems to be a great all rounder. The speech recognition on board has really opened doors for me too. However, the ADC not having the full range (only reads 0-2V) and the - for my projects anyway - overly strong charge current of 500ma has meant we can't use it for a lot of our wearable and portable devices. If this was set to something like 100ma it would allow greater flexibility for use with small batteries which I would think is the focus of a nano board. Using this with a 500+ma battery seems like towing a trailer with a ferrari. The multiple ground through holes around the edge take up a lot of space and I would think are unlikely to be used to their max capacity so there is plenty of space that could be freed up.
If this had 3.3V ADC and lower charge current it would be a definite 5 stars for me - so if these things don't matter to you go for it.
Preferred over Arduino
Faster clock speed, less power overall, more timers, more interrupts, more memory, BLE, microphone, Arduino compatible, and nearly the same price—why not?
The smaller form factor works great on a bread board with headers.
So close to perfect, just falls flat on software
This is an awesome little board--the Apollo3 module is crazy powerful, qwiic port means prototyping with this thing is a breeze, the lipo charger is more and more often becoming a must for little self-contained projects. The one place this falls short is BLE support compared to say the Arduino Nano 33 BLE, Photon Argon or one of the Ada's BLE feathers with nordic chipsets. The ability to easily define a GATT service and hook it up out of the box to stream sensor data or I/O events is non-trivial as of today. Fingers crossed Ambiq and SFE cook something up soon to get a bit easier to use and it will be the no brainer solution for quick prototypes and hopefully lead to the Artemis module becoming more common in 3rd party products!
Tiny, powerful, but BLE support in Arduino is still a work in progress
I'm using this with great success for a mobile robot; wrote the code with the Arduino IDE. The board works very well, and a 48 MHz ARM Cortex with lots of RAM and flash is great on such a small board!
The board's tiny size and battery capability (I run mine on 3 AA cells) are a real winner for a mobile or portable application.
Many of the more hardware-specific Arduino libraries may not be ported to this platform yet (IRMP now works, but FastLEDs isn't ported yet), so be aware. Bluetooth under the Arduino IDE is still being worked on. The Ambiq SDK should be a good choice for more demanding applications (and especially Bluetooth); I'm told you can use its HAL functions from the Arduino IDE, but I haven't tried that out to any extent. Example code for the Apollo3 peripherals can be found, but that can be challenging.
This board is a great choice if you're comfortable working in the Arduino IDE; if you're proficient with command-line compilers, the Ambiq SDK should enable you to do spectacular things with it.
I plan to use this board for lots of projects going forward.
Good
This is the first board I have bought from SparkFun and I am pleased with it's performance and size despite some minor issues.
It is the only board I own that runs the Max 30102 and Max30105 SpO2 sensors. It runs them well and it is snappy. The double row of through hole ground connectors on both sides of the board are a pleasant surprise I did not fully appreciate when I ordered. It facilitates prototyping on bread boards. Thoughtful details like this and the Qwiic connectors make projects easier to set up.
The board includes a microphone which I have not tried yet but seems like an interesting feature. The LiPo battery connector is solid and works well.
On the downside, the very first time I pressed the reset button the tiny metal frame around the button flew off. It is a tiny piece and getting it back on the button was tricky but solved with a pair of tweezers.
Note that this board does not use a microUSB like other brands do. Instead, it uses a USB C connector which is not included.
The third issue I've had with this board may be my fault. On Arduino 1.9 beta IDE, I keep getting error messages on my Windows 10 laptop saying the last USB device connected to the PC is not working correctly. This pops up several times a day whether or not I'm using the IDE. Not sure if this is a beta bug but it started with this board.
Overall I really like this little board. it is powerful, reasonably priced, and I'd buy it again.
An excellent surprise
I was pretty nervous about getting away from my standard Arduino nano I use in many small test tooling projects I do but since I needed the i2c buses [vs. stacking my nano with a Qwiic accessory board], the additional memory + the LiPo-battery capabilities, as the board already has all of the other features I need, I took the opportunity to give it a shot. 1st up, I ported multiple programs to the Artemis board I had for the Arduino Nano I was using, and once linked up with the Artemis board and uploaded, they ran perfectly, which answered the compatibility concern I had. At this point in time, I am looking forward to exploring the additional capabilities of the Artemis board and designing it into future projects. Thanks, SparkFun for what is looking like a great addition to future projects. my best, mike


I am looking for this with any other connection options? USB-C (3 .0) is just not an option on my coding computer. does this come with say a USB-2.0 option?
Just use this cable, that will 'convert' the board to standard USB.
Thumbs up for the board and the module. One improvement suggestion if I may. You could glue the module to the board as opposed to soldering only. This comes from me destroying one of the boards by accidentally ripping the module from the carrier with surprisingly little force. I will be more careful next time, but we would like to migrate to Artemis as our eduction platform and this fragility will cause issues for youngsters. Of course, we have an option of applying a little bit of superglue/hot glue ourselves, but maybe it can be done more efficiently in a production situation.
Thank you and keep up the good work!
Edmunds, Latvia, EU.
Can two Artemis Nanos be programmed to operate as a master\slave pair, communicating only with each other? If so, are there any guides to setup the bluetooth master\slave link and then send test signals between two Artemis Nano boards?
Duplicating my reply to your comment on the Artemis Development with Arduino page:
Well, if you're looking for master/slave hardware comm protocols, it's possible, but not currently supported by Arduino via SPI or I2C. You could likely do two way communication with Serial though. If you're asking about BLE specifically, the AmbiqSuite SDK has two examples that work together to demonstrate that kind of capability. They are called 'ble_freertos_amdtpc' and 'ble_freertos_amdtps' for client and server respectively. Those examples are located underneath the 'apollo3_evb' board from Ambiq. It will take a little more effort than using Arduino but those are a good place to begin.
If you need more technical help, try the forums - specifically the Artemis Forums.
:D
Hello! Love the Artemis boards! Are there any plans to sell the CH340E USB to serial chip? I am unable to find this part in stock anywhere? Thanks!
https://lcsc.com/product-detail/USB-ICs_WCH-Jiangsu-Qin-Heng-CH340E_C99652.html
Good idea! I'll see what I can do...
We've got strips here if you need them.
Hey there, love this board. Would it be possible to rotate the battery connector 90 degrees to the side for a future revision? It seems like it could be more useful if you are using the Nano inside a case that includes a battery.
Are there any other details available on suggested batteries and other use cases? Can we get battery charge level in any way, to make sure we don't keep the system running past a certain point?
Hi there, it sounds like you are looking for technical assistance. Please use the link in the banner above, to get started with posting a topic in our forums. Our technical support team will do their best to assist you.
That being said, to answer your questions:
Are there any compatible Bluetooth libraries that work with the Artemis?
Hi there, it sounds like you are looking for technical assistance. Please use the link in the banner above, to get started with posting a topic in our forums. Our technical support team will do their best to assist you.
That being said, there is a working example in the Apollo SDK, but we do not cover this in our tutorials.
Does the onboard RTC require a separate crystal to function or is it already on the board? I do not see this referenced anywhere in the documentation.
On this board and the BlackBoard and on the ATP, we include a 32kHz xtal next to the Artemis for RTC.
Be sure to checkout the RTC examples inside the SparkFun Artemis Arduino core.
What silicon revision is currently used on boards that have Artemis modules?
AMA3B1KK-KBR-B0 so we have the latest B silicon revision. You can check the errata here. Most of the issues have been corrected in the B revision.
When did B0 start shipping? I have 2 nano Artemis boards from batch #122745 and they both appear to be revision A1 (both were purchased Sept. 30th from Digi-Key). Will it be possible to determine silicon revision of the product being ordered prior to ordering these in the future?
We are shipping B0s including on batch 122745. What makes you believe you have Ambiq Apollo3 revision A1?
The contents of the CHIPREV register (at address location: 0x4002000C) indicate 0x000ECF12. This corresponds to revison A1 per table 138 of the Aug. 2019 datasheet. Both artemis nano boards also give this for the CHIPPN register: 0x06671198. Table 1498 (footnote 1) indicates that "The silicon revision is identified by the first letter in the bottom row of the package's top marking: C = revision A1, F = revision B0." But the metal shield covering the chip prevents me from reading the top marking.
It's my mistake. Thanks for pointing this out! Looks like there was a running change back in July from A1 to B0. I've added an example sketch to help identify chip revision. Most of the changes are transparent and taken care of with SDK v2.2.0.
Dos this board have WiFi?
Nope.
Hi there! I'm looking to experiment with Rust on this board. To do that, I'll need to take advantage of the JTAG connectors. The JTAG holes look to be closer than the normal connection. So two questions: how would I go about using this mini-JTAG connection to hook up to a programmer? Secondly which programmer do you sell which works with this board?
EDIT: I have since learned that JTAG connectors are generally small like this. So this is standard and should fit the normal ribbon cables. The question still remains if something like the J-Link EDU Mini Programmer will work to program this board?
Rust would be awesome to see on Artemis! Let us know how it goes.
Hmm, looks like I left out that section of the hookup guide. Thanks for pointing that out! I've since added it. To answer your question, checkout our JTAG section. You'll need a 2x5pin 1.27mm male header along with a JTAG programmer (we use BASE but EDU is also an option for students).
Is there a 3D step file available for the Artemis Nano?
With Sparkfun and Adafruit playing together with Qwiic, is an Artemis Nano to Feather adapter in the works?
Better yet, can Sparkfun make an Artemis Feather board???
Ask, and ye shall receive: SparkFun Thing Plus - Artemis
The ADC is specified to have 14 bits of precision. Has anyone tested whether 14 bits are usable and how much noise is in the readings?
Hi there, it sounds like you are looking for technical assistance. Please use the link in the banner above, to get started with posting a topic in our forums. Our technical support team will do their best to assist you.
Just ordered this board and am looking forward to working with it! I'm curious though, why weren't mounting holes included in the design? They would have really come in handy for QWIIC-based or other projects that don't involve soldering.
It was a design trade-off. The RedBoard and ATP have mounting holes, the Nano is as small as it will go. Unfortunately that meant we had to nix mounting holes.