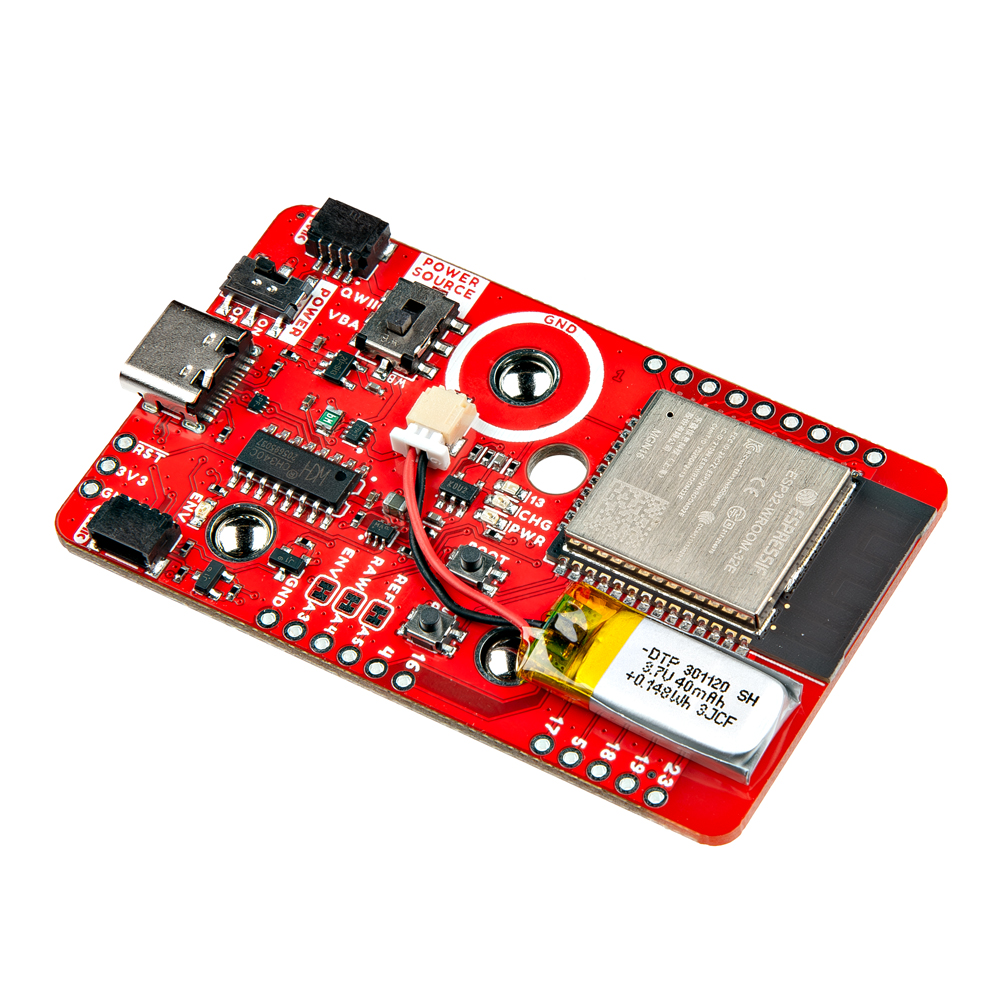
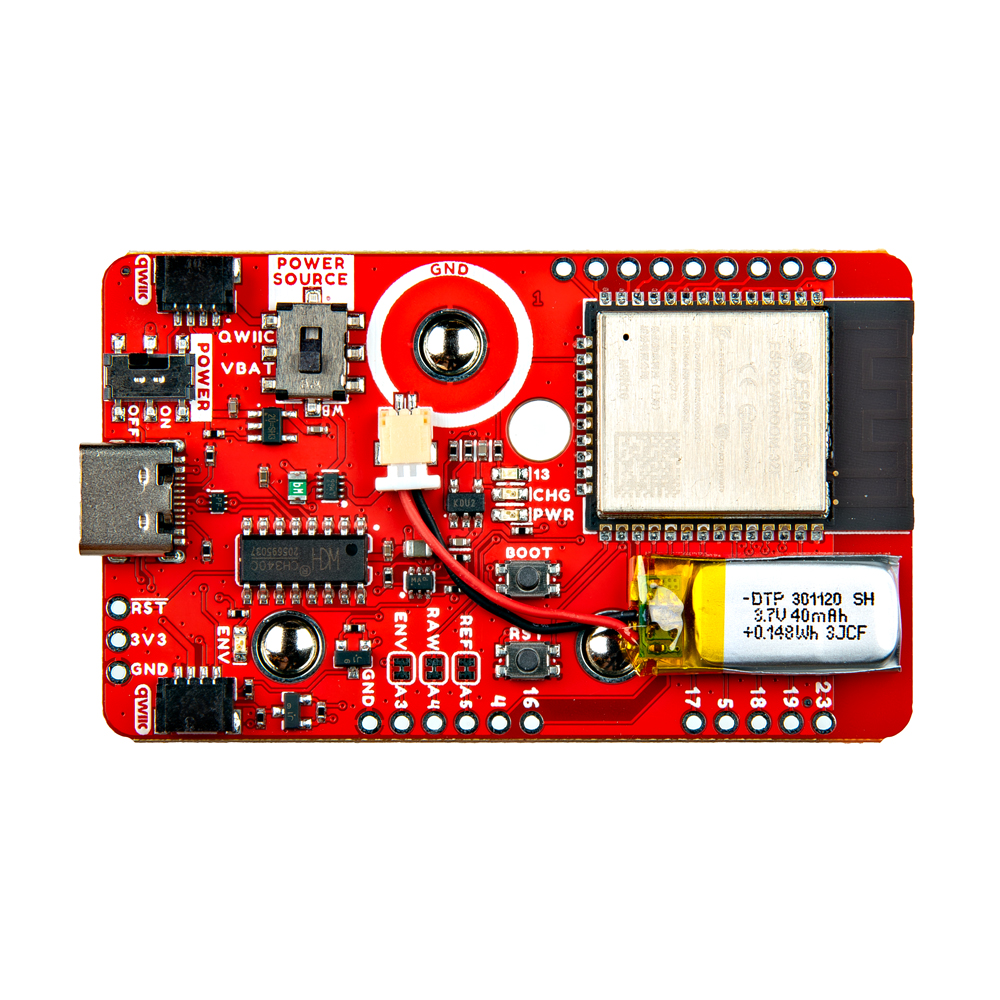
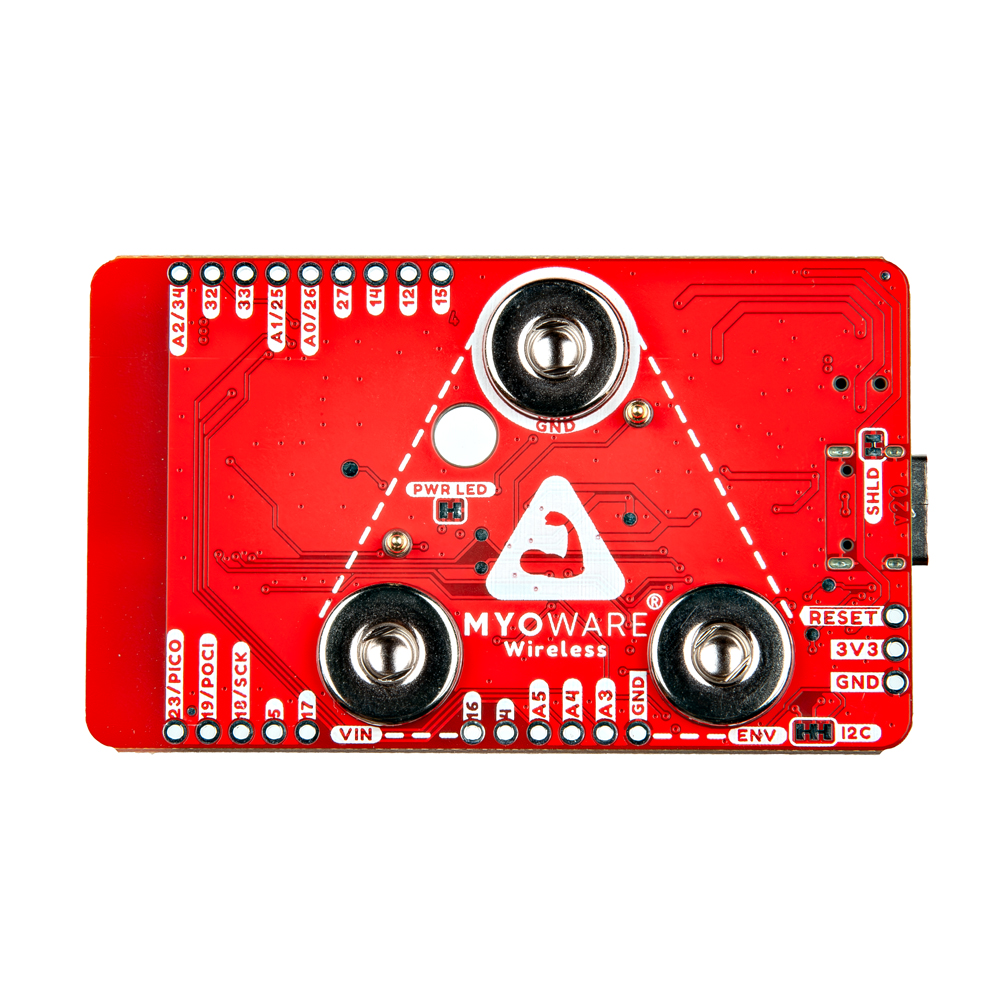
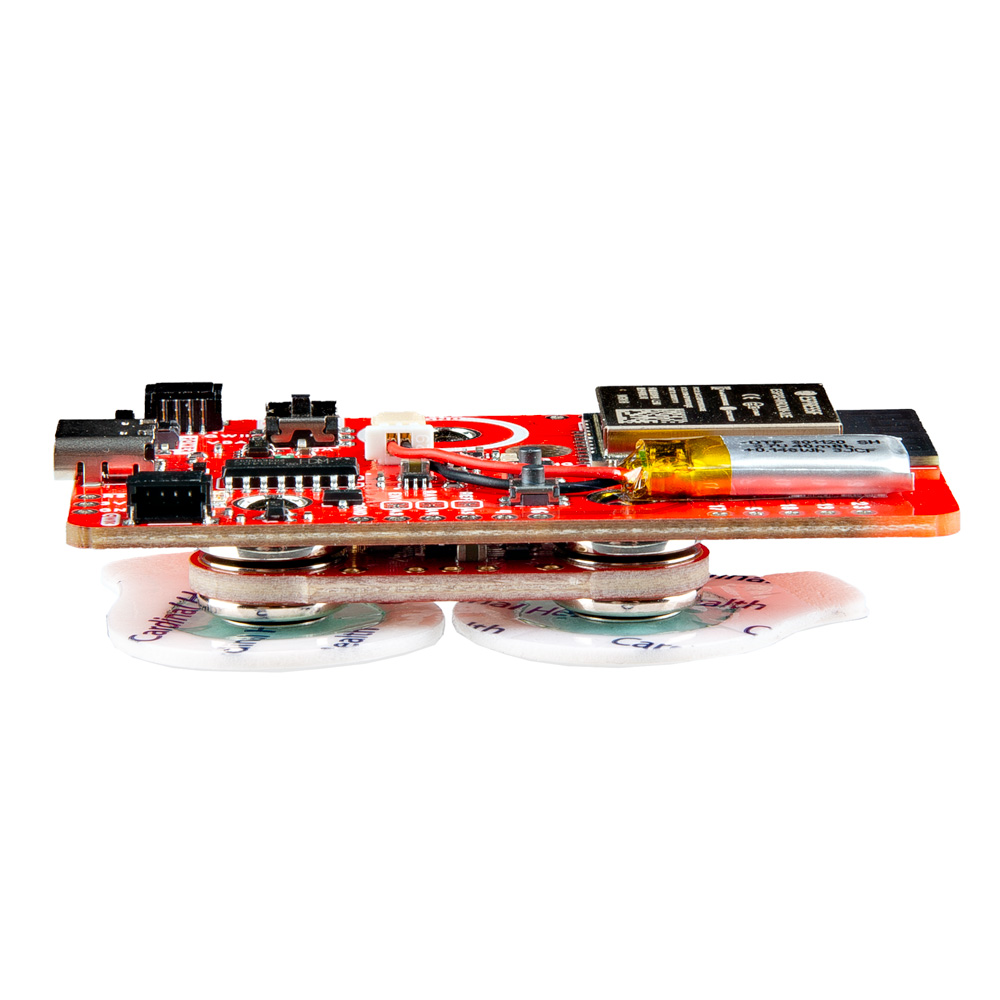
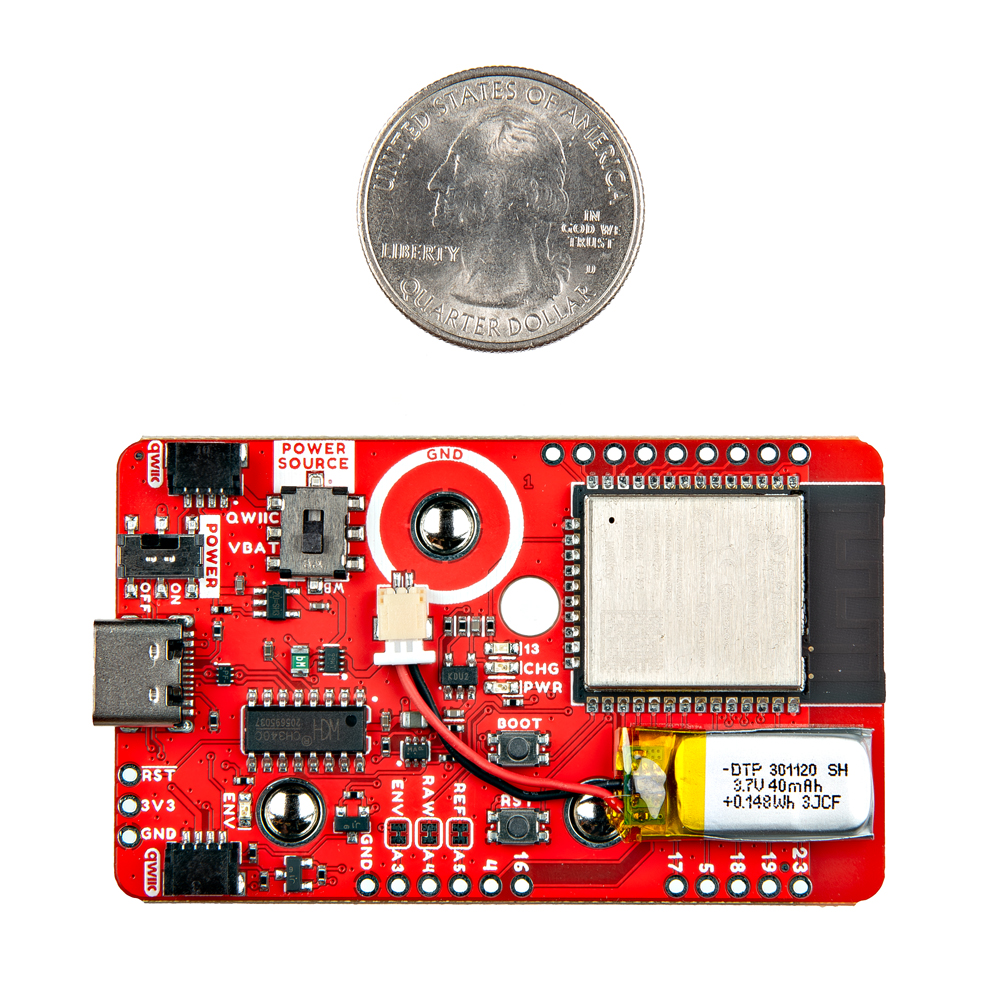
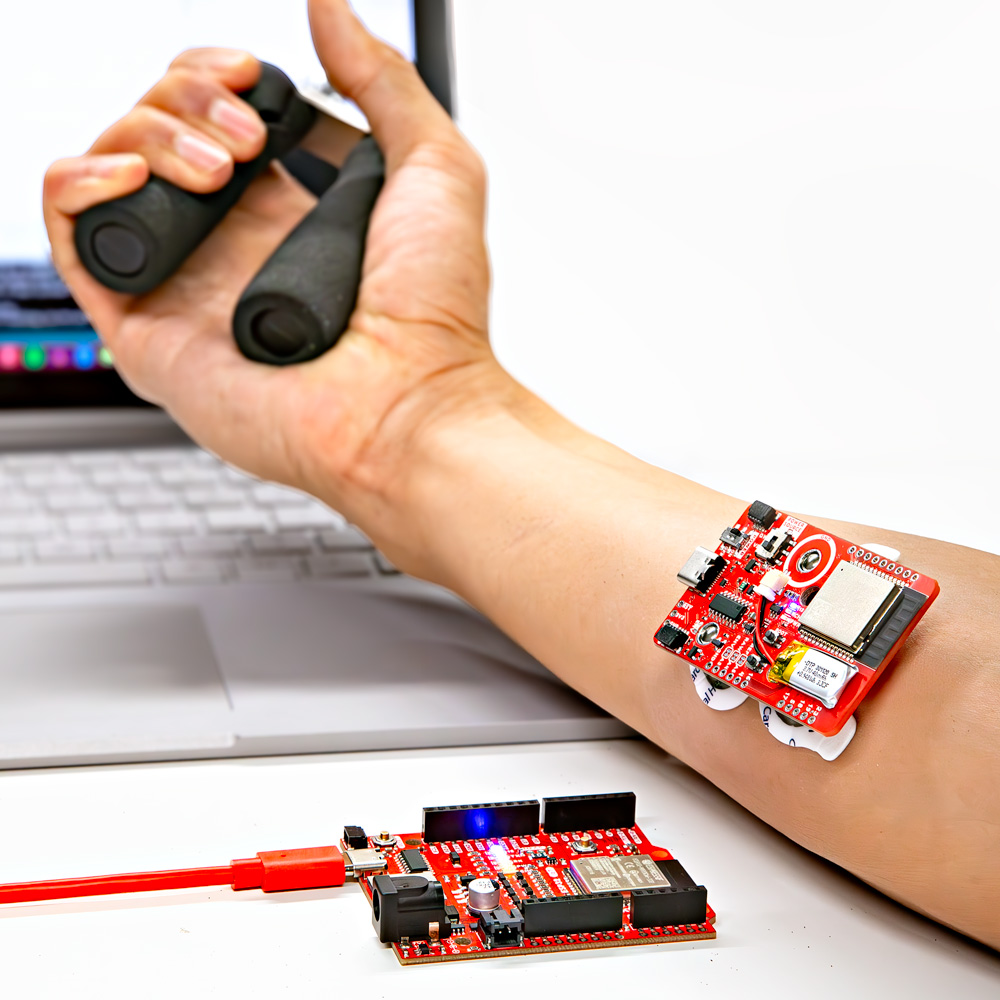
The MyoWare® 2.0 Wireless Shield is designed to take in readings from the MyoWare 2.0 Muscle Sensor and wirelessly transmit sensor data with the ESP32-WROOM! This shield also includes a built-in LiPo battery to remotely power the muscle sensor and the ESP32 module. The Wireless Shield is equipped with snap connectors and low-profile pogo pins on the board, so you can easily stack it on the top side of the MyoWare 2.0 Muscle Sensor. Simply select a Power Source and flip the power switch to the ON position to give the sensor all the power it needs to work its myoelectric magic.
TThe board's USB type C and CH340 USB-to-serial converter enable programming via serial using the Arduino IDE. As you might expect, a reset button resets the ESP32. Various protection circuits are built into the board: ESD protection diodes for the USB data lines, a resettable PTC fuse for VUSB, and ideal diodes for protection on the VUSB and VBATT nets.
Each board comes with a 40mAh single-cell lithium polymer (LiPo) battery connected to it. The battery can be recharged through the USB Type C connector, and its dedicated LiPo charging circuit is set to a charge rate of about 40mA. Operating your MyoWare 2.0 Muscle Sensor on battery power and transmitting data wirelessly allows for complete isolation from the power grid.
Power is regulated down to 3.3V. Users can select their power source as well as turn on/off the board with included switches. A button to manually place the ESP32 in bootloader mode is populated as well. This button can also be used as a general purpose button as well. The board is equipped with two horizontal Qwiic connectors and 2.2kΩ pull-up resistors if you decide to include additional Qwiic-enabled devices. Standard 0.1"-spaced plated through holes (PTHs) break out a few of the ESP32 module's pins on the edge of the board for users.
This board also includes status LEDs for power (PWR), charge status (CHG), user LED (13), and envelope (ENV). There are additional jumpers for power (PWR), USB shield (SHLD), reference (REF), raw EMG (RAW), envelope (ENV), and I2C pull-up resistors (I2C). Use it as a teaching tool to reduce the number of wires in your system or add some myoelectric flair to your Halloween costume!
Note: This item may take longer to process due to battery installed in the equipment and therefore does not qualify for same-day shipping policy. Additionally, these batteries can not be shipped via Ground or Economy methods to Alaska or Hawaii. Sorry for any inconvenience this may cause.
Important: MyoWare and the Wireless Shield are not intended for use in the diagnosis of disease or other conditions, or in the cure, mitigation treatment, or prevention of disease, in a man or other animals.
The MyoWare® 2.0 ecosystem consists of shields that easily interface with the MyoWare® 2.0 Muscle Sensor, which is a low-cost, Arduino-compatible, all-in-one electromyography (EMG) sensor from Advancer Technologies. The innovative connector system allows users to easily snap shields together with a compact low profile and connect to a microcontroller's analog input to measure raw, filtered, and rectified electrical activity of a target muscle. This eliminates the need to solder connections between boards.
This product is a collaboration with Brian Kaminski from Advancer Technologies. A portion of each sales goes back to them for product support and continued development.
- Input Voltage
- 5V via USB Type C Connector
- Output Voltage (e.g. "VIN")
- 3.3V via voltage regulator (RT9080)
- 3.3V via Qwiic Connector
- ESD Protection Diodes for USB Data Lines
- Ideal Diodes for Protection on the VBATT and VUSB Nets
- Resettable PTC Fuse (Rated 6V/500mA)
- Switches
- Power Source
- Power ON/OFF
- Built-in LiPo Battery
- Rated Capacity: 40mAh
- Nominal Voltage: 3.7V
- Max Charge Current: 1C (40mA)
- MCP73831 Single Cell LiPo Charge IC
- Charge Rate Set to ~40mA
- 3.3V Voltage Regulator
- MyoWare® 2.0 Muscle Sensor Form Factor
- 3x Female Snap Pins (Power and EMG Envelope Output)
- Espressif ESP32-WROOM Module
- CH340 USB-to-Serial Converter
- 2x Qwiic Connectors
- 2.2kΩ Pull-Up Resistors
- Button
- Reset
- General Purpose/Bootloader
- LEDs
- PWR - Power Indicator
- CHG - Charge Status
- 13 - User
- ENV- Envelope
- Jumpers
- PWR - Power LED
- SHLD - USB Shield
- REF - Reference Pin
- RAW - Raw EMG Output
- ENV - Envelope Detector Output
- I2C - I2C Pull-Up Resistors
- Board Dimensions
- 63.5mm x 38.000mm (2.50in. x 1.50in.)
- Weight: ~16.7g
- Board Dimensions
- Hookup Guide
- Advancer Technologies: MyoWare® 2.0
- Quickstart Guide (4.37MB)
- Advanced Guide (9.00MB)
- Patents [1]
- MCP73831 Datasheet
- Polymer Lithium Ion Battery (40mAh)
- MyoWare Arduino Library
- MyoWare 2.0 Ecosystem Page
[1] Note: This product is patent protected. To prevent counterfeit boards, the Eagle design files and GitHub hardware repository are not shared for boards in the MyoWare 2.0 ecosystem.
MyoWare 2.0 Wireless Shield Product Help and Resources
Getting Started with the MyoWare® 2.0 Muscle Sensor Ecosystem
April 1, 2022
The MyoWare® 2.0 Muscle Sensor, an Arduino-compatible, all-in-one electromyography (EMG) sensor from Advancer Technologies. In this tutorial, we will go over the features and related shields to connect the sensor to a muscle group.
Core Skill: Programming
If a board needs code or communicates somehow, you're going to need to know how to program or interface with it. The programming skill is all about communication and code.
Skill Level: Rookie - You will need a better fundamental understand of what code is, and how it works. You will be using beginner-level software and development tools like Arduino. You will be dealing directly with code, but numerous examples and libraries are available. Sensors or shields will communicate with serial or TTL.
See all skill levels
Core Skill: Electrical Prototyping
If it requires power, you need to know how much, what all the pins do, and how to hook it up. You may need to reference datasheets, schematics, and know the ins and outs of electronics.
Skill Level: Rookie - You may be required to know a bit more about the component, such as orientation, or how to hook it up, in addition to power requirements. You will need to understand polarized components.
See all skill levels
Comments
Looking for answers to technical questions?
We welcome your comments and suggestions below. However, if you are looking for solutions to technical questions please see our Technical Assistance page.
Customer Reviews
No reviews yet.

