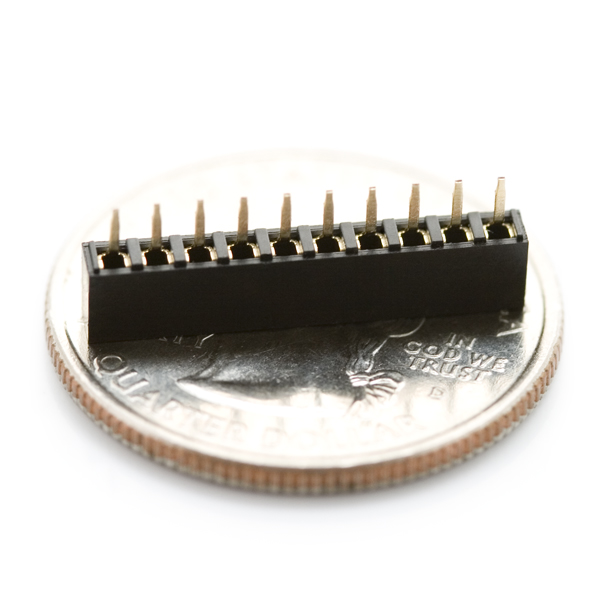
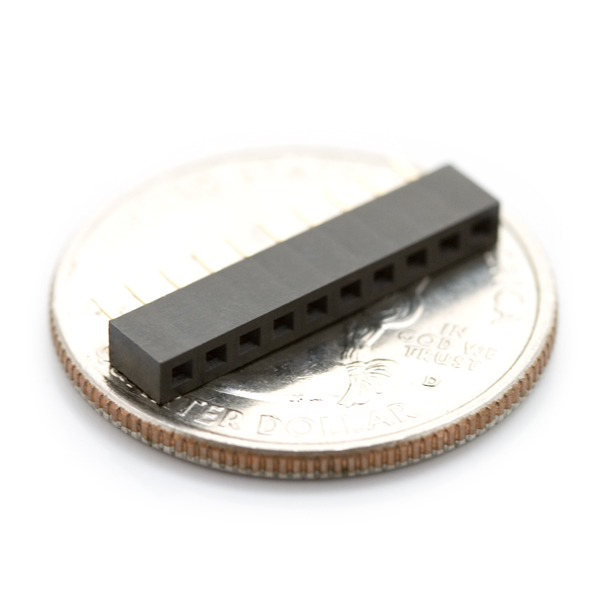
This is a 10-pin socket with 2mm pitch that mates with the popular XBee radio from Digi. Use this small part to avoid having to solder your precious radio to a PCB. You'll need two of these sockets to connect to all 20 pins on the XBee.
These headers can also be cut to work with the RFID breakout board.
Please Note: This item is sold singly, not in pairs.
2mm 10pin XBee Socket Product Help and Resources
Connector Basics
January 18, 2013
Connectors are a major source of confusion for people just beginning electronics. The number of different options, terms, and names of connectors can make selecting one, or finding the one you need, daunting. This article will help you get a jump on the world of connectors.
Soldering to 2mm Pitched Female Header
We recommend not using a lot of solder on the XBee female headers as the solder can flow into the socket. Using excessive amounts of solder can block the socket preventing you from inserting a module that has the 2mm pitch like an XBee or RFID reader into the header.
Core Skill: Soldering
This skill defines how difficult the soldering is on a particular product. It might be a couple simple solder joints, or require special reflow tools.
Skill Level: Noob - Some basic soldering is required, but it is limited to a just a few pins, basic through-hole soldering, and couple (if any) polarized components. A basic soldering iron is all you should need.
See all skill levels
Comments
Looking for answers to technical questions?
We welcome your comments and suggestions below. However, if you are looking for solutions to technical questions please see our Technical Assistance page.
Customer Reviews
3.7 out of 5
Based on 3 ratings:
2 of 3 found this helpful:
Keeps you from having to solder your expensive Xbee on your board
Nobody wants to melt solder onto a $25+ Xbee, do they?
These work well. The pins are a nice length and barely stick out the other side of your PCB.
Note the pins are not "normal" breadboard spacing. You will need SparkFun's Xbee breakout and two of these headers, if you want to make an Xbee standoff adapter for a breadboard.
2 of 4 found this helpful:
Defective, should be withdrawn
Even if I had read all those negative comments from years ago, I would have assumed by now that a great distributor like SparkFun would have fixed the problem of solder leaking into the sockets and ruining them.
I won't make that mistake again; unless SparkFun staff respond to negative comments, I will assume the issue is still unresolved.
Hi, The physical construction of this part allows for some space where solder could soak up into the header holes. Using a small amount of solder, and being cautious to not over heat the pin will help to avoid issues with solder soak. Thanks
They work great!
I have used these several times in the Sparkfun Xbee breakout board module and with custom PCBs. They work great!


Have to agree with all the comments about wicking - writes off the headers and the adaptor board. But, I didn't get any wicking with the SFE BOB, only with a cheaper clone. I have never had problems with soldering receptacles before, but these low profile 2-mm ones seem problematical. Higher profile ones don't seem to suffer. Ref the "parchment" paper comment, I guess this is what the cooks call greaseproof paper, a thin brown paper which these days is probably coated with silicone - any thin paper would do
Be careful soldering in the stand offs! Don't let too much solder run down into the holes.
I soldered in the 2mm sockets normally, and some of the solder ran through and into the holes that accept the xbee's pins. I could not get the solder out with wick, so the socket (and the board when i tried to desolder it) was ruined.
picture here:
http://picasaweb.google.com/marc.bayerkohler/Misc#5256440319164643730
you can see where some of the solder went through and filled the copper receptacles, so the xbee would not plug in.
This happened to me too. Got it on the second attempt by using parchment paper. I cut a piece of parchment paper large enough to cover the pins on the connector with a little extra to grab after soldering. Next I put the parchment paper on a piece of foam and then punched the pins on the connector through the paper. Now with the paper on the pins I put the connector on my board so the paper was between the board and the connector and soldered it in place. The parchment paper prevented the solder from running into the connector. After I finished soldering I gently pulled the parchment paper cutting it on the pins to remove it.
Brilliant advice with the parchment paper. Worked great!
Damnit! That is EXACTLY what happened to my socket. I just navigated here to warn people about this, but you beat me to it by three years. Guess I should have checked this page. !?$%@#
Moral: Buy one or two extra sockets.
Seems like alot of people struggle hand soldering these. I wonder how well they would hold up to a wave solder machine...
Please see: http://www.digi.com/support/kbase/kbaseresultdetl?id=2018
Please see: http://www.digi.com/support/kbase/kbaseresultdetl?id=2018
I can confirm it is unusually difficult to solder these sockets onto the XBee BOB. Compared to the 0.1" female headers SFE sells, these sockets are about half the depth, and the pins are thinner also, so there is more room for the solder to flow down into the socket. All you have to do is screw up one of the 20 solder joints to make it impossible to reliably seat the XBee module. Definitely buy several extra sets of these and be prepared for some trial and error.
I see lots of comments about difficulty soldering these and the poor quality, but most of the comments are dated. Have these issues been addressed? Or is there a better quality (more expensive) part available elsewhere?
Trying to use these on my XTend radios was problematic - impossible to install on the XTend header without forcing the pins to spread. Not about to do that to these radios. Instead, I opted for Mouser p/n 649-63453-120LF.
Warning: These headers are very susceptible to damage. Do not put any wires into these headers for debugging purposes just the XBee modules. After a few weeks of debugging I have destroyed all of the headers I was working with meaning I now need to replace them. Basically it seems like the socket spreads out and the connection becomes very lose and basically worthless.
Digikey part number is S5751-10-ND. May be less expensive if you need a lot. Otherwise Sparkfun is the place to order for small quantities.
Does Sparkfun have the SMD version of this available for purchase?
We're not selling them at the moment (if enough people want them we'll consider it), but you can find them at DigiKey: S5902-10-ND.
Newark Part No. 67R8090, closer to $1
Here's the Digi-Key part number: 2563S-10-ND. So much more expensive!
I know its tough always being #2 Xbee Socket. But with a positive attitude, hard work, and some crafty salesmanship one day you will be #1.
I wish I knew about the soldering issues with these! Just ruined a board since it's pretty much impossible to fix these with soldering wick (though if I had a heat gun it might allow extracting the part from the board).
Thankfully I had extras...but let this serve as a warning to others!
I couldn't find this socket in the SFE library. Has it been removed?
One last word of caution for people using these. I'd had good success soldering these guys in, but I messed one up by leaving the heat too long on the ground pin (I was trying to tack down the part and was fumbling.) It failed to make a good connection and after a long hour of debugging, I found the voltage on the soldered connection on the socket and the XBee didn't match, so there was a bad connection.<br />
<br />
So, after you solder in the socket and connect up the XBee module, measure the VCC and GND pins on the module (not on the socket pins) to make sure you get the 3.3 volts.
You can use solder wick to keep solder from dripping into the socket.
I definitely second what bearsinthesea said, the same thing happened to me. BE CAREFUL SOLDERING THESE! If you feed enough solder in to get the nice conical shape you normally have on a good connection, you will have most certainly used WAY to much and filled the sockets with solder.
If it happens to you, you can yank hard enough on the plastic shell and it will separate from the pins. You can then easily desolder each pin. Your board will be fine, but the connector will obviously be ruined.
Be careful! These are poorly designed!
A word of encouragement for potential solderers!
I soldered these successfully with no trouble at all. I only learned to solder a few days earlier by watching a short tutorial on youtube so I'm not at all expert.
I would almost certainly have got it wrong if I had not read the advice here so it's great that bearsinthesea and BobSomers shared their experiences.
I just wanted to point out that with care there is no problem at all soldering these sockets.