Ultrasonic Range Finder - XL-MaxSonar-WR1
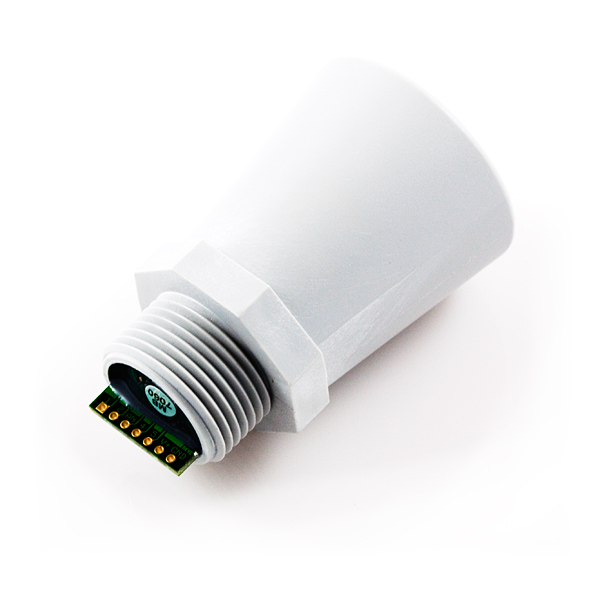
This is the new, weather resistant, field-hardened WR1 from Maxbotix. The XL series of this sensor features higher resolution, longer range, higher power output and better calibration when compared to the LV version.
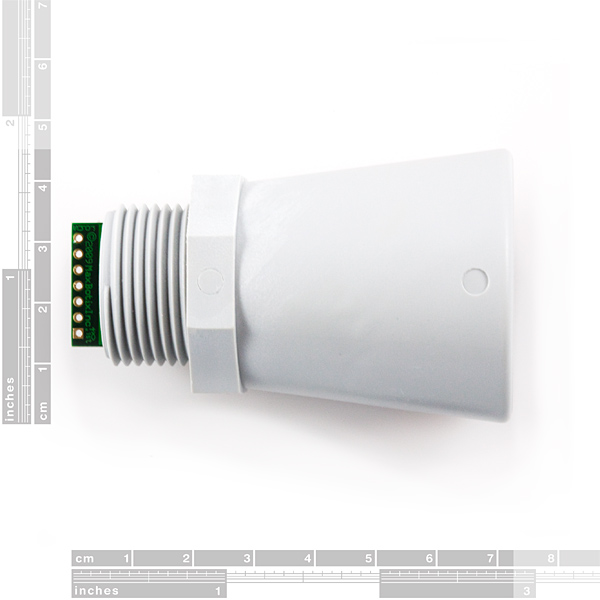
The WR1 uses a robust PVC housing, is designed to meet IP67 water intrusion, and matches standard electrical 3/4" PVC pipe fittings. The sensor provides very accurate readings from 0 to 765cm (0 to 25.1ft) with 1cm resolution. This sensor can be powered with anywhere between 3.3 and 5VDC.
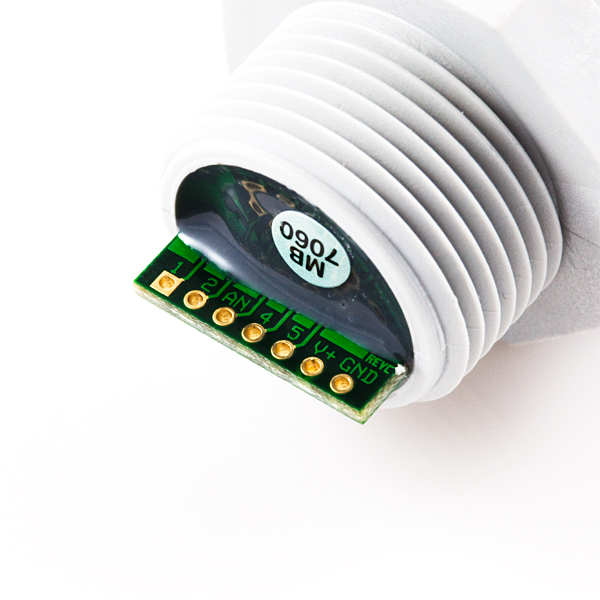
Range information can be gathered through one of three methods - analog, serial, or PWM - all of which are active at the same time. The analog output will produce a voltage proportional to the measured distance, with a sensitivity of (Vcc/1024)V/cm. The serial interface is simple and formatted to RS-232, with voltages ranging from 0 to Vcc and terminal settings of 9600-8-N-1. Finally, the PWM pin outputs a pulse-width representation of the range with a scale factor of 58us/cm.
Note: The High-Resolution version of this sensor is now available so this one is being discontinued. We're now selling them at a reduced price so get them while you can! The High-Resolution version can be found here.
- 3.3V to 5V supply with very low average current draw
- All interfaces are active simultaneously
- Serial, 0 to Vcc
- 9600 baud, 8-N-1
- Analog, (Vcc/1024) / cm resolution
- Pulse Width
- High acoustic power output
- Real-time auto calibration and noise rejection for every ranging cycle
- Precise narrow beam
- Continuously variable gain
- Object detection includes zero range objects
- Readings can occur up to every 100mS, (10-Hz rate)
- Free run operation can continually measure and output range information
- Triggered operation provides the range reading as desired
- Sensor operates at 42KHz
Ultrasonic Range Finder - XL-MaxSonar-WR1 Product Help and Resources
Resources and Going Further
"RS232" Output or Inverted TTL
If the ultrasonic range finder indicates that it has an "RS232 Serial Output" and is outputting an inverting signal with the voltage level based on Vcc, you could just use an inverting circuit using a transistor to invert the signal. This is not a standard RS232 that uses +/-12V. There are a few methods of flipping this signal through hardware or software. The resources and going further will provide specific examples.
Inverting Signal w/ Hardware
Doing a quick test using a retired NPN transistor from our storefront, I was able to get it working based on the circuit using a RedBoard Programmed with Arduino. I was using an Arduino so Vcc in my circuit was 5V. Since it's basically two diodes within the transistor, you will want to use resistors to limit the current. I just used two 330Ohm resistors just like I was turning on an LED. You probably do not need to do this but the values might need to be adjusted when using it at higher speeds or if the transistor is not fully turning ON/OFF. Testing with a multimeter, it worked as expected. An input of 5V would result in 0V (logic LOW) on the output since the transistor was turning on. With an input of 0V, the transistor would not be conducting so the output would be held HIGH at 5V. Using an Arduino serial passthrough for further testing, I was able to view the ultrasonic sensor's output data without any problems.
"RS232" Output and Inverting w/ Software
Otherwise, you could be clever in writing your code to store the value and possibly apply some sort of logical NOT operation. In Arduino, there is a special feature using software serial that inverts the signal by setting a parameter to true [ "Software Serial Constructor" – https://www.arduino.cc/en/Reference/SoftwareSerialConstructor ]. There was someone in the Arduino forums that provided example code to invert the output, parse the data, and output it through the serial monitor here => [ User "Goldthing" - http://forum.arduino.cc/index.php?topic=114808.msg864009#msg864009 ].
Connecting Ultrasonic Sensor to Raspberry Pi
There is a tutorial from MaxBotix that shows you how to connect ultrasonic sensors to Raspberry Pis => [ http://www.maxbotix.com/Raspberry-Pi-with-Ultrasonic-Sensors-144/ ]. Certain ultrasonic sensors listed in the article require an inverter. If the ultrasonic range finder's output serial output is " RS232 " like the sensors listed under "Ultrasonic Sensors that Require an Inverter" , this indicates that the signal is basically an inverted output with the voltage level based on Vcc.
Therefore, you would need to follow the tutorial and use a serial inverter in order to use it with the Raspberry Pi. If you are using a Raspberry Pi a transistor, Vcc should be 3.3V since the Pi uses a 3.3V system.
Core Skill: Soldering
This skill defines how difficult the soldering is on a particular product. It might be a couple simple solder joints, or require special reflow tools.
Skill Level: Noob - Some basic soldering is required, but it is limited to a just a few pins, basic through-hole soldering, and couple (if any) polarized components. A basic soldering iron is all you should need.
See all skill levels
Core Skill: Programming
If a board needs code or communicates somehow, you're going to need to know how to program or interface with it. The programming skill is all about communication and code.
Skill Level: Rookie - You will need a better fundamental understand of what code is, and how it works. You will be using beginner-level software and development tools like Arduino. You will be dealing directly with code, but numerous examples and libraries are available. Sensors or shields will communicate with serial or TTL.
See all skill levels
Core Skill: Electrical Prototyping
If it requires power, you need to know how much, what all the pins do, and how to hook it up. You may need to reference datasheets, schematics, and know the ins and outs of electronics.
Skill Level: Competent - You will be required to reference a datasheet or schematic to know how to use a component. Your knowledge of a datasheet will only require basic features like power requirements, pinouts, or communications type. Also, you may need a power supply that?s greater than 12V or more than 1A worth of current.
See all skill levels
Comments
Looking for answers to technical questions?
We welcome your comments and suggestions below. However, if you are looking for solutions to technical questions please see our Technical Assistance page.
Customer Reviews
No reviews yet.


For use in arduino library needs?
No, there are no libraries needed! If you take a look over at the MaxBotix website, they have a page dedicated to using the sensors in an Arduino environment. Happy Hacking!
Buyer beware that although this is advertised as "weather resistant, field-hardened" it does not work in temperatures below 40F (4.4C). Making it pretty much useless as an outdoor device unless you live in the Bahamas or Hawaii. The data sheet does not state the operating temp range.
Mine fails after spending 5-10 minutes outside. The analog pin drops to .01V and stays there until the unit is brought indoors and warms to room temperature.
Datasheet says "-40°C to +65°C operation (+85°C limited operation)". Maybe you had a faulty unit?
How would this sensor hold up if the sensing element is splashed with a hydrocarbon such as gasoline? Assuming the electronics behind it are all well protected?
Any easy way to connect it with my USB port so I can take the readings from a Virtual Com port? I also have a s19 USB-SERIAL interface connector from Acroname. What do you think, can it work ?
Thank you.
Anyone have success making a DIY weatherproof casing for the standard maxbotix rangefinders? What material can be used to protect the front without disrupting the ultrasonic signal?
The best way to weatherproof this sensor is to extend the barrel with a piece of PVC pipe. You'll sacrifice detection radius and introduce a slight measurement error, but save yourself from the impossible task of having to clean the device. Once dirt gets into it, it's as good as dead. If contamination cannot be avoided, go with the cheaper EZ series. Those are easier to disassemble and clean.
I've bought this for a stationary sonar and the device is worth the money.
The beam is very narrow, so you're less likely to get a ping from a flat angled surface, but more likely to get a precise reading from objects that do read. For a moving vehicle obstacle detection I'd recommend going with the EZ series carried by Sparkfun.
The sensor gets a much clearer readings with the 5V input, compared to 3.3V. If you put the ear to the device, you'll hear the clicks get louder with higher voltage. Just don't overdo it.
Also, in case you're wondering, the mounting gear sold by Sparkfun for LV-WR1 does fit. The dimensions are the same.
Is this the mb7060 or mb7070 model (I plan to use analog signal)-\i intend to use this to measure the water level of a stream.
It's the MB7060.
I have used the WR1 for a UAV application (before the increase in power and resolution) and it is a very impressive device. Very easy to setup and use.
What gives? Show us the front of the cone!
the front: http://www.maxbotix.com/images/beam_plot_and_wr1_nf7n.jpg
Well this is a very interesting module, however at $104.95 it becomes way less attractive to me.