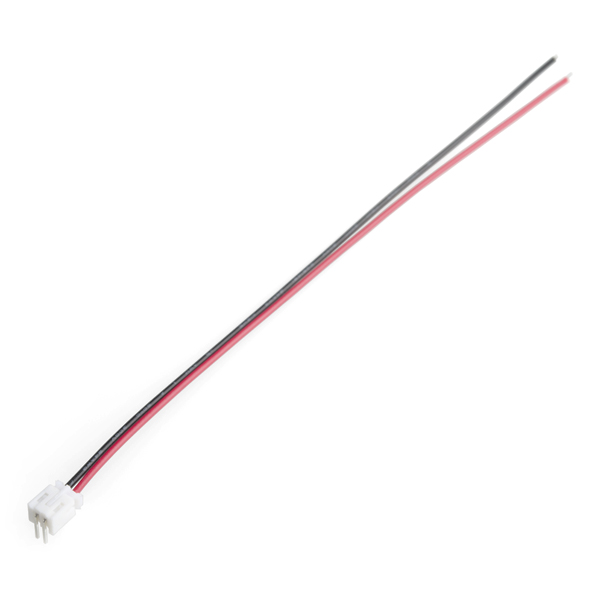
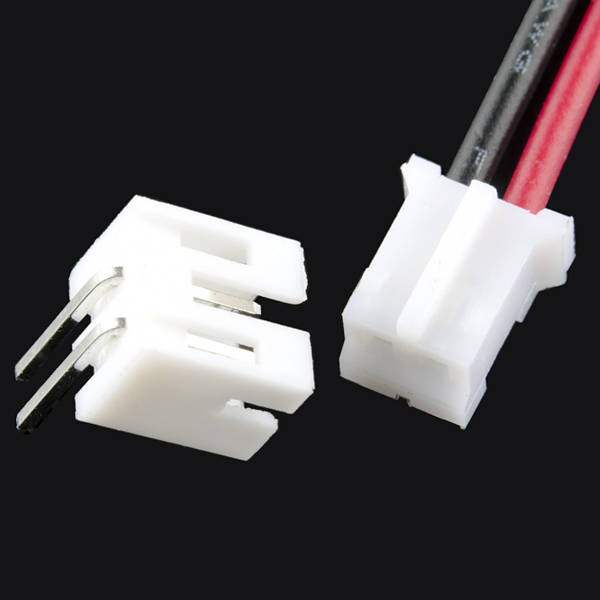
This is a simple two wire cable. Great for jumping from board to board or just about anything else. There is a 2-pin JST connector on one end, bare cable on the opposite end. It also comes with the mating connector for the JST.
- 6" length
- JST connector
- Datasheet
- Illumitune Project (tutorial) (video)
JST Jumper 2 Wire Assembly Product Help and Resources
How to Make a Custom EL Wire Extension Cable
October 24, 2018
In this tutorial, we will make a custom EL Wire extension cable as an alternative to splicing wire.
Modifying Your EL Wire Inverter
July 18, 2019
In this tutorial, we will modify the 12V EL wire inverter to power the EL Sequencer/EL Escudo Dos off a single power supply.
LiPo Fuel Gauge (MAX1704X) Hookup Guide
February 23, 2023
Monitor your LiPo battery with the LiPo fuel gauge! In this tutorial, we will be using the MAX17043 and MAX17048 to monitor a single cell, LiPo battery over the Arduino Serial Monitor. We will also connect a display to view the output without the need to connect the microcontroller to a computer.
Single Cell LiPo Battery Care
March 16, 2023
This tutorial will go over how to safely charge, connect, disconnect, reinforcing the cables, and handle single cell LiPo batteries.
Core Skill: Soldering
This skill defines how difficult the soldering is on a particular product. It might be a couple simple solder joints, or require special reflow tools.
Skill Level: Noob - Some basic soldering is required, but it is limited to a just a few pins, basic through-hole soldering, and couple (if any) polarized components. A basic soldering iron is all you should need.
See all skill levels
Comments
Looking for answers to technical questions?
We welcome your comments and suggestions below. However, if you are looking for solutions to technical questions please see our Technical Assistance page.
Customer Reviews
3.7 out of 5
Based on 3 ratings:
1 of 1 found this helpful:
Does its job, inexpensive, reliable
I have used a couple hundred of these. I don't use the female socket that comes with the the assembly because it is too easily bent when connecting and disconnecting. (I use a surface mount socket that has 4 points of contact and is generally more robust.) Sometimes the fit is a little tight and sometimes it is a little loose. I am not sure if it is the male or female part or both that vary. Overall it gets the job done and has been quite reliable. I would give it five stars if I could get in the exact length that I want.
0 of 2 found this helpful:
Quality is ok, but product information and size (maybe) are terrible.
It would really be nice to have information on the connector size. I had to dig through the SparkFun Eagle library to find it (2 mm?). The fit was still too snug with the 2 mm smd female connectors on my board, so I had to file these down. I'm not sure if that was a manufacturing issue, or I didn't get the size right. An actually useful datasheet/product page would be greatly appreciated!
Simple connectors
A perfectly fine connector and wire assembly, especially if you can find them on clearance. Great for either battery interfacing or retrofitting other batteries into the Sparkfun ecosystem.


What is the max current or voltage for this connector and the attached wires?
I would also like to know the max current and voltage ratings for this connector and the attached wires. Most importantly the current rating.
Does his come with the female AND the male conector???
Yes.
Are these the same size JST connectors that come on the end of your EL Wires, like this https://www.sparkfun.com/products/10191? A couple of my wires I have to push the connector end around to get them to light so I want to replace the connectors.
What is the mating cycle of these connectors?
A little more information (i.e. pitch size) would be nice!
The description and compatible products for this (PRT-09914) and other JST connectors in the Sparkfun Eagle Library is.....well, to put it mildly, somewhat confusing and totally inaccurate. By selecting this connector in the Sparkfun Eagle Library I assumed I would be given accurate information, such as the pitch, for example. The pitch is NOT 0.1" (as stated in the S.E.L.). The correct pitch is 2.0mm. Unfortunately, I did not discover this discrepancy until I got my boards back from the fab house and went to insert a 0.1" shrouded header that I had purchased a batch of... specifically for this project. It's really no big deal. I can use the 2.54mm headers in another project, as they are pretty much the standard for my applications, and I can buy some 2mm pitch JST headers and connectors for this run of circuit boards. I'm just wondering why the information in the S.E.L. is so screwed up where these connectors are concerned?
Do you sell just the jst connector? I want to solder it onto a battery pack holder but cannot find the item on SparkFun
would this be on digikey?
I'm not familiar with these connectors, is it on the side or standing upwards?
The connector is right angle as delivered but the pins can be easily bent to make it a vertical connector.
Is there any way to swap in the surface mount connector for the through-hole one included in this pack?
compatible with blade mcp-x helicopter to cable your own battery, just take care because red/black wires are inverted for this usage !
If you're careful, you can unpin and reverse the contacts yourself by using a jeweler's screwdriver or x-acto knife tip to gently lift up the nylon tab holding the crimp pin in the connector and slide the wire+pin out the back. Once both are out, just reinsert them in the order you like and they should click back in.