Modkit MotoProto Shield
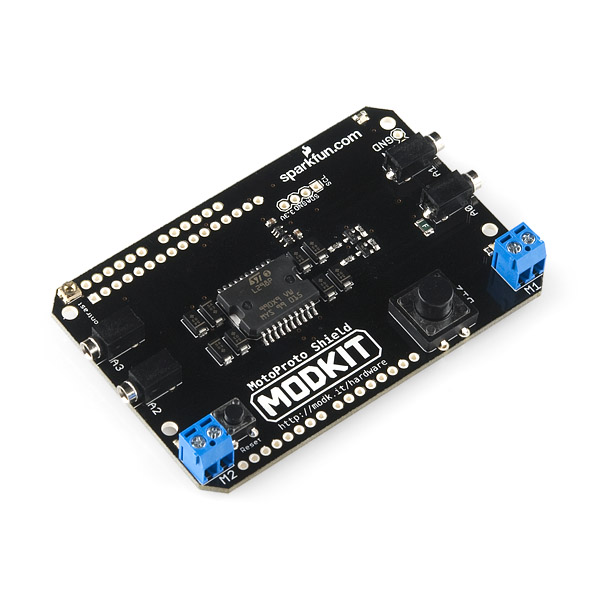
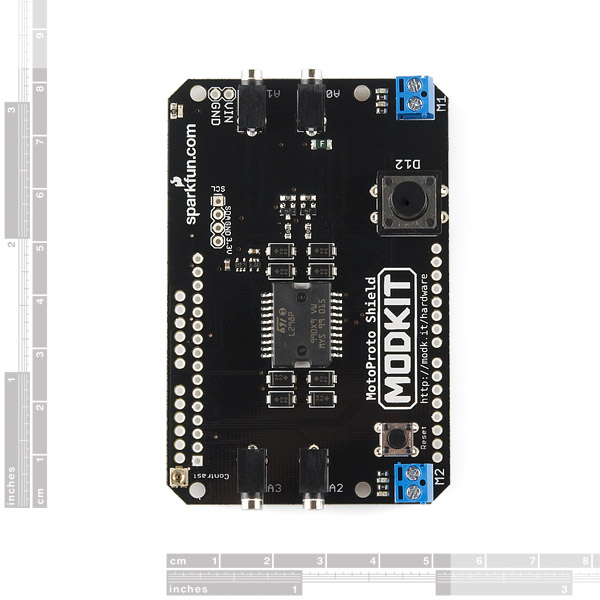
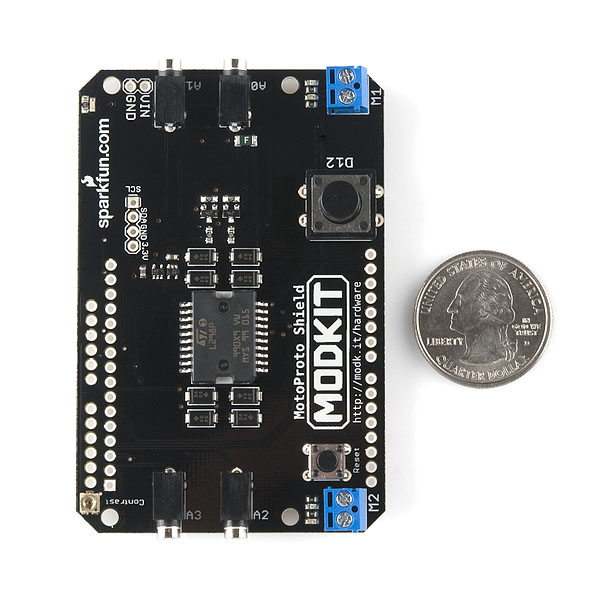
The Modkit MotoProto Shield for Arduino that makes it easy to connect up to 4 sensors and control two DC motors as well as a 16X2 character LCD. The sensor jacks accept 2.5mm cables and provide access to VCC, GND, and an analog input.
Sensors can be soldered to a 2.5mm cable and you can begin plug-and-play prototyping with a wide assortment of our sensors including line sensors, ultrasonic distance sensors, light sensors, photo interrupter, etc. There is also a large programmable button and a space for an i2c header to connect more advanced sensors such as an accelerometer.
The motor driver circuit is based on the L298 H-bridge and can drive up to 2 amps per channel. The board takes its power from the same Vin line as the Arduino board, includes blue and yellow LEDs to indicate active direction, and all driver lines are diode protected from back EMF.
Modkit develops a drag-and-drop graphical programming environment inspired by Scratch for Arduino and Arduino compatible boards, making it easier than ever to program your physical project. The Modkit MotoProto Shield is well suited for general projects, prototyping, and educational robotics.
Note: This product is a collaboration with ModKit. A portion of each sales goes back to them for product support and continued development.
Modkit MotoProto Shield Product Help and Resources
Core Skill: Soldering
This skill defines how difficult the soldering is on a particular product. It might be a couple simple solder joints, or require special reflow tools.
Skill Level: Noob - Some basic soldering is required, but it is limited to a just a few pins, basic through-hole soldering, and couple (if any) polarized components. A basic soldering iron is all you should need.
See all skill levels
Core Skill: Robotics
This skill concerns mechanical and robotics knowledge. You may need to know how mechanical parts interact, how motors work, or how to use motor drivers and controllers.
Skill Level: Rookie - You will be required to know some basics about motors, basic motor drivers and how simple robotic motion can be accomplished.
See all skill levels
Core Skill: DIY
Whether it's for assembling a kit, hacking an enclosure, or creating your own parts; the DIY skill is all about knowing how to use tools and the techniques associated with them.
Skill Level: Noob - Basic assembly is required. You may need to provide your own basic tools like a screwdriver, hammer or scissors. Power tools or custom parts are not required. Instructions will be included and easy to follow. Sewing may be required, but only with included patterns.
See all skill levels
Core Skill: Programming
If a board needs code or communicates somehow, you're going to need to know how to program or interface with it. The programming skill is all about communication and code.
Skill Level: Noob - Programming will be limited to basic drag and drop interfaces like ModKit or Scratch. You won't be writing code, but you will still need to understand some basics of interfacing with hardware. If you?re just using a sensor, it's output is analog.
See all skill levels
Core Skill: Electrical Prototyping
If it requires power, you need to know how much, what all the pins do, and how to hook it up. You may need to reference datasheets, schematics, and know the ins and outs of electronics.
Skill Level: Rookie - You may be required to know a bit more about the component, such as orientation, or how to hook it up, in addition to power requirements. You will need to understand polarized components.
See all skill levels
Comments
Looking for answers to technical questions?
We welcome your comments and suggestions below. However, if you are looking for solutions to technical questions please see our Technical Assistance page.
Customer Reviews
No reviews yet.


How does this attatch to an arduino uno? Will it work with the Magician Chassis?
Hello ! Can I use a Modkit to drive a stepper Motor ? Thank's
I have one question: I have two actuators (12 volt, 2 amps) that I need to control, but the problem is that the actuators have 3 wires. One for ground, one wire for one direction, and another for reverse. Is is possible to connect the two directional wires to a terminal block on the motoproto shield and the ground wire simply to the arduino ground, and then control the direction of the actuator through those two pins?
Thanks Yatiko
Hi Ed, any news about programming MotoProto from Scratch as mentioned in Picoboard's comments http://www.sparkfun.com/products/10311?
Hi Antonio,
It's not ready for public release. But if you email info at modk.it we can get you a copy of the Modkit Widget with Scratch integration.
Thanks!
Ed
Hi Ed,
Sorry for the delay. I have just received my second MotoProto. I am going to explore them and Modkit a little more. After that, I will drop you a line. Does Modkit Widget wih Scratch integration work without internet access? Thanks in advance.
Antonio
Hi Ed,
Sorry for the delay. I have just received my second MotoProto. I am going to explore them and Modkit a little more and, after that, I will drop you a line. Does Modkit Widget with Scratch integration work without internet access? Thanks in advance.
Antonio
Anyway to find out how to program this without using the Modkit IDE. Modkit is kinda a hassle and not complex enough for the program I am writing.
Hi,
There is an LCD example in the above downloads that you can use with the Arduino editor. There are also many LCD tutorials on the web if you want to do something different.
For the motors, you can follow this tutorial: http://www.sparkfun.com/tutorials/195. The Modkit MotoProto shield is connected to different pins than the ArduMoto so you will have to swap out the following lines:
int pwm_a = 3; //PWM control for motor outputs 1 and 2 is on digital pin 10
int pwm_b = 5; //PWM control for motor outputs 3 and 4 is on digital pin 11
int dir_a = 2; //direction control for motor outputs 1 and 2 is on digital pin 12
int dir_b = 4; //direction control for motor outputs 3 and 4 is on digital pin 13
Question: won't the 2.5mm jacks short out when connecting or disconnecting sensor cables?
The initial prototypes did, but we found a way around that. I don't have the schematic in front of me but I believe the fix was to put the sensor (analog in pin) in the middle. This way the sensor pin can touch ground or power but neither ground nor power can touch each other.
Neat, thanks! Looking into using this same sort of 2.5mm jack for a personal project.
The LCD example code for the Arduino IDE is now up. Just click the "Example Code" link above and let us know if there are any other issues.
OK thanks for your prompt reply. I will check it out. Loo forward to the "upcoming Modkit" release. Best regards
OK I have received mine... no pinouts labeled on PCB... :(
URL on PCB is fine, but this item not present....
Can someone provide a little more documentation, beyond the schematic... wasn't expecting to need to reverse engineer the PCB to workout LCD pinout etc...
Looks promising... but...
Thanks
Thanks for your feedback.. Excellent documentation and support in the upcoming release of Modkit is coming very soon. In the meantime, you can use this with the Arduino IDE. It seems the Sparkfun comments garble code snippets (or I just didn't figure out how to format properly), so I posted an LCD example that you can use in the Arduino IDE. It should be up shortly.
Best,
Ed
Just bought the MotoProto shield and got the card with an invite# and now I'm attempting to use the Modkit editor. My google account is set up for OpenID, I've downloaded and am running your version of Arduino, etc., but I can't seem to get in (I'm using Safari on a Mac). How do get started? Thanks.
Hi Stephen,
There are issues with some google (not gmail) accounts. Could you send an email to support at modk.it?
Thanks,
Ed
Do the sensors necessarily have to be analog or will a simple on/off switch do?
You might be able to get an switch to work, but it might not be totally reliable. It's possible though.
At first peek Modkit looked like a new and interesting idea. But I do not see any changes in their Blog since mid Sept. 2010. I have just purchase this shield yesterday, is anyone using it in a configuration yet? Either straight IDE or Modkit software front-end? I signed in for the invite at the website, but was wondering if there is a approximate due date for public release?
Anyone?
Hi Bchar,
Sorry if we seemed to drop off the map, but we've been hard at work ;)
You should receive an invite code for the Modkit editor with your shield and we have a major release coming in the next few weeks which will sync with more public availability and an article introducing the platform in the upcoming issue 25 of Make Magazine..
Thanks to everyone who got behind Modkit when it was little more than an idea and before anything was documented.. You'll soon see excellent documentation for the MotoProto Shield, setting the bar for what I'm sure you will come to expect from Modkit.
Best,
Ed
Hey Ed,
I was just wondering if the invitation still comes with the modkit. If not, is there was a way to contact you guys? I would like to test out the modkit system in a school setting. Maybe we could give you some feedback? I would love o help you guys out in anyway possible.
Thanks,
Sam
What license is this released under? The files are provided (hooray!) but I can't see mention of what the terms are.
Sorry about that, should be fixed now.
Page 2 is missing in the pdf-version of the Schematic.