PicoBoard
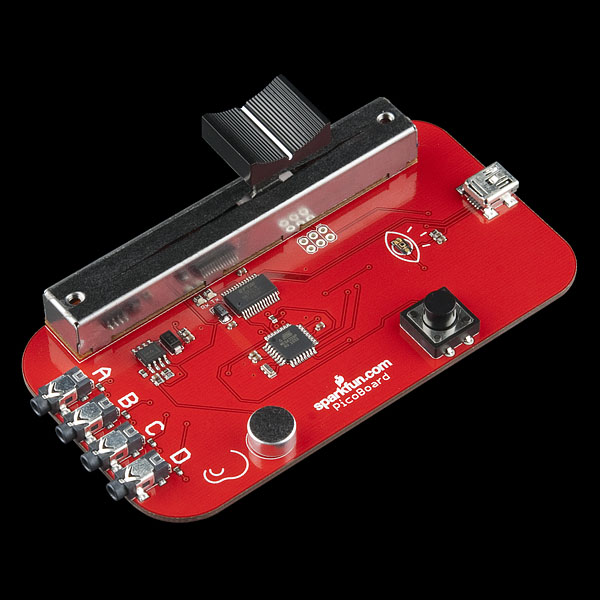
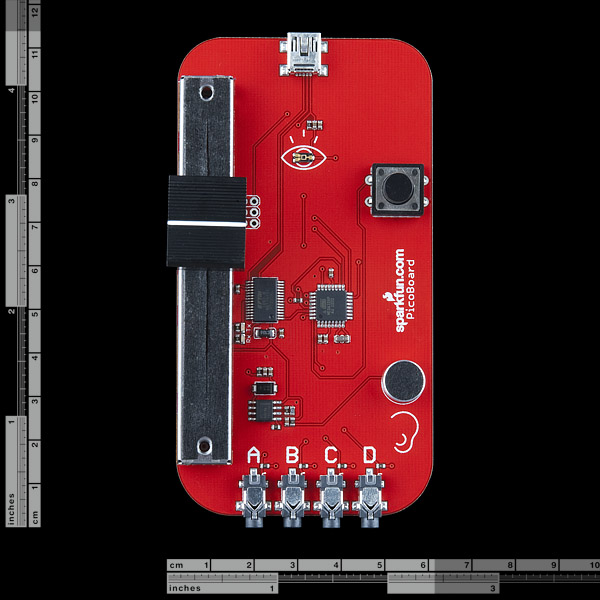
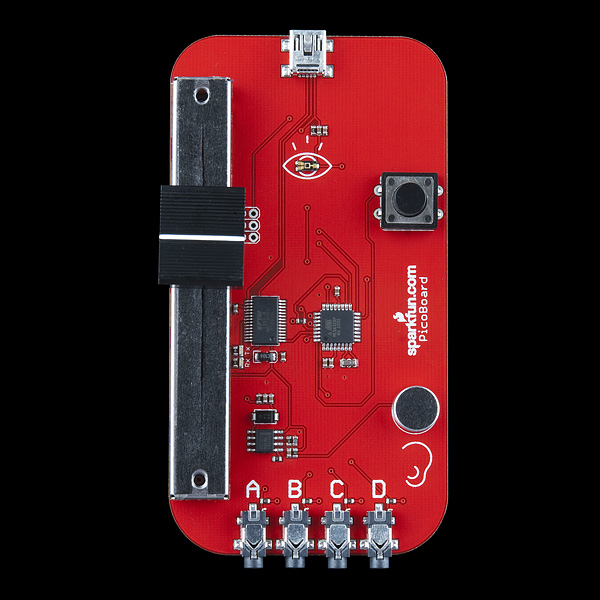
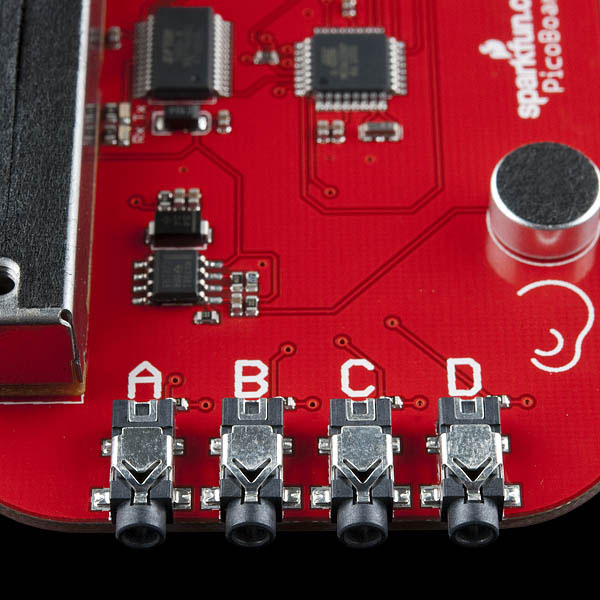
The PicoBoard allows you to create interactions with various sensors. Using the Scratch programming language, you can easily create simple interactive programs based on the input from sensors. The PicoBoard incorporates a light sensor, sound sensor, a button and a slider, as well as 4 additional inputs that can sense electrical resistance via included cables.
Designed for educators and beginners, the PicoBoard is a good way to get into the very basics of programming and reading sensors.
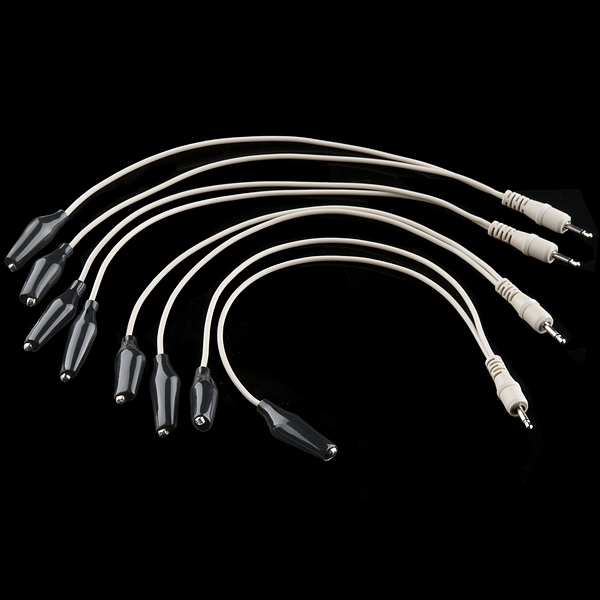
Note: 4 sets of alligator clips are included, however the miniUSB cable is not included. If you don't already have a miniUSB cable lying around make sure to pick one up. You can find the SparkFun miniUSB cable in the related products section below.
Note: The PicoBoard is a derivative work of the Scratch Sensor Board. More information can be found here and the design license can be found here.
PicoBoard Product Help and Resources
Core Skill: Programming
If a board needs code or communicates somehow, you're going to need to know how to program or interface with it. The programming skill is all about communication and code.
Skill Level: Noob - Programming will be limited to basic drag and drop interfaces like ModKit or Scratch. You won't be writing code, but you will still need to understand some basics of interfacing with hardware. If you?re just using a sensor, it's output is analog.
See all skill levels
Core Skill: Electrical Prototyping
If it requires power, you need to know how much, what all the pins do, and how to hook it up. You may need to reference datasheets, schematics, and know the ins and outs of electronics.
Skill Level: Noob - You don't need to reference a datasheet, but you will need to know basic power requirements.
See all skill levels
Comments
Looking for answers to technical questions?
We welcome your comments and suggestions below. However, if you are looking for solutions to technical questions please see our Technical Assistance page.
Customer Reviews
No reviews yet.

Just tested it on my RaspberryPi... plug and play tried and true with the pre-loaded Scratch on Raspbian. odd... the Pico board is larger than the computer that it is plugged into :)
Wondering if anyone can help…
I've been searching all over for information on whether anyone has used the older yellow Picoboard as a "disconnected" sensor platform. That is, without connecting to a computer. I have a box of 8 Picoboards from our school's computer club and as the kids have gotten more advanced than Scratch, we'd like to repurpose the boards.
Specifically, it would be neat to use it only battery powered, sending data to an Arduino, or program it as a standalone PIC16 device.
I've found projects for connecting it to a RaspPi but not an external Arduino.
If you had any advice, I'd appreciate it.
Per
We are considering purchasing picoboards for the Robotics club in our school. Would like to know when they would be available?
i restarted the program and it works! http://www.youtube.com/watch?v=rCHe_5IfwHU I followed the steps and the silder on my picoboard cannot work! the product just arrived 3 days ago.
Where can I find the plugs?
We don't have them for sale individually, but they are just 2.5 mm SMD audio jack plugs.
Hi All,
I am new to the picoboards but I like the concept very much. Still I am having issues getting it to work with scratch. I have a Windows 7 machine, 64 bit. I downloaded Scratch 1.4 of 30-Jun-09 today, and scratch works fine until I try to do anything with the sensor blocks. At that point, the program hangs and then goes transparent when I try to do anything (give the "Not Responding" message on the top. I can use the task manager to get out of scratch. I have tried restarting the computer. This behavior happens whether or not the PicoBoard is plugged in (exactly the same behavior in both cases). I have also tried with a Makey-makey which I know to be working based on testing it on their website.
I have tried running scratch as an administration. I have turned off Bluetooth. No USB devices are plugged into the computer when I run these tests. Scratch works fine with a Makey-Makey (but that's not surprising since it is just passing the equivalent of keyboard commands).
Exact circumstances of freezing are shown in the images linked below:
https://docs.google.com/a/seattleacademy.org/file/d/0B4oBpijiYVvpYUY5N1U0dnFENXc/edit
https://docs.google.com/a/seattleacademy.org/file/d/0B4oBpijiYVvpNU9YRjhpMlRvVGs/edit
I have also tried replicating the scenario with a WindowsXP SP3 machine. On this machine, Scratch 1.4 does not crash when you try to use the boolean sensor block (eg to read a button press). However, it does not successfully read the button press from the PicoBoard either. It defaults to the case where the button is not pressed, even when the button is pressed. When you try to use the real-time display for any of the "analog" sensors, it crashes.
On the Windows7 machine, the PicoBoard is showing up in the Device Manager as a USB Serial Port, COM 57. On the XP machine, it shows up as a USB Serial Port, COM 11.
The PicoBoard seems to work fine on a Raspberry Pi. So it's not the board which is the problem.
I should also add that on the Windows 7 machine, I tried using the Windows Driver located on this website: http://www.picocricket.com/picoboardsetupUSB.html . That "driver" is actually an executable and I have no idea what it is doing when it is run.
I also posted to the Scratch Forums.
I was able to get this working by assigning a lower COM number (2). Apparently scratch doesn't read all available COM ports, but only those up to a certain number.
The original SenseBoard seems to have outputs too? http://sense.open.ac.uk/
Is it possible to eg blink an LED using this board?
I'm from Argentina, how much is shipping
If you add the products you'd like to your shopping cart, then go to checkout, you can get a shipping quote on the page before you make any payment by selecting the address to send to, and (if applicable) the shipping option you prefer.
The four rubber bits that came with the board are feet, presumably?
If there's a sticky side (under some peel-off), yep - feet.. just to keep the board off of any conductive bits while working with it :)
The original picocricket kit includes sensors (light, sound, etc.) and motors. Can you provide links to compatible sensors/motors at sparkfun? Thanks. MJ
Hi,
I love to teach kids programming using scratch and they love picoboards. One of the ways I can reduce the cost to the kids is to get them a super cheap computer to run scratch on and take home. Raspberry PI has allowed this which is awesome, and I would like to get the picoboard to work with it.
I tried and it kind of works a bit then uses up all the cpu and stops working after a while. Not sure if there is anywhere that has hints on how to get this to work or if you have plans to support, but it would be great for the kids.
thanks Joel
Hi guys. You don't actually load code onto the Pico, it just spits out data that Scratch uses.
The board should work when you plug it in and open Scratch. If you're having trouble try installing FTDI drivers.
If the Pico board ever stops working just Save your project, close Scratch and then reopen. You should be good to go!
hi, can you send the picoboard also to any EU states ?
Yup. We're happy to send Pico Boards to just about anywhere.
No comment
I'm on OS 10.7. Is there an updated driver available?
Hi - Does any distributor carry these that also will just accept a school PO?
Hi there. This little sensor board is great. We use it in class with Scratch an Python and everyone likes it. But, we would like to make things a bit more advanced (without getting into programming a microcontroller itself --nothing wrong with that, it is just not the focus of the class)
Question: can I use the Sharp range finder or an analog accelerometer with this board? if so, which one. I tried the sparkfun tutorial and successfully connected a pot (ground, signal and VCC) and an PIR.
Any other analog sensor that you guys recommend for this board, I'm willing to try it. Thanks.
Need some firmware to run?
Hola que tal necesita algun firmware para funcionar??
Can you attach additional sensors to this thing? If so, which ones? I would especially like a tilt sensor. Pls talk English ... It's for a 10-year-old and I am a non-techy mom.
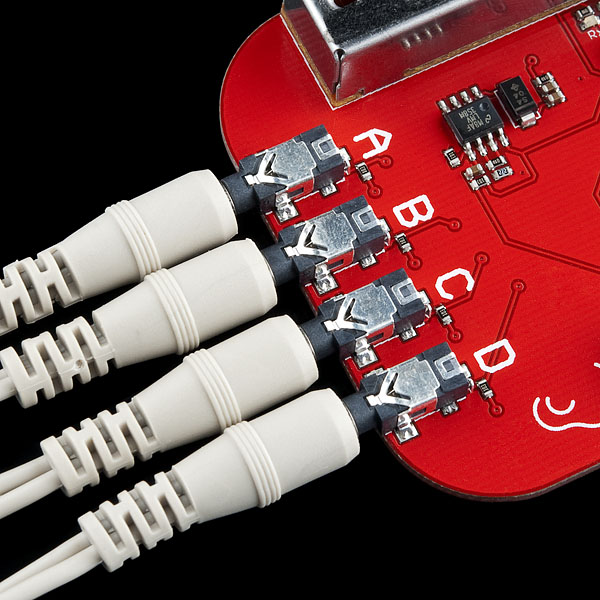
Soodle, You can definitely attach up to the 4 analog sensors connections at the bottom of the board. These are connections that look kind of like headphone jacks (2.5mm jack sockets referenced in previous posts). All you need to attach additional sensors are the sensors themselves and the alligator to headphone like jack cables that should have come with your Pico Board. Then you connect the communication line (whatever line that gives the sensor data) and a ground to the 2 alligator clip/2.5mm cable that comes with the Pico Board. There is also a version of this board in development at UMass, Lowell that includes an accelerometer sensor! Check it out here: http://www.cs.uml.edu/ecg/index.php/IchiBoard/IchiBoard I hope I answered your question.
I am contemplating recommending these for school use.
(1) Do you know the approximate maximum light level for the light sensor? (I need something that is reasonably linear all the way to full desert sunshine at 25 degrees North!)
(2) Do you know the rationale for grounding the tip as well as the sleeve of the 2.5mm jack sockets U3-6? Those 10k pull-ups are a pain when designing custom sensors without user-friendly access to the 5V rail!
Hey OK.
1) Not sure. It looks like the light sensor is currently this one: http://www.sparkfun.com/products/8348
2) The original Scratch board was designed to work with a mono plug (TRS). When connecting the mono plug to a stereo jack, the sleeve and ring will be shorted.
You're right that the schematic looks strange. I would expect the sleeve and ring to be connected, not the tip and sleeve. I have seen come across some Eagle libraries that have these backwards (or maybe they are for a different part with a different pin-out) and it is possible that this is what happened here.
The best thing would be to get one in your hands to complete your evaluation.
Best, Ed @ Modkit
Why does this picoboard look different to the one on the picocricket website? I want to be sure I purchase the right one to work with Scratch.
Hi,
Yes this will work with Scratch.
Why it looks different requires a little history. The Scratch Sensor Board was originally designed (with others including Robbie Berg) as part of Amon Millner's master's thesis work in the MIT Media Lab's Lifelong Kindergarten Group (creators of the Scratch project). These were originally produced with the help of the Playful Invention Company (makers of PICO Cricket). The first few thousand were sold for cost and shipped from Amon's desk at the Media Lab. This was unsustainable so the Playful Invention Company started selling them from their site. They have finally now found a permanent home at Sparkfun with a brand new red makeover.
Enjoy!
Hello,
Where can I download pde file?
Thanks.
Hi Abee,
There are no pde files since these were not designed to be programmed from the Arduino environment. If you want something similar that is Arduino compatible, you should check out the Modkit MotoProto Shield. It can be programmed in Arduino, Modkit, and soon Scratch as well.
http://www.sparkfun.com/products/10018
You must not know much about arduino, since this is pretty close to it with out being called an arduino.
it's an ATMEGA328. And it has a 6 pin avr programing header. You can use a arduino or a avr programer to program it(add a boot loader). Since this does have a FT232(the same TTL to usb serial that the Eariler arduinos have), this is pretty easy to turn into an arduino, since it has a 16mhz crystal. Tinker alittle. for beginers, this is fairly cheep and extensive. i like the Analog port broken out to plugs. I might pick one up to tinker with.
Hi Omaga,
Thanks for pointing out the compatibility. If you go that route, it would be great if you posted an example sketch here. That is an advanced use though and even with the Sparkfun redesign (they switched from a PIC to the atmega328) most beginners would not have an ISP programmer so milage may vary.
-Ed
hi, can you send the picoboard also to any EU states ?
This PicoBoard is based on the Scratch Sensor Board. We released that project with the license you can find here:
http://info.scratch.mit.edu/sites/infoscratch.media.mit.edu/files/file/ScratchBoardLicense.txt
enjoy!
Amon
Hi Amon. Where I can download the firmware for this project?
Thanks!
Hi, What license are these files under?
Thanks!
I hate scratch so much, I don't even include it on my SparkFun profile page.
This looks like it would be excellent for beginners though.