ProtoSnap - LilyPad E-Sewing Kit
The ProtoSnap series is a great way to prototype your project without a breadboard. Everything is wired together on a single board, which makes it easy to explore the possibilities of the components before snapping them apart and building them into your project.
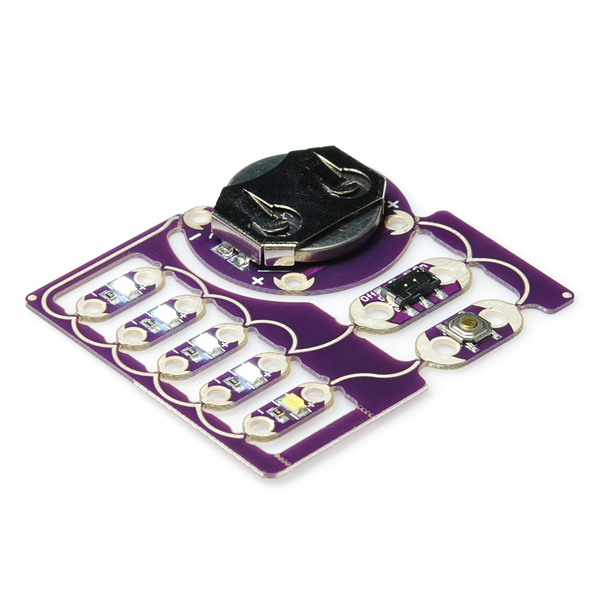
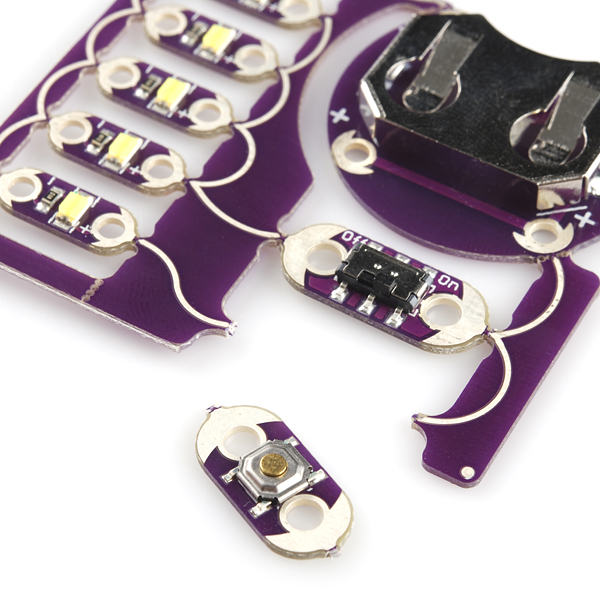
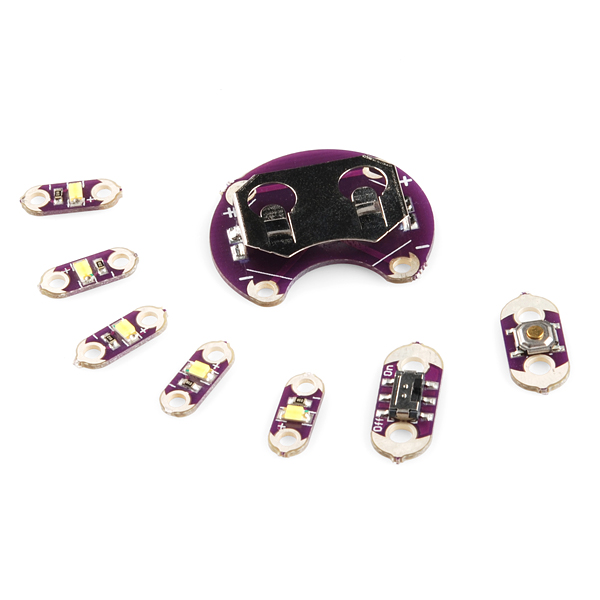
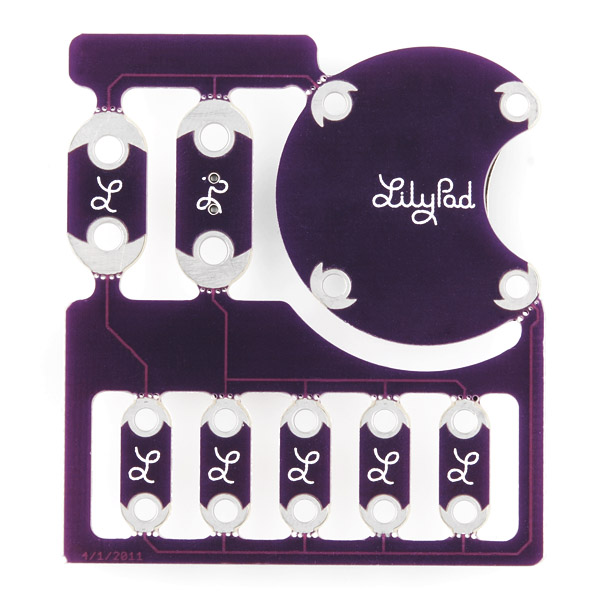
The ProtoSnap E-Sewing Kit pairs a LilyPad coin cell breakout board with a switch, a button, and five LEDs. It comes pre-wired so you can plug in a battery and use the switch and button to turn the LEDs on and off. Once you’ve mastered using the board together, break off the individual components and use them just like you would with their normal LilyPad counterparts.
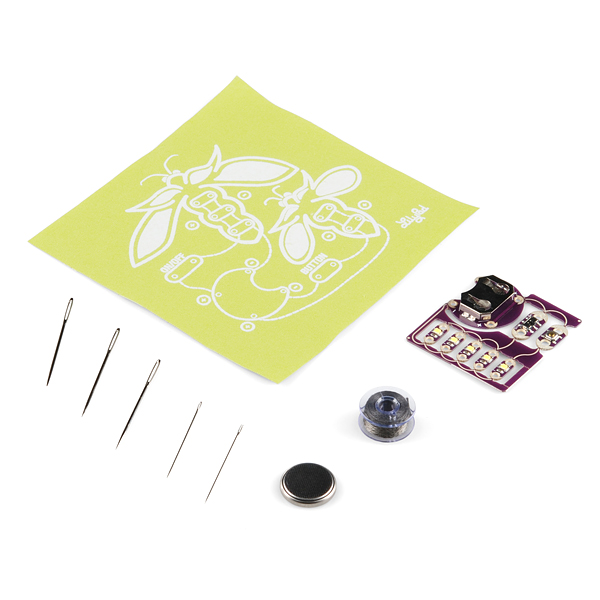
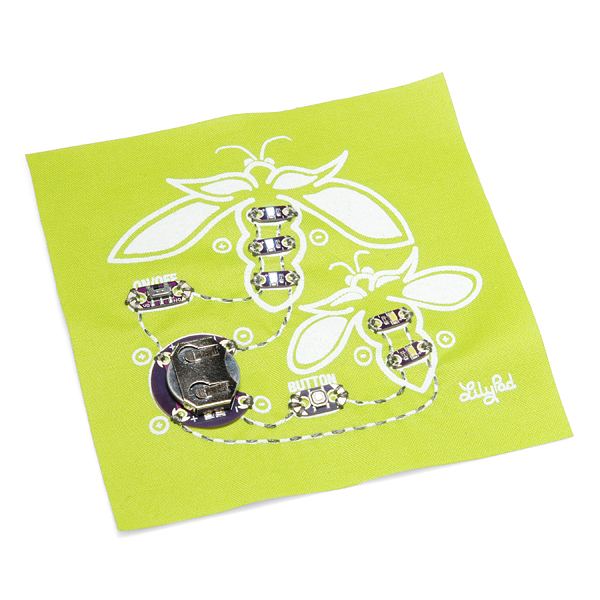
The ProtoSnap E-Sewing Kit now includes a battery so you can start your project as soon as you open the box. It also includes a fabric project template in case you don't have anything laying around to alter.
Note: A portion of this sale is given back to Dr. Leah Buechley for continued development and education of e-textiles.
Included in the panel:
- 1 x LilyPad Coin cell Battery holder
- 1 x LilyPad Button
- 1 x LilyPad Slide Switch
- 5 x LilyPad White LED
Included with the Kit:
- 1 x Needle Set
- 1 x Bobbin of Conductive Thread
- 1 x 20mm Coin Cell Battery
- 1 x 5" Fabric Template
Replaces:DEV-10964
ProtoSnap - LilyPad E-Sewing Kit Product Help and Resources
Core Skill: DIY
Whether it's for assembling a kit, hacking an enclosure, or creating your own parts; the DIY skill is all about knowing how to use tools and the techniques associated with them.
Skill Level: Noob - Basic assembly is required. You may need to provide your own basic tools like a screwdriver, hammer or scissors. Power tools or custom parts are not required. Instructions will be included and easy to follow. Sewing may be required, but only with included patterns.
See all skill levels
Core Skill: Programming
If a board needs code or communicates somehow, you're going to need to know how to program or interface with it. The programming skill is all about communication and code.
Skill Level: Rookie - You will need a better fundamental understand of what code is, and how it works. You will be using beginner-level software and development tools like Arduino. You will be dealing directly with code, but numerous examples and libraries are available. Sensors or shields will communicate with serial or TTL.
See all skill levels
Core Skill: Electrical Prototyping
If it requires power, you need to know how much, what all the pins do, and how to hook it up. You may need to reference datasheets, schematics, and know the ins and outs of electronics.
Skill Level: Noob - You don't need to reference a datasheet, but you will need to know basic power requirements.
See all skill levels
Comments
Looking for answers to technical questions?
We welcome your comments and suggestions below. However, if you are looking for solutions to technical questions please see our Technical Assistance page.
Customer Reviews
5 out of 5
Based on 3 ratings:
1 of 1 found this helpful:
Excellent Christmas!
Bought this for hubby. We went to a panel at DragonCon 2014 and he got hooked. I knew he wanted more so I went to the site and saw so many goodies that I didn't know what to choose. I picked this because he was familiar with it. He loves it and can't decide which cosplay to make so he can use it!
Great beginner project!
My 10 year old son wanted to learn to sew LEDs into fabric. This was a great project for him to reference when using the components for a project of his own design. Thanks sparkfun!!!
Great beginner project!
My 10 year old son wanted to learn to sew LEDs into fabric. This was a great project for him to reference when using the components for a project of his own design. Thanks sparkfun!!!

thanks i'd like the e-sewing ki
How much is VF value of LED? If VF value is 3.3V as written on the data sheet, I do not understand the reason turned on by the coin battery of 3V. Thank you for understanding my poor English.
it is indeed 3.3V typical (typ.) however LEDs actually have a range of forward voltages they can be driven at. At the higher end, they'll burn out faster (and nearly instantly if high enough) and at the low end it'll dim until it doesn't light. So, this LED can be driven at 3V but it'll be dimmer than what the data sheet says.
you can see a chart showing the relationship between forward voltage and the current draw, and then between the current draw and the luminosity (light output) on the data sheet's third page.