×
SparkFun will be closed on Tuesday, December 24th, and Wednesday, December 25th, in observance of the Christmas holiday. Any orders qualifying for same day shipping placed after 2:00 p.m. (MST) on Monday, December 23rd, will be processed on Thursday, December 26th, when we return to regular business hours. Wishing you a safe and happy holiday from all of us at SparkFun!
Please note - we will not be available for Local Pick up orders from December 24th-December 27th. If you place an order for Local Pick-Up we will have those ready on Monday, December 30th.
FlyCamOne eco V2
Do you ever wonder what your autonomous robots do all day? Or have you ever wanted to put yourself in the driver's seat of your favorite RC car? Maybe you just want to add a security camera to your desk at work to see who's stealing your pens. Well thanks to the FlyCamOne eco, recording video is so easy and affordable that you could get a camera for *each *of those situations.
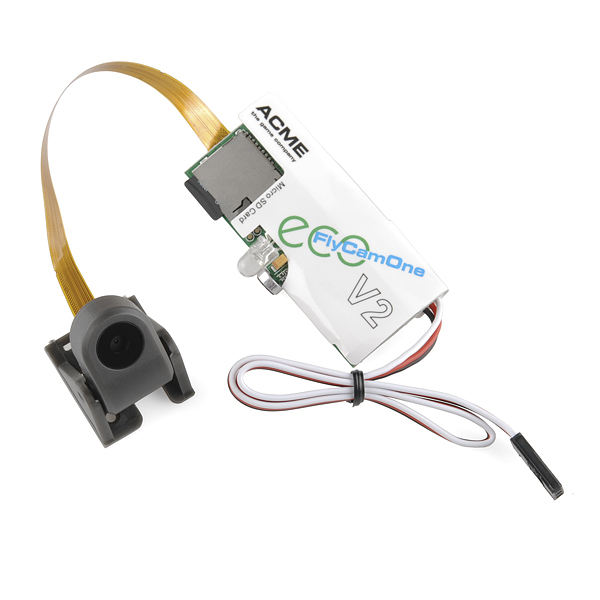
The FlyCamOne eco is a self-contained module that records 720x480 color video at 30 fps with sound! Not only that, but it can snap pictures as well. Simply plug in a Li-Poly battery, insert a Micro SD card and select the mode using the on-board push-button. If your application is remote controlled, the module can also be powered and controlled from an open channel on your RC receiver.
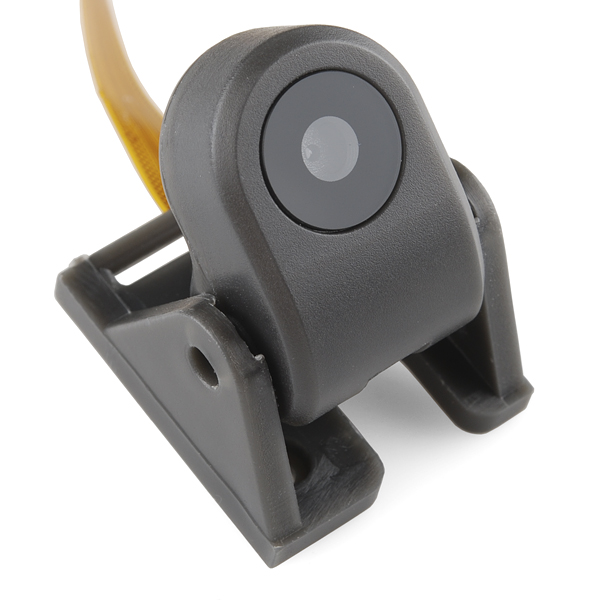
The camera itself is mounted on a swivel head and attached by a ribbon cable, allowing it to be mounted external to your project while keeping the control board out of harm's way. There's even a mode to flip the video 180 degrees so you can mount the camera up-side down.
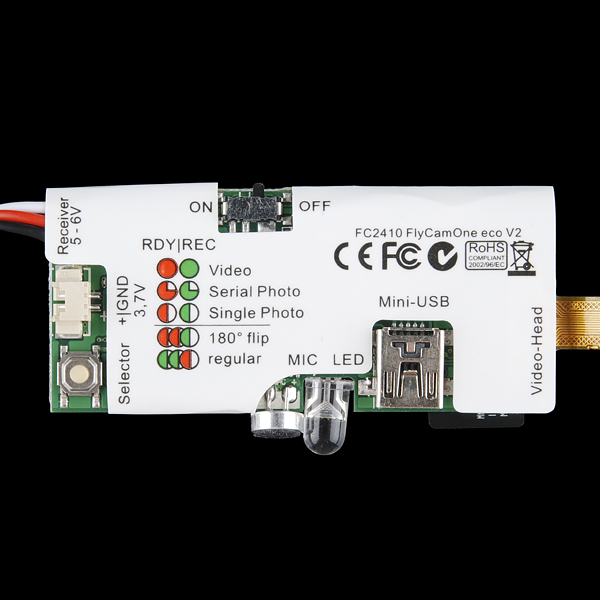
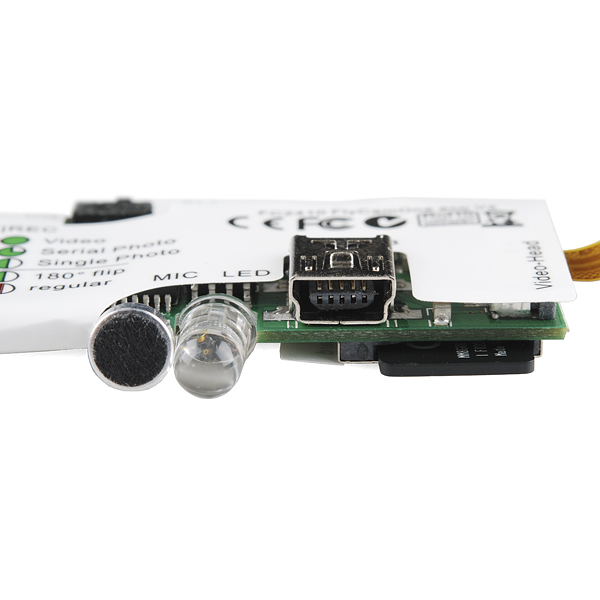
Navigating through the modes using the bi-color LED on the board can be a little confusing at first because the guide printed on the sticker seems to have "ready" and "record" backwards. When the light is green, you're on standby, when it's red, you're recording.
The battery connector on the control board is smaller than the standard JST connector that comes with our Li-Poly batteries. However, we've found that our JST-SH connectors, which can be found in the related items below, can be used to plug into the board although they don't fit perfectly.
Note: A firmware update is required to get full 720 x 480 resolution from the unit. You can get the firmware and instructions in the documents below.
Weight: 15g
- Supports up to 8GB Micro SD card
- Color Video, Picture and Picture Burst Modes
- Resolution: 720 x 480px @ 30 fps
- Voltage: 3.7V Li-Poly or 4.5 - 6V RC Receiver
- SD Card Accessible via On-Board Mini-USB
- On-Board Microphone and Status LED* Control Board: 30x57x7mm
- Camera Head: 22x24x28mm
- Ribbon Cable: 100mm
- RC Cable: 225mm
FlyCamOne eco V2 Product Help and Resources
Core Skill: Electrical Prototyping
If it requires power, you need to know how much, what all the pins do, and how to hook it up. You may need to reference datasheets, schematics, and know the ins and outs of electronics.
Skill Level: Noob - You don't need to reference a datasheet, but you will need to know basic power requirements.
See all skill levels
Comments
Looking for answers to technical questions?
We welcome your comments and suggestions below. However, if you are looking for solutions to technical questions please see our Technical Assistance page.
Customer Reviews
No reviews yet.

Is there a UART or other output to hook this bad boy up to a micro controller or xbee? Maybe hidden under that plastic wrapper? I'm surprised you guys didn't rip the wrapper off for your new product post.
like previous comment, i notice your example footage is “unavailable” on Vimeo. I'd quite like to see that before buying one.
Hello, I have a dell win 7 machine and cannot get the update to higher resolution on the FlyCamOne V2 to work. The first half of loading the driver works ok. After rebooting, I held the white button down and plugged in the USB cable. Got error message about driver working correctly. Starting the second driver install program and got "Device can't be initialized. Please check driver or hardware settings." What should I do next? Thanks.
On Windows 7 and newer you need to disable the driver signature check. Do this by rebooting Windows, press F8 after the bios screen and select "Disable Driver Signature Enforcement". Windows now boots up as normal and the driver should work.
I've had no luck, spent hours; followed the instructions to the letter. Nothing, just odd messages and a virus warning!
Is there a better way? are there instructions that work?
Just started everything from scratch - only errors. This feature is a waste of time.
Do you know anything about the timing of the "serial images"? Is that timelapse? Can you set the delay between the images?
Thanks!
(btw, your example footage is "unavailable" on Vimeo.)
As cool as this is from a project perspective. What is even cooler IMO is that it appears to be plug and play with a standard R/C receiver.
Is is possible to split a bigger card up in multiple sections and do somekind of script so it continue to record after a section is full until all sections are full? is there a possibility to add wifi,bluetooth? Can it be used with any kind of sensor like lightsensor etc?
The first unit I received had a color problem (moiré pattern effect) which was resolved with a quick replacement from SparkFun (thanks!).
Firmware upgrade on Windows 7 was a bit tricky but I ended up getting it to work with Fiskbil's suggestion below to press F8 on boot and select “Disable Driver Signature Enforcement”. Also, it seems USB power was not sufficient to upgrade firmware since it didn't work until I plugged in a charged battery (though that could have been a fluke).
I haven't used the camera much yet but my first impression is that image and video quality aren't amazing but are better than nothing and acceptable for my use given the low cost and small size. Think older webcam, not GoPro.
The camera supports charging the connected battery when power is available via USB.
Hello Everyone,
I am FlycamoneV2 in my project, i am using PIC18F458, I don't know how to control the PWM signal through the PIC and also the wire connections(How do i connect the Flycam to PIC). Can anyone Please help me out.
Do we have to set the modes every time on a fresh start or does it remember the previous set mode?? Whats the delay between switching it on and the instant it starts recording or any other set mode?
Thanks!
Two Questions: Do we have to set the modes every time on a fresh start or does it remember the previous set mode?? Whats the delay between switching it on and the instant it starts recording or any other set mode?
Could you please tell me what is the reference of the LIPO battery connector of the board as it's not an usual JST connector for LiPo battery (PRT-09749) proposed for example in the Lithium Polymer USB Charger and Battery (RTL-09876). Thanks for answer
Just got one today and the on off switch does not work and when connected to the power source it goes on just sometimes. DONT BUY IT. I am posting a video on youtube showing the problem - flycamonev2_becker
Had some problems with this. It was working perfectly up until I installed the drivers. When I went to reboot I switched the on/off and held down the button as was said. When that chose to fail I unplugged it and tried some more times unsuccessfully. Eventually I gave up and resigned myself to the original settings. The footage is decent and acceptable with the original settings unless you're willing to spend over four times the price on the similar HackHD camera which is also available.
Is it possible to connect this to a breadboard and supply the right current through regular li-ion batteries instead of having a li-poly battery?
Don't worry, solved it. :)
Can you do that?
Just fyi it appears to use about 150mA
I bought one of these and I cannot get it to turn on. Tried using a model helicopter li-po single cell, and also regulated dc. An LED turns on when I connect it to the computer, but that's it. Did anybody else have this problem? Does anyone know if it can be fixed?
thanks!
Is there any way to stream the feed to an X-bee or an Arduino? On my mobile rover platform, It would be great to be able to stream photos or videos without having to collect the SD card each time I wanted to review the pictures.
Hi
I would like to know if there is a way to read the vidéo in real time with the USB mini, so we can send it via radio. The aim is being able to see what a drone see, to aim properly the camera.
Thank you for the answer
This is not possible with this camera. USB port just allow to handle your camera as a USB stick in order to download recordings. Several other products are much more suitable for what you want to do.
Hello guys,
I am having a bit of trouble controlling this camera correctly. Have done a lot of testing with it and still cannot figure out what exact PWM it expects to turn the camera on/off. I would like to use it with an arduino and not an RC controller.
By the way, I also tried replicating an RC controller PWM with an arduino, this way it turns on/off unexpectedly. So any helpful tips are greatly appreciated.
Thanks!
AeroGuy,
I have done such thing with a PIC micro-controller two years ago, it is very stable. The problem that still remains is that even if they say that 8 GB cards are supported, the video recording stops after 4GB. Could'nt figure it out why, i suspect the firmware to be buggy.
However and like you, I experienced come trouble to make it properly work. I finally figured out that it is not enough to mimic PWM signal to get on/off/changeMode. You have also to generate the idle signal for a little time (half a second) before sending the trigger signal. If not the flycam will not obey.
I just made this code compliant with Arduino (to drive several cameras embedded in a weather balloon). If you are interested in, just have a look at my Github repo. https://github.com/sebastienjean/arduino-yasolibs
Thank you! That explains why. Regarding your 4GB problem, I'm guessing it has to do with your SD card. Did you try formatting it to NTSF?
No i haven't tried. I do not know if NTFS is supported by this camera, i will have a look. But you are right, FAT32 specifies a maximum file size of (4GB) 2^32 bytes. The firmware does not automatize recording continuation after the first 4GB of recording, creating a new file. Most people do not need that, but i do !
Hello Baz0unga,
I am FlycamoneV2 in my project, i am using PIC18F458, I don't know how to control the PWM signal through the PIC and also the wire connections(How do i connect the Flycam to PIC). Can anyone Please help me out.
Does anyone know about the low-light performance of this? Is there an infrared filter in place, or would this camera pick up nighttime video with enough infrared light?
I really needed one of these a week ago, somone stole my waterman hemisphere. :(
Hey all, I picked up one of these and love it, here's a video I shot with it on my quadcopter: http://www.youtube.com/watch?v=boOw4qGnCQY Hope it gives you an idea of how well it works, especially because the example footage is 404-ing.
Can it communicate with a uC instead of using SD???
Is the image in the SD card is accessible by an arduino? (by SPI for exemple) or can I read still image from an arduino ?
I want to use this cam for processing an image image AND record video on SD card...
there is how to make the camera images to be received on computer to remotely?
Has ANYONE actually gotten the firmware to update on their FlyCamOne?
I thought the hardest part would be tracking down a windows machine. Boy was I wrong!
I have a windows XP laptop; nothing special, and have not been able to get the firmware to update for the life of me. Been at it on/off for like 2 hours. It really should not be this hard.
The first couple of tries...I'll admit I didn't inspect the names of the files THAT carefully. The two files you are to use are VERY similar in naming convention.
Once I noticed the naming mix up I tried again 3x and still have no idea if it even worked. I was not prompted in the way the readme.txt tells me I should be, so I assume the firmware did not take.
wow what a difficult process. I was hoping to take my FlyCam on my madien air plane flight. rigged it up to be strapped to my head. I suppose Im either going to have to postpone my flight or go with lesser res. :*(
I've had trouble as well. I'm just coming back to the site to try again, but so far haven't been thrilled with the unit.
Nowhere can I find the type of sensor, is it CCD or CMOS?
I want a global shutted NOT rolling shutter, there are hundreds of cheap CMOS spy cams, the only reason for buying this is if it's CCD.
PLEASE tell me it's CCD...
^- This :)
I had the idea to use this as a squirrel camera on my fence, but the serial photos stop after 45 pictures. This occurs using the battery connector and the servo connector for power. Has anyone else had this problem?
I was successful in updating the drivers using an older pc running Windows XP. 7 wouldn't let me use unsigned drivers. Also had to reformat my microSD. Works great!
Here are some notes for the EVO FlyCam2 in R/C applications.
FC2 has 3 modes: Video, Serial-Photo�which takes stills one at a time, and Single-Photo. Each mode is indicated by a different LED color and flashing pattern.
Fast flashing green LED means Single Photo mode is ready, and slow-flashing green means Single Photo mode is ready. The two remaining modes flip/unflip the picture 180 degrees. Point is, to get videos, you have to have a solid green led, then cycle switch or button less than 3 seconds to toggle video capture ON/Off.
At power-up, FC2 normally starts up in �Video� mode indicated by the LED showing solid green. If LED is not solid green, FC2 is in a mode other than �video� and you must change it, assuming you want to shoot videos. When the Transmitter�s (TX) switch or button is �on� (closed) MORE THAN 5 SECONDS the FC2 will SWITCH TO THE NEXT MODE.
If the receiver channel to which the FC2 is attached is controlled by a switch rather than a button, you must CYCLE THE TX�s SWITCH from from OFF to ON to OFF in no more than 3 seconds to BEGIN/END the mode�s processing, whether video or still. OR if a button controls the channel rather than a switch, you simply PUSH THE BUTTON to start and then push it again to stop the mode�s processing. Be sure to hold down the button no more than 3 seconds.
Prior to power-up, remember to turn video card switch to ON. Turn video capture switch/button on TX to OFF then turn TX ON. If solid green, video is ready; Otherwise, cycle to correct mode as explained above.
Hope this helps
DOZ
Is the camera waterproof/watertight?
I have a question about the servo connector. The manual says this is for a button press on the transmitter. What signal is the camera expecting? Is it a 0 to 180 degree transition? or is it a simple on-off pulse?
Tried capturing serial images by using the arduino servo "sweep" example but I'm not getting consistent results. I assume I should get one picture per sweep, but I'm getting pictures at random times.
What gives?
I don't get it from the description nor the video. Is this capable of live streaming the video to pc/mobile/something? Thanks!
No streaming, it records video and audio to the uSD card for later playback.
I got 1hr 49mins 3secs using 4.0gb on an 8gb microsd. almost two hours and only half the card was used. Don't know why it stopped battery might have died I'll have to check.
Could be a 2gb limit?
I tried five times, it would only record for just shy of two hours each time I tried it and max of 4gb, must be the size of the buffer onboard.
It could be the FAT fs, it doesn't support files larger than 4GBs.
Is it possible to use this as a webcam so it could be attached to a beaglebone and used with opencv?
how to interface with arduino?
1gb = 10 min recording
thank you!
Are you sure usually 1 hour of high quality video is 1gb
its probably a more raw encoding. To make the file smaller, put the SD in a computer and use a video editing program to export it to a smaller file type, such as MPEG or mp4.
What is the pinout of the 3-pin connector? Also, what kind of signal does it use to control the start/stop?
Uses the standard rc servo protocol,PWM. you can control it using the standard arduino servo library.
So is it black or white? :D
No, full color.
agreed. we need to know total recording time.
Total time, possible to record on 8Gb?
Pearce was able to get 20 min/2GB, so you can get 10min per gigabyte. 80 minutes for 8 GB.
What is the max recoding time for 2GB and 8GB micro SD cards?
Using a 2Gb, I was able to get a little over 20 minutes.
What video encoding does this record to? I read through the linked materials, but didn't see the format mentioned, just the resolution&fps.
It's MJPG, but apparently there's a firmware update in the works that does h.264. file is an AVI.
What is the resolution of this camera when you click a photo? is it remains the same as 720 x 480px or it will increase?
also i want to hack the sd card to be read by the arduino ,so as you have seen this module ,what you think? Will i be able to access the SPI bus of the SD card?
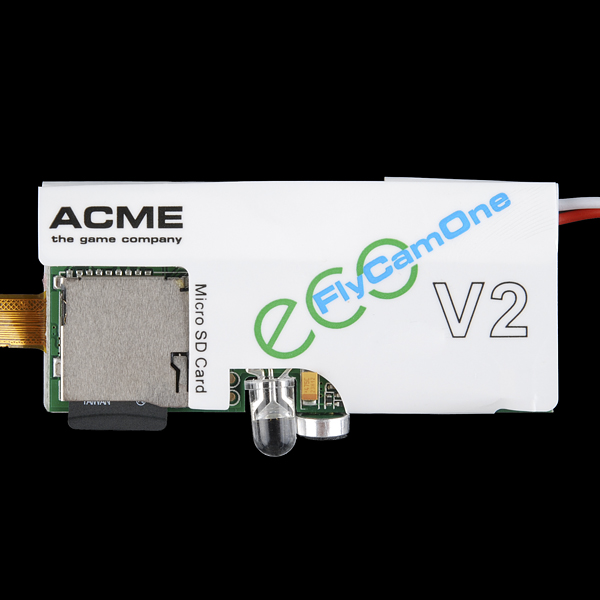
The SD card socket has exposed solder connections after removing the white "wrapper". You could also tap into the SD card signal by using a uSD card sniffer. Tapping into the SPI signal is unlikely to do much good since the photo (or video) will be compressed and would require a much more powerful processor than an Arudino to make sense of the data.
I doubt there is Arduino code for decoding a JPEG file.
You'd also have a problem of where to hold an image inside the Arduino. The Uno has 32K of RAM and a still image is 72K in size.
SparkFun does sell a LinkSprite camera that sends a JPG photo over a UART. You'd still have the problem of storing a decoding a JPG but communication with the camera would be easier than communicating with this camera.
It's the same resolution I believe. It's limited by the sensor.
As for the SPI question, I really don't know. Looks like you might have to get one and tinker around with it :-)
Too bad the thing doesn't seem to have ntsc/pal outs.
Too bad that it's a micro sd and not standard SD... Then you could stuff a Eye-fi there and be styling!!
The buffering issue mentioned in the video suggests that the eyefi won't get written to until you stop the recording. unless you remotely control recording there's kinda no point.
Since the pin-outs are (basically) the same, could you wire a regular SD slot in place of the MicroSD slot?
Someone should make a microSD to SD converter that has a form similar to this board.
Is it color or black-and-white? The manual doesn't say.
Full color.
*Adds to wishlist* Sweet, thanks!
No problem! Sorry for the omission. I updated description as well.
Do you have something to actually stream Live video back to an iPhone or something?
Or to a computer? Live video feed would be amazing
How fast? 30 fps may be impossible, but an image or two/second might be doable... but not easy.
Not a problem. Thank's for fixing that. Quick question also: Would the servo in the Related Products fit the tilt-mount, or does the camera already have a motor built in? Alternatively, do I just have to preset the swivel manually?
I looked at the website of the company that makes these, Is there a way that Sparkfun could get the 1080p version of these?