Webcam - USB
This is a simple USB Webcam that can be plugged into your computer or dev board and start capturing video right away. The resolution is 1024x768 which is adequate for motion-tracking or object-detection, but don't expect to use it for photography or movie-making.
Note: This webcam works well in Linux, so it pairs well with a pcDuino.
- Max Resolution: 1024 x 768
- 3' (914.4mm) Retractable USB-A Cable
Webcam - USB Product Help and Resources
Core Skill: Electrical Prototyping
If it requires power, you need to know how much, what all the pins do, and how to hook it up. You may need to reference datasheets, schematics, and know the ins and outs of electronics.
Skill Level: Noob - You don't need to reference a datasheet, but you will need to know basic power requirements.
See all skill levels
Comments
Looking for answers to technical questions?
We welcome your comments and suggestions below. However, if you are looking for solutions to technical questions please see our Technical Assistance page.
Customer Reviews
3.5 out of 5
Based on 4 ratings:
It does not work properly.
It works in camera mode (continuous images) but doesn't work in picture mode. Sometimes it takes single pictures some times don't. And when it takes them the images are blurry. I tested the same webcam from my class mates and those worked good with my LabView program.
Beware, components have changed
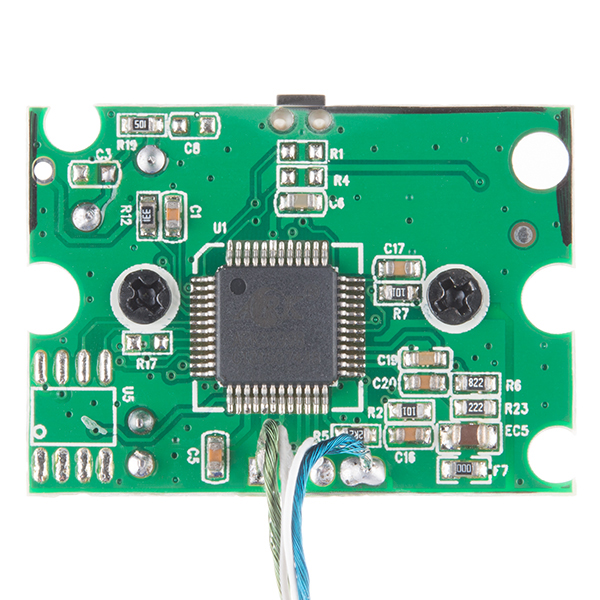
Pics of the PCB are not accurate Got it and it works but they have changed the components around so it only has the one IC. I was planning on running this on 3.3V, bypassing the 5V to 3.3V regulator, only but it may not be possible with the model I have as it looks like the regulator is now on the main IC. Still trying to track down the spec sheet on the new chip.
followup: I am able to run the new model on one li-po cell so it does function as needed. Update rate seems a bit slow but it works. Connected to an Edison powered off the Sparkfun Battery board. Pics are updated too, thanks!
Sorry about this. We weren't aware of any changes to this device. I'll have the photos updated. Thanks for bringing this to our attention.
Will not take pictures in Linux
I bought this specifically to take pictures in (ARM) Linux for detection / processing. Device does not appear to work with any standard Linux drivers. I bought this due to the note about working well in Linux which I have found to be completely false. Device is recognized and is accessed, but will not function. I will be happy to change my review to 3 stars if I can find even a nonstandard driver that will allow this to function. For now it is of no use to me. Looking at the forums, I believe the old board of ID 18ec:3299 was supported, but the new board ID 18ec:3399 is not.
Update: I did get this working for my automation program with openCV in Python by manually adjusting properties. It is a reasonably well made and very well priced device. Be warned that until the V4L drivers are updated to include the newer board set for this device, this is still only marginally compatible with Linux and is definitely not fully supported.
OK
Good:
Worked just fine under linux, both on RPi2 and my Dell laptop, also on Mac, both with OpenCV2 and my own V4L2 apps.
Was able to get 9 FPS depending on lighting conditions ( exposure time limited rate under dark conditions).
Size. These are tiny and easy to integrate into projects.
Bad: Only supports YUYV. Framrate limiting ioctls "succeed" but don't limit framerate. ioctls to turn off auto exposure aren't supported. Mild bug in firmware allocates too much USB bandwidth in low resolution modes ( 4 should work on the same USB hub at 160x200, but only 3 will work per hub at this resolution).
Coiled cord is cute but ultimately annoying, tending to retract at random times on its own. I removed these from mine.
Conclusion:
These are nowhere near the quality of, say, a Logitech C310, but they do work and are fairly cheap.
$9.00 would be a better price for what you get.

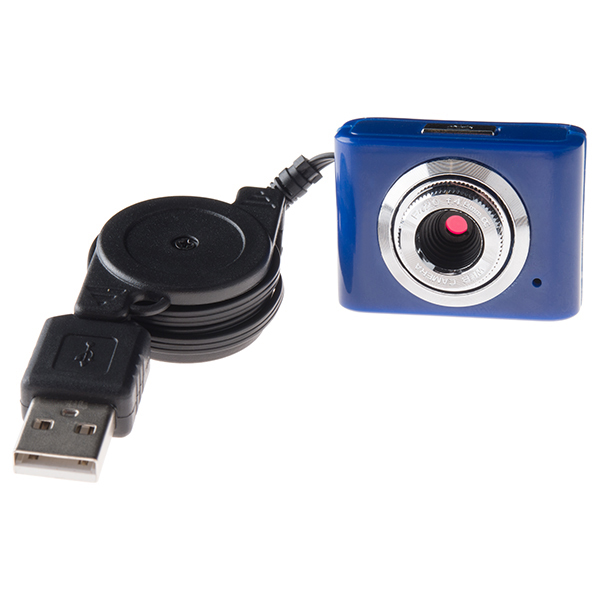
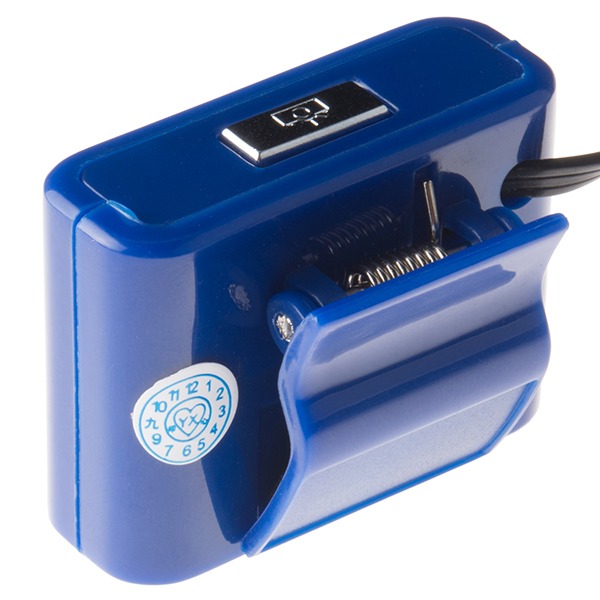
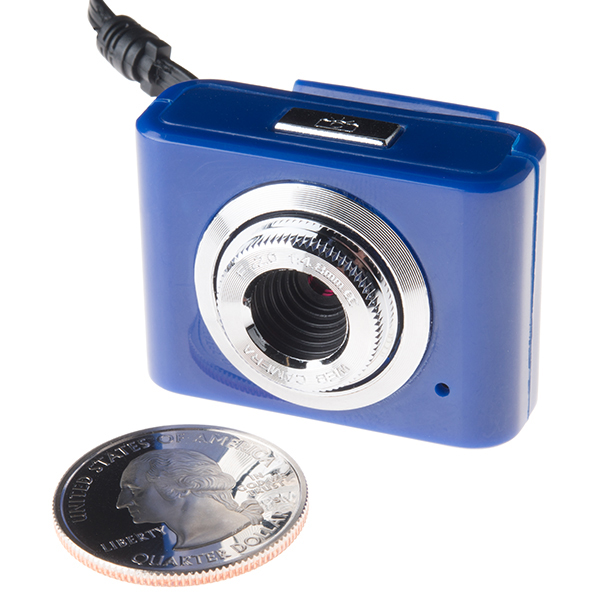
Works out of the box on Mac OS 10.9. The OS reports it as follows:
USB 2.0 Camera:
Product ID: 0x62f1
Vendor ID: 0x0c45 (Sonix Technology Co., Ltd.)
Version: 1.00
Speed: Up to 480 Mb/sec
Manufacturer: Sonix Technology Co., Ltd.
Location ID: 0xfa130000 / 7
Current Available (mA): 500
Current Required (mA): 500
I tried it with Photo Booth. The image looked really really good, however the framerate was crap, maybe about 1.2fps or something.
Raspberry Pi: This works very very easily with Raspian. Shows up as /dev/video0. I've been using it with "motion", to log motion event videos to my NFS server.
I just bought one to use with the BeagleBone Black. I sort of got it working, but not quite. I can get video for linux 2 to probe the camera, and it tells me it's a 640x480 yuyv camera using the uvcvideo driver. If I try and set it to 1024x768, that doesn't work, but I get no errors on why. If I try and take a picture using v4l2grab -x640 -y480 -n1, I get an output .ppm file that has each scan line not aligned with the line above it in the picture. So, I get "shredded paper strips" in my picture, with each "strip" seeming to be valid, but the alignment of the strips to be invalid. The result is not intelligible as a picture...
Any ideas how I can get a real picture from this camera and BBB?
Any luck getting the BBB to take a picture with this camera? What distro are you using on the BBB, Angstrom or Ubuntu?
So does this webcam have actual drivers for it or does it rely on the generic AVC drivers that don't allow for direct control of exposure or other settings? This camera might be worth getting if it's the former, but if it's the latter, it's really no better than any junk webcam you can get from any online shop out of Hong Kong.
It relies on generic drivers. The one thing that makes it slightly better than the rest of the cheap webcams out there is that we can tell you for sure that it works under Linux, and on the pcDuino particularly.
That's not as common as it seems like it would be; I tried about 8 different webcams on the pcDuino to find one that works, and several of those were name-brand units.
How fast can it take/transfer pictures?
When taking video, expect at least 1.2fps at full image size.
Worked ok with Windows 8 "Camera" app until error message "Looks like there's something wrong with your camera. Check the manufacturer's website for troubleshooting info." I think I can resolve the problem by restarting my PC.
Also, the camera works great with the RPi2 (Raspberry Pi 2)
can it be used for recording video and storing that to sd card from Raspberry pi on which linux based OS are used e.g. raspbian??
can it be used for recording video and storing that to sd card from Raspberry pi on which linux based OS are used e.g. raspbian??
While it is affordable and works well under Linux, I believe the maximum resolution is not correct. Neither have I been able to obtain over 640 x 480 pixel video.
This webcam is Made In China?
I saw that someone else asked about using this with an Intel Edison, but it wasn't answered. Any idea if this camera would work with an Edison and the Edison breakout board (not the Arduino board)?
Perhaps with USB OTG hubs? (I have ordered one named "3 in 1 micro USB OTG Hub Cable Adapter" for testing, but it will take time to arrive from China to Estonia, maybe a full month before I finally see it.)
Is possible to use this camera with the Intel Edison system ?
Here's a timelapse I made using this camera and my rPi, running the "motion" application.
How I could connect it to an arduino board?
You would need to add a USB host shield (or similar circuit) and basically write your own drivers. It can be done, but not easily.
could ipeerbhai please comment on weather he had any success with the camera and the bbb
No, I never got it to work.
Anyone know if this supports an mjpeg stream directly or if its yuv only? That is, can I use it with mjpg-streamer without the - y flag?
Hey wait, what about the Arduino using the USB master shield from circuitsathome.com? XGA resolution pictures taken by an arduino would definitely be worth doing.
The one I received seems to max out at 640x480 resolution when I use VLC on Windows and gucvview on Ubuntu. Is the max resolution possible through specific drivers?
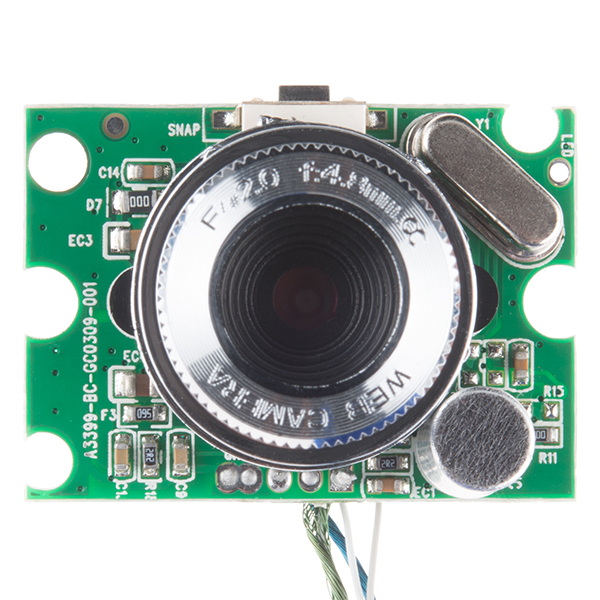
Does it have a microphone?
Yeah, you can see it in their teardown photos :)
Has anyone tried removing the IR filter on this thing?
Yes. It's kind of a dodgy prospect; the lens assembly threads in, and you have to remove it to remove the IR filter. Then, to get the filter out, you need to dig at the lens assembly a bit, which screws up the threading, making it hard to put the assembly back. And, of course, you've screwed up the focus now, by removing it, and you'll need to be careful replacing it to get the focus back to where it started.
Oh, and everything inside is hot-glued in place, making reassembly a bit harder.
But yes, it can be done.
You guys are awesome for tearing one apart so we can see the guts.
Is Sparkfun going to post a datasheet or the exact dimensions?
Would this also work with the Raspberry Pi?
it should, yes.
Cute little bugger. :)