NeoPixel Ring - 16 x WS2812 5050 RGB LED
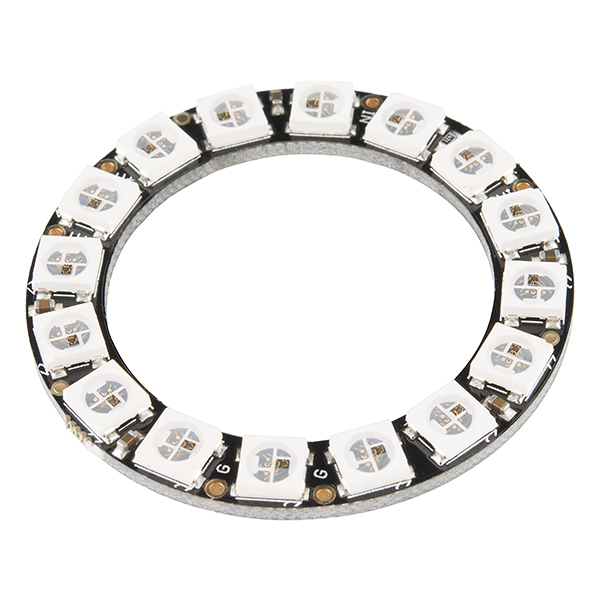
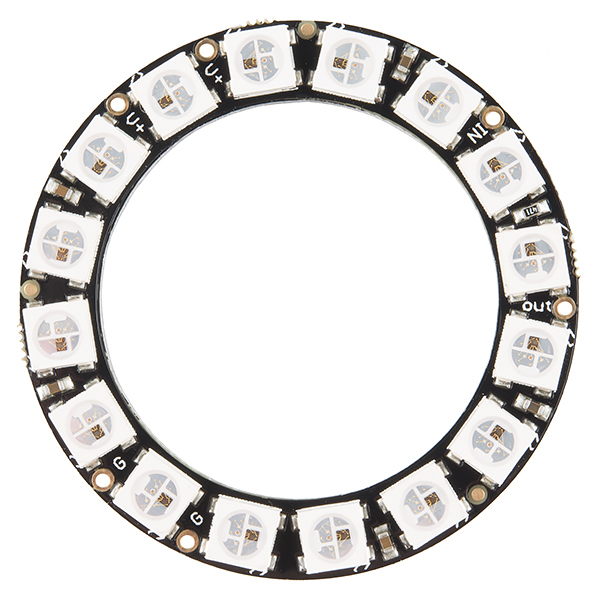
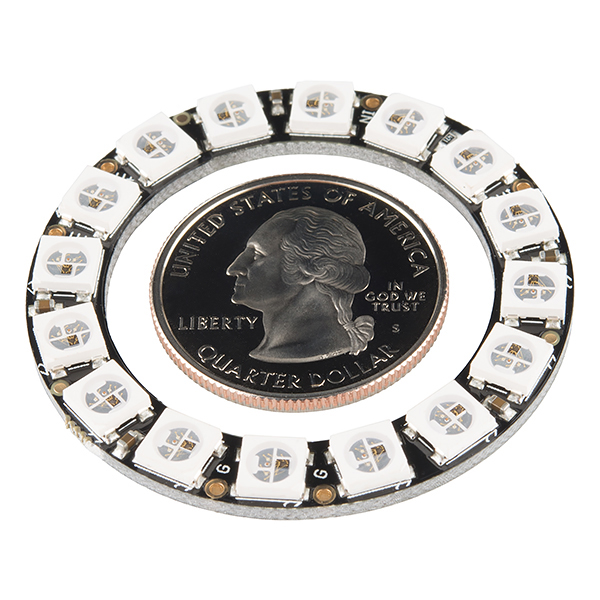
This is the 16 LED NeoPixel Ring from Adafruit, a small chainable 1.75" (44.5mm) outer diameter board equipped with 5050 WS2812 RGB LEDs. The WS2812s are each addressable as the driver chip is located inside the LED. Each NeoPixel Stick has ~18mA constant current drive so the color will be very consistent even if the voltage varies, and requires 5V.
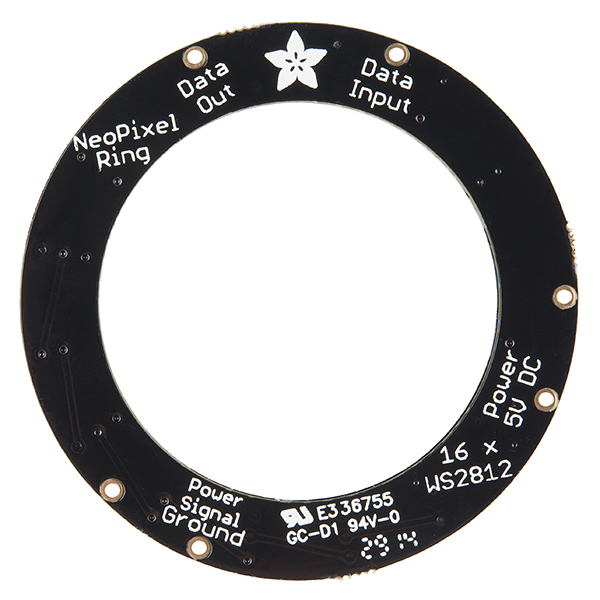
Every ring is equipped with a single data line with a very timing-specific protocol requiring a real-time microconroller with a 8MHz or faster processor such as an AVR, Arduino, PIC, mbed, etc. There are solder pads on the back for connecting wires or breadboard pins and two mounting holes for securing this board to many different surfaces.
NeoPixel Ring - 16 x WS2812 5050 RGB LED Product Help and Resources
WS2812 Breakout Hookup Guide
July 24, 2013
How to create a pixel string with the WS2812 and WS2812B addressable LEDs!
LED Cloud-Connected Cloud
February 22, 2016
Make an RGB colored cloud light! You can also control it from your phone, or hook up to the weather!
DIY Heated Earmuffs
January 31, 2018
Embedded with heating pads and four Neopixel rings, these earmuffs do more than your average winter accessory to keep you warm while still looking good.
1 of 1 found this helpful:
LEDs working in pairs, not individually
Neopixel rings have a known issue where sometimes the LED's only work in pairs instead of individually. Contact SparkFun Technical Support if you run into this issue.
Core Skill: Soldering
This skill defines how difficult the soldering is on a particular product. It might be a couple simple solder joints, or require special reflow tools.
Skill Level: Competent - You will encounter surface mount components and basic SMD soldering techniques are required.
See all skill levels
Core Skill: Programming
If a board needs code or communicates somehow, you're going to need to know how to program or interface with it. The programming skill is all about communication and code.
Skill Level: Rookie - You will need a better fundamental understand of what code is, and how it works. You will be using beginner-level software and development tools like Arduino. You will be dealing directly with code, but numerous examples and libraries are available. Sensors or shields will communicate with serial or TTL.
See all skill levels
Core Skill: Electrical Prototyping
If it requires power, you need to know how much, what all the pins do, and how to hook it up. You may need to reference datasheets, schematics, and know the ins and outs of electronics.
Skill Level: Rookie - You may be required to know a bit more about the component, such as orientation, or how to hook it up, in addition to power requirements. You will need to understand polarized components.
See all skill levels
Comments
Looking for answers to technical questions?
We welcome your comments and suggestions below. However, if you are looking for solutions to technical questions please see our Technical Assistance page.
Customer Reviews
4 out of 5
Based on 3 ratings:
2 of 2 found this helpful:
Sensitive little bugger...
Typical LED RGBs, they are very bright, easily handled with Arduino code, yet are VERY sensitive to voltage limits. Don't ever go above 5v. It will smoke check fairly quickly. ;) Also, solder from the back side ONLY. The tolerances on the LED side are way too tight. One little extra slip or blob of solder and you've shorted them out; apply voltage to it and you've destroyed another ring.
I would recommend these things be redesigned using solder PADS on the back-side for the connections instead of through-holes. That way you can't ever get too much solder leaking through and shorting on the front side.
worked exactly as promised
It showed up - I followed instructions, and it all worked perfectly.


Beware! 16-pixel rings are addressed counter-clockwise, while 12- and 24-pixel rings are addressed clockwise! This can make programming the rings of different sizes arrayed together VERY difficult.
How sensitive to input voltage are these? I would like to power them from a 6V lantern battery (6.6V unloaded according to my DMM). Will I burn it out? (This seems to be in the unfortunate range of to high for most 5V projects, but too low for a 7805 regulator).
What is the inside diameter?
Dimensions:
Outer diameter: 44.5mm / 1.8"
Inner diameter: 31.7mm / 1.2"
Thickness: 6.7mm / 0.3"
Copied from manufacturers website
How many mm thick are these?
My educated guesstimate would be somewhere between 2.6mm and 3.0mm.