Intel® Edison and Mini Breakout Kit
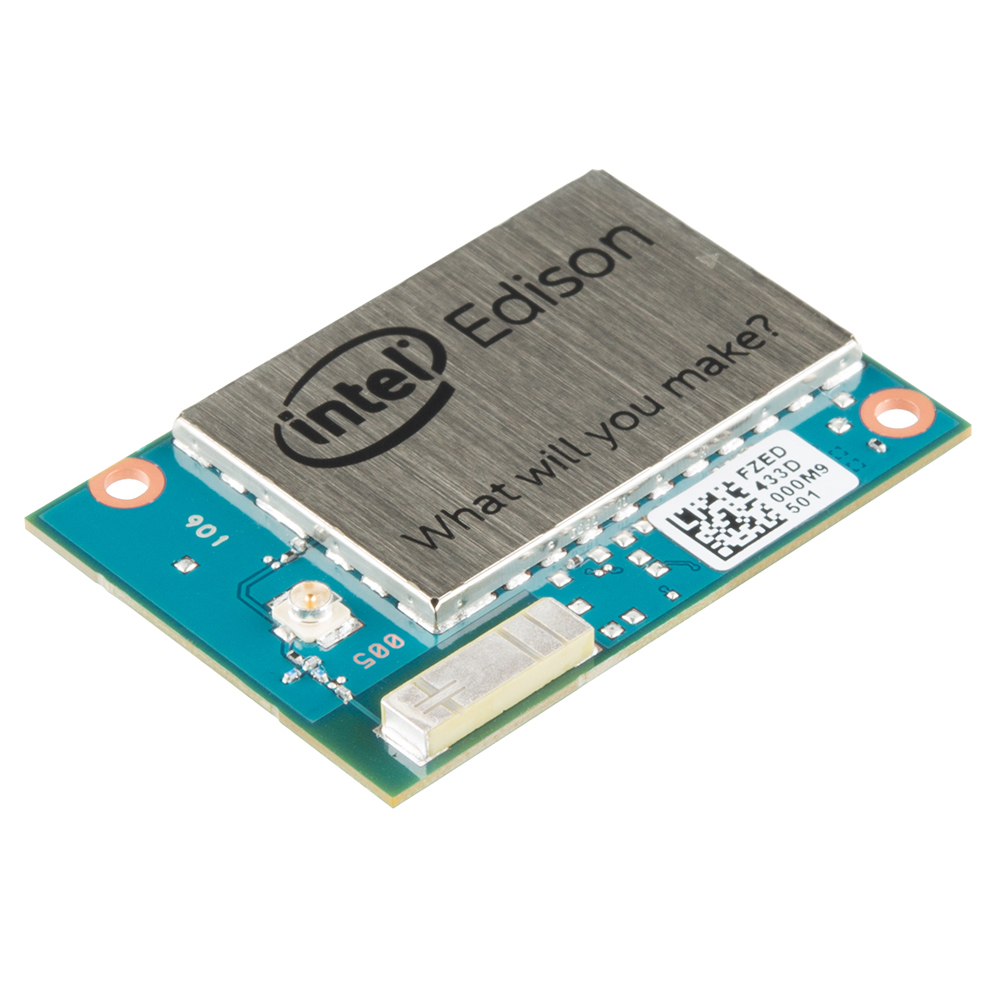
The Intel® Edison is an ultra small computing platform that will change the way you look at embedded electronics. Each Edison is packed with a huge amount of tech goodies into a tiny package while still providing the same robust strength of your go-to single board computer. Powered by the Intel® Atom™ SoC dual-core CPU and including an integrated WiFi, Bluetooth LE, and a 70-pin connector to attach a veritable slew of shield-like "Blocks" which can be stacked on top of each other. It's no wonder how this little guy is lowering the barrier of entry on the world of electronics!
The Intel® Edison packs a robust set of features into its small size, delivering great performance, durability, and a broad spectrum of I/O and software support. Those versatile features help meet the needs of a makers, inventors, and beginners. This is a module with a high speed processor and WiFi and Bluetooth Radios on board. It’s low power and small footprint make it ideal for projects that need a lot of processing power, but don’t have the ability to be near a larger power source or have a large footprint.
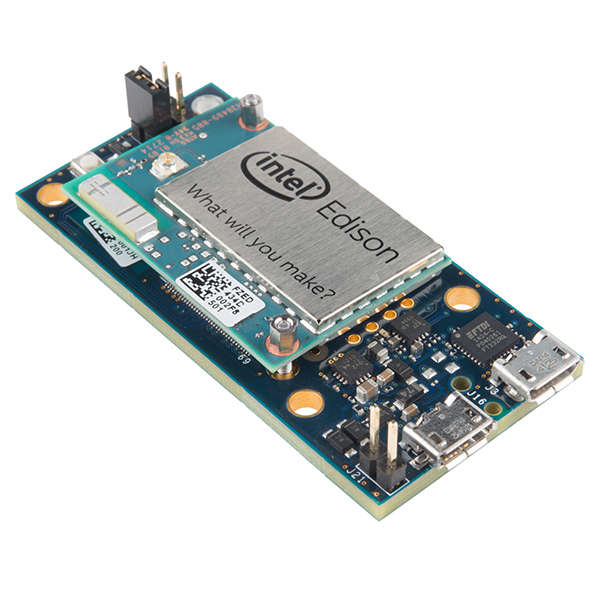
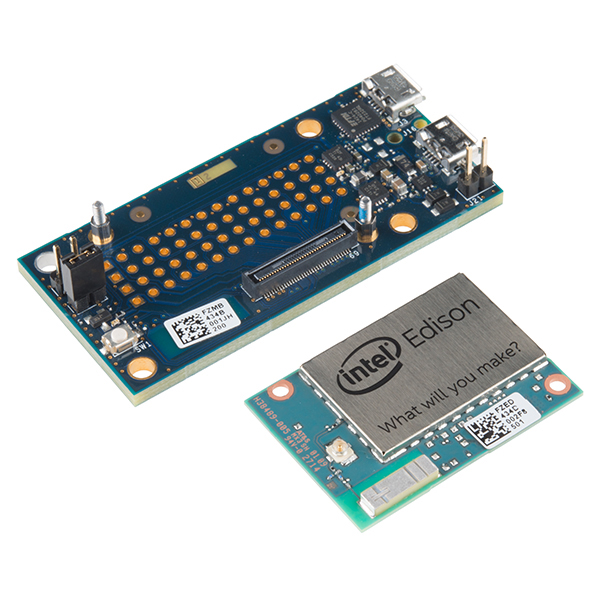
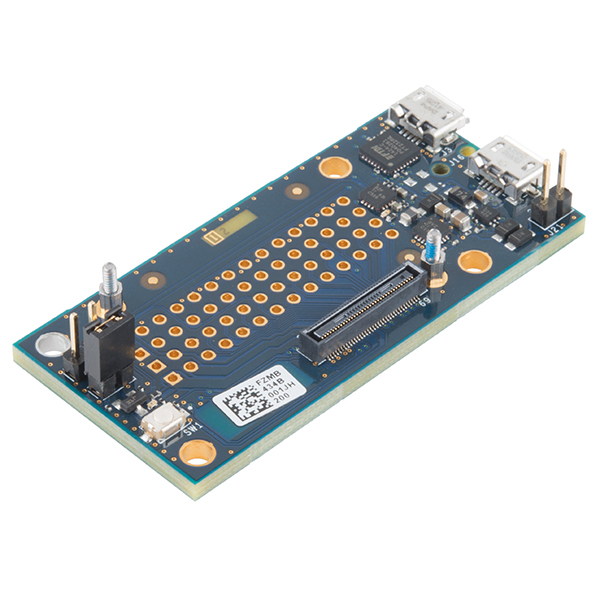
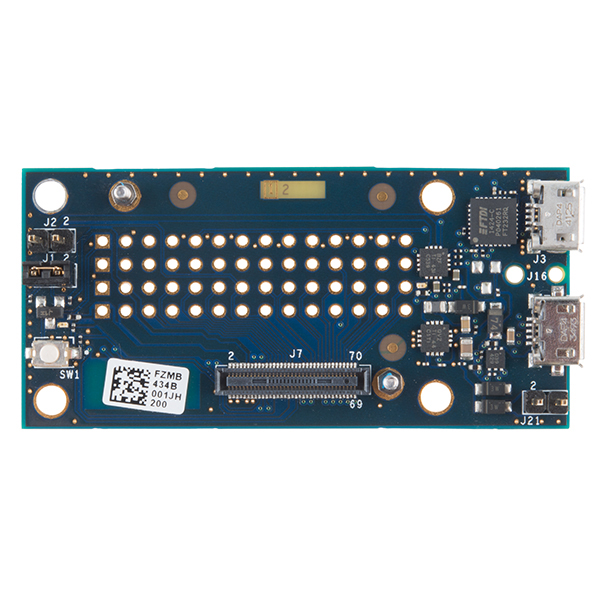
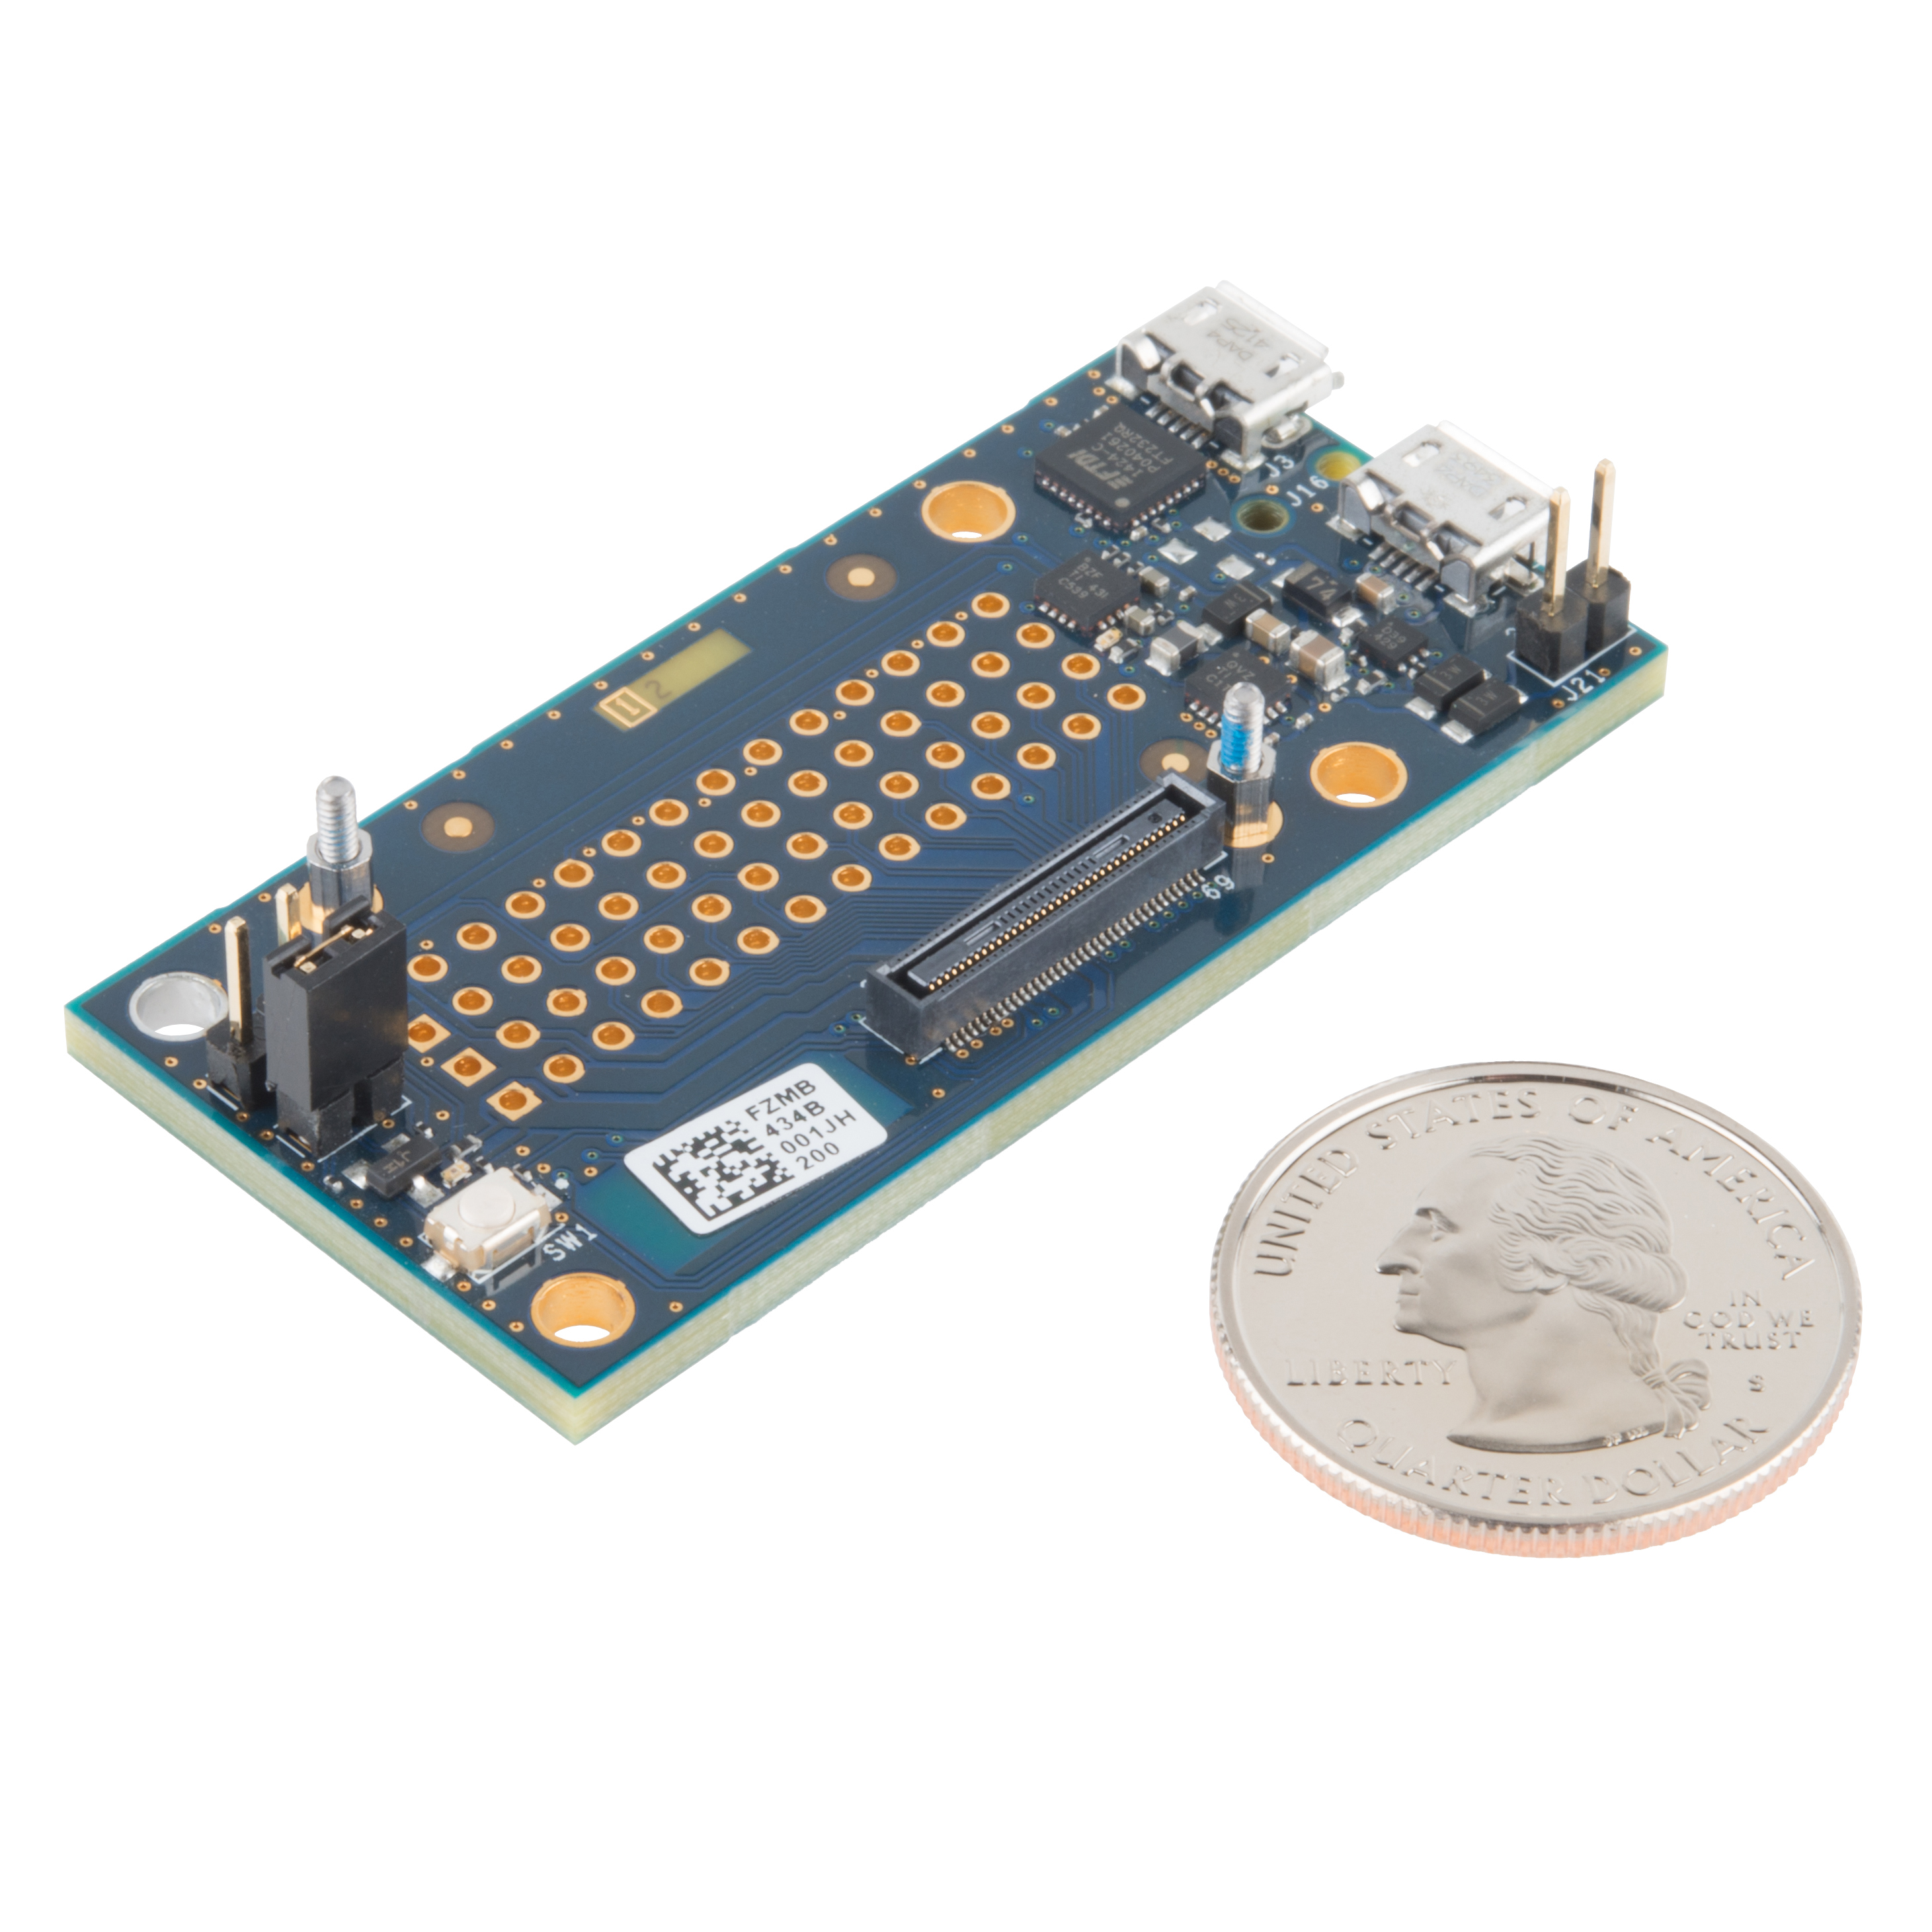
The Intel® Edison Mini Breakout is designed to expose the native 1.8 V I/O of the Intel® Edison module. The board consists of power supply, battery recharger, USB OTG power switch, UART to USB bridge, USB OTG port, and I/O header
- Intel® Edison (EDI1.SPON.AL.S)
- Mini Breakout Board
Intel® Edison and Mini Breakout Kit Product Help and Resources
SparkFun Blocks for Intel® Edison - ADC V20
October 6, 2015
A quick overview of the features of the ADC Block.
SparkFun Blocks for Intel® Edison - 9 Degrees of Freedom Block
August 19, 2015
A quick overview of the features of the 9 Degrees of Freedom Block.
Programming the Intel® Edison: Beyond the Arduino IDE
January 7, 2015
Intel's Edison module goes beyond being just another Arduino clone. Check this tutorial for advice on how to get the most out of your Edison by writing code in C++!
SparkFun Blocks for Intel® Edison - microSD Block
January 15, 2015
A quick overview of the features of the microSD Block.
SparkFun Blocks for Intel® Edison - UART Block
January 15, 2015
A quick overview of the features of the UART Block.
SparkFun Blocks for Intel® Edison - PWM
June 22, 2015
A quick overview of the features of the PWM Block.
SparkFun Blocks for Intel® Edison - OLED Block
February 13, 2015
A quick overview of the features of the OLED Block for the Edison.
SparkFun Blocks for Intel® Edison - Battery Block
December 5, 2014
A quick overview of the features of the Battery Block.
SparkFun Blocks for Intel® Edison - Arduino Block
March 11, 2015
A quick overview of the features of the Arduino Block.
SparkFun Blocks for Intel® Edison - GPIO Block
January 9, 2015
A quick overview of the features of the GPIO Block.
SparkFun Blocks for Intel® Edison - Dual H-Bridge
July 17, 2015
A quick overview of the features of the Dual H-bridge Block.
SparkFun Blocks for Intel® Edison - Base Block
January 15, 2015
A quick overview of the features of the Base Block.
General Guide to SparkFun Blocks for Intel® Edison
January 5, 2015
A general guide for using SparkFun Blocks for Intel® Edison in your next project!
SparkFun Blocks for Intel® Edison - I2C Breakout Block
January 15, 2015
A quick overview of the features of the I2C Breakout Block.
Edison Getting Started Guide
December 5, 2014
An introduction to the Intel® Edison. Then a quick walk through on interacting with the console, connecting to WiFi, and doing...stuff.
Installing libmraa on Ubilinux for Edison
January 5, 2015
libmraa is a tool kit for interacting with various Intel single board computers.
SparkFun Blocks for Intel® Edison - Console Block
December 5, 2014
A quick overview of the features of the Console Block.
Loading Debian (Ubilinux) on the Edison
December 5, 2014
How to load a Debian distribution (specifically Ubilinux) onto the Edison.
SparkFun Inventor's Kit for Edison Experiment Guide
December 17, 2015
Learn how to harness the power of the Intel® Edison using JavaScript to post data to the cloud, control electronics from smartphones, and host web pages that interact with circuits.
Using AP Mode on the Edison
You need the latest firmware version to be able to enable AP mode with the power button. You can get the latest version on the Intel Edison webiste here.
After downloading, follow these directions for updating firmware.
Then follow the directions for enabling AP mode here.
The Intel document mentions a blinking light on the board they are using that shows AP mode is enabled. Our base block does not include the LED that is on the Intel board so you won't see anything, but holding the power button for 4 seconds will enable AP mode. (it takes about 15-30 seconds to turn on) The WiFi password is the same as the login password on the Edison.
Core Skill: Programming
If a board needs code or communicates somehow, you're going to need to know how to program or interface with it. The programming skill is all about communication and code.
Skill Level: Competent - The toolchain for programming is a bit more complex and will examples may not be explicitly provided for you. You will be required to have a fundamental knowledge of programming and be required to provide your own code. You may need to modify existing libraries or code to work with your specific hardware. Sensor and hardware interfaces will be SPI or I2C.
See all skill levels
Core Skill: Electrical Prototyping
If it requires power, you need to know how much, what all the pins do, and how to hook it up. You may need to reference datasheets, schematics, and know the ins and outs of electronics.
Skill Level: Rookie - You may be required to know a bit more about the component, such as orientation, or how to hook it up, in addition to power requirements. You will need to understand polarized components.
See all skill levels
Comments
Looking for answers to technical questions?
We welcome your comments and suggestions below. However, if you are looking for solutions to technical questions please see our Technical Assistance page.
Customer Reviews
4.2 out of 5
Based on 6 ratings:
3 of 3 found this helpful:
Amazing little device
Out of the box and ready to go, quite a statement and it is true. Wasn't too impressed with the Yocto partitioning so I flashed Ubilinux onto the unit and am now very happy. Loaded Apache, Php, MySql, PhpMyAdmin and now have a complete LAMP server that I can carry around in my pocket. Bought the Sparkfun battery block and now the unit is completely unteahered. I'll be building my own expansion board with the sensors and IO I require for a project I'm working on. With this little compute module running everything, the time to finished product should be under 60 days. Bottom line: Great little device with endless possibilities!!
1 of 1 found this helpful:
Awesome embedded system
Embedded wifi, Bluetooth, lots of GPIOs, a responsive community, Arduino compatability, built in lipo charger and regulator (with thermistor support!). Quite an amazing piece of kit!
Setup is straightforward and all the info you need is right at your fingertips. Linux is well supported, though Mac support is a bit half baked when it comes to flashing via dfu-utils, but for those not needing to replace the OS wholesale, an alternative method via USB mass storage is available.
Only thing the standard breakout board needs is an SD card slot, though for most use cases the device has roughly 2 GB available on internal storage for hacking space.
Best part: it's all wrapped around an Intel x86 chip, so no cross compiling is necessary for most software -- just drop a Linux 32-bit binary on the device and it mostly just works.
Only thing Sparkfun could do to improve upon this: sell lipo batteries with thermistors built in to prevent overheat conditions.
4 of 4 found this helpful:
Fantastic Product [If You Have Prior Experience]
Note: The mini-breakout board (m-bb) does not have analog pins like the Arduino Edison board (AEb). If you wish to use analog pins on the m-bb, you'll have to design your own circuit. (The add-on ADC/Arduino Sparkfun boards won't fit with the m-bb). I wish this was specifically noted in the description.
If you're just starting out, consider buying an AEb, or even the Raspberry Pi (RPi). They're way more user-friendly, especially the RPi. The Intel Edison has a slew of amazing features, (insanely low power consumption, good slew of GPIO pins, built-in wifi/bluetooth, m-bb is very tiny and very light, bunch of great tools already installed [Ex. Node.js! Huzzah.]) but requires a lot more out of the user to functionally use, especially the m-bb version.
You will not find a lot of good guides out there, as they're all tailored to the AEb or just don't exist as the community is still new. You will have issues running code, either due it being coded for the AEb (bloody analog pins) or for the Arduino (it has some specific timers and other things related to the atmega328 chip). You'll realize you should have bought some headers, a fine tipped soldering iron, and applied electrical tape to the backside of the Edison shield because otherwise good luck actually using the GPIO pins. You'll find out that although you can hook things up via USB, you'll need a 7-15V power source on the J21 pins to do so. You will find these problems, and many more.
But, it's absolutely amazing and you generally have to deal with those kind of problems at some point anyway once you get to complex projects and inventions. For the person with experience this thing is fantastic! I can't stress this enough. And most importantly, it's a good time to get in and help build that community and write the guides for others to learn and build off of. I'm probably going to be buying several over the next year and incorporating them into all my projects, as they're far superior to any other board out there at this price point.
1 of 1 found this helpful:
No breakout blocks permitted...!!
If you're getting some other Edison blocks, expect to not be able to use them with this base board. The bottom board doesn't offer any room for them, as the space has instead been utilized by ... jumper headers. Additionally, there is no place to mount a stack, even if you are able to de-solder the jumper headers; the mount holes don't line up.
My recommendation is that if you're looking at this, and you plan to use some blocks, instead go for the "SparkFun Block for Intel® Edison - Base" and buy the Edison by itself, since that will allow you to implement your block stack.

Since I cant find the info here or on the Intel site... Does anyone have the board dimensions? preferably with the edison mounted to it.
You can get them from Newegg.com cheaper, and they have them in stock. http://www.newegg.com/Product/Product.aspx?Item=N82E16813121801
It's not stackable, but combines the gpio and console block for the price of one.
Don't bother getting anything from ewegg. Slow service and goods never turned up. Now they have canceled my order without anyone contacting me. Waist of time. Best to wait and stick with sparkfun
Hardly. I ordered it and chose next day, and received it next day. Then a week later i turned around and bought the Edison Arduino kit from them. 3 days later i received that as well. I choose to use my money wisely, if a popular company like them has the kits in stock and at a lower cost that is where I am going.
I support SparkFun, but have been a Newegg customer for years, and have never had a problem or complaint. The one time I did have a problem, it wasn't their problem, but they resolved it.
Quick (possibly stupid) question: how is the mini breakout board powered? Do I simply apply 7-15V on J21 or can I power it via USB? Is there a "Getting Started" for this board (not for the Arduino breakout)?
I followed the getting started guide for the arduino board and it work (skipped the arduino parts). You can power it from USB alone via the otg port, but external power is necessary for running as a USB host. 7-15 Vdc on J21 or a LiPo cell on J2 (iirc - check the schematic).
Any chance of sharing the Eagle files for the Mini Breakout Board?
$74.95 seems a bit expensive. I try to support SparkFun whenever I can, and I usually don't mind spending a small premium on products to support their good work, but Frys has the same product for $59.99 and free, same-day shipping.
Can I stack other Edison Sparkfun blocks onto this?
Can I stack other edison blocks onto this?
Intel Edison board "Powered by the Intel® Atom™ SoC dual-core CPU"? You sure like to jest, don't you? :-)
Wish I could just get the breakout kit without the Edison, I already have and Edison and Arduino kit but want the smaller one.
What I'd like to see is a table (grid?) showing every 'block' / module in a standard orientation (eg. receptacle facing up in the lower, left corner) and listing whether it has a receptacle, a plug, or both.
What is the Difference Between this and the Edison Blocks? (Sorry this may be a dumb question).
It’s not stackable, but combines the gpio and console block for the price of one.
This is a quick start breakout kit (ie. similar to an arduino but not an arduino, also this breakout kit doesn't have it's own microcontroller (that's what the edison is for!)).
The blocks work without a breakout kit. To power the edison, you will need a block which will supply power to the edison. If you want to use pins on the edison, you will need another bock which will break the pins out for you to use. So, to do anything special you will need another block.
With the breakout kit, all you need is the breakout kit and it has a USB port on it for power as well as locations to solder on pins or a socket of your choice.
If I've got my Edison connected to this, will I be able to fit the Sparkfun Battery Block on there too?
Does anyone know the range of the wifi on these?
More helpful details: https://communities.intel.com/mobile/mobile-access.jspa#jive-content?inbox=false&content=%2Fapi%2Fcore%2Fv3%2Fcontents%2F275807&anchor=%2Fapi%2Fcore%2Fv3%2Fmessages%2F253180&mentionType=none&inboxId=2-252414&fromStream=true
Here are the schematics for this board: https://communities.intel.com/docs/DOC-23323 -- Intel's hardware guide doesn't tell you enough
I understand that unless you want to solder wires directly to the prototyping area, what type of connector would the most appropriate to get access to the full array of connections (4 x 17) from under the breakout?
How about 2 ribbon cables, one going left, one going right, to 2 breadboards...
I don't think there's any connector, but you could solder wires to another connector or larger breadboard. They're a standard 0.1" grid
A quick question, since you will soon have the modules in stock, i would like to buy one, however what i really need is the entire kit (mini). Can i buy the module now and the mini breakout later, or do i have to buy the breakout as a kit?
Both breakout boards can be purchased from Mouser. Maybe Sparkfun will carry them eventually.
I see nothing on Mouser except "on order".
The kits come with the Edison and are prepackaged from Intel. I don't know if they are selling the mini separately, but we don't carry them without the Edison. But at this point you will need the mini or the Arduino board to be able to do anything with the Edison since we don't have any of our boards ready yet.
Can the breakout USB be used for the console, replacing the need to get the Console Block?
I am unclear about what you mean by the "breakout USB". If it is the breakout on this page, then out of box one usb can be used for uart/usb kernel debugging and the other as an rndis gadget device (usb, storage, etc).
In case anyone's curious about the power supply on this thing, it looks like the Edison alone uses about 1W (3W when actively transmitting on wifi). This board takes 7-15V in, 5V from USB, or 3.15-4.5V from a Li-ion battery (which it can charge at 190mA). It has a 5V 1A regulator on board that supplies the Edison (and peripherals?).
I know it's a bit early to ask for things, but can we please get a better view of the GPIO headers on this breakout? It looks like 4 of the 20 are showing near the top USB port. The "Product Brief" doc has a good shot of them, but it's a bit small and doesn't have the Official Sparkfun Size Reference Quarter next to it.
Perhaps the Spark Fun team would measure (and post) the width of Shawn's distal phalange (index), we could then infer the scale from the video.
Better pictures will arrive, in time. All the examples, and the prime photographer, are in San Francisco at IDF ATM.
The GPIO is in 4 rows of pins which are completely obscured by the Edison in this picture. The board is super thick, so the bottom of the pins don't protrude through the top and poke the Edison.
Also, and this is important, this can't be in a stack with Blocks unless you remove the two headers on the end opposite the USB. It's not a big deal, really; you can short one and leave the other open.
Since this comment was prior to the final release 5 months ago, I'd like to confirm whether the Mini Breakout Kit can be used with Sparkfun Blocks once the 0.1 mm header on the left side of the board has been removed?
I.e. can I insert this IMU block between the Edison and the Mini Breakout Kit? https://www.sparkfun.com/products/13033
I'm not sure we actually have these in the building at the moment. I think we got a few quick pictures and now everything is at IDF. We will get more pictures and information up soon though.