SparkFun Photon Weather Shield
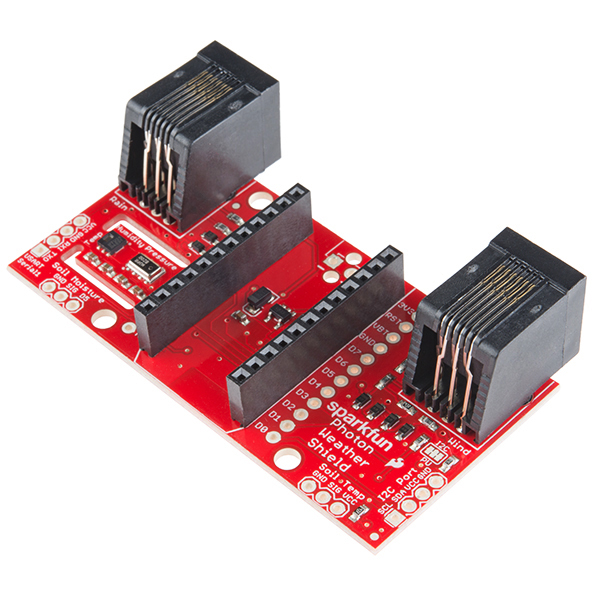
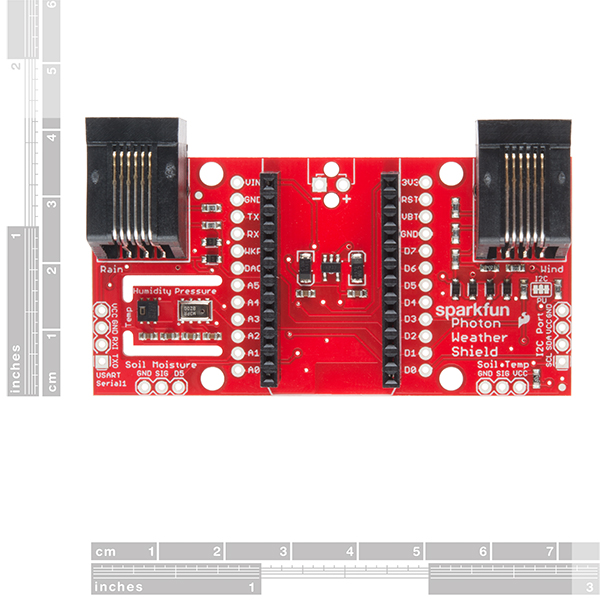
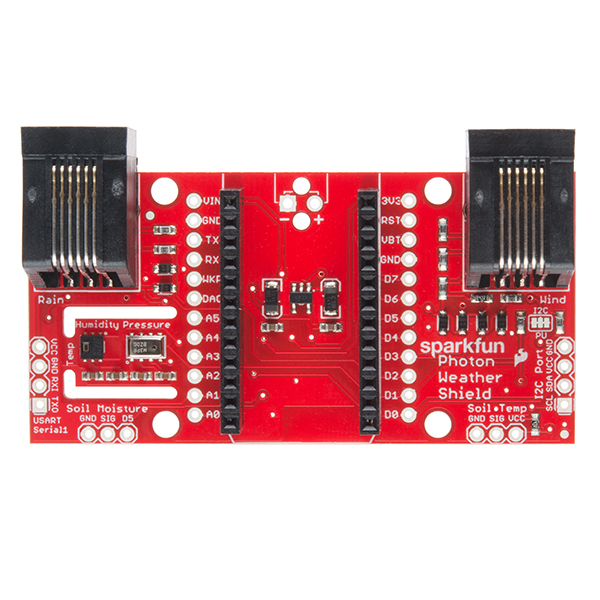
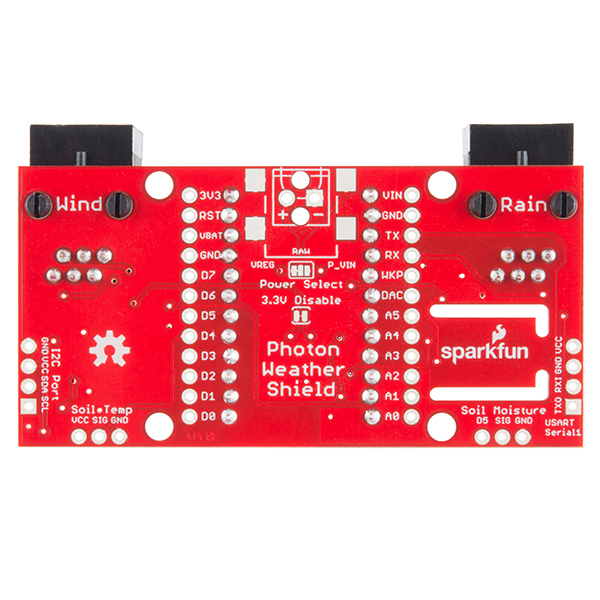
The SparkFun Photon Weather Shield is an easy to use add-on board that grants you access to barometric pressure, relative humidity, and temperature. There are also connections on this shield to optional sensors such as wind speed, direction, rain gauge and soil readings!
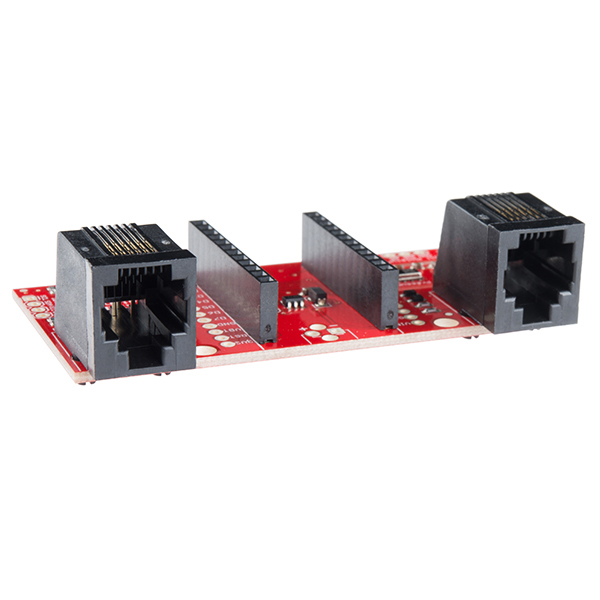
These Weather Shields utilize the HTU21D humidity and MPL3115A2 barometric pressure sensors. Each shield comes with two RJ11 connectors (for optional hook up of rain and wind sensors) and a 3-pin soil temperature and moisture hookups. Finally, each Weather Shield can attach effectively and easily to your Photon in no time at all!
The Particle Photon is a tiny WiFi development kit for creating connected projects and products. Sporting a 120Mhz ARM Cortex M3 and built-in WiFi, the Photon is not only powerful, but easy to use. The small form factor is ideal for IoT projects with cloud-connectivity.
Note: Not only can this shield operate with the Photon, it can also be used with the Particle Core! We understand that there are a ton of you out there who still haven't been able to get your hands on a Photon yet and would like to start playing with this shield now. If that person is you we hope we have obliged!
- Humidity/Temperature Sensor - HTU21D
- Barometric Pressure - MPL3115A2
- Headers and Connectors Pre-Soldered
- Compatible with the Photon and the Core
- Schematic
- Eagle Files
- Hookup Guide
- Photon Development Guide
- Datasheets
- GitHub (Design Files)
- GitHub (Library)
SparkFun Photon Weather Shield Product Help and Resources
Photon Development Guide
August 20, 2015
A guide to the online and offline Particle IDE's to help aid you in your Photon development.
Adjusting for Altitude
If you are finding that the barometric pressure readings you are getting are off, you may need to correct pressure for altitude. For instance, In Denver, if the pressure is measured by NOAA 29.92"Hg it's already been corrected for altitude. The weather shield is going to read actual pressure, not pressure that has been corrected for altitude and you should expect to see a reading of about 24.73"Hg. Below is a link to a calculator that will give you a correction factor for whatever altitude your station is at. Link to calculator
Core Skill: Programming
If a board needs code or communicates somehow, you're going to need to know how to program or interface with it. The programming skill is all about communication and code.
Skill Level: Competent - The toolchain for programming is a bit more complex and will examples may not be explicitly provided for you. You will be required to have a fundamental knowledge of programming and be required to provide your own code. You may need to modify existing libraries or code to work with your specific hardware. Sensor and hardware interfaces will be SPI or I2C.
See all skill levels
Core Skill: Electrical Prototyping
If it requires power, you need to know how much, what all the pins do, and how to hook it up. You may need to reference datasheets, schematics, and know the ins and outs of electronics.
Skill Level: Rookie - You may be required to know a bit more about the component, such as orientation, or how to hook it up, in addition to power requirements. You will need to understand polarized components.
See all skill levels
Comments
Looking for answers to technical questions?
We welcome your comments and suggestions below. However, if you are looking for solutions to technical questions please see our Technical Assistance page.
Customer Reviews
4.5 out of 5
Based on 6 ratings:
1 of 1 found this helpful:
Up and running fast for my Stream Gage / Flood Monitor project
I received my weather shield last night, was able to solder on headers for the i2c bus, integrate my ultrasonic sensor code into the Sparkfun example and have it collecting data in just a couple hours.
I posted a bit of a write-up at in the Particle.io community forums. https://community.particle.io/t/i2cxl-maxsonar-mb7040-examples/17971/7?u=tsayles
1 of 1 found this helpful:
Works perfect. Couldn't be happier
I am using this shield with the battery shield and everything works as described. I have both the soil moisture and soil temperature sensors connected as well and a photocell for reading outdoor light levels. With the weather station for wind and rain, my Monitoring Apparatus Networked For Reading Environmental Data, MANFRED for short, is working perfectly. I highly recommend this shield. I had a blast building this project. Thanks SparkFun. You guy's are the best. Also, your software libraries were extremely helpful.
Thoughtful and expandable
An i2c wonderland, with uart for you wierdos who are into that (or have sensors that are). One of the rj11's was on at a bit of a jaunty angle, but a tap of the iron set it straight. Really pleased with this thoughtful little gem on the Core. The i2c is a bit of a trouble spot on the Photon though, through no fault of the shield some photons, with some firmware versions may have some trouble getting good readings.
Thanks for the review. And I wanted to mention that Particle pushed a fix for the I2C issues. It should auto update with the V0.4.4 release for Photon and P1
A good device to test out the Photon
I bought this board in order to have another board to talk to for a device I am building. Using the Particle web IDE it is extremely easy to get code working and this thing running. Finally I have two Photons communicating over Wifi, and that is really cool!
iOS 10 not compatible with Photon
My Spark Fun Photon kit worked with iPad iOS 9.x, but stopped with upgrade to 10.1.1. And my new Photon with riser pins also incompatible. So haven't setup weather shield. Had chat with Apple support. No explication. Photon community reviews silent on this. Waiting on my new MacBook Pro to try again.
Works great with a Photon
Even though this is now the "old" version, it works fine for me. My main complaint is the temp readings for the humidity sensor and baro sensor seem to be either self-heating or are heated by the Photon. My guess is the latter. If you sleep the Photon mostly and just wake up to take readings it improves this issue. A remote temp sensor is probably the best bet. However, the humidity is calculated based on the sensor's internal temp measurement, so it can mess with that. I have mine hooked to the SparkFun weather station and it is great.

Got my shield up, running, and configured in no time; temp (~+3F), humidity, and pressure were all working up-until yesterday when humidity starting reading negative numbers. What is the possability of a sensor going bad in matter of a week? Any suggestions on troubleshooting?
RE: Member #841366
Same. I have had a weather shield reporting temp, humidity, pressure, etc. on and off for about a month. The humidity numbers starting dropping and now its just reading 0. Had a second weather shield on hand so I swapped the photon over to it and the humidity numbers starting reading correctly again. Defective HTU21D?
What type of environment was your Weather Shield exposed to? Very humid environments can have adverse effects on humidity sensors. One possible solution is to place a PTFE Filter over the humidity sensor to prevent water particles from entering the sensor and potentially shorting out the internal circuitry.
is there any example mqtt code please ? i really need some sample code to get me going.
Thanks.
Do the Photon shields come with stack-able headers or do these need to be brought. I am presuming that the Photon Pin Breakouts used to allow stacking or am I missing something
All of the Photon Shields come with stackable headers soldered on, EXCEPT the weather shield, which has regular, non-stacking female headers, as it's meant to be on the bottom of a given stack.
Awesome thank you weather shield just arrived
Do I have to solder a pullup resistor to the I2C PU to make the temp/humidity sensor work? I am testing the example ino within the Photon HTU21D library and I just got "HTU21D not found". Using the weather shield library's example, I get 998 for both temp and humidity readings.
I tried using the I2C port on the board to connect it to an Arduino, but it made the board hang by trying to communicate via I2C.
Ignore my first silly question, apparently, there are two 10k resistor on the shield and the pads are to disable them if needed.
I am getting consistent off values. I get about 2 deg C on the cold side, and the pressure readings are off, even when using calibration formulas.
I am unable to get accurate readings no matter how I calibrate it.
Is this a design issue or an issue directly related to my Shield? If so.. How can I get it checked and exchanged for a good one?
I've tried support contact, they where going to get back to me but never did...
Thanks
Hi, Sorry to hear you're having trouble. If anything, it should be reading a little on the warm side since the Photon puts off a decent amount of parasitic heat. Sounds like you may have a bad shield. Please try contacting our technical support team. They can help you troubleshoot further to see if it's bad and help get you a replacement.
hi, i just got my photons and weather meters, but i couldn't find the code any help please ?
The Hookup Guide, linked to above, should have what you're looking for.
This is a great board, and I have it up and running.. But..... I'm seeing spurious rain drops... And not real ones... Has anyone else seen this? I have double checked the connections and securely mounted the gauge. Any suggestions would be appreciated.
Just got this Photon Weather Shield and connected it to my Core. It seems to operate correctly, using the basic sketch in the hookup guide, into the serial output. But the values its measuring seem way off: Temps reading about 79 instead of 67 deg F actual, Humidity reading about 60% instead of 85+% actual. And the pressure, while it states "pascals" I think should be 100 Pa or "millibars", is reading about 1165 mbars or 34.5 inHg instead of 1016 mbars or 30 inHg actual. These are based on the local conditions at the time, and while not precise, are reasonably close to actuals. I didn't expect high precision at this price, but did expect something useful. Is there a calibration step that needs to be done for these sensors?
Just for comparison, I connected up my old weatherboard SEN-10586 to compare readings. The temps on the SEN-10586 are about 4 deg F lower (better) and may be close to actual. The interesting thing is both sensors (humidity & pressure) on each board agree within 1 deg F of each other on the same board. So it may have to do with how these boards were calibrated. The pressure reading is 29.96 inHg, which is about spot on for current actuals. The humidity reading is ~71% which is closer, but I think still reading low. So, if anyone has some good experience using these to measure real weather, I'd like to hear how you did it.
Ive found with the other weather shield that my network shield was generating heat and affecting the readings. I wonder if the heat given off by the wifi chip on the photon is doing the same thing
The Photon definitely runs on the warm side and causes parasitic heat throughout the PCB. We tried to eliminate as much of this as possible by routing out around the sensors. However, the readings still tend to be higher than actual, especially in an enclosure. You can compensate for the extra heat in the code.
Hi, am planing to buy this product but I was wondering if it's possible to attach the Bob-8688 Or SEN-12055 light sensor please? https://www.sparkfun.com/products/8688
Thanks
Hi, yes both of those light sensors will work with this shield, though one is an analog sensor and the other communicates over I2C. Both are broken out into through holes so you can attach any extra sensors you desire.
The basic example code compiles and works fine, but when I try the "Phant" code, to send weather data up to the cloud, there are multiple library compile-time errors and warnings. I've tried with both the "Build" and "Dev" IDE's, and the same errors reoccur. Am I doing something wrong? Either I've missed something, or perhaps the libraries may have changed since the time the tutorial was written? I grabbed them all from the Github repository.
For the record, I'm using a Core with both the deep_update and cc3000 firmware upgrades installed.
Hi there. I just tried compiling that code for my Core, and it compiled just fine. Can you relay what errors you are receiving?
Because I'm still waiting for my Photon, is it possible to use a Core in the shield? The pin layout is nearly identical.
Stupid me can not read -> "Compatible with the Photon and the Core"
No worries. It's a question worth knowing the answer to. We designed all of our Shields for the Photon to be compatible with the Core as well.
What about the software needed to remotely query the results? The Github code lists the chip firmware, but that's not going to work very well on my iPhone ;)
We've left that part up to you ;) If you would like a starting point, we show how to query data.sparkfun.com and input that data into Google charts in this tutorial. You can see an example of a working page here.
Neat! The picture shows it as having a hookup for soil moisture/temp sensors. Are there any recommended ones to use?
Information about all the external sensors can be found in the hookup guide. We recommend the waterproof DS18B20 temp sensor. And, we will be releasing a soil moisture sensor very soon!
Got to see these in person at the Makers Faire, I will be exited to pair my photon up with one of these when available. I have a spark core weather station sending data to Weather Underground, but this would be way cleaner than the thing I cobbled together.
Is there a schematic for the board ( or any of the Photons ) ? I'm looking for full-duplex RS485 in a shield and wondering what is on the two RJ11 connectors (RS232 ?). I tried the Spark IO web site but it seems outdated or "coming soon" pictures.
The Photon Shields are still in the prototyping phase. Once the designs have been finalized and ordered, we'll be happy to share the schematics. The two RJ-11 connectors on this shield are for connecting to our Weather Meters. No communication protocol, just connections to the magnetic switches embedded within each sensor on the weather meter. They connect to three of the interrupt pins on the Photon.
Yes, Photos are definitely powerful and easy to use. I'm sure Photons are the same as well! Just a little typo it looks like! Looks like a shield I may have to pick up. Of course, I should also finish all my other projects in the queue first!
This is why we aren't releasing them until June. This way you have time to finish all your other projects!
Good catch!