SparkFun Soil Moisture Sensor (with Screw Terminals)
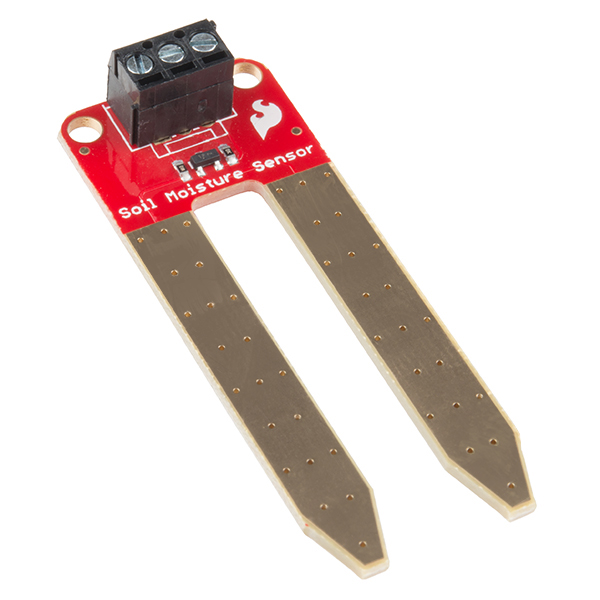
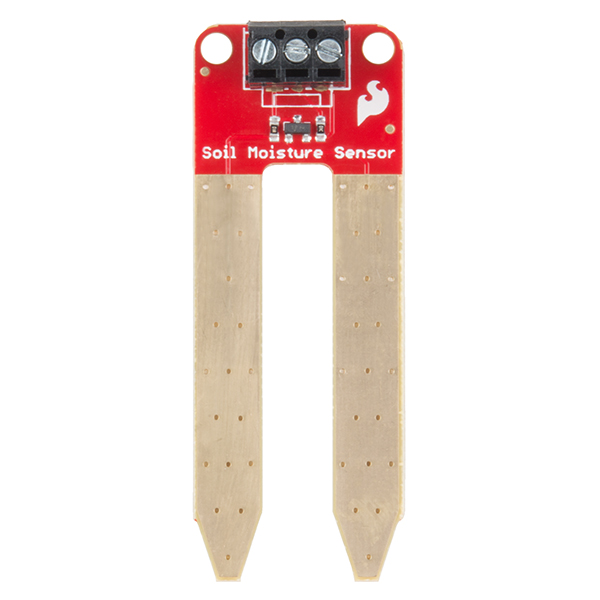
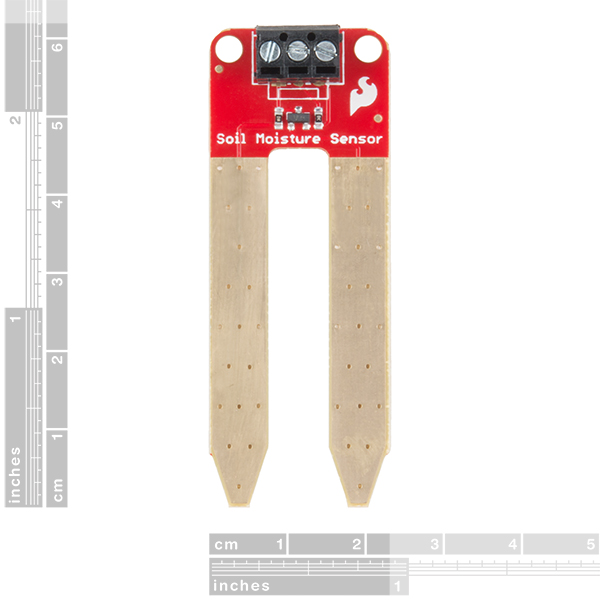
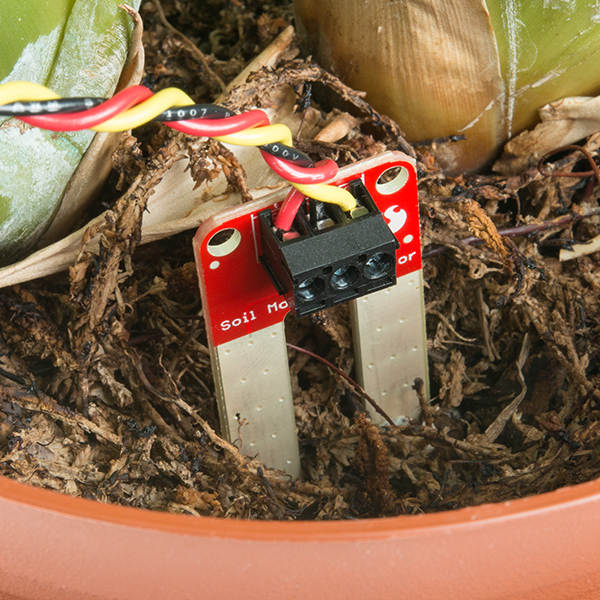
The SparkFun Soil Moisture Sensor is a simple breakout for measuring the moisture in soil and similar materials. The soil moisture sensor is pretty straightforward to use. The two large, exposed pads function as probes for the sensor, together acting as a variable resistor. The more water that is in the soil means the better the conductivity between the pads will be, resulting in a lower resistance and a higher SIG out. This version of the Soil Moisture Sensor includes a 3-pin screw pin terminal pre-soldered to the board for easy wiring and setup.
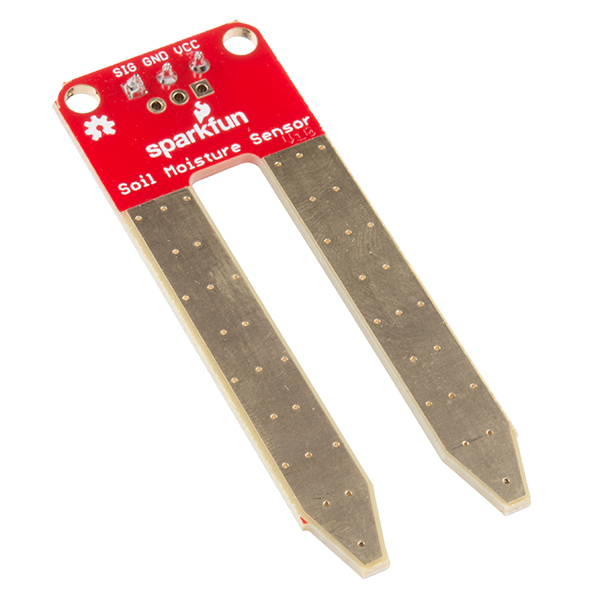
To get the SparkFun Soil Moisture Sensor functioning, all you will need is to connect the VCC and GND pins to your Arduino-based device (or compatible development board). You will receive a SIG out, which will depend on the amount of water in the soil. One commonly known issue with soil moisture senors is their short lifespan when exposed to a moist environment. To combat this, we’ve had the PCB coated in gold finishing (ENIG, or Electroless Nickel Immersion Gold).
Note: Check the Hookup Guide below for assembly and weatherproofing instructions, as well as a simple example project that you can put together yourself!
- Schematic
- Eagle Files
- Fritzing Part (without Screw Terminals)
- Hookup Guide
- GitHub
SparkFun Soil Moisture Sensor (with Screw Terminals) Product Help and Resources
SparkFun Inventor's Kit for Photon Experiment Guide
September 3, 2015
Dive into the world of the Internet of Things with the SparkFun Inventor's Kit for Photon.
Soil Moisture Sensor Hookup Guide
January 29, 2021
A quick hookup guide and project to get you started with the Soil Moisture Sensor from SparkFun.
BadgerHack: Sensor Add-On Kit
February 16, 2016
Turn your Badger or Redstick into a temperature and soil moisture sensing display with the BadgerHack Sensor Add-On Kit
Logging Data to Google Sheets with the Tessel 2
December 12, 2016
This project covers how to log data to Google Sheets two ways: using IFTTT with a web connection or a USB pen drive and "sneakernet" without.
micro:climate Kit Experiment Guide
July 21, 2017
A weather station kit that is built on top of the inexpensive, easy-to-use micro:bit and Microsoft MakeCode.
Wireless Remote Weather Station with micro:bit
May 11, 2020
Monitor the weather without being exposed to it through wireless communication between two micro:bits using the radio blocks! This is useful if your weather station is installed in a location that is difficult to retrieve data from the OpenLog. We will also explore a few different ways to send and receive data.
Core Skill: Programming
If a board needs code or communicates somehow, you're going to need to know how to program or interface with it. The programming skill is all about communication and code.
Skill Level: Rookie - You will need a better fundamental understand of what code is, and how it works. You will be using beginner-level software and development tools like Arduino. You will be dealing directly with code, but numerous examples and libraries are available. Sensors or shields will communicate with serial or TTL.
See all skill levels
Core Skill: Electrical Prototyping
If it requires power, you need to know how much, what all the pins do, and how to hook it up. You may need to reference datasheets, schematics, and know the ins and outs of electronics.
Skill Level: Rookie - You may be required to know a bit more about the component, such as orientation, or how to hook it up, in addition to power requirements. You will need to understand polarized components.
See all skill levels
Comments
Looking for answers to technical questions?
We welcome your comments and suggestions below. However, if you are looking for solutions to technical questions please see our Technical Assistance page.
Customer Reviews
4.3 out of 5
Based on 4 ratings:
I got some stange value
Hello, I am using this part since a couple of weeks. I am tetsing it with my plant and I am suprised to see some stange value (if it is). First I mesure the value with the sensor outside of the soil. It return me something like 12. The I insert in glass of fully dreid soil. It return me a value of 860. Then into a soil humid. It return me something like 700, and a soil dry. Instead of a value close to 100 or below 300, it return a value of 700.
Then I tried with my plant. I gave to my plant a lot of water and then inserted the sensor into soil for one week. At the begining, the sensor return me a value of 779. During the week, I expected to see the value going down, but not. Now the soil is fully dried and the sensor return me a value of 650. It's strange because it should print a value below 300. If I remove the sensor from the soil, it print me a value of 12.
I do not understand when the soil is fully dried, I do not have a value below 300 or around 100.
FYI: I inserted the 3/4 of the "legs" into the soil. If I insert only 50% of the legs, the values seam to be better...
Cheers
Sorry to hear about the trouble with the moisture sensor. Have you reached out to our technical support department? They can be reached at techsupport@sparkfun.com - they're usually very good at helping make sense out of abnormal readings.
Does what is says on the box
Easy to use and gives better readings than similar-looking sensors from other suppliers. The documentation is excellent and easy to follow.
So easy to wire up and use
The addition of the screw terminals made the physical installation easy (and easy to rewire w/ longer cables) in flower pots. Once it was wired, I used a RPi to get the various readings I needed to control water pumps.
Good sensor, easy to set up
Used this little guy for my first year engineering final project, and had no issues. Pretty easy to setup, just three pins, and a useful little gadget to play around with.

I came across a video talking about different moisture sensors and the difference between them. He provided tests that showed some exposed copper plating sensors and fall off and taint the soil. Link Here: https://www.youtube.com/watch?v=udmJyncDvw0&t=214s
Can you provide and detail or reassure why this won't happen to my sensor? I will make sure its out of the water, but I don't want to go eat my food and its toxic for my family.
I'm looking in the near future to purchase one and wanted a heads up.
Thanks, Caleb
Wouldnt this device with its current over the terminals make the water sour?
By sour do you mean does the electricity alter the pH of the water? This probe acts as a voltage divider, so there is no current flowing across the probes, only through them. The probe itself should not be a problem. The gold and copper are fine for the plant, and the fiberglass is inert. Leaving the device on all the time can corrode the exposed PCB probes. However, it is suggested in the Hookup Guide that you not leave the probe on all the time and only power it when you want to take a measurement. This same method should result in the current flow not having any affect on the water composition. And even if it did, it shouldn't be enough to affect the plant's health as water would be replenished frequently enough to negate any side effects.