Teensy 3.6
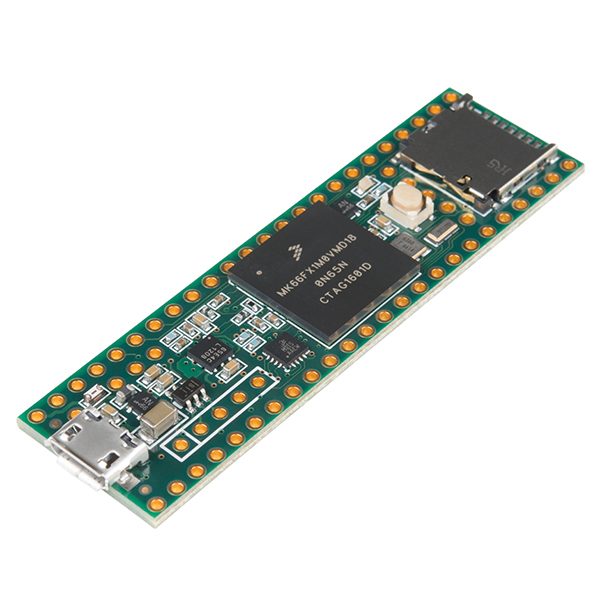
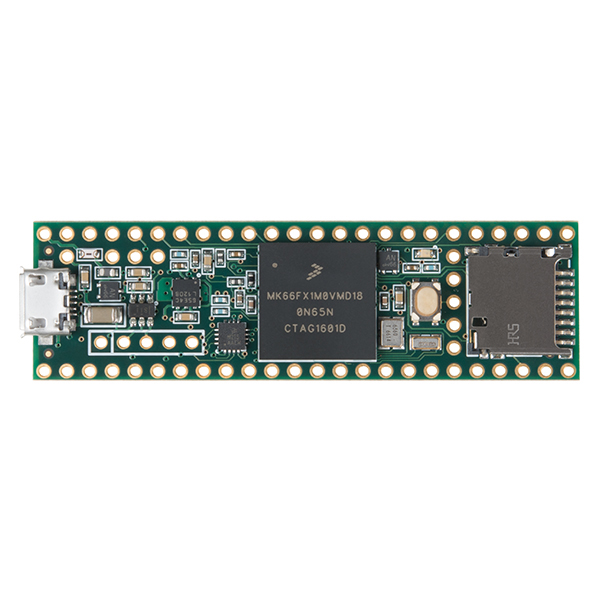
The Teensy is a breadboard-friendly development board with loads of features in a, well, teensy package. Each Teensy 3.6 comes pre-flashed with a bootloader so you can program it using the onboard USB connection; no external programmer needed! You can program for the Teensy in your favorite program editor using C or you can install the Teensyduino add-on for the Arduino IDE and write Arduino sketches for it!
The processor on the Teensy also has access to the USB and can emulate any kind of USB device you need it to be, making it great for USB-MIDI and other HID projects. The 32-bit, 180MHz processor brings a few other features to the table as well, such as multiple channels of Direct Memory Access, several high-resolution ADCs and even an I2S digital audio interface! There are also four separate interval timers plus a delay timer! Oh yeah, and all digital pins have interrupt capability and are 3.3V tolerant.
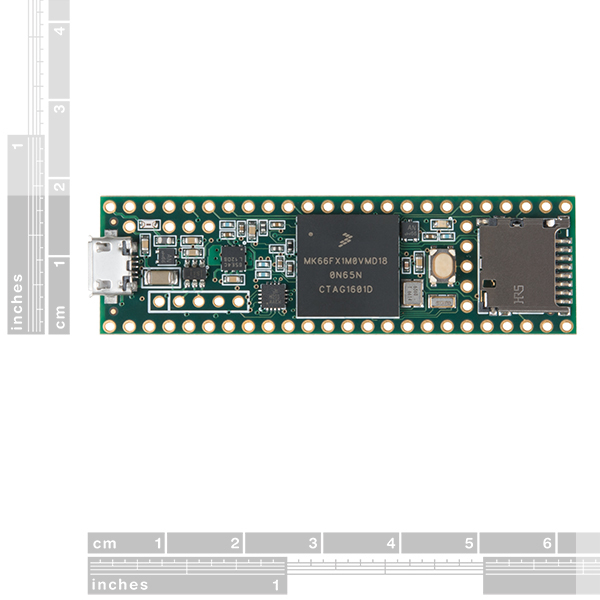
All of this functionality is jammed into a 62.3mm x 18.0mm board with all solder points on a 0.1" grid so you can slap it on a breadboard and get to work! The Teensy 3.6 (as well as its sibling, the Teensy 3.5) is larger, faster and capable of more complex projects, especially with its onboard micro SD card port. An upgraded ARM Cortex MCU (180MHz from 72MHz), more memory (1M from 256K), as well as more RAM, EEPROM and accessible pins make up the key new features of this "teensy" board. The Teensy 3.6 is slightly scaled up from the Teensy 3.5 but is offered at a higher price point, comparatively.
Note: This does not come with a USB cable; please check below for an appropriate one.
Attention: Due to supply constraints, orders may not be filled immediately; orders not allocated to immediately, will be placed on backorder and filled as inventory allows. If you are a business, distributor, or reseller, please contact sales to place your order: sales@sparkfun.com.
- 180 MHz ARM Cortex-M4 with Floating Point Unit
- 1M Flash, 256K RAM, 4K EEPROM
- Microcontroller Chip MK66FX1M0VMD18
- USB High Speed (480Mbit/sec) Port
- 2 CAN Bus Ports
- 32 General Purpose DMA Channels
- 22 PWM Outputs
- 4 I2C Ports
- 11 Touch-Sensing Inputs
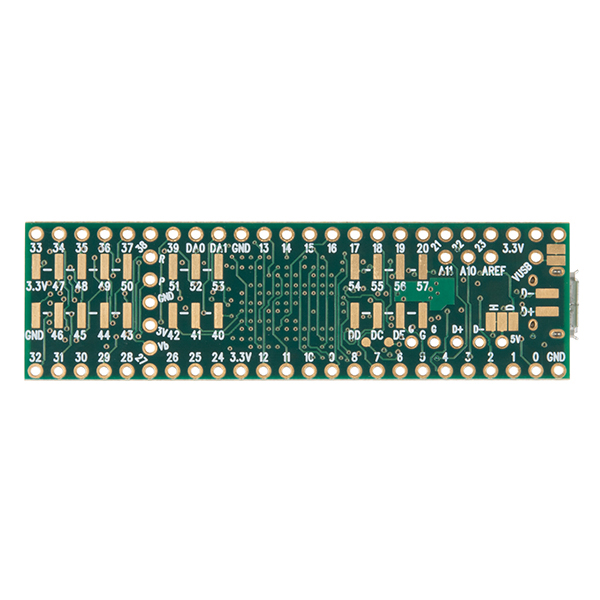
- 62 I/O Pins (42 breadboard friendly)
- 25 Analog Inputs to 2 ADCs with 13-bit resolution
- 2 Analog Outputs (DACs) with 12-bit resolution
- USB Full Speed (12Mbit/sec) Port
- Ethernet mac, capable of full 100Mbit/sec speed
- Native (4-bit SDIO) micro SD card port
- I2S Audio Port, 4-Channel Digital Audio Input & Output
- 14 Hardware Timers
- Cryptographic Acceleration Unit
- Random Number Generator
- CRC Computation Unit
- 6 Serial Ports (2 with FIFO and Fast Baud Rates)
- 3 SPI Ports (1 with FIFO)
- Real-Time Clock
- 62.3mm x 18.0mm x 4.2mm (2.5in x 0.7in x 0.2in)
- Datasheet (MK66FX1M0VMD18)
- Manual (MK66FX1M0VMD18)
- Teensy Quick Start
- Teensyduino Software
- Pin Assignment Charts
- Using the RTC
- Teensy Help Page and FAQ
Teensy 3.6 Product Help and Resources
Getting Started with the Teensy
June 18, 2015
Basic intro to the Teensy line of products, with soldering and programming suggestions.
Vox Imperium: Stormtrooper Voice Changer
October 25, 2016
Add some flair to your Imperial uniform by changing your voice using a Teensy 3.2 and Prop Shield.
How to Load MicroPython on a Microcontroller Board
September 4, 2018
This tutorial will show you how to load the MicroPython interpreter onto a variety of development boards.
Getting Started with the SmartLED Shield for Teensy
November 9, 2018
In this tutorial, we will connect different RGB LED matrix panels to PixelMatix's SmartLED shield and Teensy.
LuMini 8x8 Matrix Hookup Guide
January 24, 2019
The LuMini 8x8 Matrix (APA102-2020) are the highest resolution LED matrix available.
Core Skill: Soldering
This skill defines how difficult the soldering is on a particular product. It might be a couple simple solder joints, or require special reflow tools.
Skill Level: Rookie - The number of pins increases, and you will have to determine polarity of components and some of the components might be a bit trickier or close together. You might need solder wick or flux.
See all skill levels
Core Skill: Programming
If a board needs code or communicates somehow, you're going to need to know how to program or interface with it. The programming skill is all about communication and code.
Skill Level: Rookie - You will need a better fundamental understand of what code is, and how it works. You will be using beginner-level software and development tools like Arduino. You will be dealing directly with code, but numerous examples and libraries are available. Sensors or shields will communicate with serial or TTL.
See all skill levels
Core Skill: Electrical Prototyping
If it requires power, you need to know how much, what all the pins do, and how to hook it up. You may need to reference datasheets, schematics, and know the ins and outs of electronics.
Skill Level: Rookie - You may be required to know a bit more about the component, such as orientation, or how to hook it up, in addition to power requirements. You will need to understand polarized components.
See all skill levels
Comments
Looking for answers to technical questions?
We welcome your comments and suggestions below. However, if you are looking for solutions to technical questions please see our Technical Assistance page.
Customer Reviews
4.8 out of 5
Based on 15 ratings:
2 of 2 found this helpful:
Teensy 3.6
I have been using the Teensy 3.1 for quite some time and really like it. I saw the Teensy 3.6 specs and wanted to get one to play around with. I only just received the Teensy 3.6 so I haven't pushed it very hard yet but the board works as advertised and is awesome! These boards are developed by Paul Stoffregen at PJRC; https://www.pjrc.com/ is his web site where you can find all kinds of information about the Teensy line of products. Thanks Paul! And thanks SparkFun, as always ordering and delivery were outstanding! You guys help keep my spark interests alive!
1 of 1 found this helpful:
Best thing i ever owned!
wonderfull speed, easy to programming and really small!!
Teensy it's a excellent platform
I use teensy with frequency and in my opinion is the more power embedded microcontroller system in the market, additionally is very stable and very well assembled
awesome board
There's a lot in this small package and the teensyduino environment makes it so easy to use! I use these boards for projects again and again. Also love how there are different price levels/sizes (Teensy 3.6, 3.5, 2, LC etc) most code being completely compatible.
My favorite microcontroller in the world!
PJRC has done an AMAZING job with the 3.6 and 3.5. I am going to talk to Sparkfun today about adding a few more stars in order to rate the Teensy appropriately. The hardware specs are just the tip of the iceberg. The forum is my favorite place to lurk and learn things, and whenever I have a question the incredible Teensy community has been beyond helpful. I totally recommend this for anyone who has gotten their feet wet with an Arduino.
Someone made an expansion board for this that makes the surface mount GPIO on the bottom easily accessible that I really appreciate, so I want to point it out to other T35 and T36 users:
https://www.tindie.com/products/loglow/teensy-3536-breakout-revision-a-standard/
https://www.tindie.com/products/loglow/teensy-3536-breakout-revision-a-dip-64/
I use visual micro for visual studios to program this, and it has seriously been the best microcontroller programming experience I've ever had. Works flawlessly with the Arduino IDE. I honestly can't say enough about the T36. Get one, hit the forums, and make your project come to life!
Essential part of a research project
This was used in a device for neurophysiological experiments and has been published in a high-profile journal:
Desai, N. S., Gray, R. & Johnston, D. A Dynamic Clamp on Every Rig. eNeuro ENEURO.0250–17.2017 (2017). doi:10.1523/ENEURO.0250-17.2017
A web page describing it in detail is at: http://dynamicclamp.com
Teensies are my goto board for Arduino programming
http://www.plantation-productions.com/Electronics/Weensy/Weensy.html
Worked well
First Arduino, easy to setup as it only needs USB. just installed the IDE and teensy drivers and it was up and running. It's easy to figure out, just got to remember that it's case sensitive and uses semicolons!
0 of 1 found this helpful:
Board is great, documentation almost great
Let me highlight the great things first. The board is an almost drop in replacement for the Arduino. This board also extends the PWM capabilities, leaving Arduinos in the dust, not to mention having more ports than any board of its size that I have seen. I was able to port some arduino sensor code to this board with minimal code changes. Since my first thoughts on this board, more documentation is slowly coming out in relation to my uses, so 4 stars seems to fit.
As a side note, I should also mention it was a bit awkward trying to solder on those headers myself... not a lot of room next to the main processor. I guess next time I should wait until the pre-soldered version is in stock, or if you are new to soldering.
One more thing: are there going to be any -boards for the 3.6? The other add-on boards seem to work with the smaller Teensy boards only. Thanks for taking the time to read my rating.
The pin layout on the first half of the 3.6 (and 3.5) is the same as the earlier, smaller Teensy boards, so many add-on boards should remain compatible. I just tested the Teensy Audio Board with the 3.6, and it worked flawlessly.
Great board, amazing libraries
I use Teensy 3.6 for my midi expander "Lilla", which takes advantage of T3.6 fast clock, toghether with Teensy powerful libraries. Great hw and sw support for this product on Teensy forum. Lilla project: https://github.com/SandroGrassia/Lilla-midi-expander


Does anyone know if the Sparkfun LSM9DS1 Library is compatible with this board?
With the addition of the FPU, I wish I was smart enough to implement a Kalman filter for IMU sensor fusion. This teensy little fella would fly nicely. Someday maybe.
The video mentions using the 'octows2812' library. From what I've been able to find on PJRC website/forums/rest of the interent, the octows2811 library currently doesn't explicitly support the teensy 3.5/6 but I'd love to be proven wrong. I've been waiting with bated breath for the octo library to come to the newest teensy's. Any chance Nick (or anyone) could post up a link to the library used in the video and maybe even the code for running the animation shown in the video?
for both 2811 and 2812:
http://www.pjrc.com/teensy/td_libs_OctoWS2811.html
https://github.com/PaulStoffregen/OctoWS2811
Should work with all T 3.x stuff.
I believe the description should read "... digital pins have interrupt capability and are 5V tolerant." Rather than 3.3V tolerant.
From pjrc website: Version 3.6 features a 32 bit 180 MHz ARM Cortex-M4 processor with floating point unit. All digital and analog pins are 3.3 volts. Do not apply more than 3.3V to any signal pin.
It's not even 3.3v, but VDD+0.3v
Correct; AFAICT the 3.6 is 3.3V, the 3.5 is 5V tolerant.