SparkFun Air Quality Breakout - CCS811
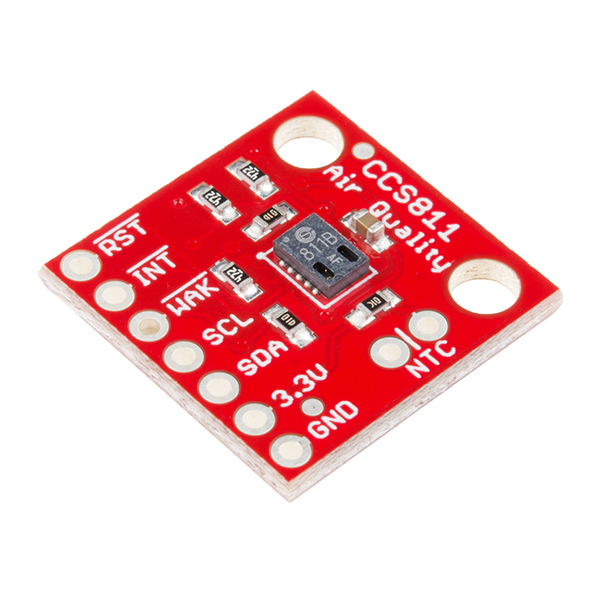
The CCS811 Air Quality Breakout is a digital gas sensor solution that senses a wide range of Total Volatile Organic Compounds (TVOCs), including equivalent carbon dioxide (eCO2) and metal oxide (MOX) levels. VOCs are often categorized as pollutants and/or sensory irritants and can come from a variety of sources like construction materials (paint, carpet, etc.), machines (copiers, processors, etc.) and even people (breathing, smoking, etc.). This breakout is intended for indoor air quality monitoring in personal devices such as watches and phones, but we’ve put it on a breakout board so you can use it as a regular I2C device.
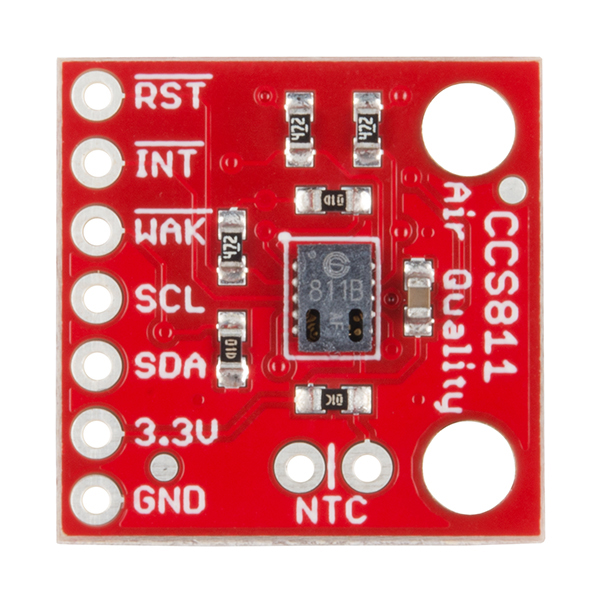
The onboard CCS811 supports multiple measurement modes that have been optimized for low-power consumption during an active sensor measurement and idle mode extending battery life in portable applications. We have broken out each necessary pin on the CCS811 as well as additional pins to add your own NTC Thermistor to determine the temperature of the CCS811’s surroundings, which can be used to help compensate the readings.
Note: Please be aware that the CCS811 datasheet recommends a burn-in of 48 hours and a run-in of 20 minutes (you must allow 20 minutes for the sensor to warm up and output valid data).
Note: Temperature compensation from an attached NTC Thermistor is no longer supported on the CCS811. In order to add environmental compensation to the CCS811 an external environmental sensor like the SparkFun Atmospheric Sensor Breakout -BME280. If you are looking for a board that has this envirnomental compensation built in, check out the SparkFun Environmental Combo Breakout - CCS811/BME280 (Qwiic).
- Total Volatile Organic Compound (TVOC) sensing from 0 to 32,768 parts per billion
- eCO2 sensing from 400 parts per million to 29,206 ppm
- Five Operating Modes
- Integrated MCU
- Onboard Processing
- Standard I2C Digital Interface
- Optimized Low-Power Modes
- Optional NTC Thermistor Pins
SparkFun Air Quality Breakout - CCS811 Product Help and Resources
CCS811 Air Quality Breakout Hookup Guide
April 27, 2017
This tutorial shows you how to get data from a CCS811 breakout board with the I2C interface.
CCS811/BME280 (Qwiic) Environmental Combo Breakout Hookup Guide
September 8, 2017
Sense various environmental conditions such as temperature, humidity, barometric pressure, eCO2 and tVOCs with the CCS811 and BME280 combo breakout board.
Core Skill: Soldering
This skill defines how difficult the soldering is on a particular product. It might be a couple simple solder joints, or require special reflow tools.
Skill Level: Noob - Some basic soldering is required, but it is limited to a just a few pins, basic through-hole soldering, and couple (if any) polarized components. A basic soldering iron is all you should need.
See all skill levels
Core Skill: Programming
If a board needs code or communicates somehow, you're going to need to know how to program or interface with it. The programming skill is all about communication and code.
Skill Level: Competent - The toolchain for programming is a bit more complex and will examples may not be explicitly provided for you. You will be required to have a fundamental knowledge of programming and be required to provide your own code. You may need to modify existing libraries or code to work with your specific hardware. Sensor and hardware interfaces will be SPI or I2C.
See all skill levels
Core Skill: Electrical Prototyping
If it requires power, you need to know how much, what all the pins do, and how to hook it up. You may need to reference datasheets, schematics, and know the ins and outs of electronics.
Skill Level: Rookie - You may be required to know a bit more about the component, such as orientation, or how to hook it up, in addition to power requirements. You will need to understand polarized components.
See all skill levels
Comments
Looking for answers to technical questions?
We welcome your comments and suggestions below. However, if you are looking for solutions to technical questions please see our Technical Assistance page.
Customer Reviews
4.3 out of 5
Based on 9 ratings:
Fantastic board
Really simple to use, remarkably accurate, and surprisingly sophisticated. Just what this project needed!
very usefull
I had to unsolder the pull up resistors to make it working on an AT91 Sam9G25 plateform. No works flawlessly
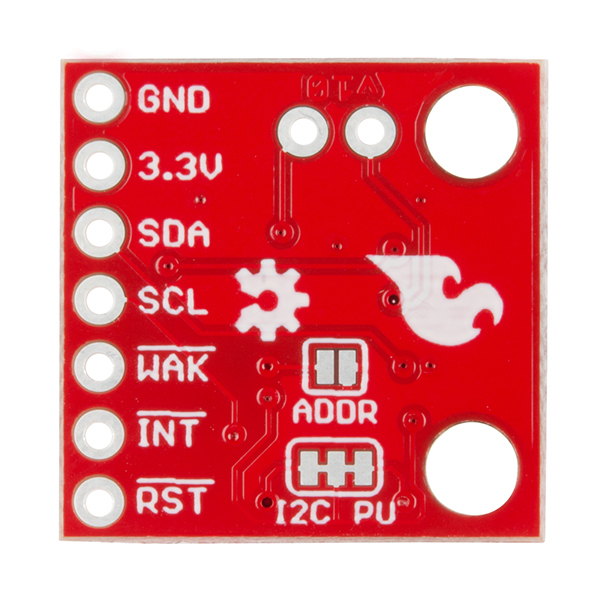
For future reference most of our boards (including this one) have the pullup resistors soldered on so that they can be used as is, but also have jumpers on the board where you can cut the trace to disconnect them which should be easier than desoldering.
Very good for proof of concept demo
This product is easy to use, has great docs, and is very reliable. Great for student projects
Easy to implement but values go out of control on continuous use
Ok. it is pretty easy to use. and the library is very easy. But, after a few hours of continuous use, the values go crazy. I also added temp/humidity compensation. but still, after an hour or two, the results go off the charts. Anyone else have an idea on how to handle this? Or is there a problem with the actual device?
It sounds like you may have a connection issue or a bad unit. Please contact our tech support department for assistance. You can reach them at techsupport (at) sparkfun (dot) com.
Great sensor but be prepared to do a fair amount of setup
I have this sensor set up to record data using a Particle Photon. The graphs spike when we cook food, have large groups of people over to our house or use hair spray. The CO2 equivalent value appears to be calculated based on the tVOC reading. Both readings follow the same trend line but have different min and max values. Based on my experience and looking at the spec sheet, the values produced by this sensor are largely dependent on the baseline measurement established during the warm up period (and periodically thereafter). I have yet to tinker with the baseline getter and setter functions provided in the library for this sensor.
The setup process recommends a one time 48 hour burn in and 20 minute warm up. The default sampling rate for this sensor is every second. At this sample rate, the sensor gets pretty warm. You can slow down the sample rate by using a function in the library for the sensor.
Here is a link to GitHub with the code that I'm using:
https://github.com/blackcj/SparkFunCCS811
Great little sensor!
I hooked this thing up as the first sensor for my new Particle Mesh Xenon, and love it so far. We see the spikes when cooking, and we saw a really big spike when we spilled some drippings in the bottom of the oven and smoked up the kitchen.
There is some burn-in, and I plan on updating my firmware to include enough of a wait before I start sending data to avoid tracking the meaningless values. If I remember I will try and post an update to the code.
Uses clock stretching so will not work with ESP8266 and some others
More info and possible work around at https://github.com/maarten-pennings/I2C-tool/blob/master/I2Ctest8266/README.md#how-to-fix
Update: I did managed to get this to work with the SparkFun ESP8266 Thing - Dev Board
Good for tVOC and eCO2, other functions could use work
The core functionality, tVOC and eCO2, work well and are very reactive to changes in air quality. And while you may need a 20 minute warmup to get the best readings, it does detect adverse conditions well before that.
A couple things were a bit lacking, at least with the Arduino library: 1) there's no MOX readings to be found, and 2) I couldn't get any temperature readings despite installing a 10k NTC thermistor (got the same bogus reading no matter if I left those contacts open, had the ntc installed, or shorted them).
Mixed feelings
Soldered it to a qwick adapter, and then burned it for 20 minutesusing the example just to see if it worked. Everything went ok.After that hooked it up to a bme 280 also soldered to a qwick adapter .. used the example . everything went okish. Readings fluctuated ... So I realized i had not cutted the pullups for the i2c bus. Went ahead and cutted them .. aaand then nothing worked. Tried examples for bme alone in the bus and they work but as soon as I plug the ccs811, even without initializing it in the program, the reading of the bme start to slow down and sometimes they are not correct (negative temperatures etc). The ccs811 alone with jumpers soldered and unsoldered dont work.. in either case. So I wonder if the i2c port is so sensible that just plugging it with less than 4.3k on the pull up will damage the bus .. seems like it .. maybe the pull up was too strong with two sensors on the bus with their respective 4.3k resistors ... the bme still works. Can anyone confirm that having a small pull up resistor on the bus damages the ic? Either Way this sucks!
Update: my neanderthal past genes cutted the trace below the jumpers (brute force facepalm) .. so I soldered a wire from the parts that where cutted.... and now everything works ....


See my LCD CCS811 Live Environmental Monitor here using this sensor: https://www.thingiverse.com/thing:2386674
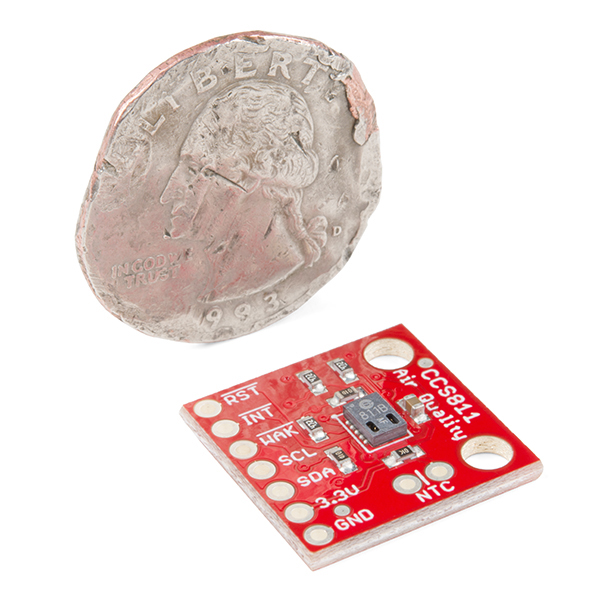
What happened to the quarter?
Oh that? Too many volatile organic compounds...
I don't get this after a few hours of continuous use, the values go crazy. I also added temp/humidity compensation. but still, after an hour or two, the results go off the charts.
Anyone else have an idea on how to handle this? Or is there a problem with the actual device?
Hi there, it sounds like you are looking for technical assistance. Please use the link in the banner above, to get started with posting a topic in our forums. Our technical support team will do their best to assist you.
That being said, I remember there being a "break-in" period for the sensor that is mentioned in the datasheet.
Quick question...can this sensor, umm, detect farts??
I am experiencing the same problems as "dafoink". Values are spiking after a few hours of continuous use and are going down again after power cycle (reset via the reset line does not help). Even after upgrading to app version 2.0.0 it is happening. To me it looks like the firmware is not stable. A second, different unit, does not show that behaviour yet, but I will see.
Can this detect bad stuff from 3d printers?
At $29, I'm incredibly surprised you didn't include the NTC on the board. Seriously, they cost like $0.10, and the pin seems to be reserved for the NTC exclusively.