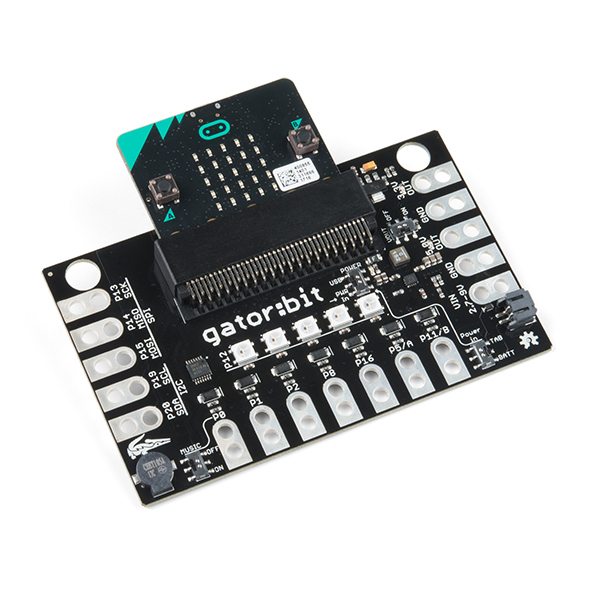
SparkFun gator:bit
The SparkFun gator:bit is an all-in-one “carrier” board for your micro:bit that provides you with a fully functional development and prototyping platform. Almost every pin on the micro:bit is broken out to pads that alligator (or crocodile, if you prefer) clips so you can get the most out of it! Whether it is data visualization using the five on-board addressable LEDs, capacitive touch sensing on pins 0, 1, & 2, or creating musical works of art using the built-in speaker we’ve got it covered with the with the SparkFun gator:bit!
The major benefit of gator:bit that we have provided is safe access to as many GPIO as possible from the micro:bit. Not only are pins 0, 1, 2, 8, 16, 5 (Button A), and 11 (Button B) broken out, but they are also protected against over voltage and over current/short circuit. Pins 0, 1, and 2 are ADC pins and are also the capacitive touch pins. Pins 8, 16, 5, and 11 are digital pins capable of read and write. Additionally, pins 13 (SPI), 14(SPI), 15(SPI), 19 (I2C), and 20 (I2C) can be used to read and write whatever digital signals you could want. We go into much more detail about each pin and other attributes (like supplying voltage out, light, and sound) in the SparkFun gator:bit Guide found below. Make sure to check that out!
Each SparkFun gator:bit can be powered from 2.7V - 9V giving you quite a range of powering options. There are two ways of powering your gator:bit, either from the JST battery terminal or the alligator clip pads labeled “VIN”. Any voltage input between 2.7V and 9V will be regulated to 3.3V to power the micro:bit, the speaker, and for use by any of the alligator clip pins.
Even without any external hardware the gator:bit is still an exploratory development board for micro:bit allowing the easiest access to it for educators, beginners, and pro-makers alike.
The micro:bit is a pocket-sized computer that lets you get creative with digital technology. Between the micro:bit and our shield-like bit boards you can do almost anything while coding, customizing and controlling your micro:bit from almost anywhere! You can use your micro:bit for all sorts of unique creations, from robots to musical instruments and more. At half the size of a credit card, this versatile board has vast potential!
Note: The SparkFun gator:bit does NOT include a micro:bit board. The micro:bit will need to be purchased separately.
- micro:bit card edge connector
- Input voltage: 2.7V - 9V
- 5 built in addressable LEDs
- Built in buzzer
- 5V output
- 3.3V output
- 7 protected input/output pins
- 3 pins for SPI communication
- 2 pins for I2C
SparkFun gator:bit Product Help and Resources
Getting Started with the micro:bit
September 2, 2021
The BBC micro:bit is a compact, powerful programming tool that requires no software installation. Read on to learn how to use it YOUR way!
Gator:color ProtoSnap Hookup Guide
October 18, 2018
Clip some LED's onto your gator:bit with the gator:color.
Core Skill: Programming
If a board needs code or communicates somehow, you're going to need to know how to program or interface with it. The programming skill is all about communication and code.
Skill Level: Rookie - You will need a better fundamental understand of what code is, and how it works. You will be using beginner-level software and development tools like Arduino. You will be dealing directly with code, but numerous examples and libraries are available. Sensors or shields will communicate with serial or TTL.
See all skill levels
Core Skill: Electrical Prototyping
If it requires power, you need to know how much, what all the pins do, and how to hook it up. You may need to reference datasheets, schematics, and know the ins and outs of electronics.
Skill Level: Rookie - You may be required to know a bit more about the component, such as orientation, or how to hook it up, in addition to power requirements. You will need to understand polarized components.
See all skill levels
Comments
Looking for answers to technical questions?
We welcome your comments and suggestions below. However, if you are looking for solutions to technical questions please see our Technical Assistance page.
Customer Reviews
No reviews yet.


