×
SparkFun will be closed on Tuesday, December 24th, and Wednesday, December 25th, in observance of the Christmas holiday. Any orders qualifying for same day shipping placed after 2:00 p.m. (MST) on Monday, December 23rd, will be processed on Thursday, December 26th, when we return to regular business hours. Wishing you a safe and happy holiday from all of us at SparkFun!
Please note - we will not be available for Local Pick up orders from December 24th-December 27th. If you place an order for Local Pick-Up we will have those ready on Monday, December 30th.
SparkFun LoRa Gateway - 1-Channel (ESP32)
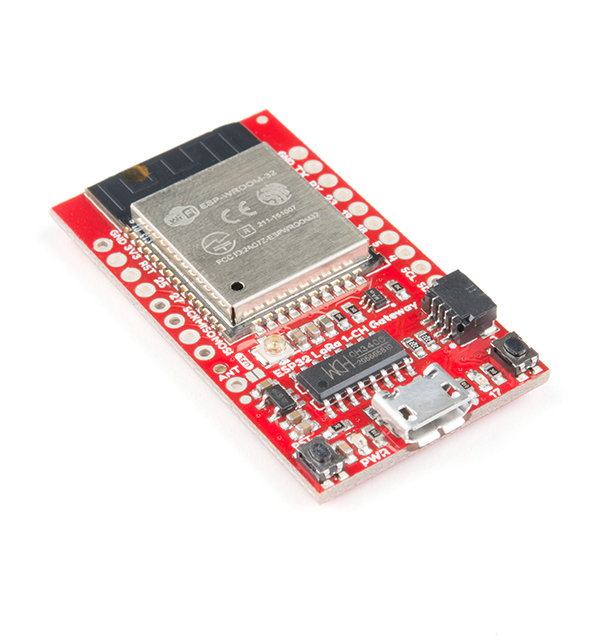
The SparkFun 1-Channel LoRa Gateway is a powerful 3-network capable device thanks to an onboard ESP32 WROOM module and an RFM95W LoRa modem. The RFM95W handles the 915MHz band while the ESP32 takes care of Bluetooth and WiFi capabilities. One of the ideal uses is to convert LoRa (Long Range) radio messages into data packets that you can access via the web, but of course the flexibility it offers can be put to many more uses! It's a perfect, low-cost tool for monitoring a dozen-or-so LoRa devices and relaying their messages up to the cloud.
Complete with a Qwiic connector and a breadboard-compatible array of ESP32 pin-breakouts, the Gateway can can also serve as a general-purpose ESP32/RFM95W development platform. The LoRa Gateway can act as either a gateway (hence the name) or a device, but not both at the same time. To really be sure that your setup works as expected you should have another LoRa device to listen to, and/or another LoRa gateway to transmit to. The good news is that the LoRa Gateway 1-Channel can act as both so if you have two then you’re all set.
To use the 915 MHz radio on the gateway you will need an antenna - for which you have two choices. You may cut a length of solid-core wire to approximately three inches for a through-hole antenna connection with strain relief or you can use a 915MHz antenna with a U.FL connector for higher performance antennas.
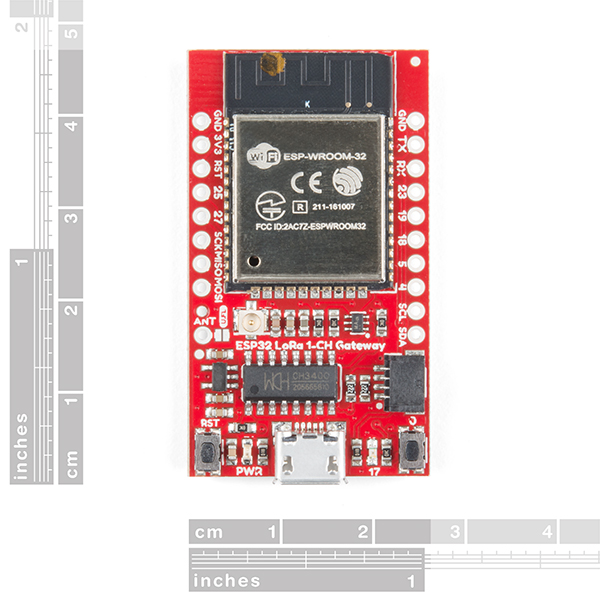
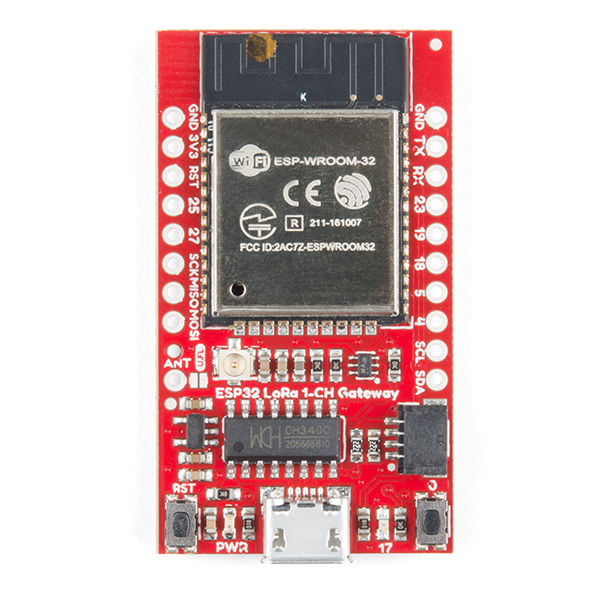
- ESP32-WROOM-32 Module
- WiFi, BT+BLE microcontroller
- Integrated PCB antenna
- 4MB SPI Flash Memory
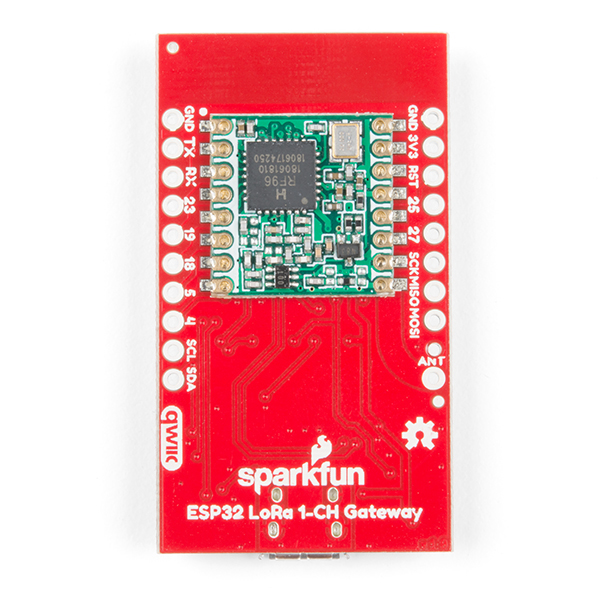
- Hope RFM95W LoRa modem
- Frequency range: 868/915 MHz
- Spread factor: 6-12
- SPI control interface
- U.FL antenna connector for LoRa radio
- Reset and ESP32 pin0 buttons
- 14 GPIO ESP32 pin-breakouts
- Power and user LEDs
- Qwiic connector
- CH340C USB-to-Serial interface
- Micro-B USB connector for power and programming
- All current consumption tested at 5V
- ~170 mA when formatting SPIFFS in Gateway mode
- ~150 mA when searching for WiFi network in Gateway mode
- 80 to 100 mA in steady operation of Gateway
- ~70 mA when using the LoRa Device example
SparkFun LoRa Gateway - 1-Channel (ESP32) Product Help and Resources
SparkFun LoRa Gateway 1-Channel Hookup Guide
November 15, 2018
How to setup and use the LoRa Gateway 1-Channel in Arduino.
Three Quick Tips About Using U.FL
December 28, 2018
Quick tips regarding how to connect, protect, and disconnect U.FL connectors.
Core Skill: Soldering
This skill defines how difficult the soldering is on a particular product. It might be a couple simple solder joints, or require special reflow tools.
Skill Level: Noob - Some basic soldering is required, but it is limited to a just a few pins, basic through-hole soldering, and couple (if any) polarized components. A basic soldering iron is all you should need.
See all skill levels
Core Skill: Programming
If a board needs code or communicates somehow, you're going to need to know how to program or interface with it. The programming skill is all about communication and code.
Skill Level: Rookie - You will need a better fundamental understand of what code is, and how it works. You will be using beginner-level software and development tools like Arduino. You will be dealing directly with code, but numerous examples and libraries are available. Sensors or shields will communicate with serial or TTL.
See all skill levels
Core Skill: Electrical Prototyping
If it requires power, you need to know how much, what all the pins do, and how to hook it up. You may need to reference datasheets, schematics, and know the ins and outs of electronics.
Skill Level: Rookie - You may be required to know a bit more about the component, such as orientation, or how to hook it up, in addition to power requirements. You will need to understand polarized components.
See all skill levels
Comments
Looking for answers to technical questions?
We welcome your comments and suggestions below. However, if you are looking for solutions to technical questions please see our Technical Assistance page.
Customer Reviews
4 out of 5
Based on 3 ratings:
3 of 3 found this helpful:
Good Entry LoRa Gateway
This will, with the SAMD21 Pro RF, allow me to explore this new sensor network. Love the QWIIC! No soldering makes prototyping quick and easy! (Without the flashbacks to my board stuffing work history.) For me, the magic is in the sauce and not the hardware.
Like the Pro RF, there are a lot of little fiddly changes to make to the software configuration. Just be careful and patient and you will get through that. A small format change to the Hookup Guide would make this easier for the users. Maybe if there was a short checklist in addition to the text discussion?
Seems robust and has been up for a while with no issues. Love it!
Small Design Issues: Making a small case for it was a slight challenge: No mounting holes in the board and the location of the antenna connector. It would be possible to place less stress on the antenna connector if it was a little more outboard. That would allow a straighter path for the connector without bending tightly around the casing of the ESP32.
2 of 2 found this helpful:
Just testing the gateway
I got it to work - not really easy. The archived software worked, but the newer versions from GitHub would not. Range also seems poor. Works when connected to the same computer, but separated by 30 feet (different rooms), there is no signal. RSSI when adjacent is about -64 db. Probably needs more testing on my part, and reading the docs. Thanks to Sparkfun for setting up the tutorials! Oooops! Let me update my comment - there was no signal because of the hang on Serial Monitor. When I commented it out and then ran it from a wall wart, all is well. I am using the RTL-SDR to monitor the signal. Everything seems to be working OK. I will be testing with a friend to see what kind of range we can get with the little antennas.
Nice, reliable prototyping gateway
I bought this along with the SAMD21 ProRF module to get started with LoRa. The device itself works great: connects to my WiFi 99% of the time on the first try, picks up my node's signal just fine, and is almost always seen by TTN. My main difficulties were with setting it up as a gateway; the old version of the code posted in the tutorial works alright, but the new version has some nice added features (particularly to the web server part) and seems to be more reliable. It took some fumbling around with the arduino code but it works well and wasn't too hard to figure out.
My only remaining issue seems to be with TTN itself. The gateway connects just fine and all the traffic is visible, but messages rarely and sporadically get forwarded to my application. The EU router still seems to work best, and it could be something to do with the frequency of messages I'm sending or that TTN doesn't like 1-channel gateways.


Hi, I am currently looking at using the module for direct LoRa communication (without the WAN layer). This is why I try to use a different library (LoRa from Sandeep Mistry) to control the RFM95W LoRa modem. To do so, I need to configure the pins and was looking at the schematic. It seems that for the library I need to define NSS, RST and dio0. NSS is connected to IO16, dio0 to IO26 but I was not able to find the connection for RST. Anyone can help here? I also accept suggestions like "you should use a completely different library" :-)
You are correct - the RFM reset line is not connected to GPIO on the ESP32. However it is fairly easily accessible on the top side of the board to do a white wire fix. I added a screenshot of the design that shows where the line is. You can solder a wire from that side of the resistor to an available GPIO of the ESP32 in order to control the reset
Thanks for the quick answer. Does this imply that it is not expected that the reset needs to be used during operation?
Yes, at least for the typical use cases of LoRa WAN we found that it was unnecessary to be controlled.
Hi, If i have a sensor that use SPI port, It can work with LoRa module on this board in the same SPI bus but different CS Pin? (or SCK, MISO, MOSI Pin that show on board)
Yep, that should work as long as you are sure that the CS line for the LoRa module is high while you try to access your sensor.
Hi, why this design doesn't have a 12 Mhz crystal for CH340 IC? Does the CH340 can work properly without it?
Hi - good eye. The part used here is the CH340C which has an internal oscillator. This makes it a lot simpler for us to include in designs than the CH340G
Will the RFM95W on this board also work at 868MHz?
Good question. The simple answer is "yes, but we haven't proven it personally." Here's a little more info.
You'll be able to find a frequency setting function in the majority of the LoRa libraries out there because generally speaking all the LoRa radio modules use the same Semtech SX1276 chip at their core. The RFM95W is one such module so it should have an adjustable frequency range and be compatible with those libraries.
You can see an example of what I'm talking about in the LMIC Arduino library. The config.h and lmic.h files both have references to both 915 MHz and 868 MHz. Just a little more digging should turn up a function that is used to set the frequency during initialization. It might be as simple as defining #define CFG_eu868 1 instead of #define CFG_us915 1
We haven't tested the modules at 868 MHz, however, so if you get this working we'd love to hear about it so that we can say definitively in the future that it is proven. Thanks for asking a great question!
Thank you for the answer. Yes I have always been confused as I understood the SX1276 to work at both 868MHz and 915MHz via config but the Hope RFM95W modules have a marking and part number which specifies one of 868 or 915. I was never sure if there are other parts on the module which are frequency specific.
The Hope spec sheet states that the RFM95 has a frequency range of '868/915 MHz' which makes me feel more comfortable so I am going to order the gateway from SparkFun and do my research :)
I am currently using an RFM95W with the single channel packet forwarder on Raspberry Pi which works really well but is not nearly as convenient as these :)
Awesome, good luck and keep us in the loop about how it goes!
I have an ESP32 Thing board and a RFM95W module. Can I expect problems to combine them to your "SparkFun LoRa Gateway - 1-Channel"?
No, you should be able to do that with little trouble on a breadboard. Hook up your wires in the way that the schematic shows. Then you should be able to follow along with the hookup guide and use all the same software. Cheers!
Please note that this can only listen on one channel at a time, so it will definitely lose transmissions that aren't heard on that channel. This device is for experimentation and personal use, not for use with a public network like The Things Network.
That's a pretty good assessment. I'd elaborate by saying that single-channel gateways are great for personal use, including posting data to the internet on networks like The Things Network, however they do not play nicely with stranger's devices and so they don't contribute to building a true LoRaWAN network that anyone can use.
Indeed the radio module is only designed to listen to one channel at a time so to eek out all the possible range you'll need to set your devices to operate on only one channel - this is a move that doesn't align well with the duty cycle rules of LoRaWAN. With that in mind people should be considerate of how they use our shared radio bandwidth.
However you can still post received messages to public networks like The Things Network (the Internet, being hardwired, has plenty of bandwidth). Additionally the gateway code can make use of Channel Activity Detection (CAD). CAD makes an attempt to listen for packets on all channels and quickly switch to that channel to receive the data. Tradeoffs will be decreased sensitivity and potentially more frequent packet misses.
Thank you for bringing this up!
also whats the current consumption of this device ... I dont see that spec listed....
Thanks for spotting that, I have just updated the Features tab to include my current measurements for a few different modes/phases of operation. Hope that helps!
So when will you make a full gateway for lora?
That's a good question. As of right now we aren't working on a full gateway because there are several good solutions already available (I'll list them below). However if there's a need that we are not aware of please let us know and we might be interested in coming up with a solution. What would you want from a SparkFun (fully capable) LoRa gateway? Thanks!
Here are some gateway options: