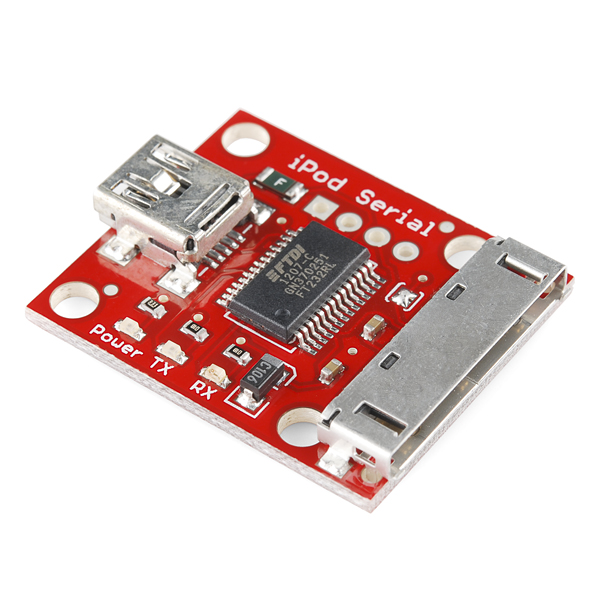
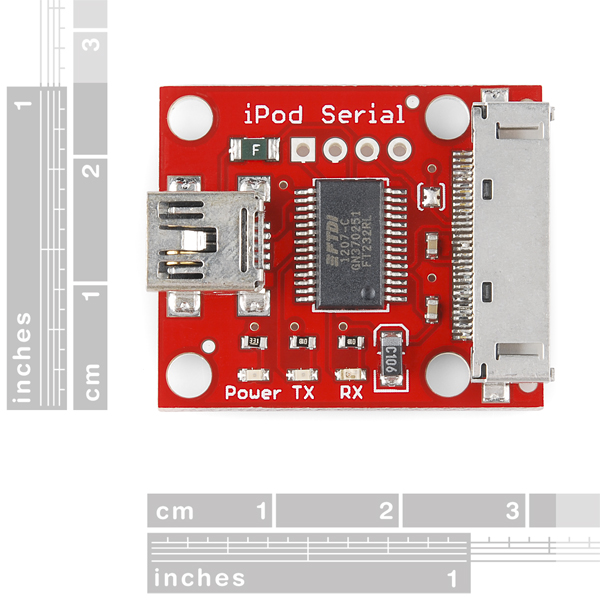
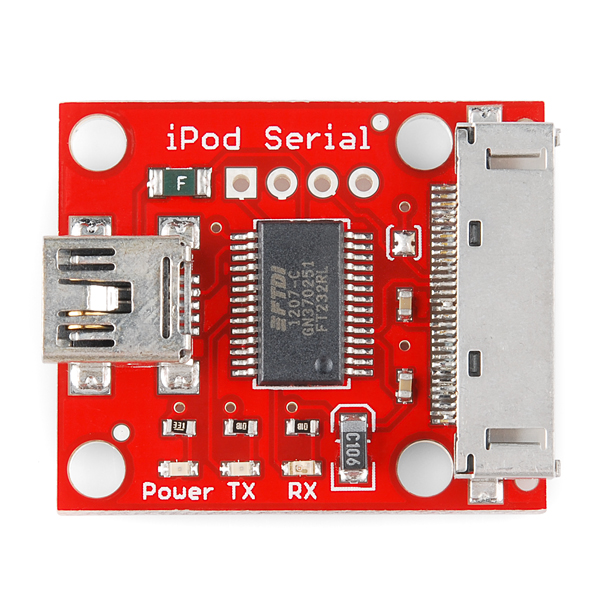
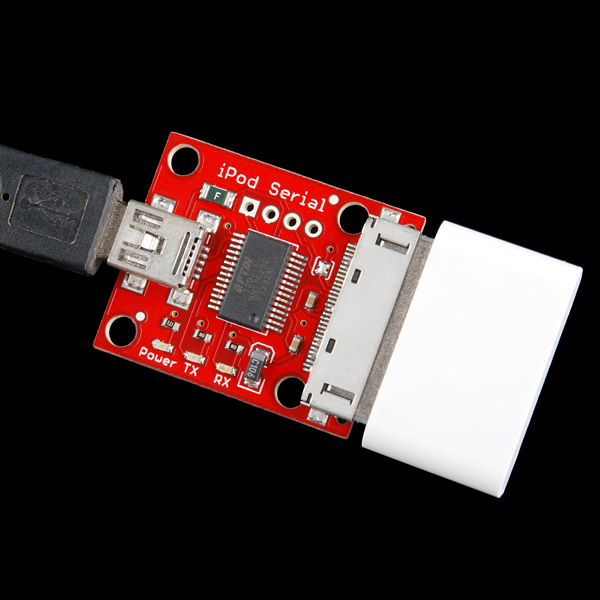
SparkFun Serial to USB Adapter - Nike+iPod
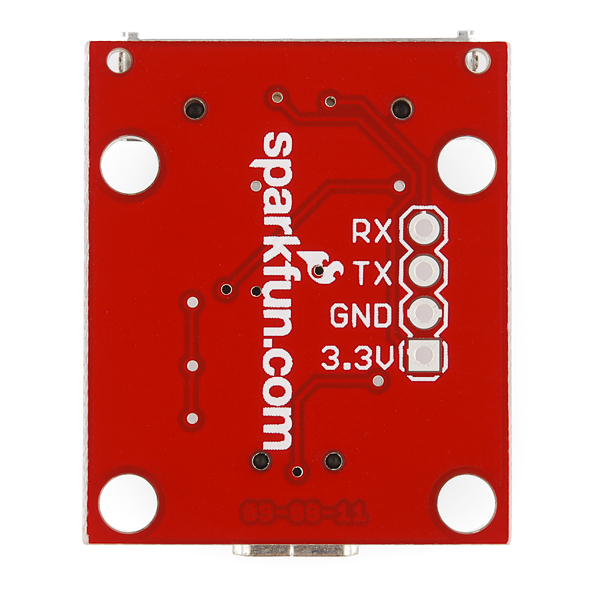
This is a simple USB serial interface to mate with the Nike+iPod product. Use this breakout board to send and receive serial commands to the receiver and listen for individual foot pods. This will allow easy creation of proximity based projects and running/workout research. VCC (3.3V), ground, and iPod TX and RX are brought out to a standard header so that you can connect this board to a microcontroller.
Don't forget to checkout the original tutorial!
We provide a simple example VB program that demonstrates how to initialize the receiver to listen for all foot pods in range and display the raw data including foot pod IDs. Any receiver can hear any foot pod - they don't have to be mated in any way.
It turns out the foot pod will activate with minimal movement. We really want to attach these to our cats and make an ID controlled cat-door-lock system. 'Are you Carlos? No? You can't come in.'
SparkFun Serial to USB Adapter - Nike+iPod Product Help and Resources
Core Skill: Programming
If a board needs code or communicates somehow, you're going to need to know how to program or interface with it. The programming skill is all about communication and code.
Skill Level: Competent - The toolchain for programming is a bit more complex and will examples may not be explicitly provided for you. You will be required to have a fundamental knowledge of programming and be required to provide your own code. You may need to modify existing libraries or code to work with your specific hardware. Sensor and hardware interfaces will be SPI or I2C.
See all skill levels
Core Skill: Electrical Prototyping
If it requires power, you need to know how much, what all the pins do, and how to hook it up. You may need to reference datasheets, schematics, and know the ins and outs of electronics.
Skill Level: Noob - You don't need to reference a datasheet, but you will need to know basic power requirements.
See all skill levels
Comments
Looking for answers to technical questions?
We welcome your comments and suggestions below. However, if you are looking for solutions to technical questions please see our Technical Assistance page.
Customer Reviews
No reviews yet.

For those having trouble with the VB, here's a really simple python version (works for Mac) for establishing a connection with Nike+ using SparkFun's adapter:
http://www.borismus.com/nike-hacking-with-python/
Thanks! I'm using your script and receiving data from my Nike+ sensor. However, I only get about one message per second, as opposed to every step. Do you know if it's possible to use the Nike+ as a low-latency step sensor?
The VB Program is very old, but very helpful, I am in middle of hacking together a C#.net version and I'll post when It's done.
I can connect to the board via usb, bu cannot get it to comunicate with the arduino atmega 328, im using the Ifob.pde and got tx-tx, rx-rx, 3.3v and ground, what am i missing,?
Ok, got it working......If anyone is interested:
First of all, I'm using a mac... so no VB, im using text wrangler and the python script from BORISMUS posted above, once i have the id is going to be in hex, go to google and using a hex to decimal converter, convert your hex into decimal.
Note: when you copy your hex into the converter is going to paste with spaces between the characters, remove them or youll get a different decimal i.e. CC 30 1f 30 change to CC301F30
Once you got that, use the Nike_quickstart.pde from Deadly Damon, edit the part were it says//drive the pin
if (fob_id == 1521890351) { //this is my ID, get your own! timeCheck = millis(); fob_id = 0; digitalWrite(drivenPin, HIGH); }
if ((millis() - timeCheck) > 5000) { // keep things lit constantly and for 5 seconds afterwards digitalWrite(drivenPin, LOW); }
Replace the 1521890351 with your unique id you got from the hex converter.
VERY IMPORTANT:
1.I did not have to desolder the jumper as per Deadly Damon sugestion.. 2.Because the BOARD IM USING DUEMILANOVE uses the ftdi chip, i cant use the pins 0,1 for serial comunications while conected to usb.
read the pde carefully and youll understand...
Hope it helps, Enjoy.
Here is another interesting article on the nike iPod with decoding software for the arduino. It decodes the ID but also the 20+ other bytes such as walked and running steps and also lifetime walking and running miles. The total on time is also calculated.
Here is the link to the website: Nike iPod
Anyone know what baudrate the serial connection is here if I want to go direct to a microcontroler?
Is there any way to get this is work on a HCS12 Dragon12 - Plus. Everything looks interesting and I would like to implement this into a project that I have to do, but I'm forced to use the Dragon 12 MicroController MC9S12D256
Noob question....
Arduino support?
I spent some time trying to get Nate's iFOB script to work for me. Found out there's some undocumented hardware stuff that needs to be taken care of to make it work... read the notes in the script.
NIKE_quick_start.pde
has anybody figured out now how to use the sensor to measure or register every single pace? This 33 byte data chunk does not really make sens to me (except for the unique ID)?
Has anyone tried using this with the Garmin chirp?
https://buy.garmin.com/shop/shop.do?pID=74811
What do you mean by the unique ID of each foot pod? As assigning a certain value to each step? Sorry if I am way off.
My goal is to find the raw acceleration produced by the accelerometer (i.e. what raw acceleration value (g's) constitutes a running step vs. a walking step). Any ideas??
I ventured into the raw data on the XML file, but this aspect (raw acceleration) is the only thing missing. Is this a proprietary item solely to Nike/Apple? It's giving me headaches.
Thanks guys!
Hi everyone
I'm musician, and I want to use the nike+ sensor to make music. I need to trigger a soun for each step via midi (max/msp for ableton live).
Is this adaptor what I need?
And how many sensors can it carry? I need 4
Is that working on mac?
Thanks!!
Also note that this adapter works with the Timex Ironman iControl watch dongle. Sweet!
Hi,
Do you know what is the data structure received by the dongle?
here it's a track:
http://ipodlinux.org/wiki/Apple_Accessory_Protocol#Nike.2B_.28Mode_9.29
Thanks
Geonaute
Hi,
I tried the VB programm (VB is not installed) without issue with windows XP.
But it doesn't work when I try to launch it on vista.
It's normal? Is there vista version available?
Thanks,
Geonaute
Can someone tell me if the footpod transmits on a fixed schedule (ie. every 10 seconds), or per step.
I'm trying to figure out why my Nike+ running data only shows pace readings at a 10-sec resolution, and whether it's the footpod, the receiver, or Nike+ website that's smoothing over the second-to-second data.
And once that's figured out, how we can hack the device to increase the frequency for the readings.
I am having a hard time getting anything other than the VB code to communicate with the device. I have tried the perl code from the rtadlock.blogspot.com post both on my Mac and on redhat linux but no luck yet. I ultimately would like to get this to work on my Mac but anything on Linux would work too (perl, C, python) Pretty much anything script based, but I refuse to use VB :). Nothing I send seems to get the thing in listen mode and I have to be doing something simple wrong since it works with the VB code (on Fusion on my Mac even). Any sample code would be appreciated.
Thanks in advance.
-Bill
Hopefully someone knows the answer to this.
My current project is building a carpc, I've got it all together and have a aftermarket stereo installed (DEH-P4000UB), which has a usb port w/ ipod support.
Now what I wanted to do, is use something like this to interface the carpc with the stereo, allowing the stereo to control the pc & display music information on the stereo display. I've already gotten the p-bus pinout(used by car stereo), so connecting the audio to the stereo isn't a problem. And since this device based on sending and receiving signals, I'd imaging it could be used for this as well. And advice?
Here is the P-Bus pinout, just in case...
http://stereophonik.com/gutterslide/IP-BUS_Hack/
I created a Perl script that reads from this adapter and I've got it working on Windows and Linux, and it shouldn't be long before it's working on the Mac if anyone is interested:
http://rtadlock.blogspot.com/2009/06/some-perl-code-for-nikeipod-serial.html
Do you plan on offering a serial only version without the USB?
i should have mentioned this before, but my sensor has the xmit side of the pcb covered in plastic goo. this wa a pain in the ass since i was trying to see what got transmit (to do differential against what the ipod serial side saw).
anyway, the pic side doesn't seem to have any goo (or as much) so here are teh pin connections from pic to xmit.
4 - clk
5 - cs
6 - pwr_up
7 - ce
12 - din
i had some time so i soldered some leads to the 2402 on the sensor unit (back to work tomorrow :-) and hooked it up to the analyzer.
on the receiver i see
ff 55 1e 09 0d 0d 01 a8 69 29 30 af b3 c5 16 c3 .U......i)0.....
3c 4f 28 56 1c 29 0b 8f fd 77 71 20 aa 1b a0 e2 <O(V.)...wq ....
ec 34 .4
this gets sent in groups of 9/11/10 octets as
c2 bd 0d 01 a8 69 29 30 af
b3 c5 16 c3 3c 4f 28 56 1c 29 0b
8f fd 77 71 20 aa 1b a0 e2 ec
the first three nibbles are different so i've been thinking this was used to 'encode' something since the remaining #s dont seem to be monotonic up/down like a timer would be.
the last byte in the first group appears to be a sequence #. the first nibble comes as 0 when the sensor hasn't triggered in a while (and as 'a' otherwise). the last nibble is a sequence 0-f.
i guess i'll have to attach to the pic to see what the timers are doing to actually reverse something.
neutered: _
this gets sent in groups of 9/11/10 octets as
c2 bd 0d 01 a8 69 29 30 af
b3 c5 16 c3 3c 4f 28 56 1c 29 0b
8f fd 77 71 20 aa 1b a0 e2 ec
the first three nibbles are different so i've been thinking this was used to 'encode' something since the remaining #s dont seem to be monotonic up/down like a timer would be.
_
When I looked into this a while back, I was under the assumption that 'c2 bd' was actually the address field value in order for the nRF2401A to send the receiver. If you look at the spec sheet, the address field is automatically removed when the device is in ShockBurst mode (which I also found out to be the case). This would explain why it doesn't appear on the receiver side.
i forgot to add that the original vb has a comment
The last byte is a addition CRC - always 0x54 remainder?
i'm not quite hw person enough but this generates the proper checks against the messages i've seen thus far. (skipping the leading 0xff/0x55)
for(i = 0, n = bs[2], sum = 0xff; i <= n; i++)
sum += bs[2 + i];
return ~sum;
just an fyi for the next experimentor.
i wrote up some c code since i dont have vb, but my transmitter thingee (ma365ll/c) seems to have a slightly different protocol which seems to work.
i send the commands as in the original vb but the responses are slightly different
79: read(8) : 8
ff 55 04 09 00 00 07 ec
91: read(8) : 8
ff 55 04 09 06 00 25 c8
the original said that the commands 1 and 2 should have the same response string (0xFF, 0x55, 0x04, 0x09, 0x00, 0x00, 0x07, 0xec).
anyway, after this i do get 34 byte strings but i think that these have 'timestamps' or something because they appear to vary each time i hit the 'button' on the sensor.
99: read(34) : 34
ff 55 1e 09 0d 0d 01 a8 69 29 30 a9 ef dc 70 fe 0d d9 0d 3d 5a 8e ff 62 b6 a4 87 3f f4 b6 8a 7d 7e aa
99: read(34) : 34
ff 55 1e 09 0d 0d 01 a8 69 29 30 aa fd 7a af 2a 94 5e d0 cc be 23 3b 18 1e 70 6c a6 61 5f 10 5f 35 94
Your decoded data:
Packet 1:
->packet is from device '4H847CE4VSX'
->payload: 06 02 B0 00 5E 00 00 0A 00 00 44 00 00 1C 00 00 A7 EC 02 85 64
->on hours: 2
->Tc: 176
->walking steps: 94
->running steps: 68
-> lifetime walking miles: 10
-> lifetime running miles: 28
I just got mine and tried it out with the sample software and it works as advertised!
Now I want to try my own applications, what are the serial commands I need to send to the receiver to put it in listen mode?
Take a look at the Example VB files. You won't need VB Studio installed, a text editor will suffice. We send a couple serial HEX commands to the pod that cause it to then go into 'listening' mode. And then we parse the response for what we believe is the unique ID of each footpod. Be sure to checkout the tutorial for more details.