SparkFun Humidity Sensor Breakout - HIH-4030
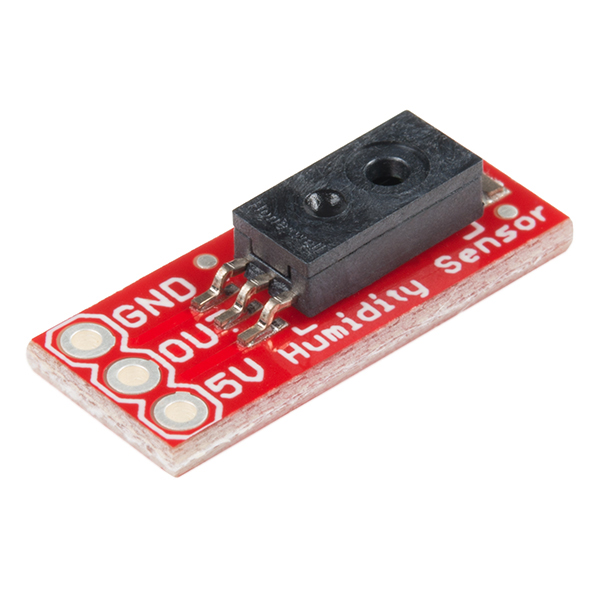
This is a breakout board for Honeywell's HIH-4030 humidity sensor. The HIH-4030 measures relative humidity (%RH) and delivers it as an analog output voltage. You can connect the output of the sensor directly to an ADC on a microcontroller; and, thanks to the sensor's near linear voltage output, the data is very easy to process.
Voltage applied to the supply pins should be within 4-5.8VDC, and optimally at 5V. The sensor will typically only consume about 200μA.
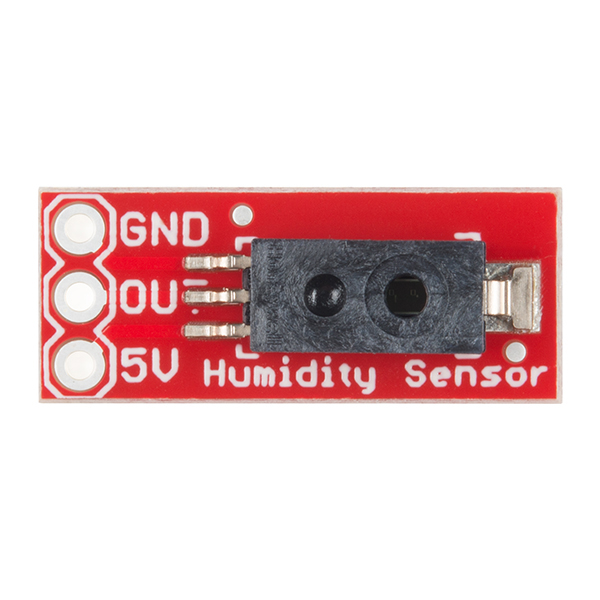
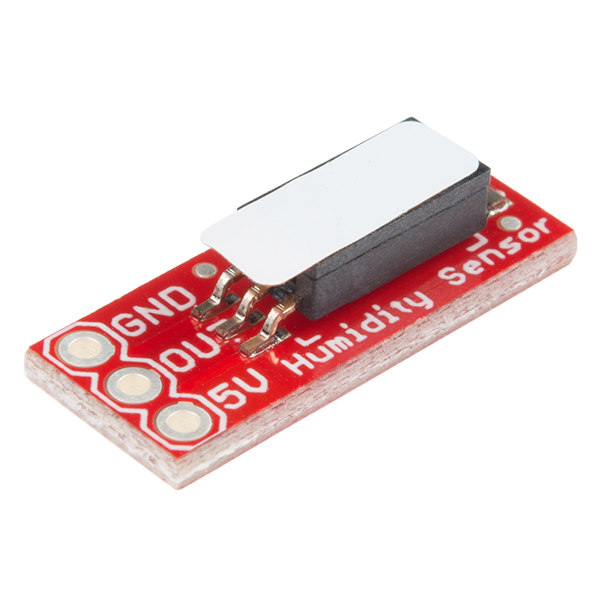
This product comes as shown in the picture, with the HIH-4030 soldered onto the breakout board. The pins of the 3-pin header are spaced by 0.1".
- Near linear, analog output
- 4-5.8VDC voltage supply
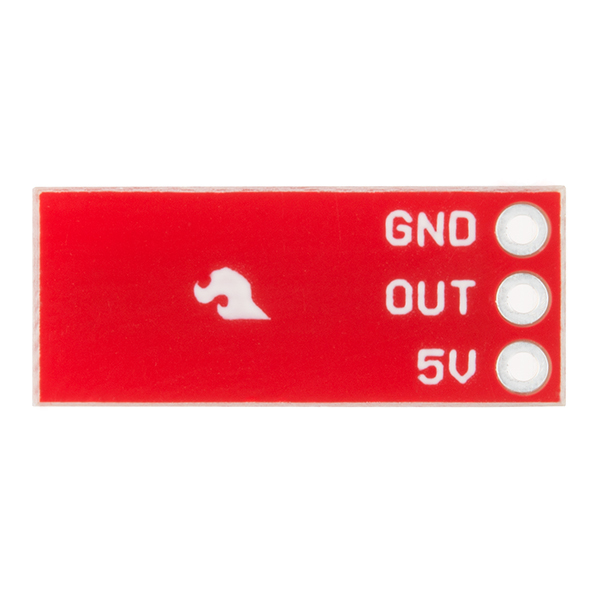
- All pins broken out to a 0.1" pitch header
- Laser trimmed interchangeability
- Low power design, typical current draw of only 200μA
- Enhanced accuracy
- Fast response time
- Stable, low drift performance
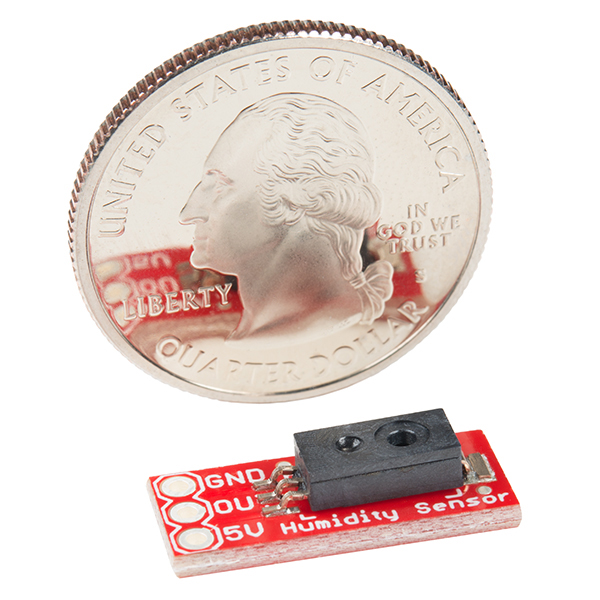
- 0.75 x 0.30 " (19.05 x 7.62 mm)
- Schematic
- Eagle Files
- Hookup Guide
- Datasheet (HIH4030)
- Hygrometer Reconditioning Note
- GitHub (Design Files)
SparkFun Humidity Sensor Breakout - HIH-4030 Product Help and Resources
HIH-4030 Humidity Sensor Hookup Guide
December 6, 2016
Measure relative humidity with SparkFun's HIH-4030 Humidity Sensor Breakout.
Core Skill: Soldering
This skill defines how difficult the soldering is on a particular product. It might be a couple simple solder joints, or require special reflow tools.
Skill Level: Noob - Some basic soldering is required, but it is limited to a just a few pins, basic through-hole soldering, and couple (if any) polarized components. A basic soldering iron is all you should need.
See all skill levels
Core Skill: Programming
If a board needs code or communicates somehow, you're going to need to know how to program or interface with it. The programming skill is all about communication and code.
Skill Level: Rookie - You will need a better fundamental understand of what code is, and how it works. You will be using beginner-level software and development tools like Arduino. You will be dealing directly with code, but numerous examples and libraries are available. Sensors or shields will communicate with serial or TTL.
See all skill levels
Core Skill: Electrical Prototyping
If it requires power, you need to know how much, what all the pins do, and how to hook it up. You may need to reference datasheets, schematics, and know the ins and outs of electronics.
Skill Level: Noob - You don't need to reference a datasheet, but you will need to know basic power requirements.
See all skill levels
Comments
Looking for answers to technical questions?
We welcome your comments and suggestions below. However, if you are looking for solutions to technical questions please see our Technical Assistance page.
Customer Reviews
4.4 out of 5
Based on 7 ratings:
1 of 1 found this helpful:
works well!
it took a little bit of work, but I got this thing working and giving accurate humidity readings!
two things to be aware of:
first, it is sensitive to light and exposure to light can throw your readings way off.
second, the code in the Bildr tutorial isn't right. read the comments in the Bildr tutorial for details, or just go off the datasheet to derive the transform function.
difficult
The tiny mounting board is a challenge. The surface mount joints are so close to the pin holes that you can unsolder the chip while soldering 3 sockets. I wasted a lot of time on that and on finding software online that gave accurate readings. Finally did it, though. I only bought 2 of these because I have had failures with cheaper DHT22s (at 100% humidity they fail). Maybe the HIH will too???
We are using this module to monitor humidity in data centers. Works well for our requirements.
Works very well
I integrated this with a 1-wire board to send data from the outdoors. It has been running well for a few weeks now. I only wish the 4030 was a 4031 so that it was more condensation-proof. We'll see how it goes...
I want to also add that delivery was excellent...both speed and packaging -- thanks!
Review of Sensor Breakout - HIH-4030
We are please with the performance and delivery of our order.
A standard in our instruments
Takes some work to build up the humidity sensor for our instruments; but, they are typically effective.
Works like a champ
Did everything Sparkfun said it would do, just took a little basic algebra to get the values to map the analog signal. I didn't bother to check the calibration using the information found on your website. All in all it does a good job.

We take pricing concerns very seriously. The last thing we want is to come across as taking advantage of anyone.
There are multiple drivers here including:
Market demand
Perceived value
Ease of use
We set the retail price where it is because of our calculated cost to build it. Yes, it is very expensive, and I feel torn setting a retail price every time we post a new item. Because of the state of the market, this board is selling, and well. It's hard to lower the price when market demand is holding it up.
That said, we inaccurately calculated our cost (our system was running on the prototype price which was really expensive) so I am comfortable lowering the retail price. I really appreciate the comments, it helps us a lot when customers point out what looks to be a mistake.
In the future, please shop around for us. The best way to lower prices is competition.
lol your positive response makes me feel bad about the wording of my first comment. I was just a bit too floored by the markup.
Heh for what it's worth, $16.95 is very reasonable.
You shouldn't mark up popular components so much. It leads newcomers to think SparkFun is overly-expensive.
The price is reasonable for buying one unit and experimenting. If you plan to make a batch, it'd probably be best to create an EAGLE schematic and go that route.
For experimentation, this price is just fine.
This sensor reads accurately for me using a 2.94V Vref and voltage source (instead of 5V). The test environment is pretty consistently ~25C, so I have not been able to test the drift with a lower excitation voltage.
For those wanting to use this with their 3.3V MCU you can just take the zero-offset voltage and mV/RH slope in the datasheet and convert those to their bit values with a 5V ref. and simply make the calculation based on the bits.
Math: Calibration readings from data sheet (note "%RH" is just the units for percent relative humidity, not fancy math): 0%RH reads 0.958V 75.3%RH reads 3.268V so (3.268V-0.958V)/(75.3%RH-0%RH) = Volts/%RH = 0.03068 V/%RH
Conversion: To make it universal just fill in your adc resolution (e.g. 1024 for 10b resolution, 4096 for 12b resolution), I'll use 4096 as an example: (3.268V/5.0V)4096 = 2677 bits at 75.3%RH (0.958V/5.0V)4096 = 784.8 bits at 0%RH (the zero-offset)
(2677bits - 784.8bits) / (75.3%RH - 0%RH) = 25.13 bits/%RH
Final Calculation (what'll be in your program): Let rdg_H = your analog reading of the humidity sensor @ any voltage: (rdg_H - 785bits) / (25 bits per %RH) = RH (in units of Percent Relative Humidity) (I just keep it all as unsigned 16 bit values as % relative humidity to the nearest whole percentage is good enough for me, but feel free to convert everything to floating point for slightly better accuracy)
Thanks iklln6 for your complete explanation. I think this link would be useful as well: http://www.arduino.cc/cgi-bin/yabb2/YaBB.pl?num=1263225751
I used this to measure the humidity in my BBQ Smoker to determine if the water pan is getting empty. And then send myself a text message. http://www.tinkurlab.com/?p=4
I'm thinking of doing something practical :) we often turn on our bathroom vent fan after a shower to help decrease the steamage, but we also usually forget to turn it off, hehe ;D.
I was thinking maybe have this hooked up to an ATMega328 with the Arduino bootloader so that when the humidity went over a certain level, the fan would turn on automagically, and then when it was done and the humidity was back down it would turn off. Although mom won't fund me unless I promise to do it...
I think the 'minimium load' spec in the datasheet means minimum resistance, which is slghtly confusing as it could be misinterpreted as the device requiring a load.
If it meant minimum current load, they would also quote a maximum, which they don't.
The load spec refers to the input resistance of the device connected to the output. If you connect it to an ADC pin on a microcontroller, that pin must present a resistance of at least 80k. Same if you connect it to an op amp to buffer/scale the signal. If you wanted to scale it down with a simple voltage divider, the total resistance must be at least 80k. The input resistance of the ADC pins on the Arduino Uno is 200M. The uA741 op amp is 2M. Either can be driven directly from this sensor. The reason for this is that there is an internal resistance in the sensor, probably 1-5k. Assume it's 1k. If you connect a 9k resistor from the output to ground, you will have a voltage divider, and at a full scale output of 5V, you will only measure 4.5V across your resistor. This will throw off your measurements. It will also try to pull 500uA. The datasheet doesn't have an "absolute maximum ratings" section, but 500uA looks like the most it can manage for the whole device, not just the load.
This appears to be true. I found that to be very confusing. I bought the 5030 from Mouser and made my own breakout and originally included a 10k ohm resistor between out and gnd. It did not work. To me, this would be better referred to as maximum load (=more current) For people mentioning price...I paid $11 for the 5030 at Mouser and it was the cheapest humidity sensor they had. The 4020 (here) is nearly $13.68. The 5030 supports 2.7V to 5.5V so SparkFun should just use those. Maybe the 4030 is cheaper from their supplier? Also, maybe this is a lower price now so it's not an issue but just a FYI.
I'll second the request for SparkFun to base this product on the 5030. Being able to power it at 3.3V would work better for those of us with 3.3V max ADCs, e.g. Netduinos.
The 5031 would be even better because it's filtered.
Am I looking at a different datasheet from everybody else? I've seen this 80kohm load value thrown around in a few comments, and that seems to be the reason I was getting screwy readings (I was using a 10k trim pot as a voltage divider), but I cannot for the life of me find anything in the datasheet that says so. Some of the comments are older, is there an older version of the datasheet and the newer ones don't mention this? Or am I blind?
Has anybody tried using these at high temperatures? The datasheet says they only go up to 85C. I am working on a coffee roaster and want to measure the humidity of the air coming off the beans. I figure the calibration will be way off at my temperatures which are up towards 150-200C, but I wonder if the sensor will even survive at these conditions. I can definitely make my own calibration curves, but from the datasheet it does not look promising from a sensor survival standpoint. But I thought I would throw it out there anyway because if there is any universal truth about makers it is that someone, somewhere, has already tried what you are going to try.
Would be great to have this with the HIH-4031; I am trying measure an environment with tons of condensation and it appears the humidity sensors you guys have are all suitable only for non-dew environments.
Has anyone had a problem with these flat-lining after a year or so? I have one mounted outdoors in a waterproof box with a breather hole and it worked great for about 7 months and then it slowly got less responsive and after about a year it got stuck at 70% all the time. Should I use an HIH-4031 since it is outdoors?
I'm going to try and stick it in a bag of fresh silica gel to see if I can get a response out of it.
Yes, mine did the same thing - just tried to use it after it sat around in my house for ~2 years. It reads 65% RH. It will change (go up) if I blow on it. I tried reconditioning it for a day in a plastic bag with a saturated salt solution, and now it reads 43.5%. Actually humidity is ~30%. Here's an interesting paper on capacitive RH sensors: http://www.delmhorst.com/Documents/PDFs/Product-Support/White-Paper---Relative-Humidity-Sensor-Behavior-an.pdf They mention the calibration can go out in as little as months. They also say being inside certain types of plastic enclosures can contaminate them. I guess you could periodically check it's calibration in an environment with a saturated salt solution, but they do note that at the 75.5% RH level, the RH is very sensitive to temperature, so you'd still only be ballparking it.
Im trying to use this for the first time and after following the Bildr Tutorial, I am only seeing an output voltage of .69 to .7 volts. Has anyone seen this before? Could I have a bad part?
Sorry for the noob question here, but could this be used to measure outdoor humidity (I'm in Florida where humidity routinely reaches 100%)? I'm assuming I'd need some sort of enclosure to isolate this sensor from my Arduino (since I try to keep it as dry as possible). I've been using the outdoor version of a DHT22 and they are only lasting about 4 months before they start reading 100% RH (and yes, I've tried the reconditioning process). Any input would be greatly appreciated! Thanks!
I have a problem with the output - when supply voltage is 5V, sensor gives about 3V - according to datasheet this refers to about 70%RH but ... my office already has RH meter (air conditioning, office temp. is about 25 C) and it shows 58%RH. The difference is too much for me. Can anybody help?
float sensorRH = 161.0 * voltage / supplyVolt - 25.8 Can someone please explain me where does the number 161 from the Bildr tutorial came from? Thanks in advance.
Here's a HIH4030/HIH4031 Arduino library that aims to produce results that are as accurate as possible, allowing the user to adjust temperature, supply voltage, and use factory calibration data when available. The formulas used are fully explained in the source code and are derived directly from the data sheet, not from assumptions, over-simplifications, or sample data.
Price for this one is the way it is, not just on Sparkfun but on other sites as well.
Tha being said, mine just went in puff of blue smoke while connected to 3.324V regulated Vcc. Power supply voltage is 4.76V so I can't figure out what happened and why... Nothing else was affected... 17 bucks went in blue smoke just like that... :o(
Do you guys sell the HIH-4030 as smd component? Without the breakout board?
Good explanation about this sensor with temperature compensation and dewpoint calculation is here: http://www.arduino.cc/cgi-bin/yabb2/YaBB.pl?num=1267245927
Arduino library with temperature compensation support.
Would this work if I had it submerged in a in a dish of water to see when the water evaporated. Srry for the n00b question
Water would likely ruin it. It measures humidity IN AIR.
You could use a float switch to measure when fluid dropped. Or an ultrasonic transducer to detect the level.
Why not the HIH-4031, which is spec'ed for condensing environments? That would be handy for projects designed for outdoors.
"After testing, this sensor worked really well at 3.3V. You just have to linearly convert the 5V graph to 3.3V."
Has anyone linearly calibrated this for 3.3 volts?
How would you go about doing that?
This sensor works fine in -30 celcius and 92% humidity:
http://on.tuu.fi/d/tallennetut/MTQ0MzIwMDE=.png
Blue is temperature and orange is humidity.
Couldn't this work? http://search.digikey.com/scripts/DkSearch/dksus.dll?Cat=2360393&k=33213
I would gladly buy another one with calibration data!
Any chance getting these with the calibration sheet?
Doesn't hurt to ask, right? I'll see if we can get them with the cal sheet.
any chance of running this thing at 3.3V?
After testing, this sensor worked really well at 3.3V. You just have to linearly convert the 5V graph to 3.3V.
The datasheet says 5V, but it also says the output is ratiometric to the supply voltage. I haven't tried it yet but I've got a 3.3V project with it that I hope to get working soon. So in scientific terms - 'yes maybe'.
I am so going to get one of these, Along with that nice one-wire temp sensor I will be able to do weather statistics and telescope observatory dome operation based on outside weather, not just using the "eyeball technique"
Ooh...my gears are turning now, ideas!
Plugged the OUT directly into an ATMega ADC, and works great. Its fun to blow on.
hi guys,
you could slap on a HIH 5031 on here (same footprint) and it only requires a 15Kohm load instead of the 80Kohm load.
im sure you already purchased a bunch of 4030's however!!
the 1 on the end is conedsation filtered.
anywhoo, just a heads up.
thanks!
wow it sure does get around hehehehe :)
http://www.warf.com/electronic-products-4883.html
Geez, that thing is selling for 790 bollars [sic] on that website.
dont forget the 80K minimum load as per the datasheet!!
who speaks datasheet?
wheres Nate?
I guess $16.95 is the adjusted price? I hope so because DigiKey is listing just the sensor itself for $16.46!
Thanks SparkFun, another order incoming (I'd save a lot on shipping if I just ordered all at once ;-))
You can find the sensor without the breakout board for half the price but a lot of people don't have the means to use SMD parts. If you want to start making your own PCB's to make your own breakout boards or entire boards I would suggest looking into a product called PCB FAB-In-A-Box which runs about $150. Then you can make your own fairly easily.
I understand how many people would appreciate a breakout board for an SMD part, even I would if I needed to prototype with this sensor. What I'm saying is that the profit margin just appears to be a little too high. $10 component on a $1 (guess?) board.
What a jaw dropping price!
Sparkfun is having FREE DAY because they feel remorse over 300% markup of products like this. Not everything is this bad, though.