Micro Maestro 6-channel USB Servo Controller
The Micro Maestro is the first of Pololu’s second-generation USB servo controllers. The board supports three control methods — USB for direct connection to a PC, TTL serial for use with embedded systems, and internal scripting for self-contained, host controller-free applications — and channels that can be configured as servo outputs for use with radio control (RC) servos or electronic speed controls (ESCs), digital outputs, or analog inputs. The Micro Maestro is a highly versatile six-channel servo controller and general I/O board in a highly compact (0.85 x 1.20") package.
The extremely accurate, high-resolution servo pulses have a jitter of less than 200 ns, making this servo controller well suited for high-precision animatronics, and built-in speed and acceleration control make it easy to achieve smooth, seamless movements without requiring the control source to constantly compute and stream intermediate position updates to the Micro Maestro.
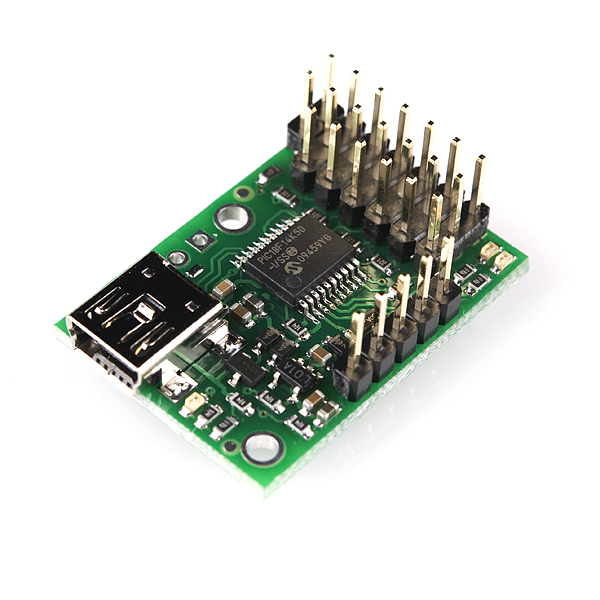
This kit includes the headers as shown in the first picture, the headers do not come populated.
- Three control methods: USB, TTL (5V) serial, and internal scripting
- 0.25μs output pulse width resolution (corresponds to approximately 0.025° for a typical servo, which is beyond what the servo could resolve)
- Pulse rate configurable from 33 to 100 Hz
- Wide pulse range of 64 to 3280 μs when using all six servos with a pulse rate of 50 Hz
- Individual speed and acceleration control for each channel
- Channels can also be used as general-purpose digital outputs or analog inputs
- A simple scripting language lets you program the controller to perform complex actions even after its USB and serial connections are removed
- Free configuration and control application for Windows makes it easy to:
- Configure and test your controller
- Create, run, and save sequences of servo movements for animatronics and walking robots
- Write, step through, and run scripts stored in the servo controller
- Virtual COM port makes it easy to create custom applications to send serial commands via USB to the controller
- TTL serial features:
- Supports 300 – 250000 kbps in fixed-baud mode
- Supports 300 – 115200 kbps in autodetect-baud mode
- Simultaneously supports the Pololu protocol, which gives access to advanced functionality, and the simpler Scott Edwards MiniSSC II protocol (there is no need to configure the device for a particular protocol mode)
- Can be daisy-chained with other Pololu servo and motor controllers using a single serial transmit line
- Board can be powered off of USB or a 5 – 16 V battery, and it makes the regulated 5V available to the user
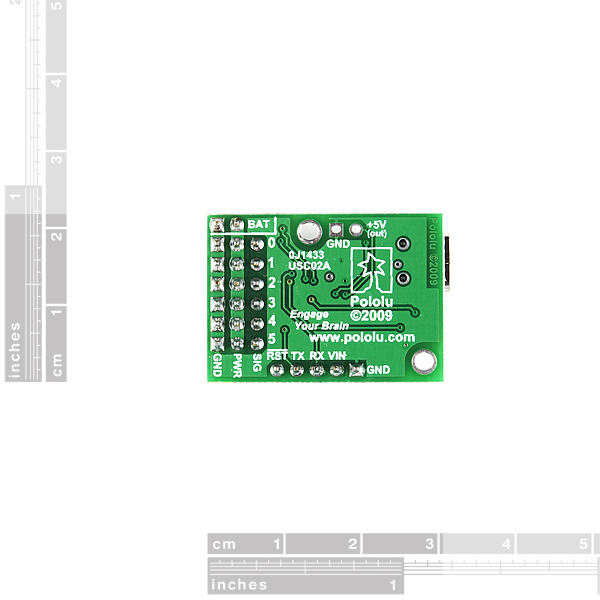
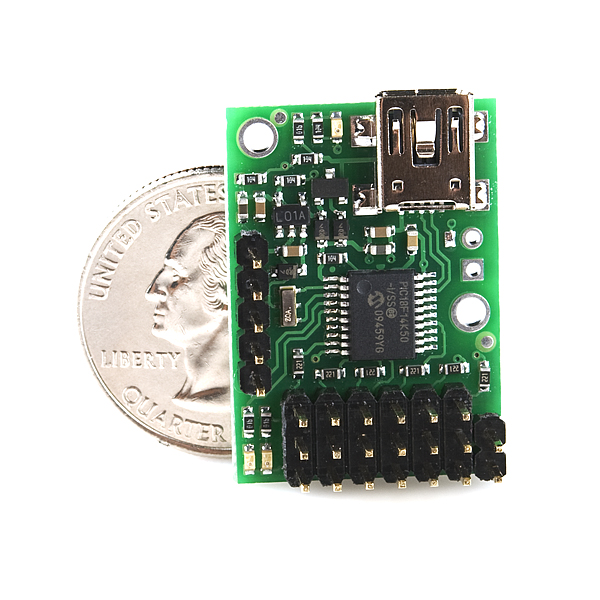
- Compact size of 0.85" × 1.20" (2.16 × 3.05 cm) and light weight of 0.17 oz (4.8 g)
- Upgradable firmware
Micro Maestro 6-channel USB Servo Controller Product Help and Resources
Core Skill: Robotics
This skill concerns mechanical and robotics knowledge. You may need to know how mechanical parts interact, how motors work, or how to use motor drivers and controllers.
Skill Level: Competent - You may need an understanding of servo motors and how to drive them. Additionally, you may need some fundamental understanding of motor controllers.
See all skill levels
Core Skill: Programming
If a board needs code or communicates somehow, you're going to need to know how to program or interface with it. The programming skill is all about communication and code.
Skill Level: Rookie - You will need a better fundamental understand of what code is, and how it works. You will be using beginner-level software and development tools like Arduino. You will be dealing directly with code, but numerous examples and libraries are available. Sensors or shields will communicate with serial or TTL.
See all skill levels
Core Skill: Electrical Prototyping
If it requires power, you need to know how much, what all the pins do, and how to hook it up. You may need to reference datasheets, schematics, and know the ins and outs of electronics.
Skill Level: Competent - You will be required to reference a datasheet or schematic to know how to use a component. Your knowledge of a datasheet will only require basic features like power requirements, pinouts, or communications type. Also, you may need a power supply that?s greater than 12V or more than 1A worth of current.
See all skill levels
Comments
Looking for answers to technical questions?
We welcome your comments and suggestions below. However, if you are looking for solutions to technical questions please see our Technical Assistance page.
Customer Reviews
5 out of 5
Based on 1 ratings:
Will get more of these!
Used for an animatronic project. The Maestro was easy to set up and worked flawlessly from the start.I 'm still finding out what this controller can do, but it works great.


I bought one of these and love it but i am having trouble mounting it. The mounting holes are too small to use any standoffs I have found. what do you suggest?
The mounting holes have a diameter of 0.086" work with #2 screws. The 2-56 versions of these standoffs will work, or you could use #2 screws with these nylon spacers.
Which power adapter should I use to plug into this board when one or two servos (this servo: https://www.sparkfun.com/products/11883) will be plugged into it? I'm very new to this kind of stuff and I don't want to ruin the servo so any help/suggestions are greatly appreciated.
Any power supply 5-16v should work fine. The board regulates that to 5V. Generally the reason folks run into issues powering their servos is due to a lack of current from their supply, so you should aim for something with at least a 1A rating.
Would this one work? https://www.sparkfun.com/products/8269 Also, how do power adapters plug into the board? I know it can plug into a barrel jack but I don't know where it would go on the Micro Maestro.
Yea, that one should work fine. To connect it to the board, you could use an adapter like this one, and then simply connect the adapter to the Micro Maestro using male to female jumper wires.
Thanks a lot, I'll do it that way then with that adapter. I can't find male to female jumper wires here on SparkFun though... do you guys sell jumper wires?
We sure do! Long ones, short ones, M/M, M/F, F/F...Find them all here.
Awesome!
Sorry for all these questions but just one final question: do I cut off the male connectors on the wires and then put them in the screw terminals on the DC barrel jack and then connect the female connectors on the wires to the board's servo power pins?
Yup, that should work!
Okay, great, thank you for all of your help!
Okay, thanks Toni.
Is the USB slot on this controller Mini USB or Micro USB?
Should be mini (as per photo and http://www.pololu.com/docs/0J40/1.a)
Alright, thanks.
Has anyone tested the resolution? I can't imagine how it can get that 0.25us resolution with a pic and max 12 Mhz, attending USB and the interrupt overhead...
Did anyone success in controlling servos using MATLAB serial commands? I found this video in youtube: http://www.youtube.com/watch?v=arN_P0I4JG4 And the code was : s1=serial('COM8','BaudRate',9600) fopen(s1) fwrite(s1,[132,0,112,46],'uint8') fclose(s1)
But it is not working with me..!! It is not clear for me how did he get it?
Any Idea??
Love the board. Works absolutely terrific. Definite buy.
Hi Pololu Developers,
Please see our Developer Tool which can used as shareware to try at http://www.progwhiz.com/maestro.html
Some of the features are: 1) HUD to use the 6 port or 12port Maestro quickly 2) Configure jostick to map to any servo port 3) Higher level scripting to manage remotely on the fly no need to preprogram. Can also call internal scipts see manual at http://www.progwhiz.com/files/External_Scripting_Commands.pdf 4) Ability to define triggers based on sensor input
Please do have fun exploring the possibilities.
Regards
Mark
Would it be possible to use one of the servo channels to power up laser pointer?
Hi Maestro/Pololu Developers,
Please see our Developer Tool which can used as shareware to try at http://www.progwhiz.com/maestro.html
Some of the features are: 1) HUD to use the 6 port or 12port Maestro quickly 2) Configure jostick to map to any servo port 3) Higher level scripting to manage remotely on the fly no need to preprogram. Can also call internal scipts see manual at http://www.progwhiz.com/files/External_Scripting_Commands.pdf 4) Ability to define triggers based on sensor input
Please do have fun exploring the possibilities.
Regards
Mark
Can it be used with xBee for controlling RC Servos without any micro-controller (on the plane!)?
It seems that the linux software provided contains files for windows. Has anyone been successful in using this motor controller with linux??
Yes. After following the instructions in the included README.txt, you can run the programs by typing ./MaestroControlCenter or ./UscCmd.
This is definitely something ill have to get for my current project! at the rate you all are churning out new products my robot will probably be the next thing on the list ;)